
Fillets of Chickens, with Bechamel-ſauce and Bread-crumbs
It’s been a while since I made Fillets of Chickens, with Bechamel-ſauce and Bread-crumbs at Nelles Manor Museum. I made it twice in the summer of 2019, which was the last time that I was able to teach an open hearth cooking class there. The recipe’s from the 1781 cookbook The Practice of Modern Cookery by George Dalrymple and at this class, we made recipes that would have been popular when the house was newly constructed using fresh garden produce and some newly purchased open hearth cooking implements.
Keep reading after the recipe to learn about some open hearth cookery techniques using a salamander and a couple of different styles of reflector ovens. I also share some ideas for creating DIY reflector ovens using common items that you can use in front of a fireplace or campfire.

You’ll find this recipe in:
The Practice of Modern Cookery
By: George Dalrymple
Edinburgh, 1781
Historic Recipes:
Filets des Poulettes á la Bechamel pannée.
Fillets of Chickens, with Bechamel-ſauce and Bread-crumbs.
CUT the hind part of two or three chickens off, meaning the legs and the rumps, they will ſerve for another diſh; roaſt the breaſts; when done and cold, cut the meat in fillets, mix them with a bechamel ſauce, and put it in the diſh that you intend for table; ſtrew bread-crumbs over it; baſte with a little melted butter, and give it a colour in a oven or with a ſalamander. You will find the ſauce in Sauce-articles. The breaſts of cold roaſted chickens, fowls, capons, or turkies, will anſwer the ſame.
Sauce à la Bechamel. Begamel Sauce.
PUT in a ſtew-pan a few ſlices of veal, ham, a few muſhrooms and ſhallots, two cloves, a laurel-leaf, a little good butter; ſoak all together without letting it take colour; add a little good broth and cream, according to the quantity of ſauce you want; ſimmer it half an hour, and ſift it through a ſieve; you may add ſcalded parſley chopped very fine.
If you’re wondering about the letter that looks a bit like an ‘f’, but appears sometimes where an ‘s’ would go, head over to my To boil green Peas recipe, where I wrote a short history of the Long S.

My version of the recipe:
Chicken Fillets with Bechamel Sauce and Breadcrumbs
5 chicken breasts (or leftover chicken or turkey)
2 or 3 slices of ham and/or veal
4 or 5 mushrooms
1 or 2 shallots
2 whole clove buds
1 bay leaf
1/3 cup butter – 75 g
3 cups cream – 710 mL
3 cups broth – 710 mL
1 cup breadcrumbs – 125 g
A handful of fresh parsley
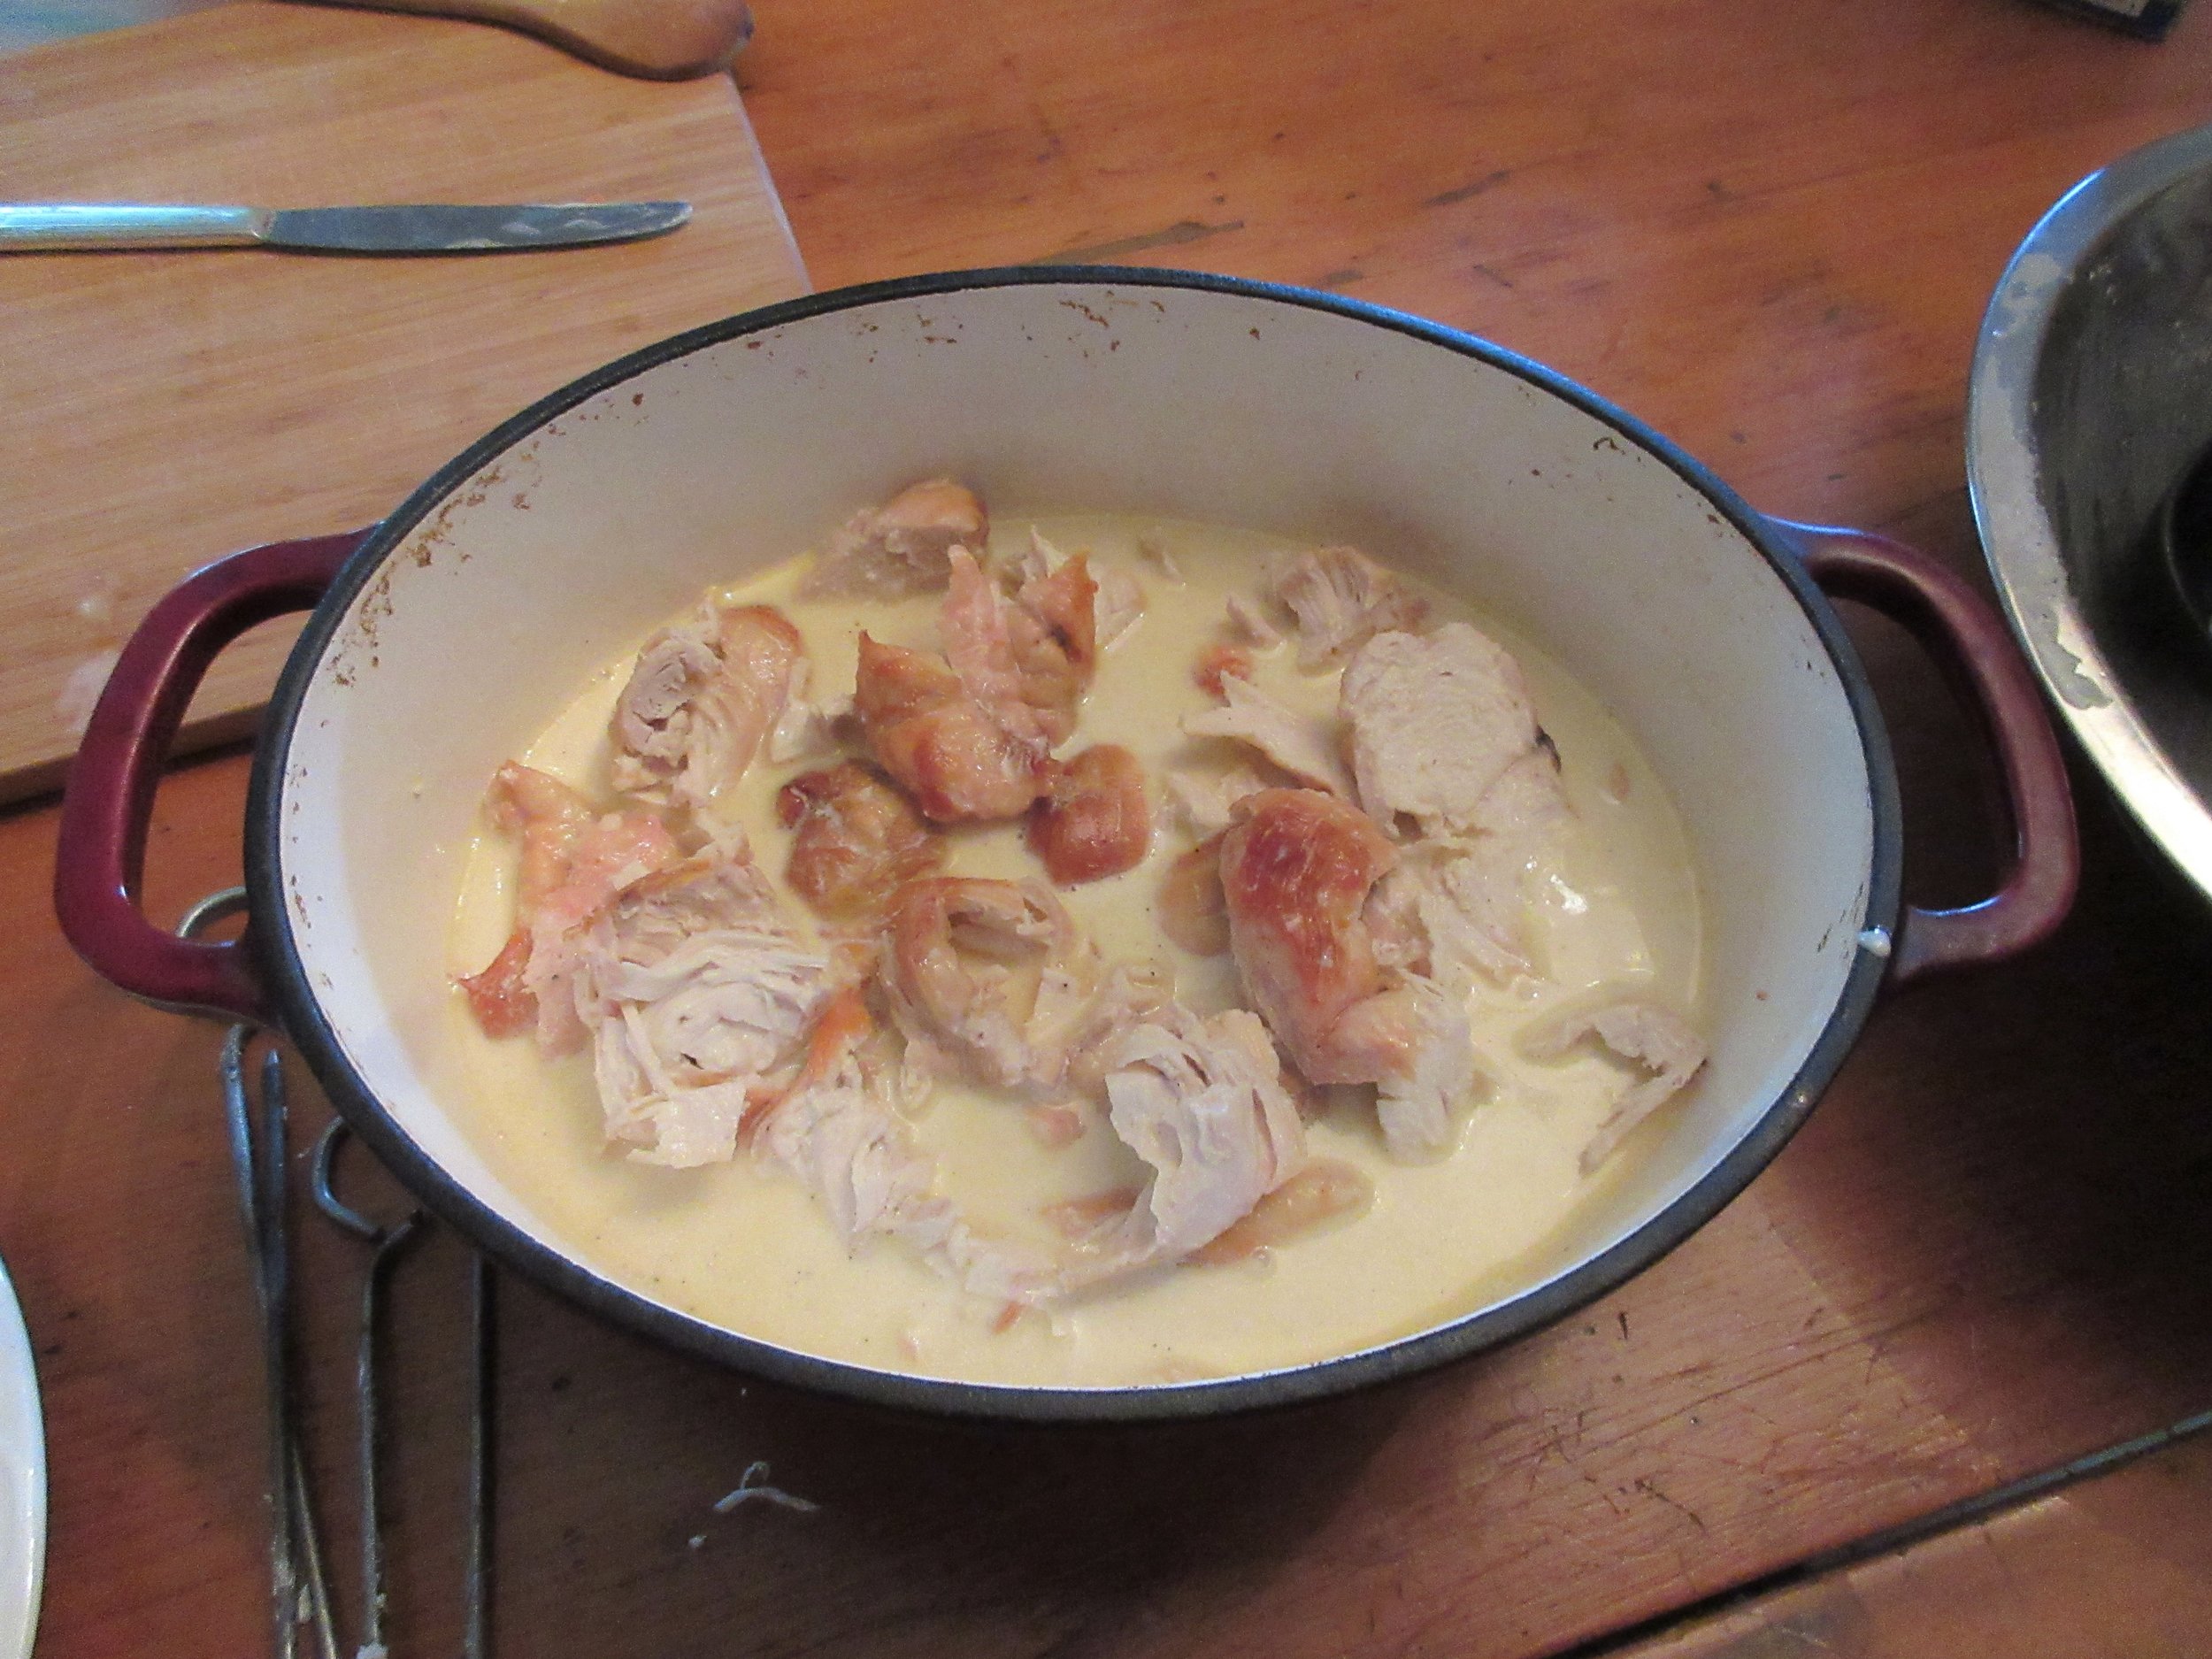
1) Roast the chicken breast or use leftover chicken or turkey in this recipe. Slice into fillets, place in your serving dish and set aside until you’ve made the sauce.
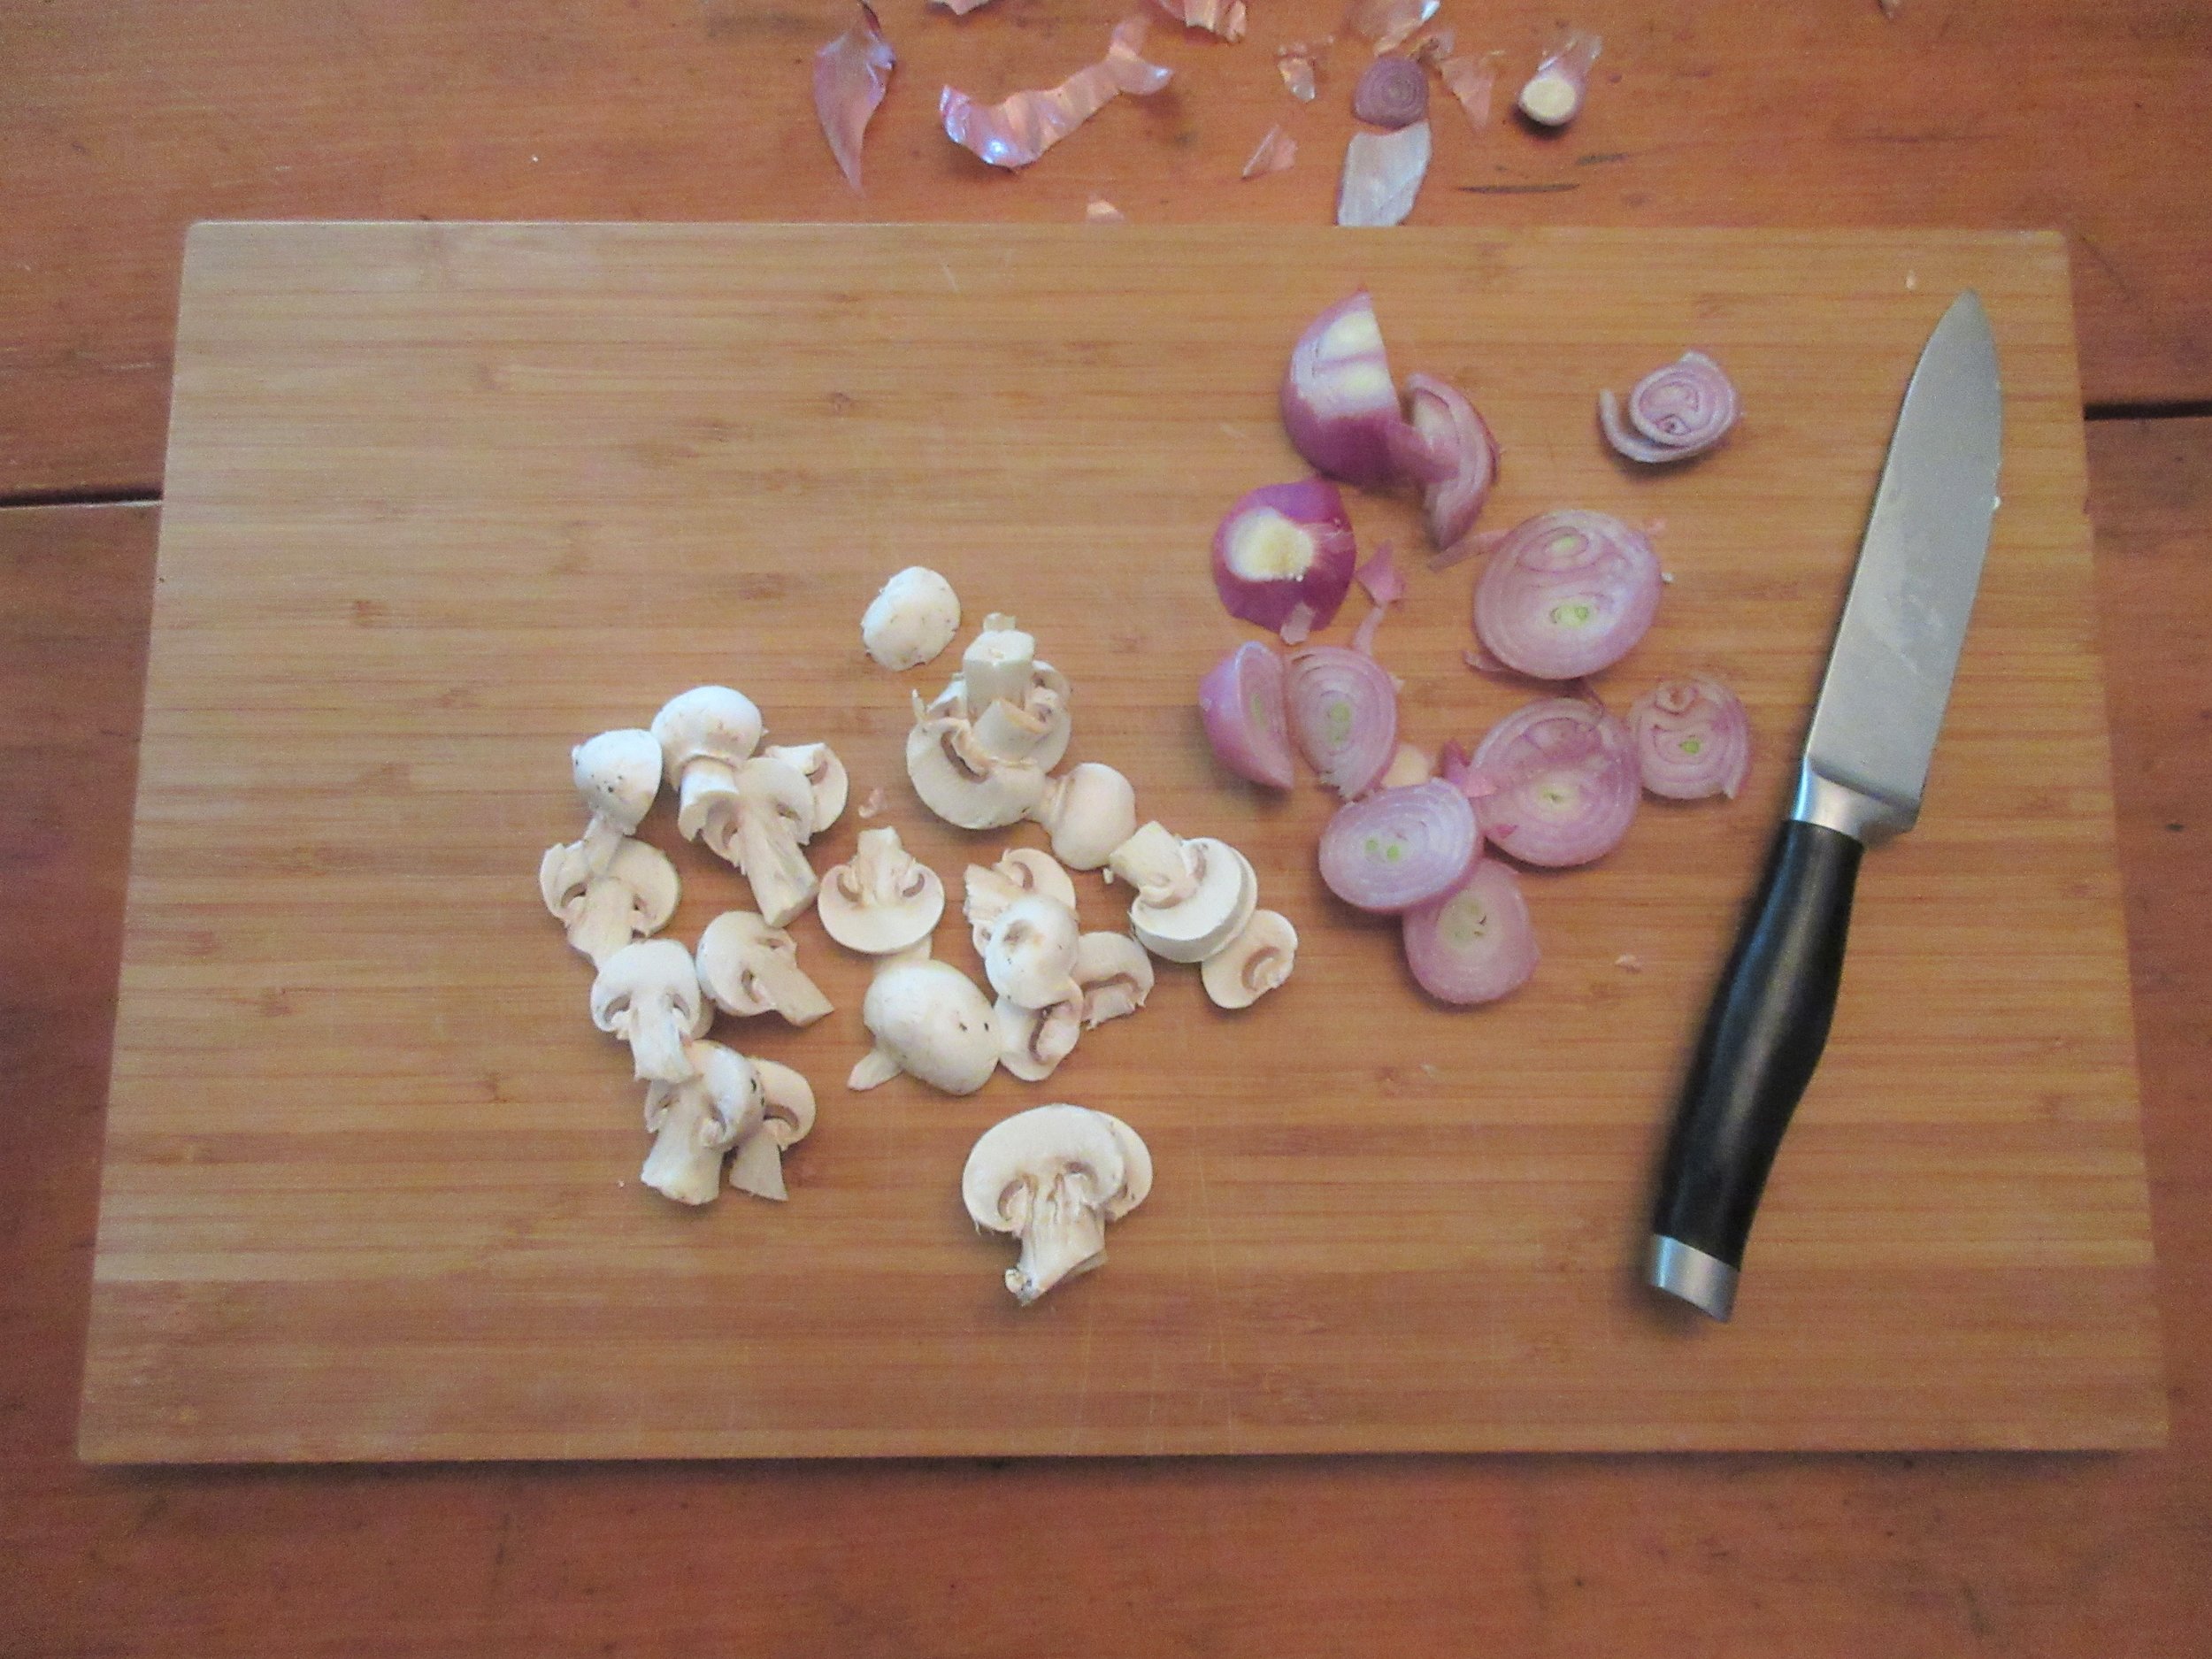
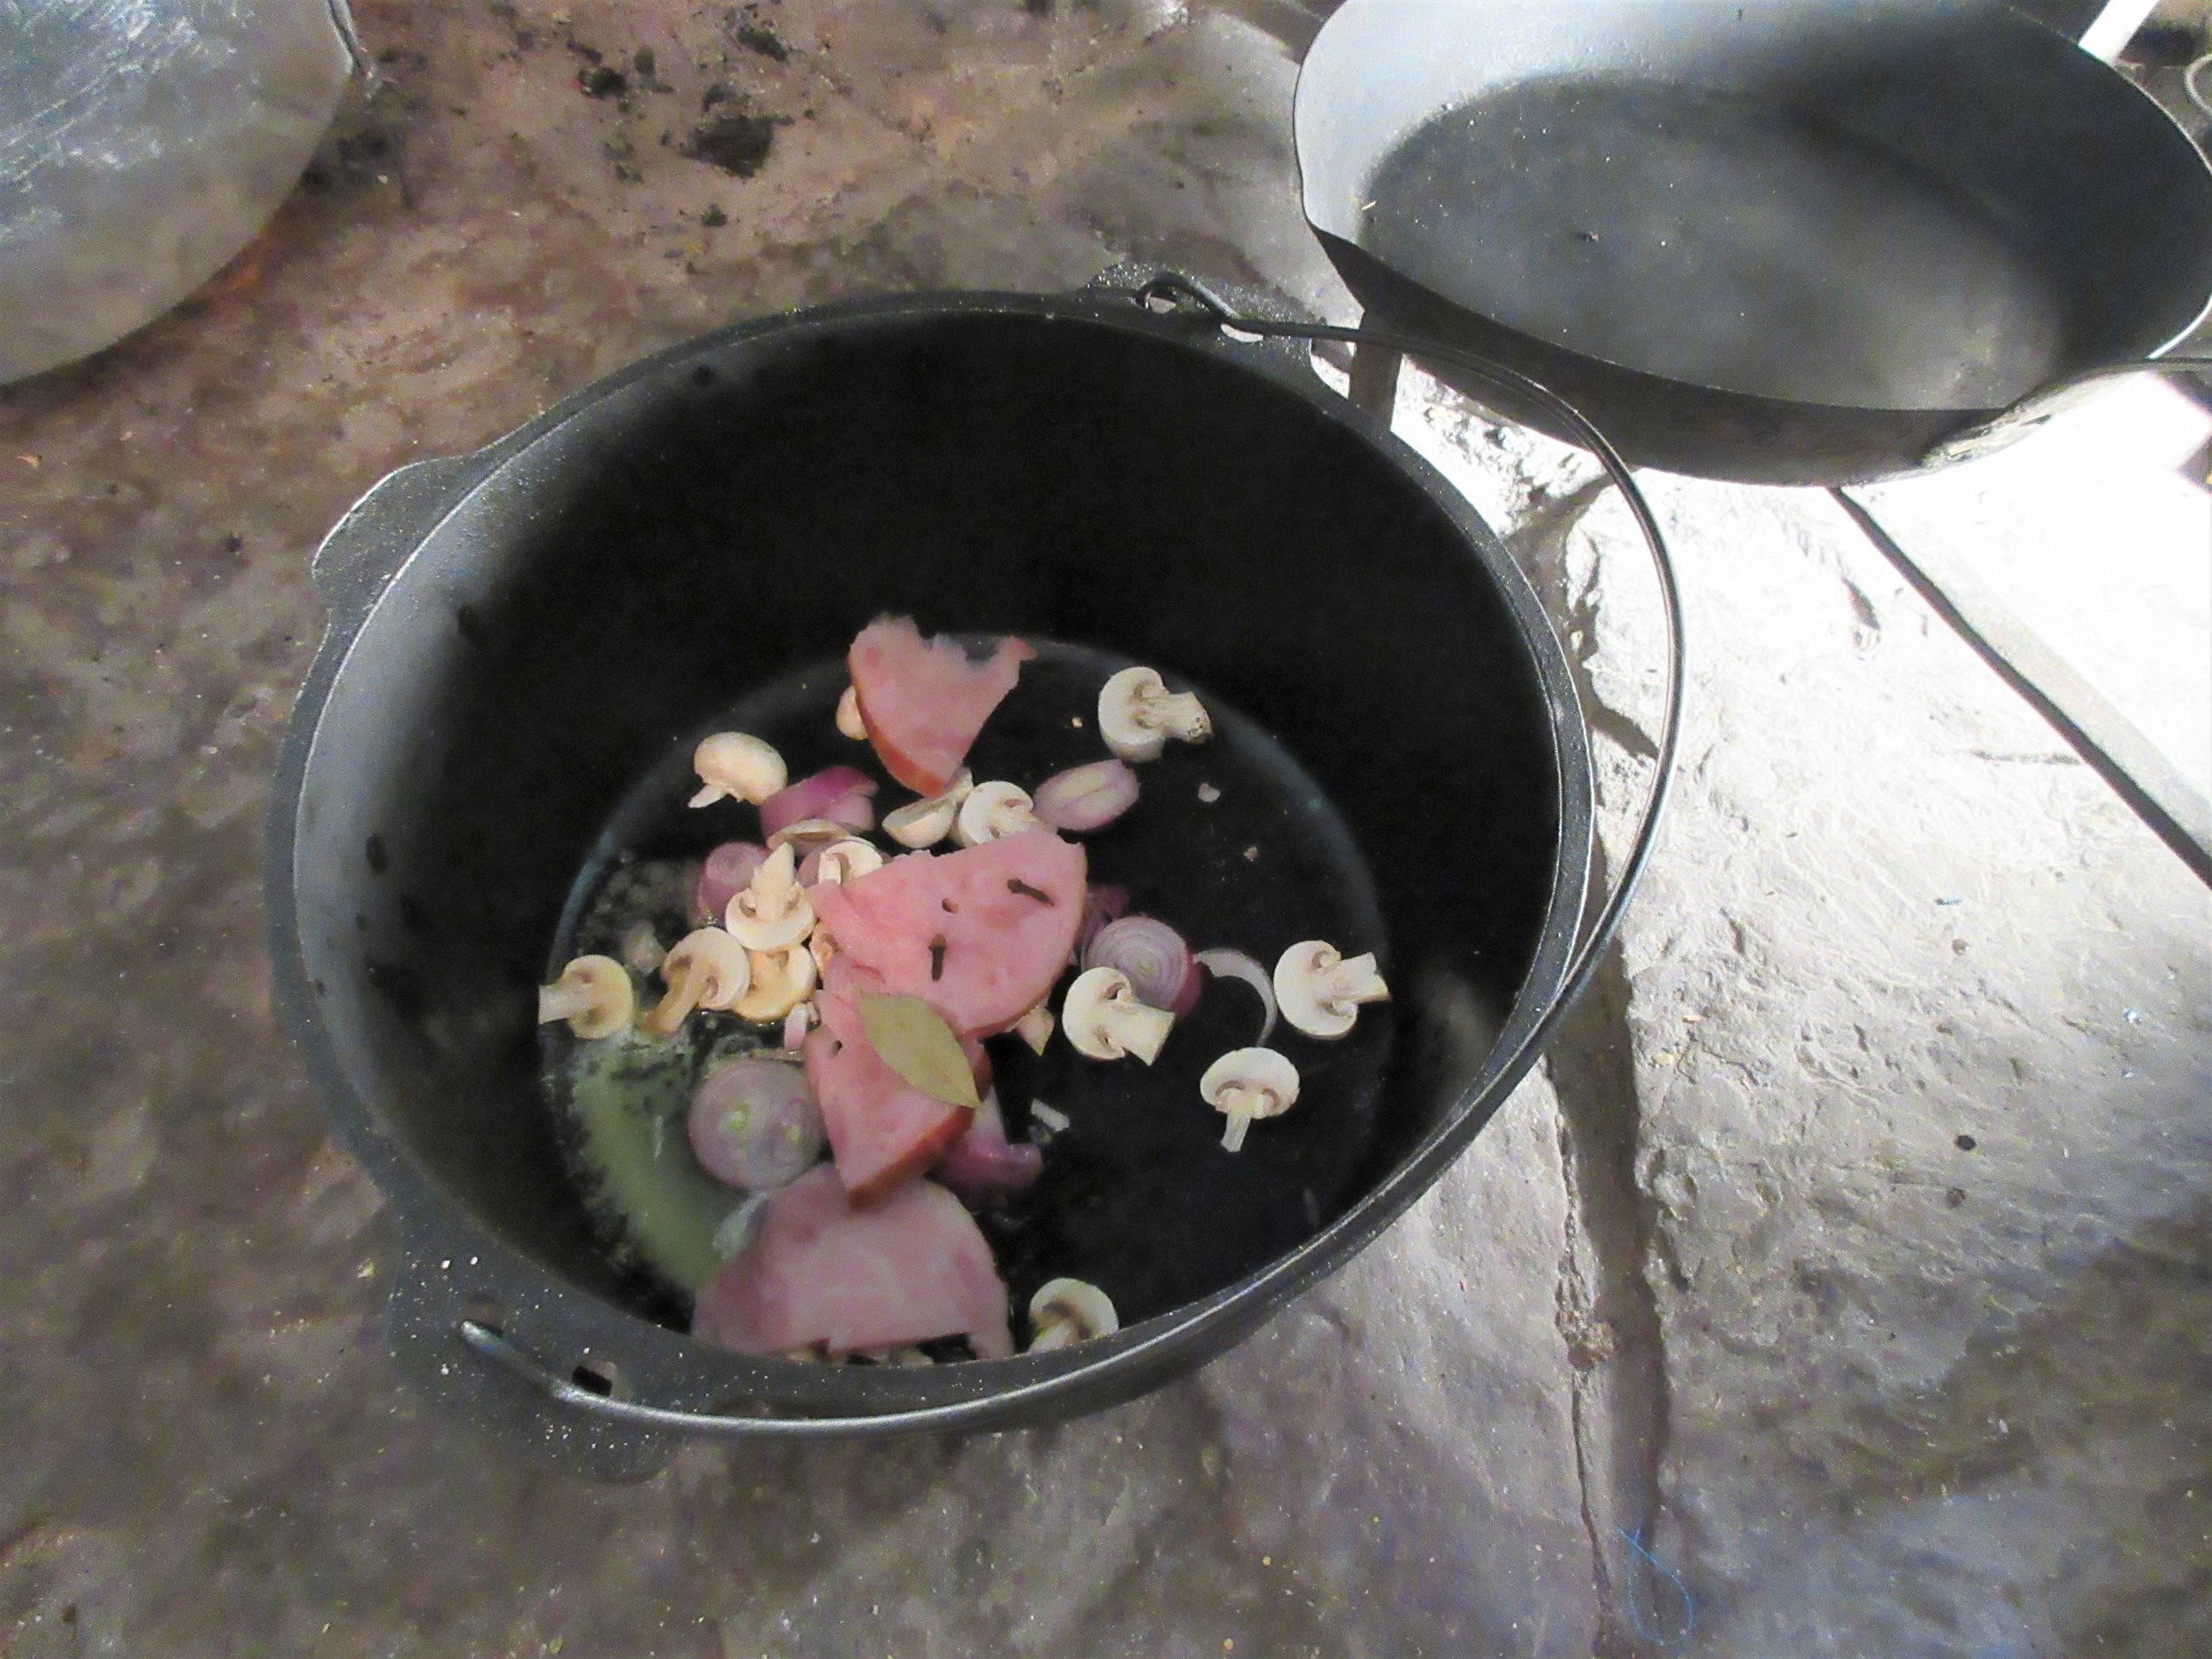
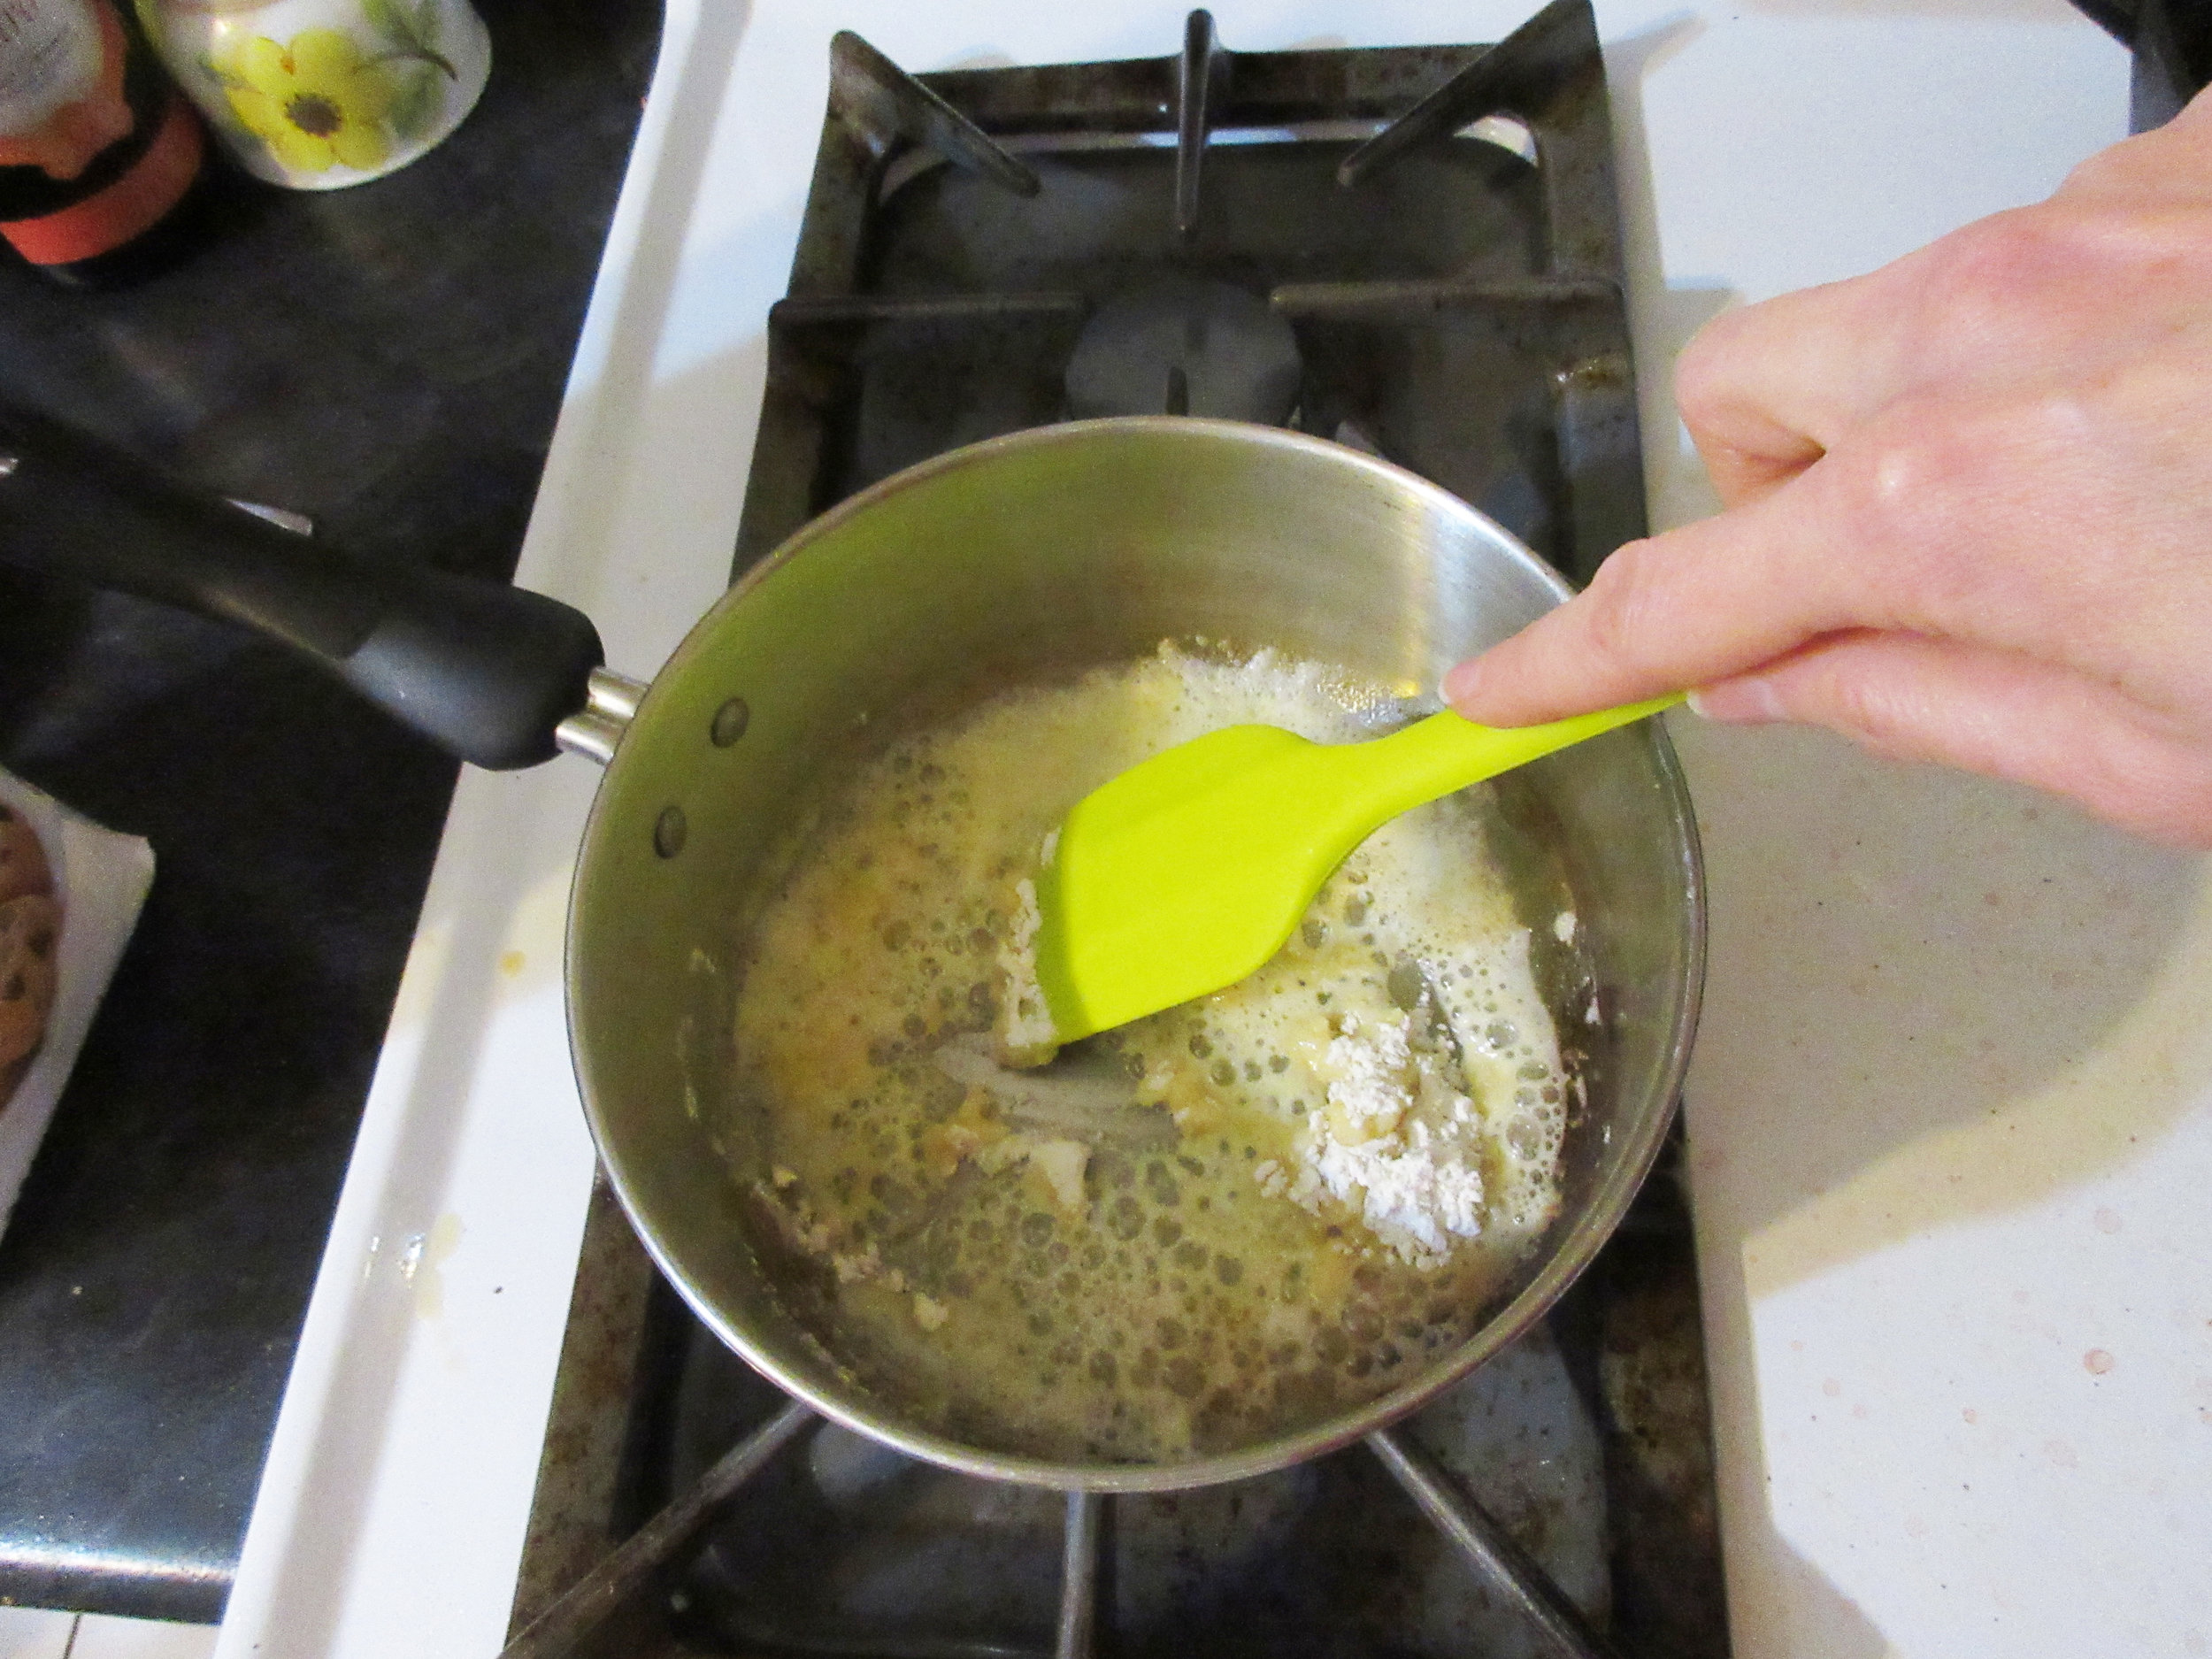
2) While roasting the chicken, slice the veal, ham, mushrooms and shallots. Melt 2 tablespoons of the butter in a large sauce pan and add the veal, ham, mushrooms, shallots, cloves and bay leaf. Simmer gently over low heat until the shallots and mushrooms are soft.
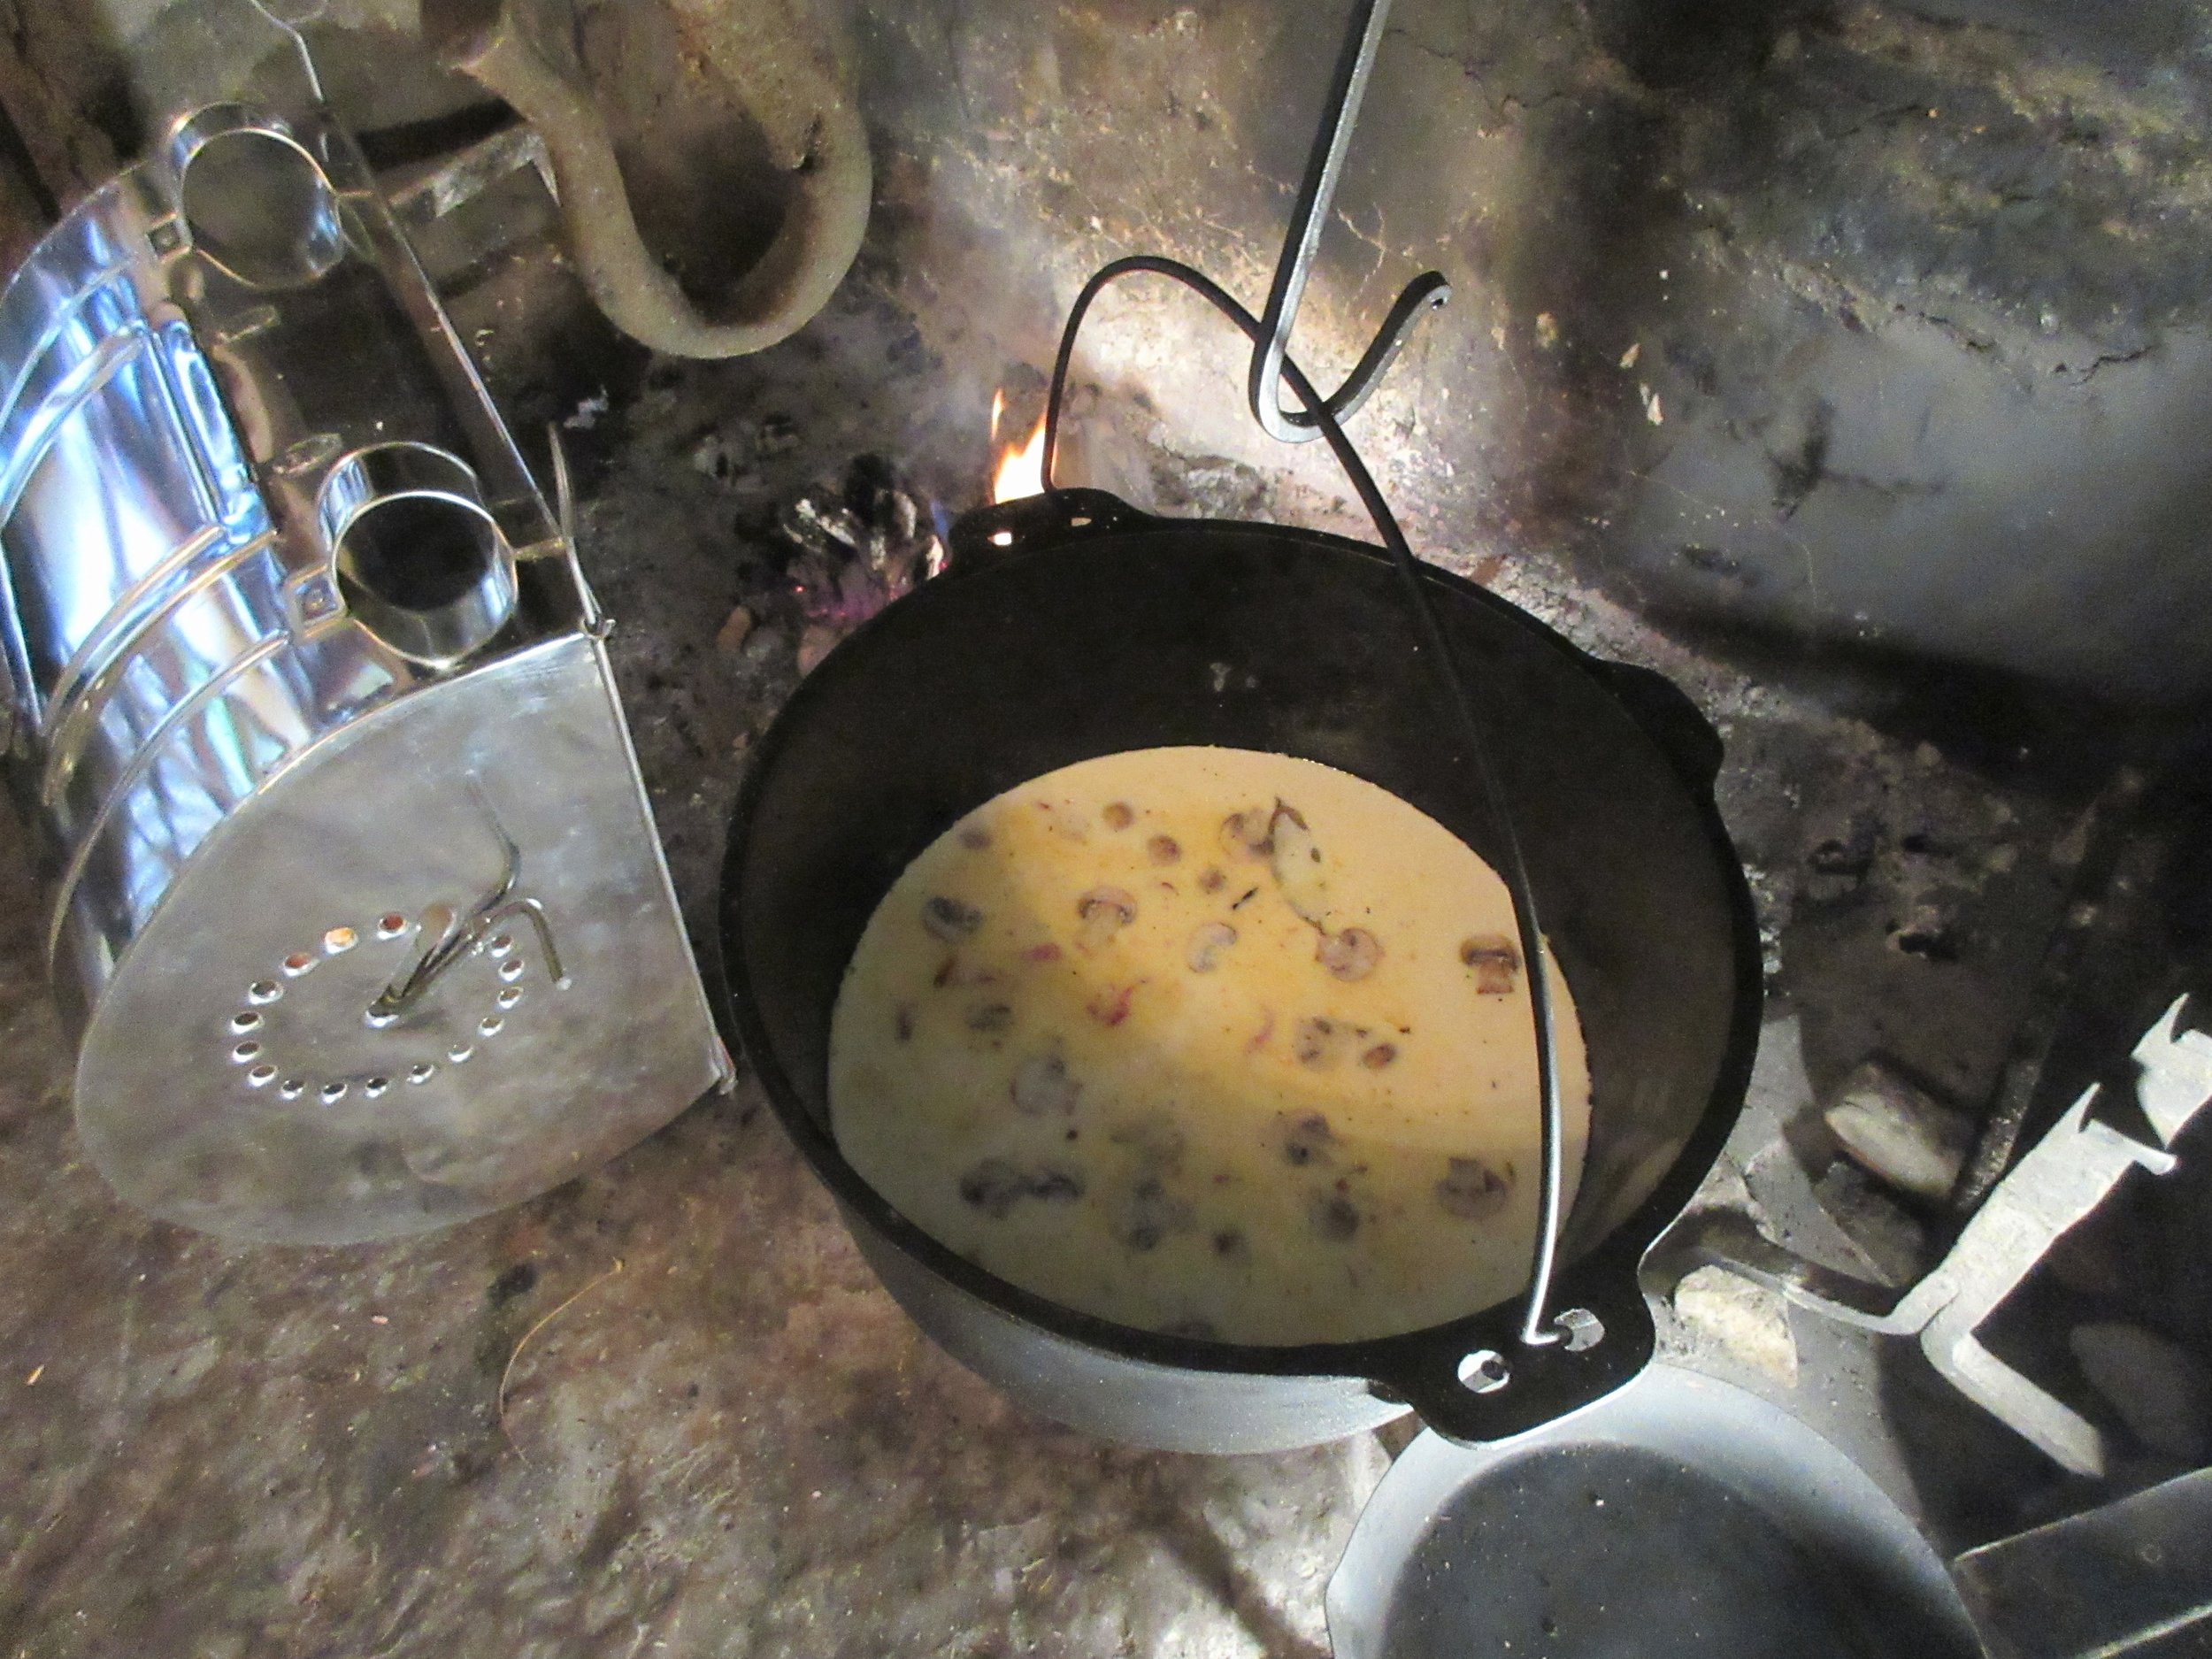
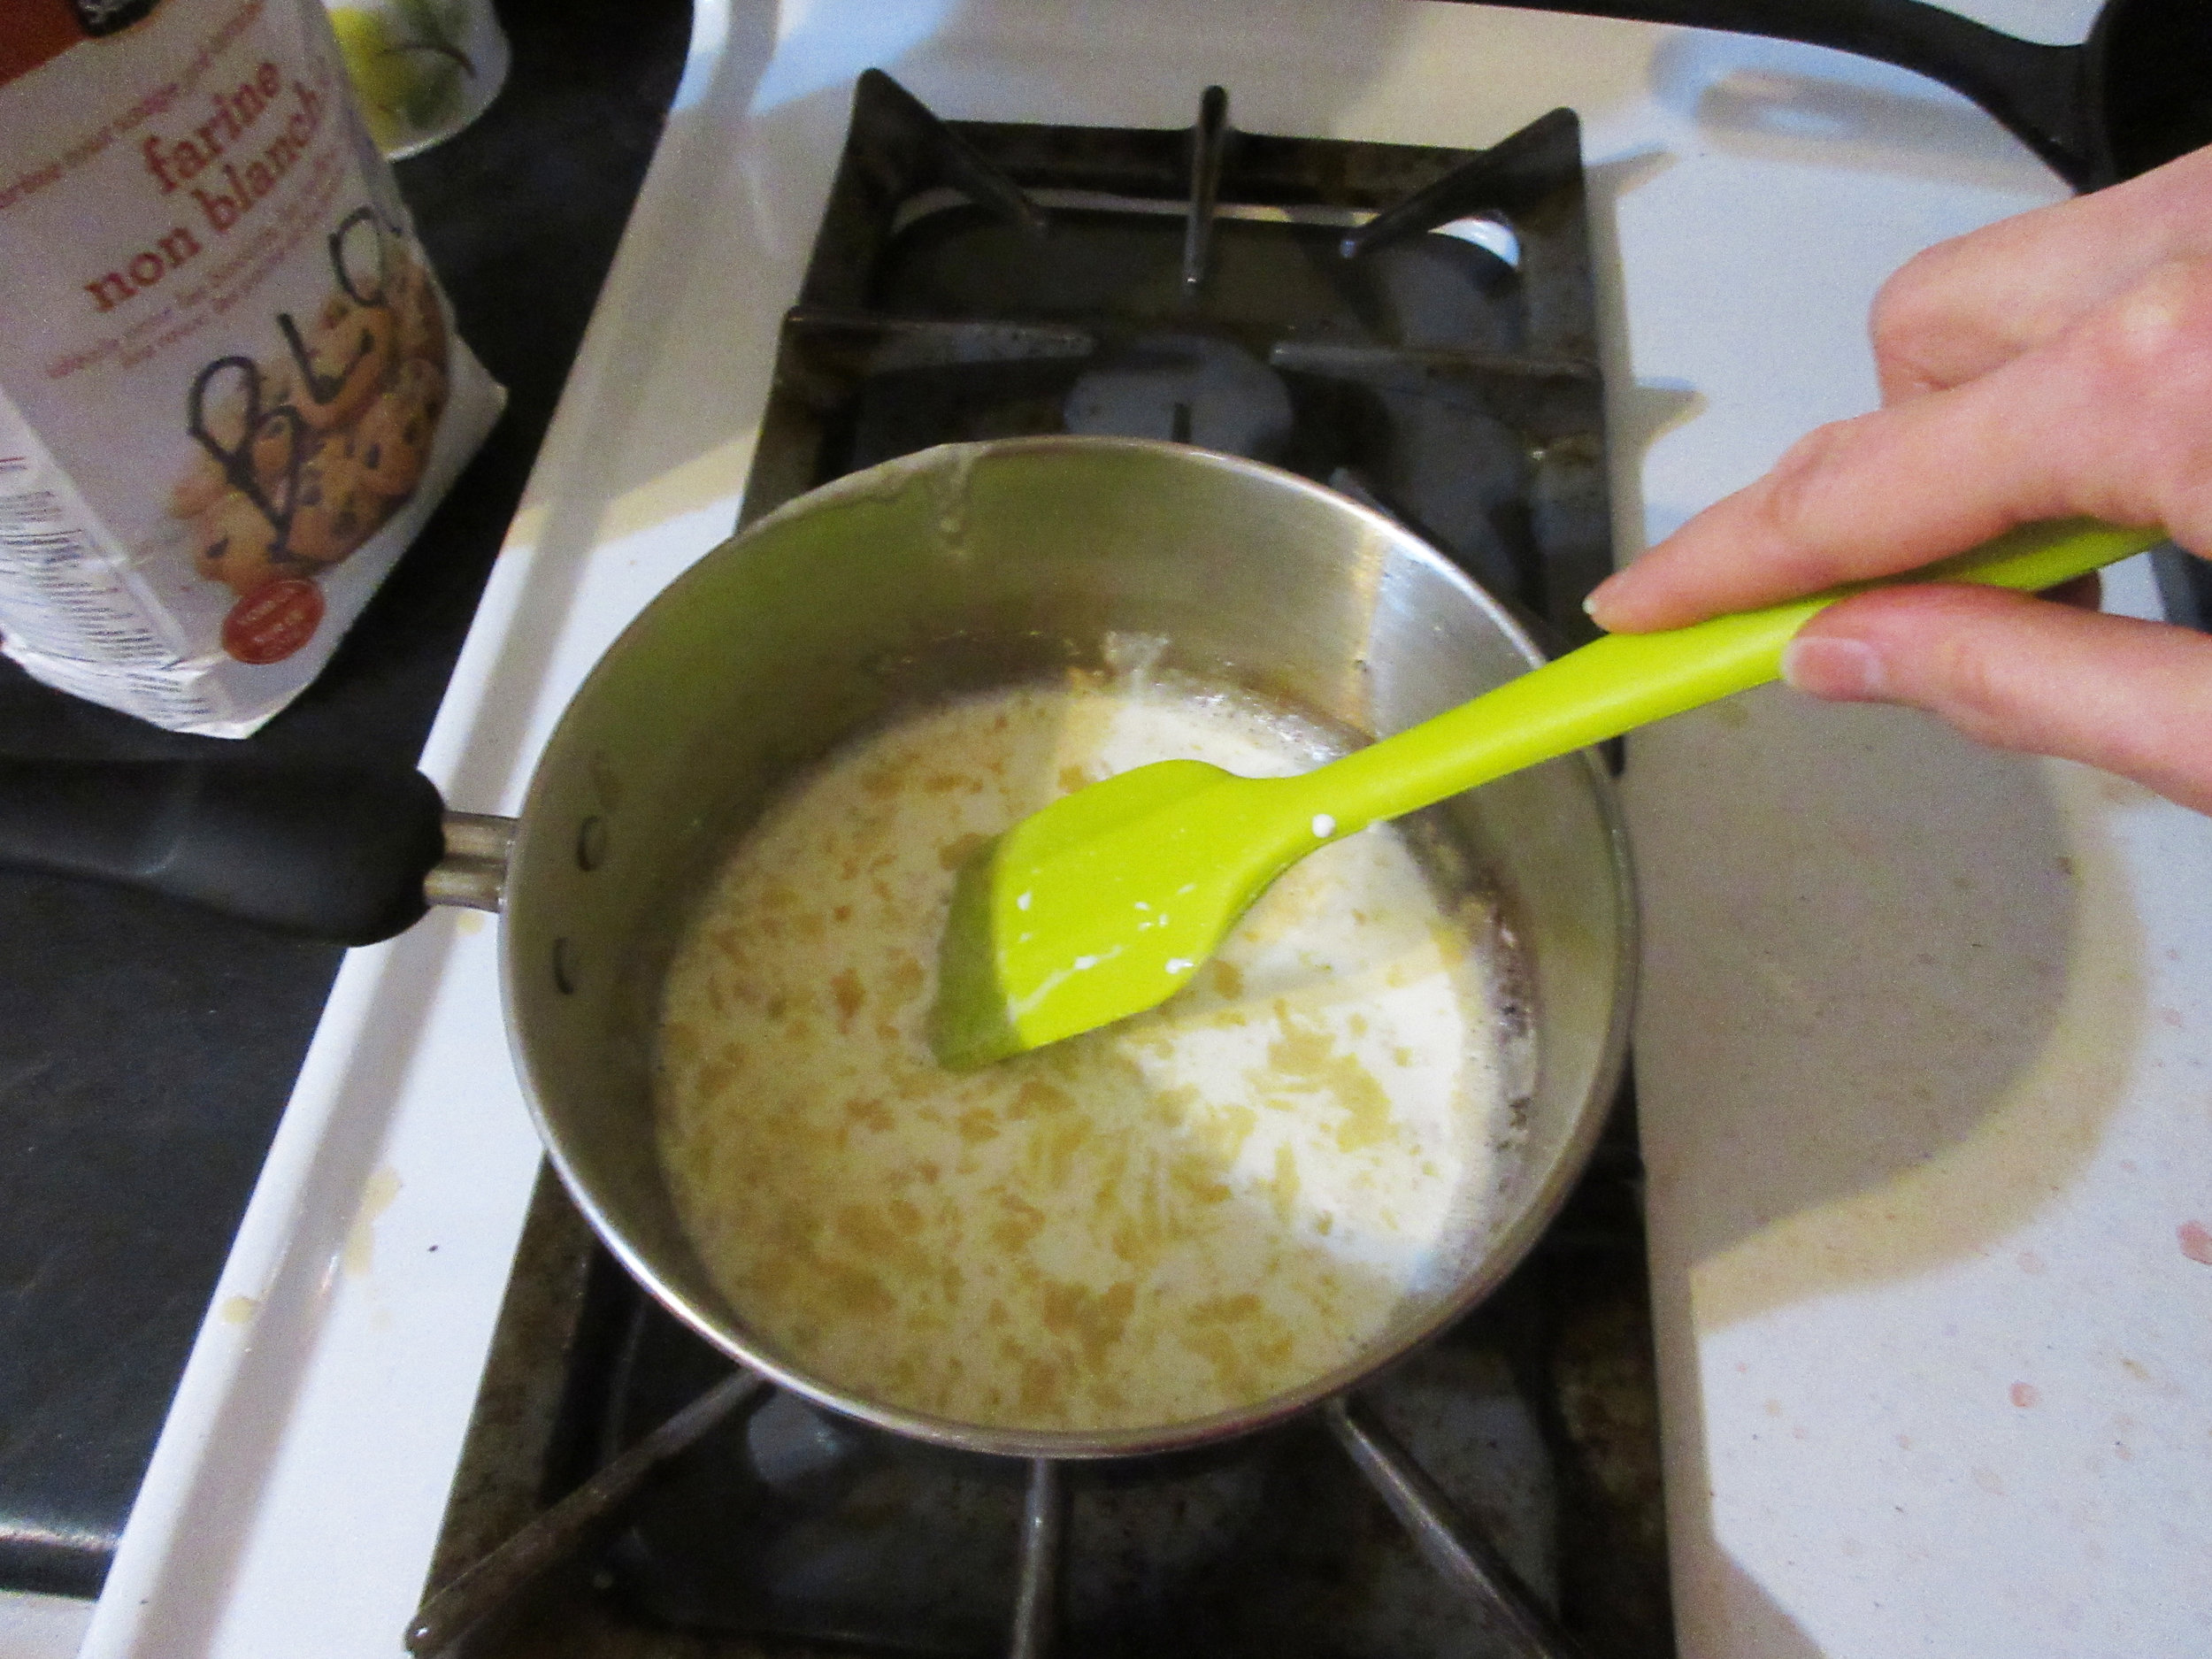
3) Add the cream and broth to the sauce pan and turn the heat up to medium. Allow it to bubble away for about 30 minutes to reduce and allow the flavours to mix. Chop a handful of fresh parsley and melt the remainder of the butter.
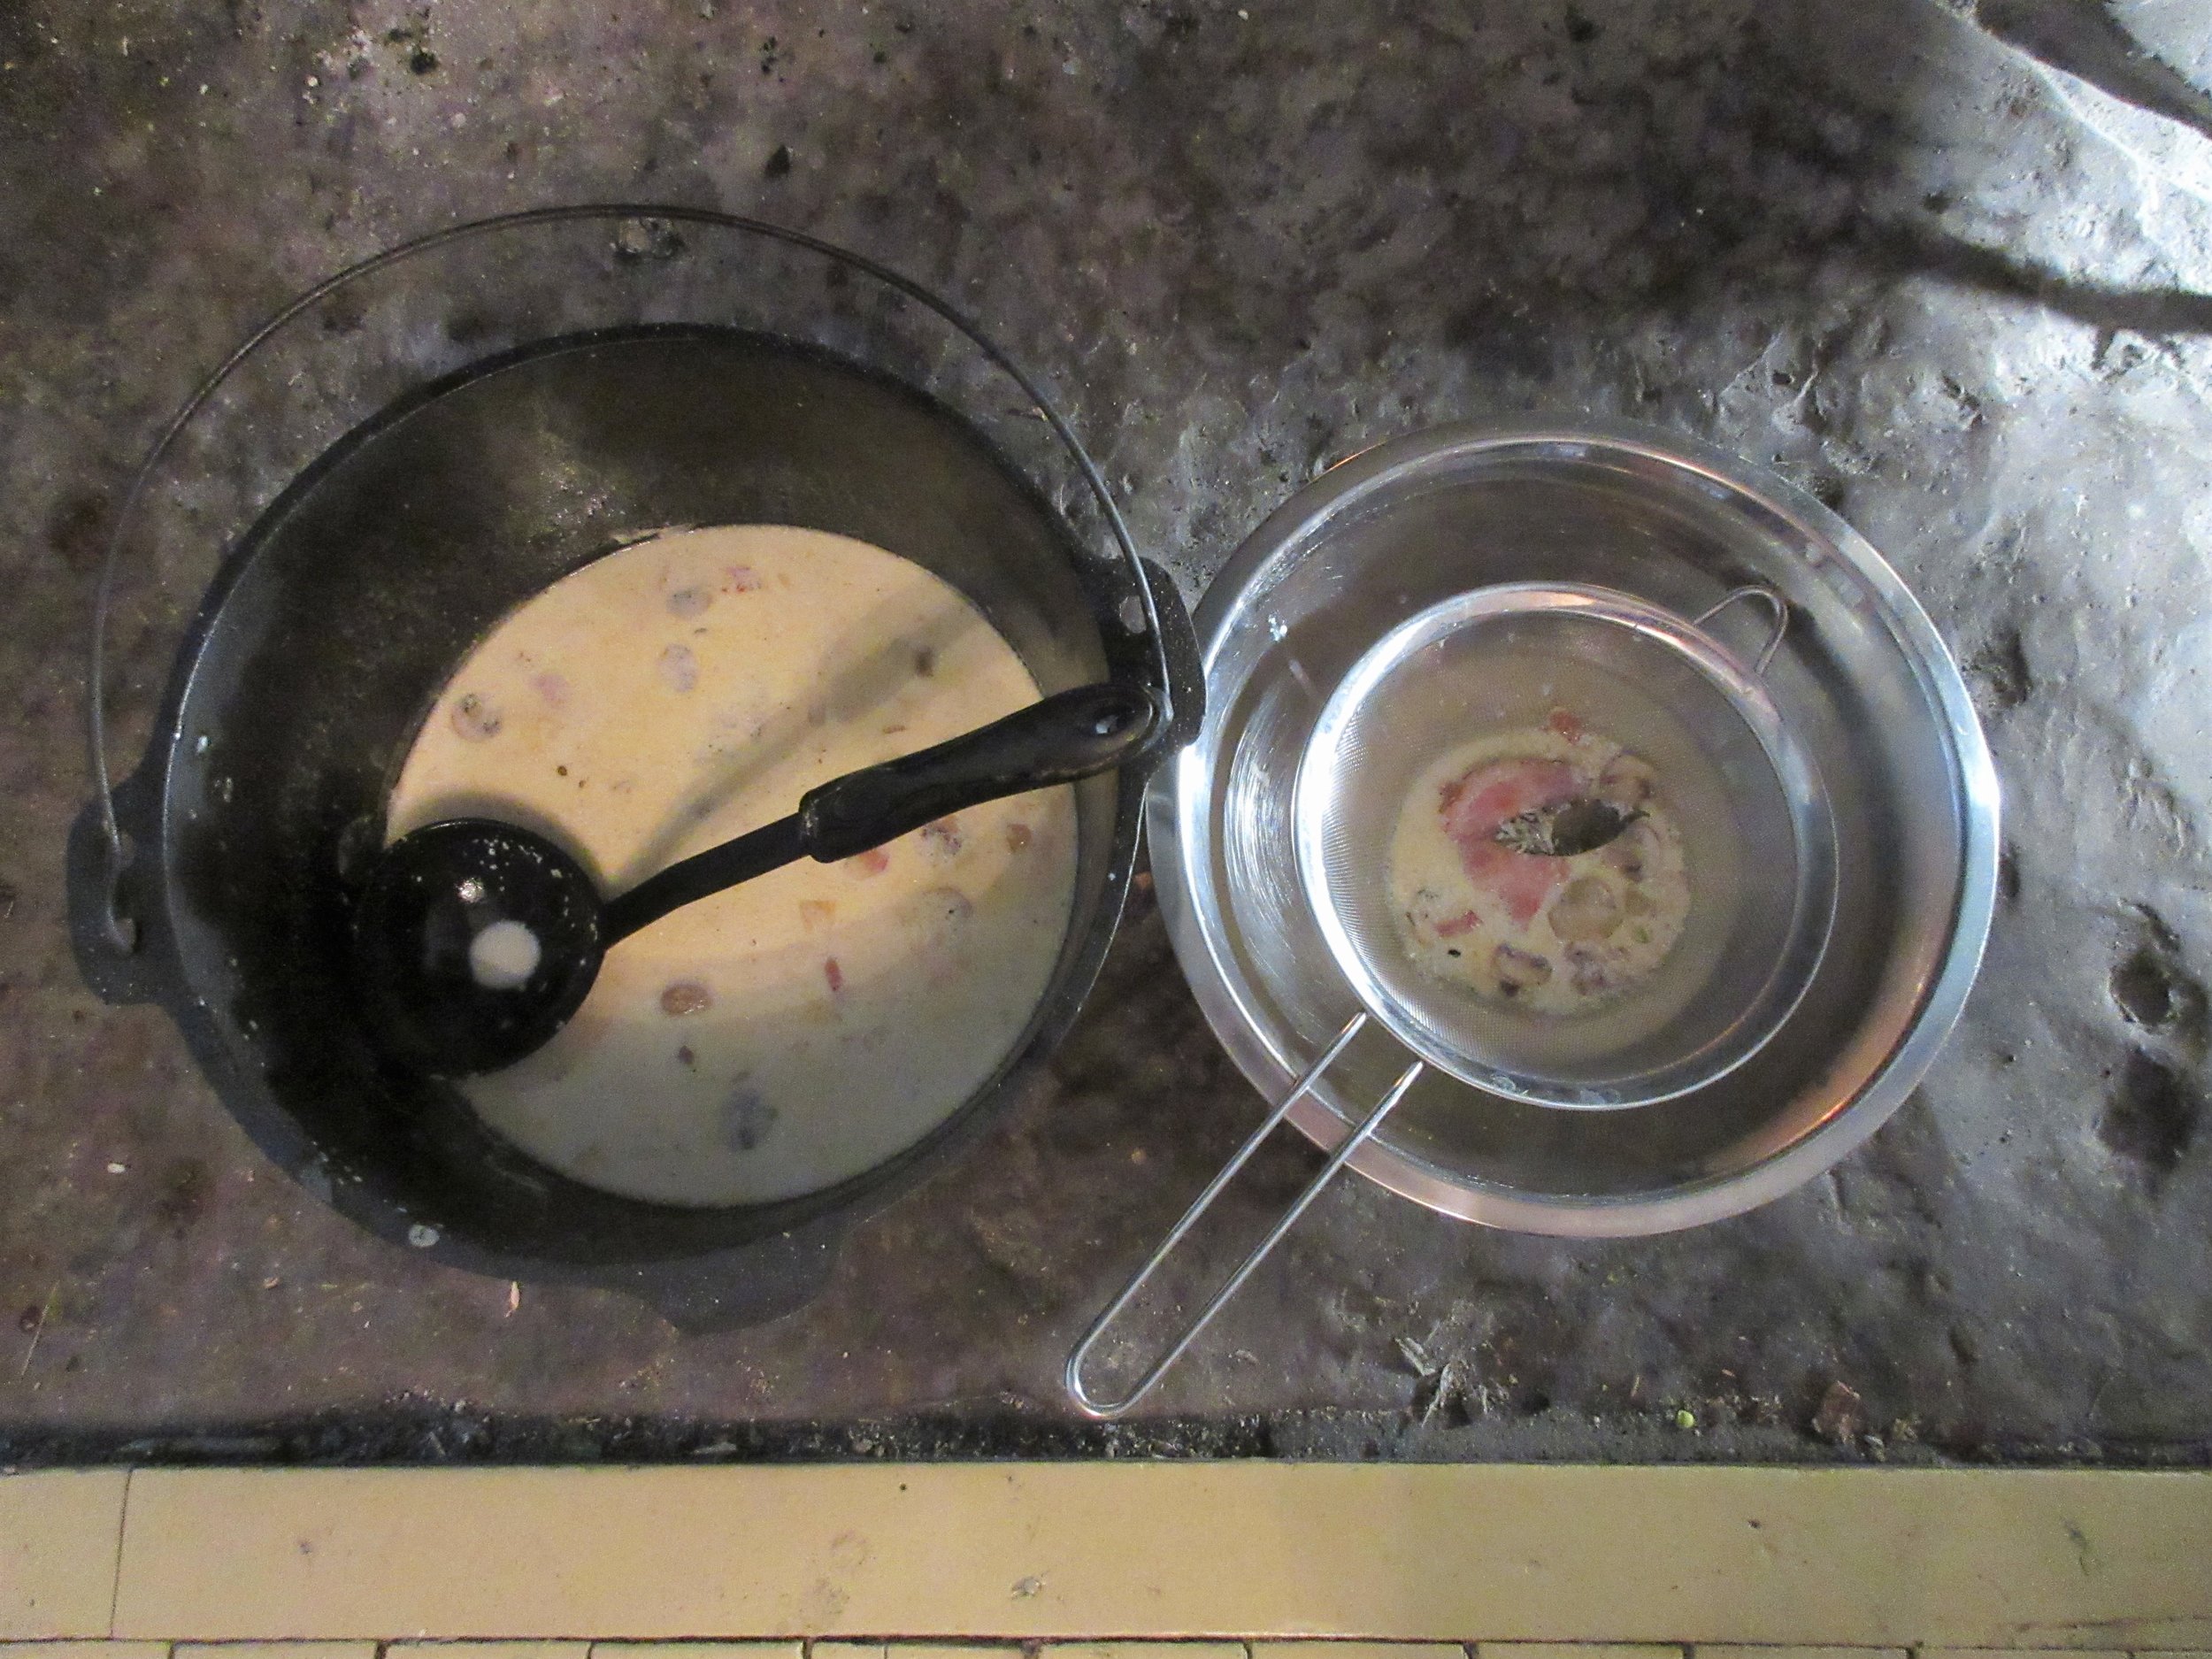
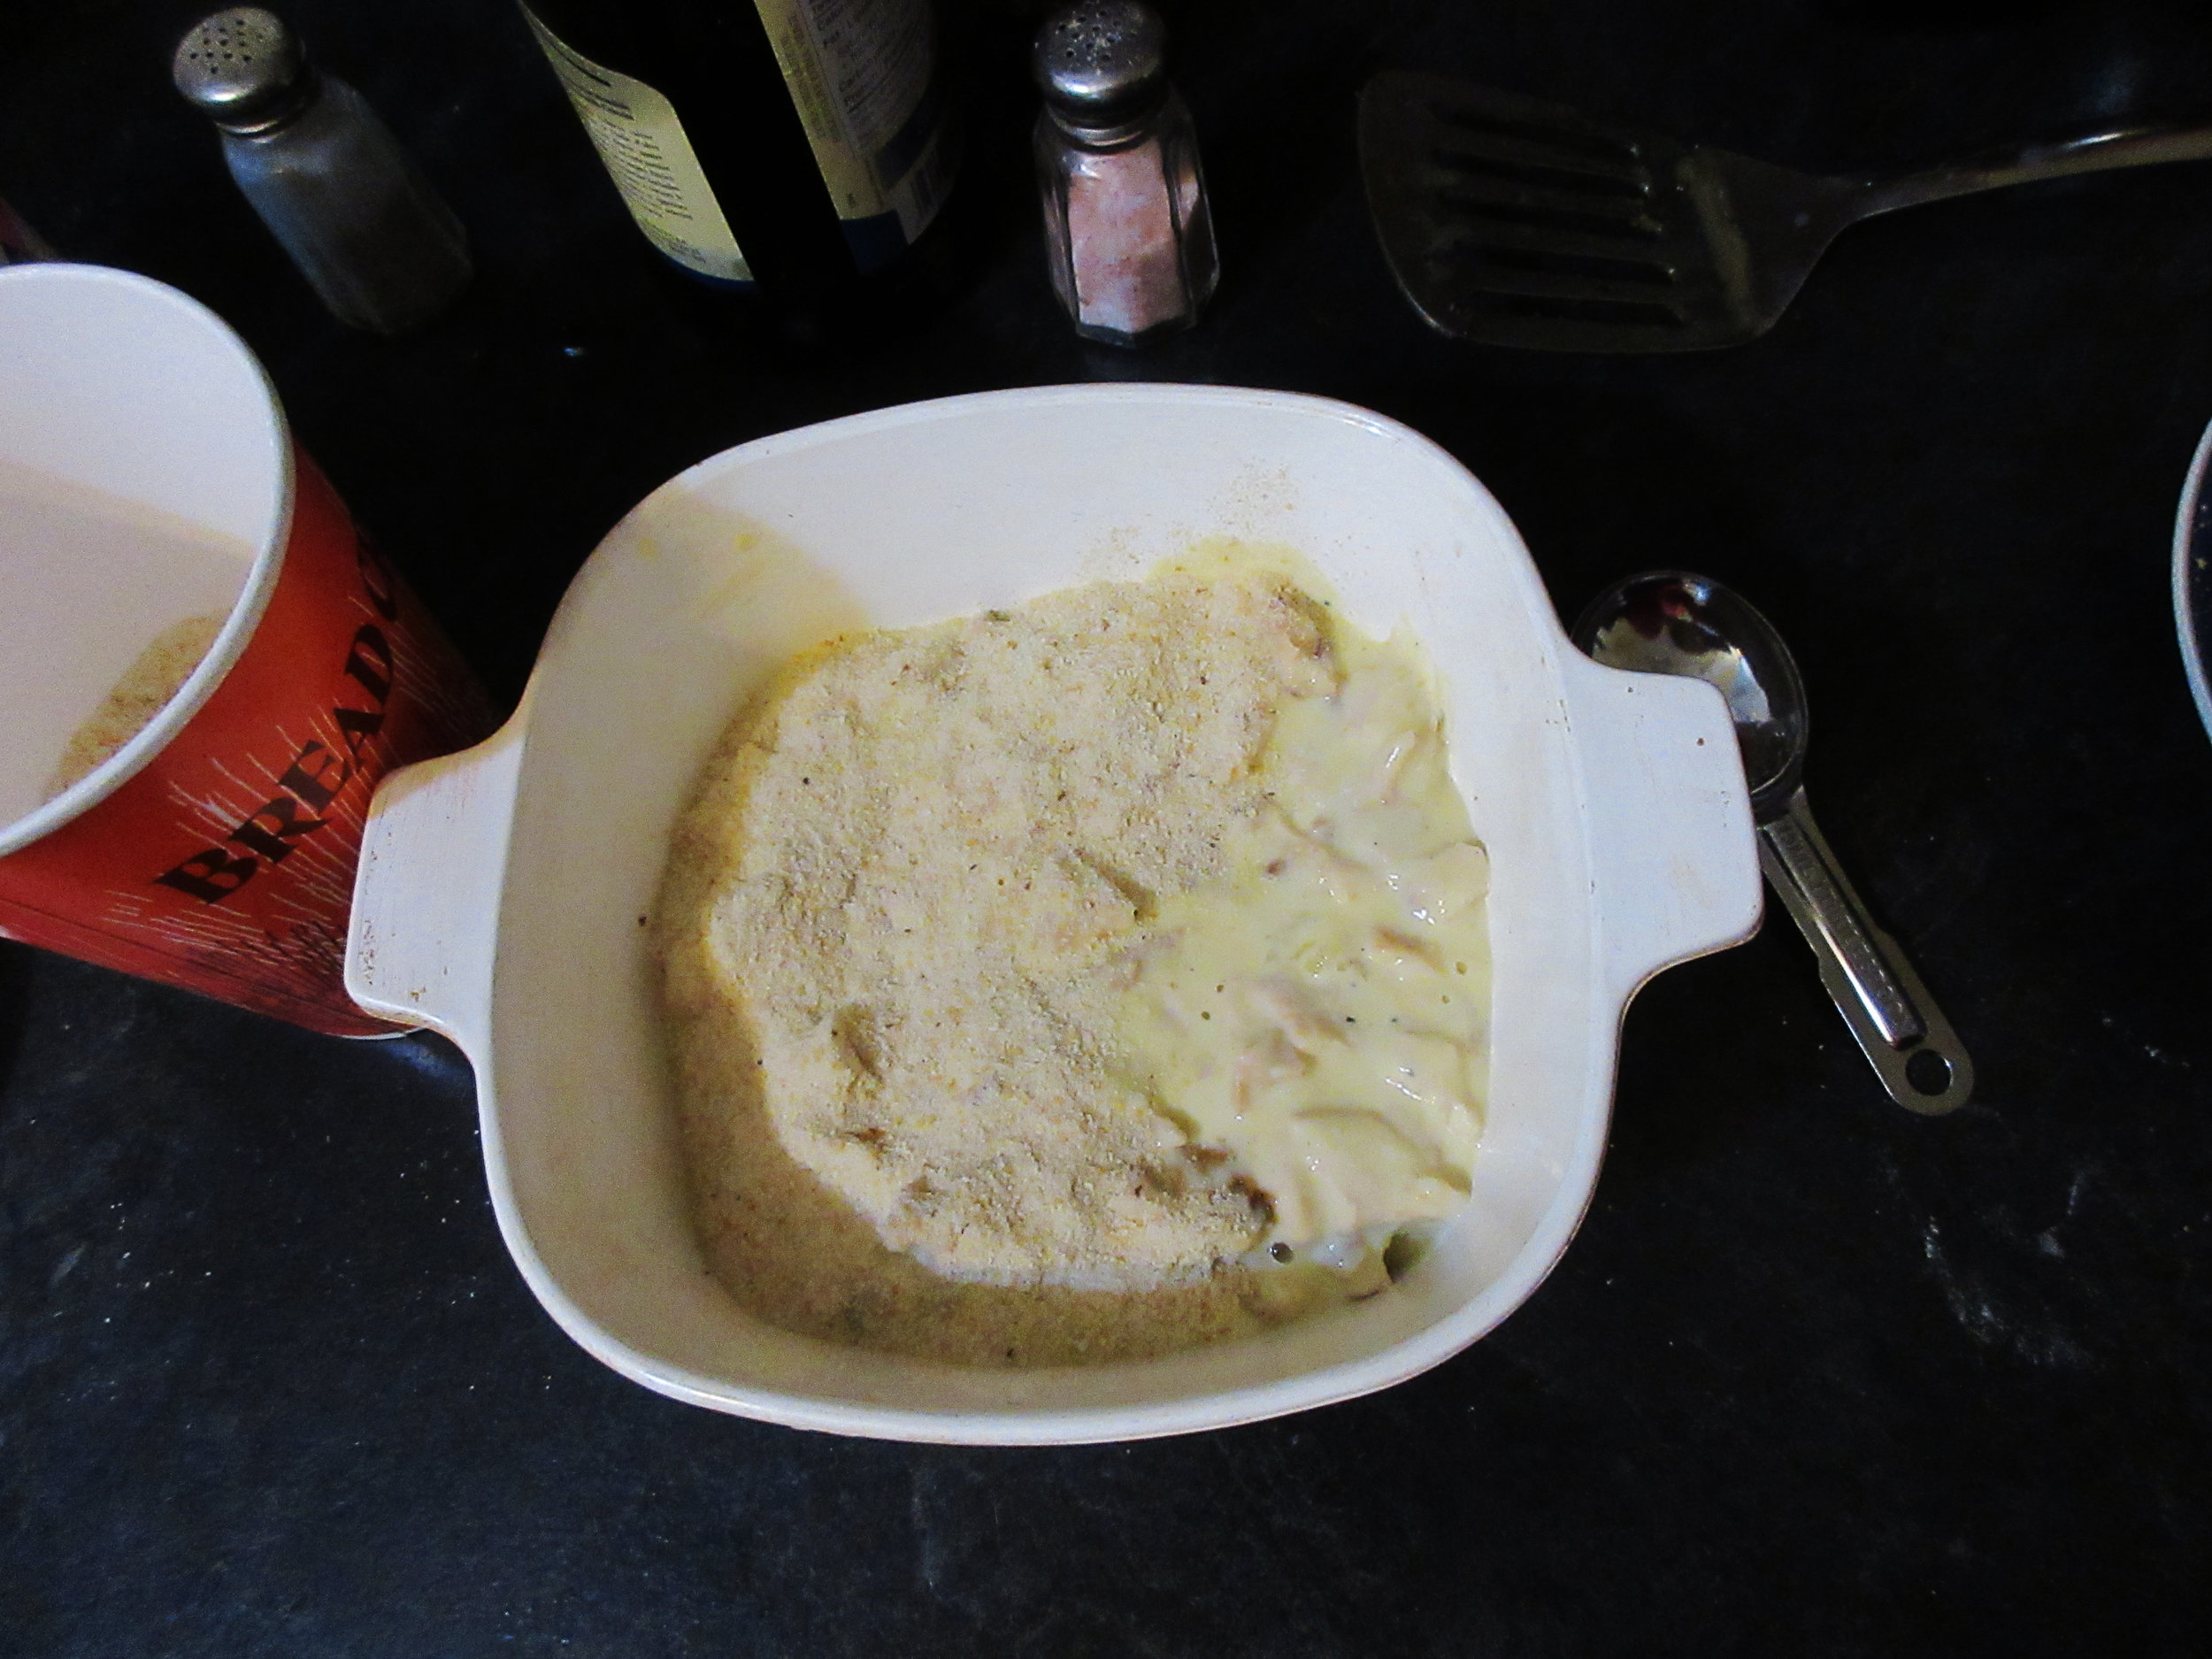
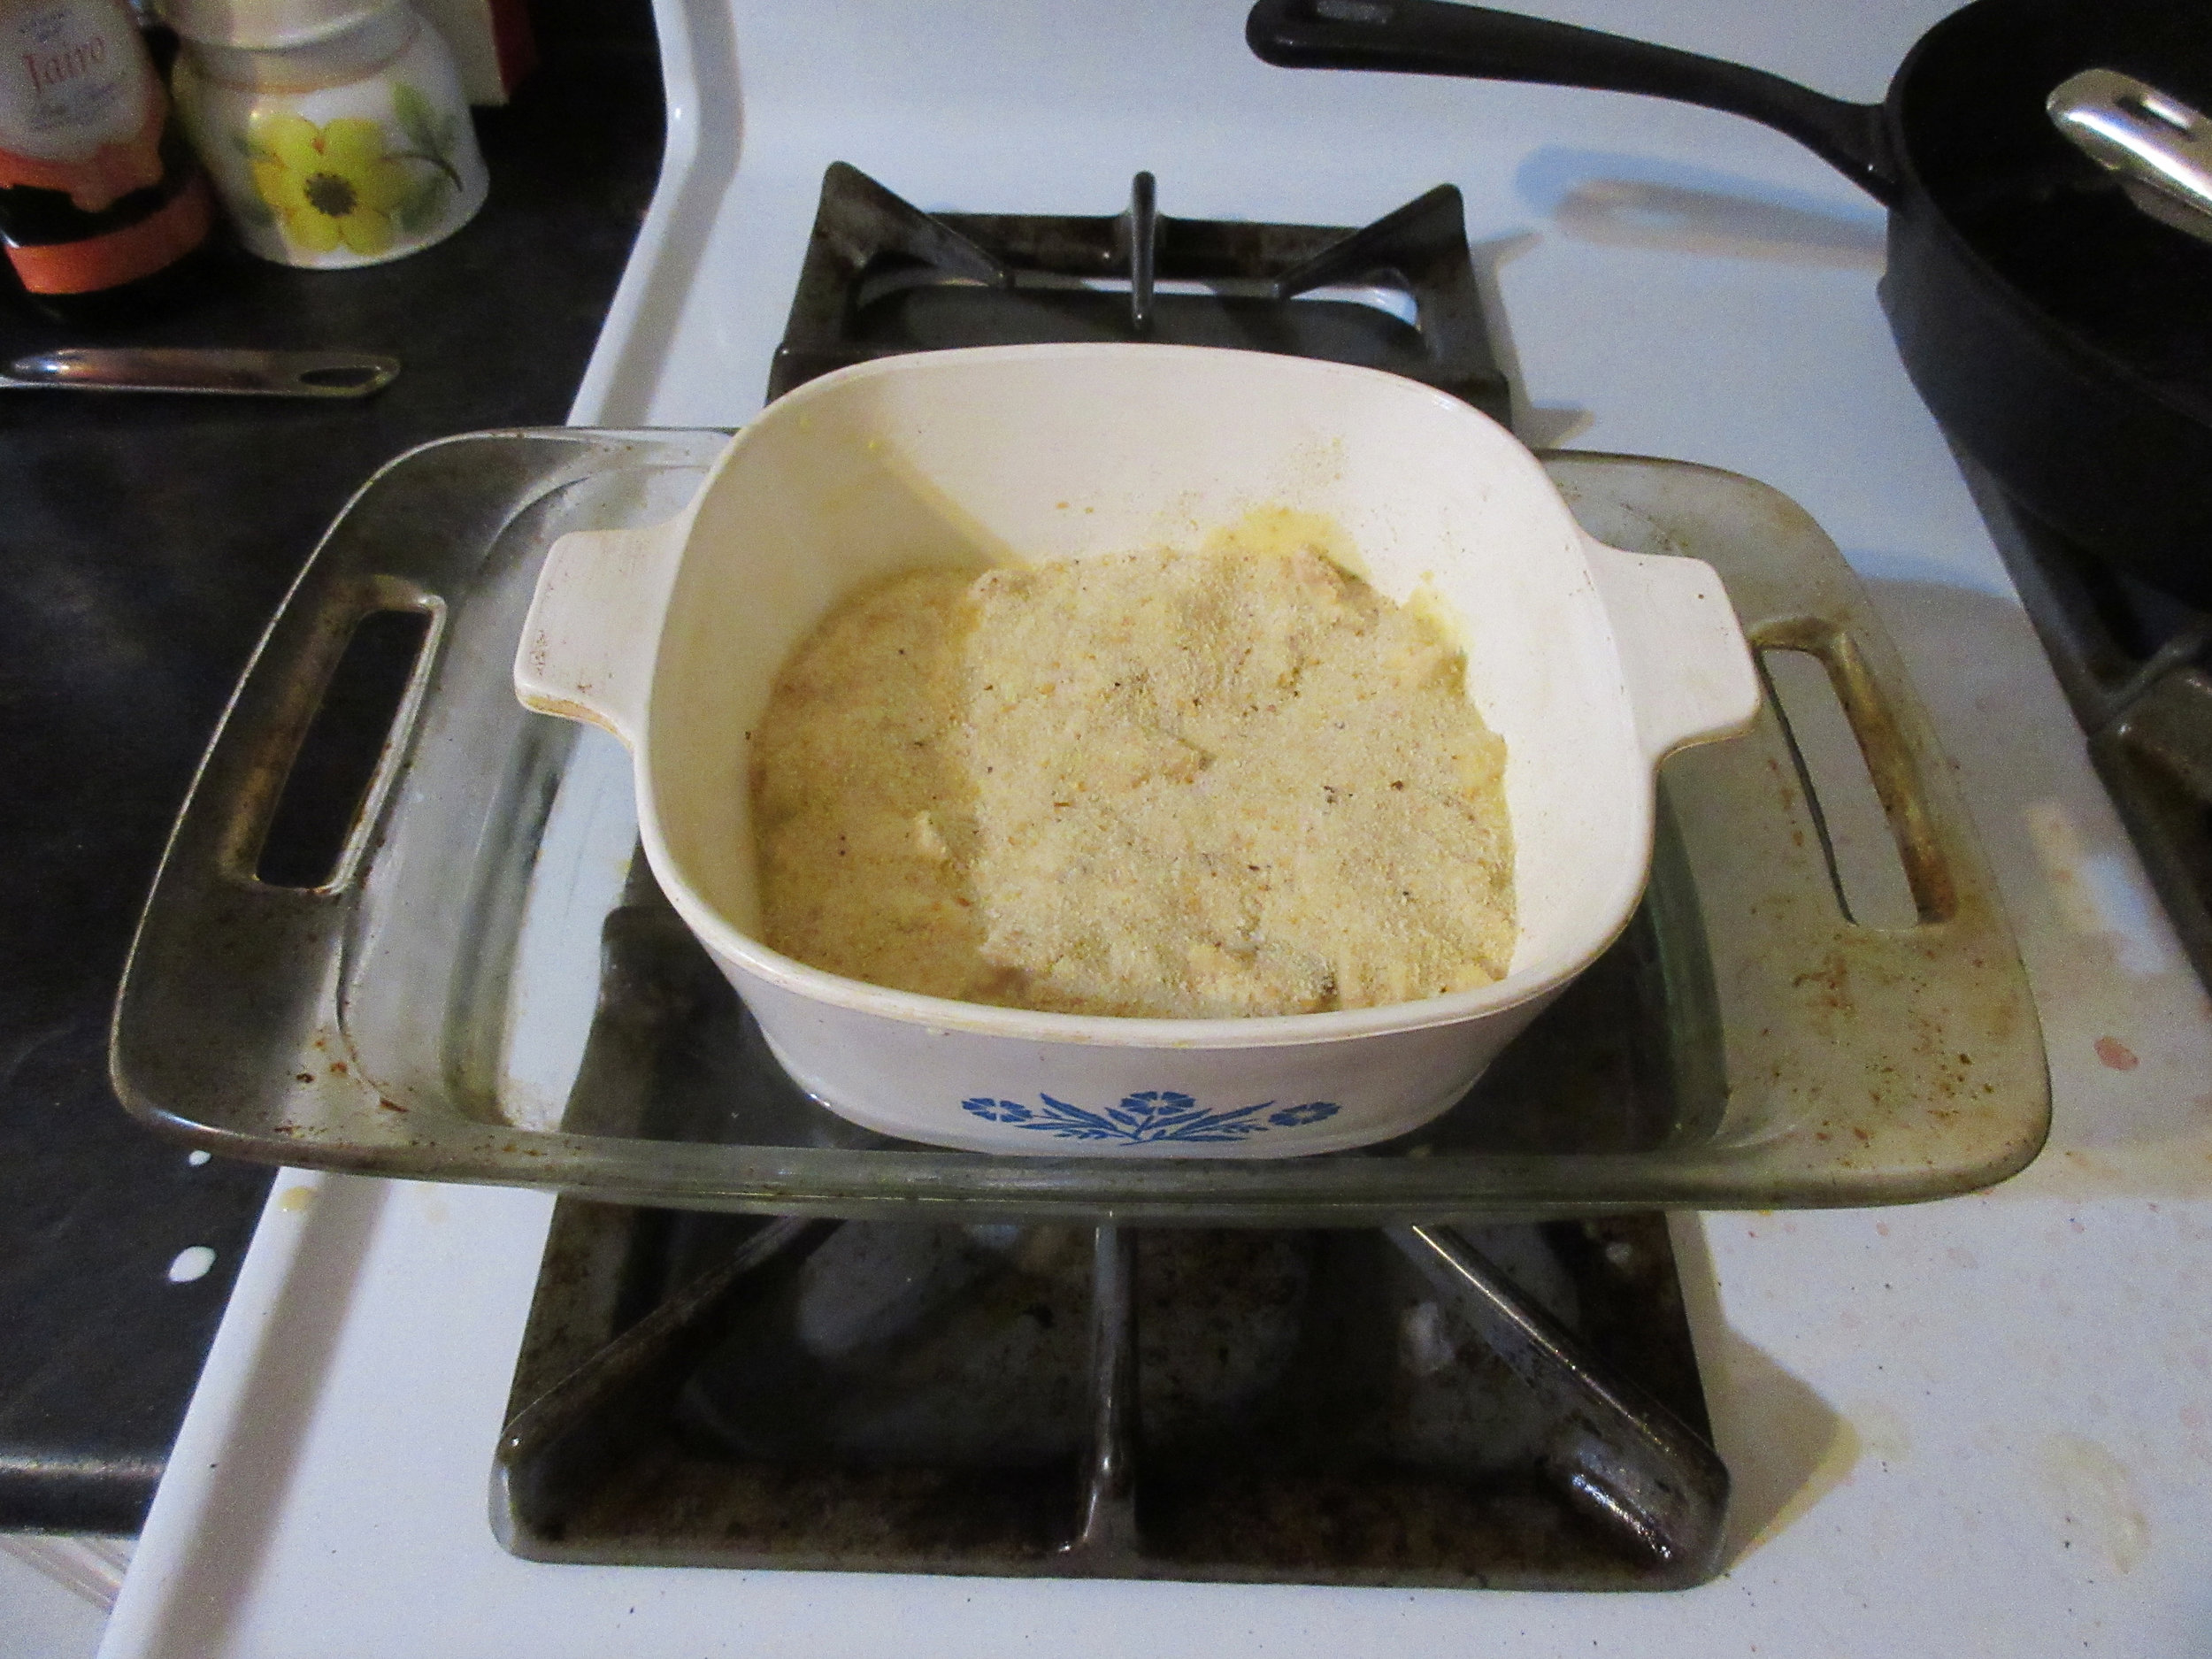
4) Strain the sauce through a sieve into the serving dish with the meat, then add the chopped parsley. Mix the melted butter with the breadcrumbs and layer on top of the sauce and chicken.
5) If your chicken is still warm from roasting, you may broil in the oven until the breadcrumbs are brown (or if you have a salamander, you can use that to brown the top). If your meat is cold, bake uncovered at 350F or 175C for 20-30 minutes. Switch to broil at the end to brown the breadcrumbs if needed.
Optional, but delicious: Slice the ham or veal into small pieces and remove the cloves and bay leaf. The ham, veal, mushrooms and shallots are tasty as a side dish or as a garnish with this dish.


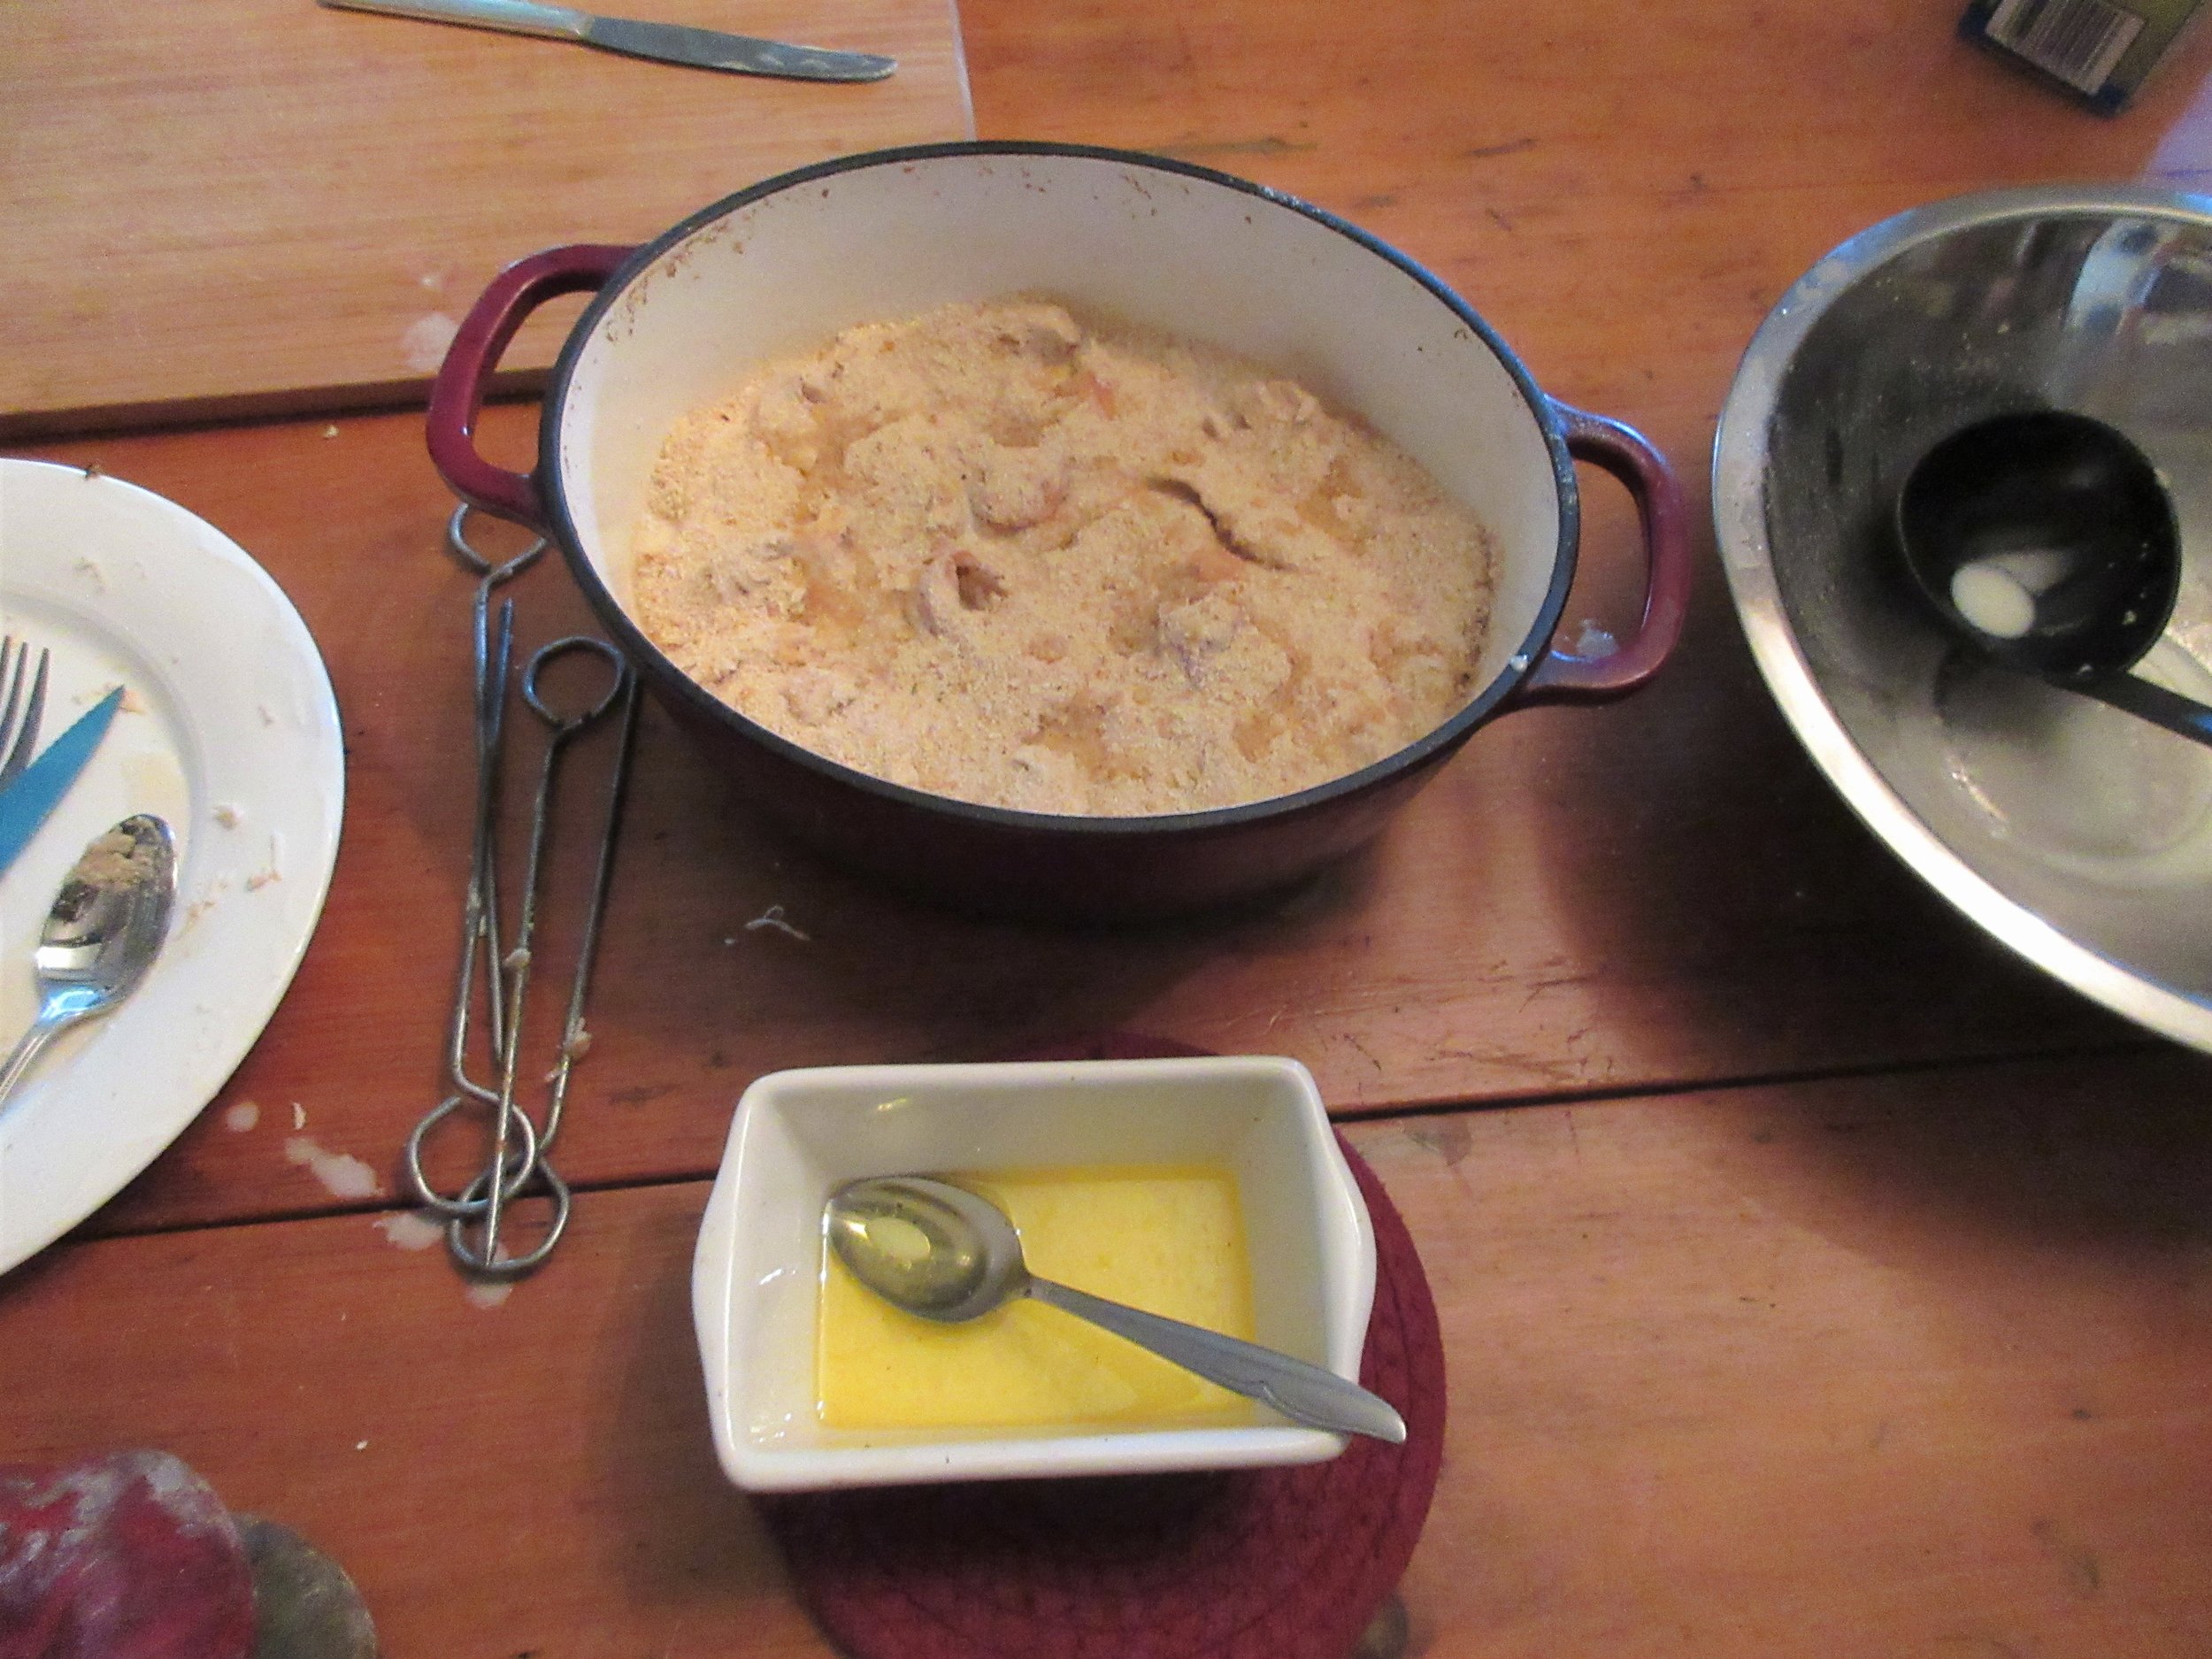
It’s been a while since I made Fillets of Chickens, with Bechamel-ſauce and Bread-crumbs at Nelles Manor Museum. I made it twice in the summer of 2019, which was the last time that I was able to teach an open hearth cooking class there. The recipe’s from the 1781 cookbook The Practice of Modern Cookery by George Dalrymple and at this class, we made recipes that would have been popular when the house was newly constructed using fresh garden produce and some newly purchased open hearth cooking implements.
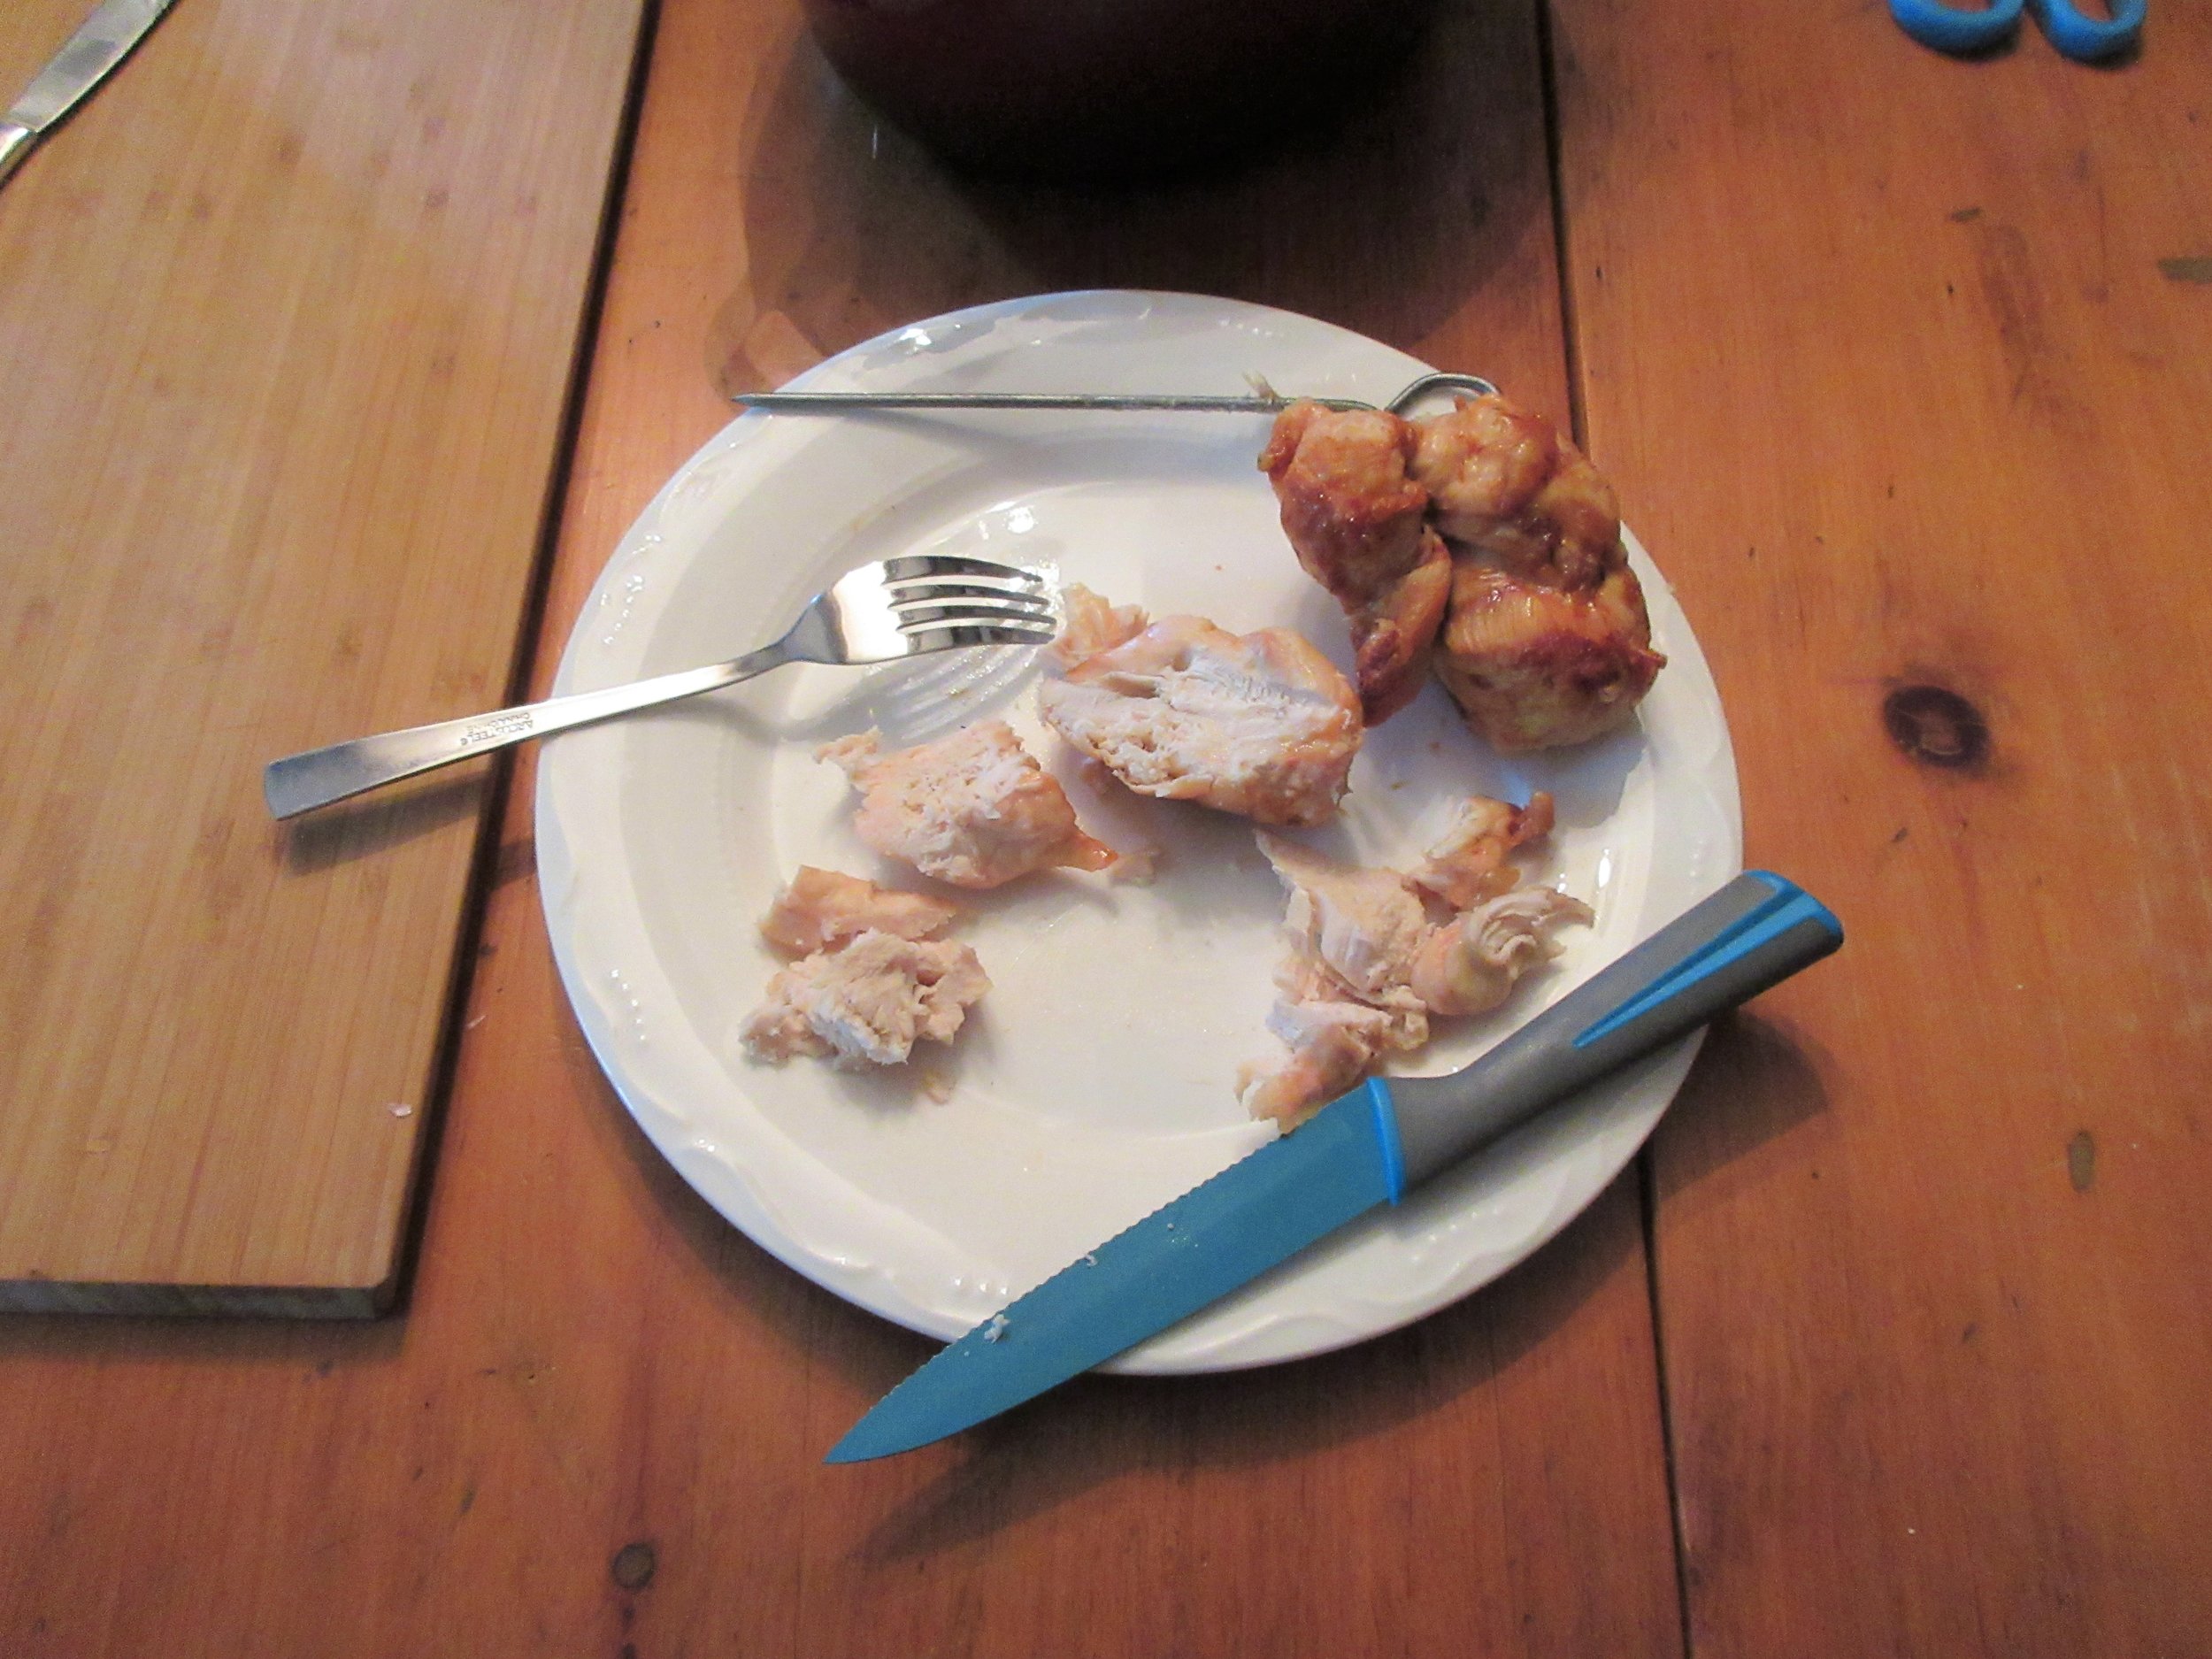
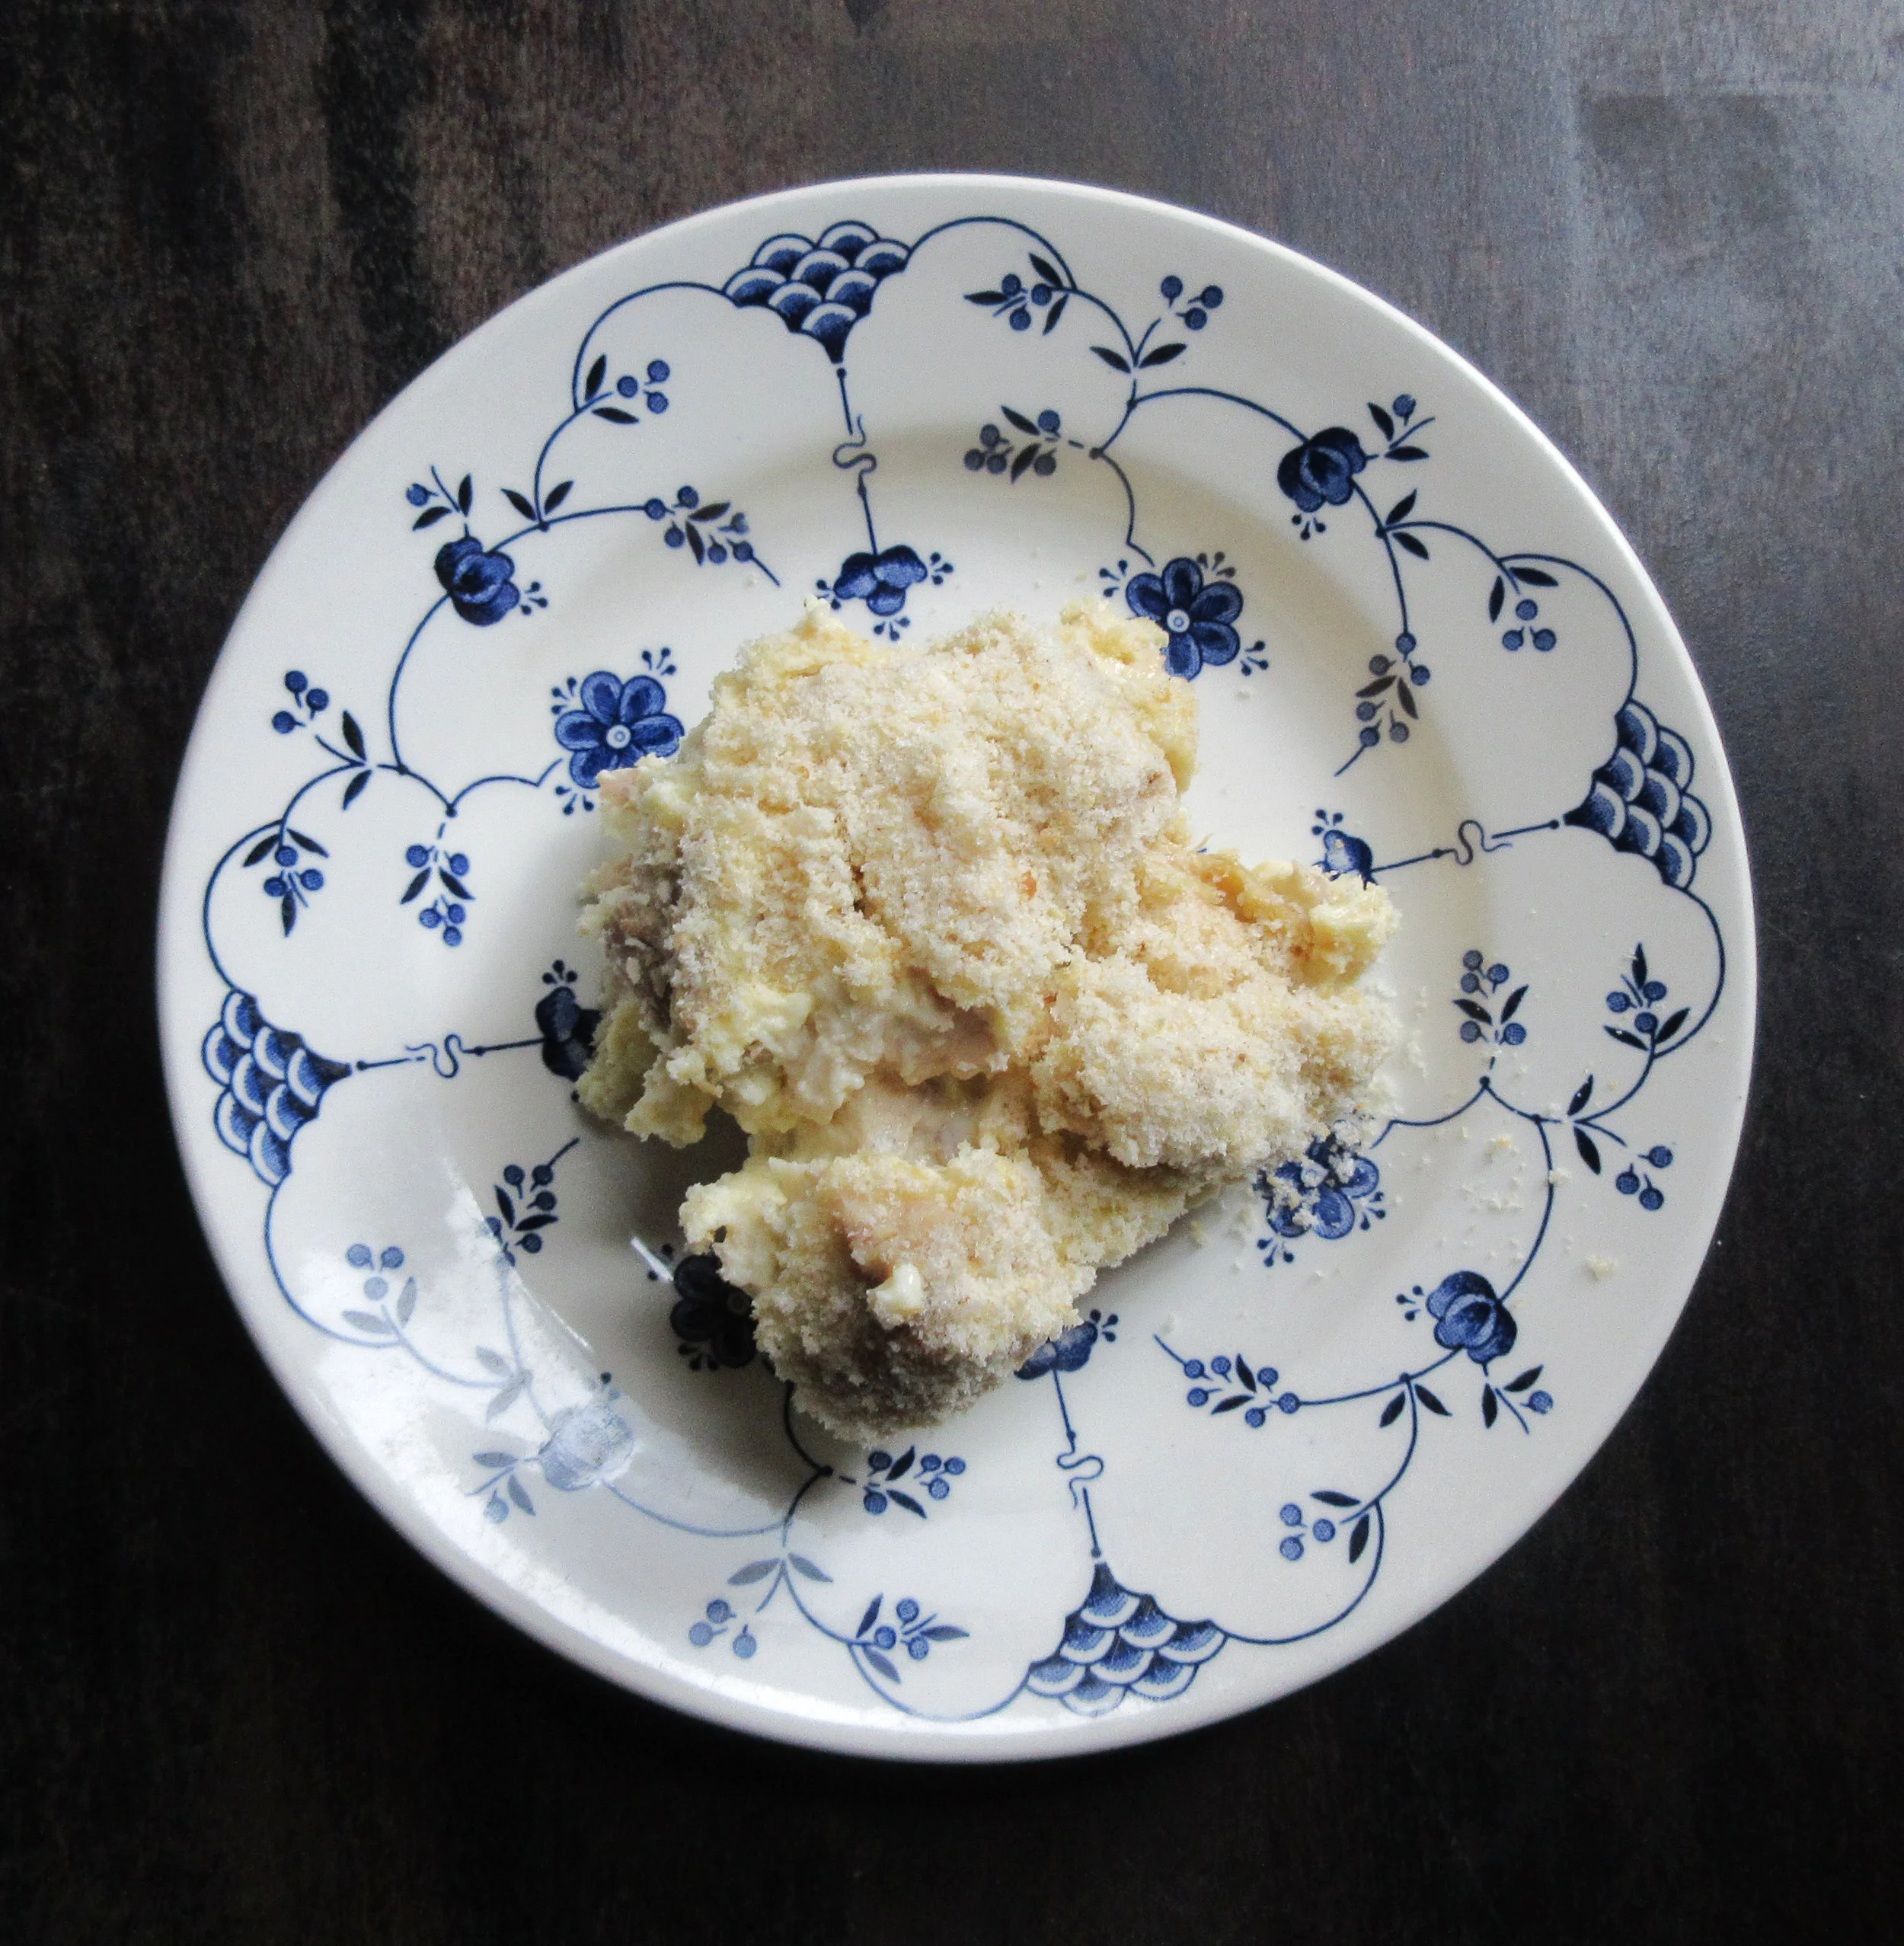
Above, the plate of Fillets of Chickens, with Bechamel-ſauce and Bread-crumbs on the left was cooked on recipe testing day, when I forgot both string and parsley. The picture of the plate on the right was snapped by a class attendee. You’ll also see To ragoo French Beans on the plate and you can just make out a glass of Freſh Raſpberry Water at the top. We finished off with some Strawberry-fritters for dessert.
If you’re curious about cooking with fire, keep reading to learn about some open hearth cookery techniques: using a salamander and a couple of different styles of reflector ovens. I also share some ideas for creating DIY reflector ovens using common items that you can use in front of a fireplace or campfire.
Salamanders
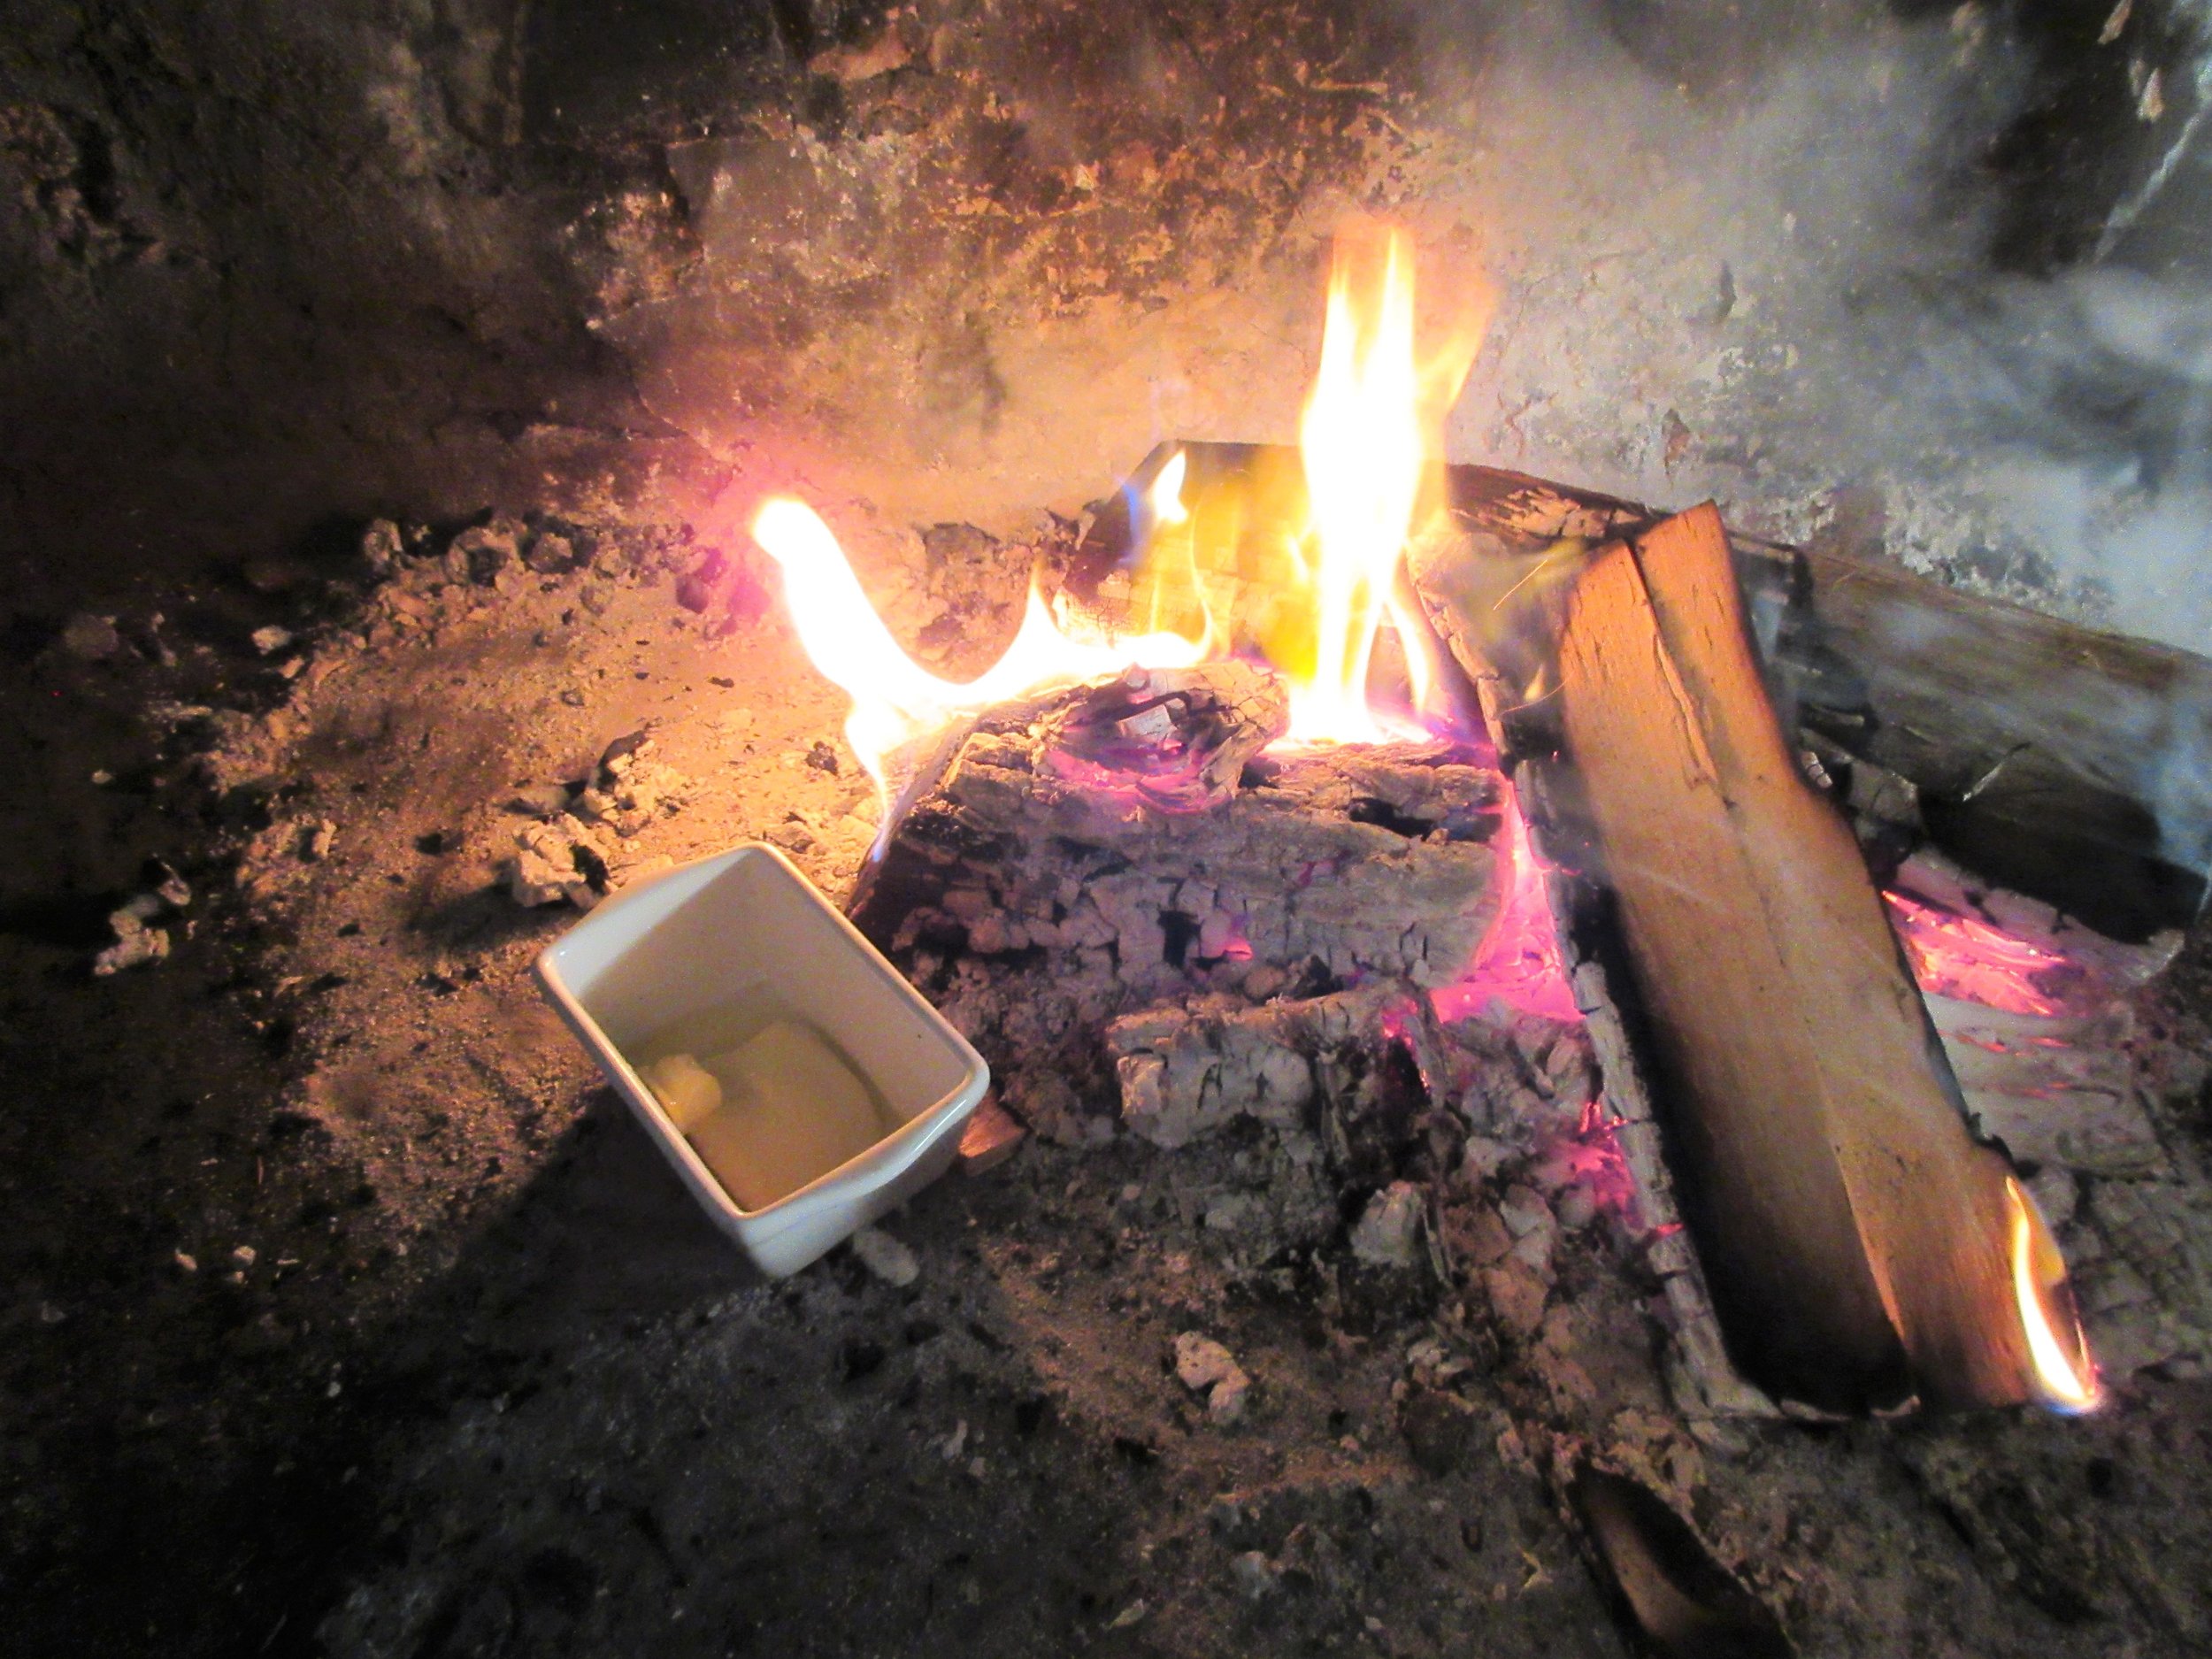
One of the final steps in our recipe is to “give it a colour in a oven or with a ſalamander”. Keep reading to find out how to brown a breadcrumb top in an oven in open hearth cookery, but our other option is to use a salamander. This recipe isn’t instructing us to brown the breadcrumbs by using a small lizard, though. A salamander is a metal tool used used to brown or caramelize the tops of dishes before being served. Today, a salamander is a small broiling oven that’s used for the same purpose.
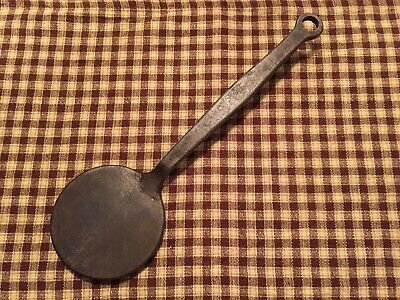
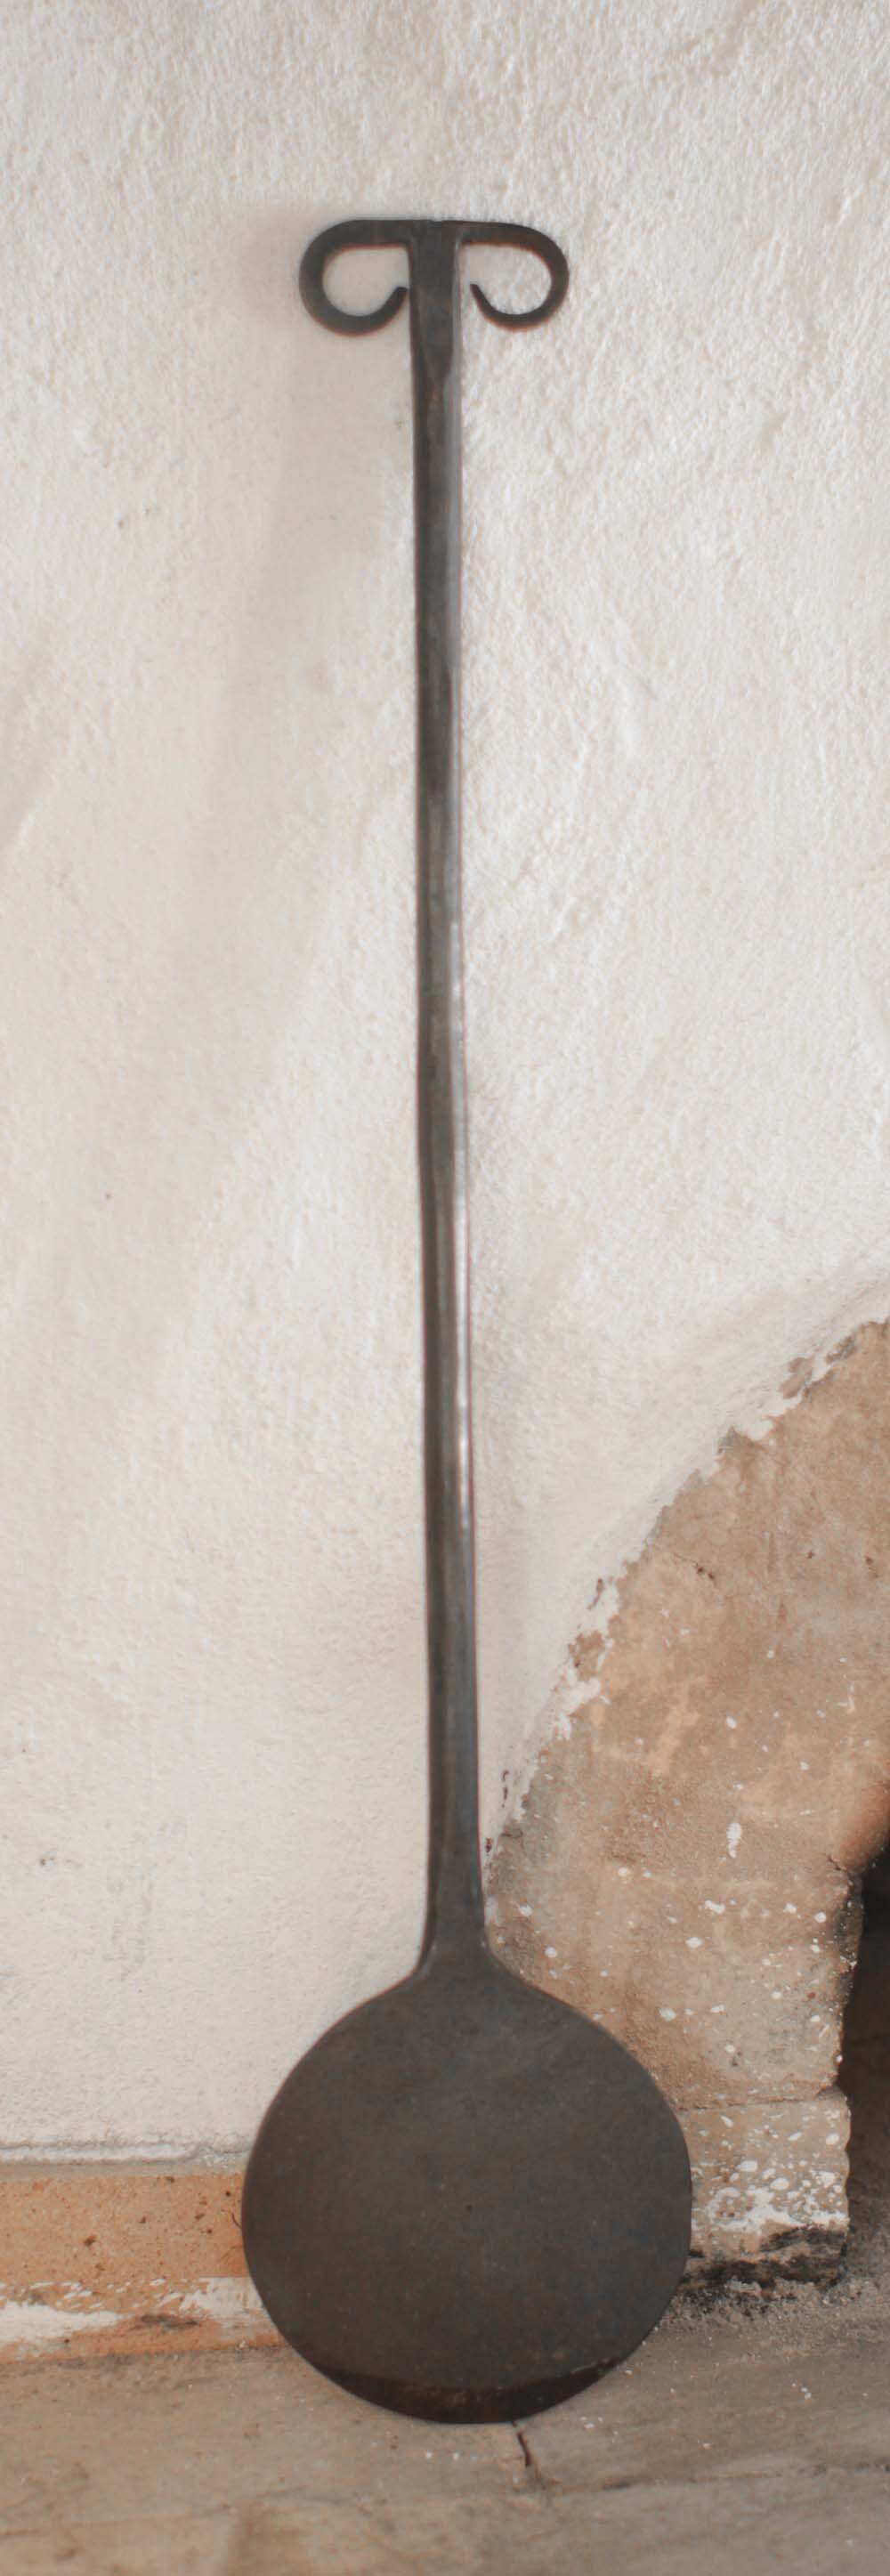

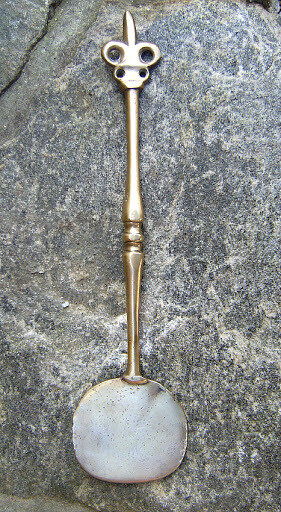
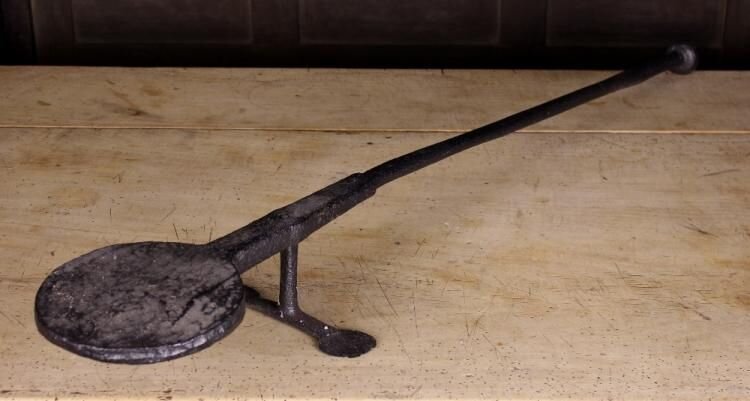
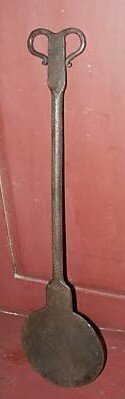
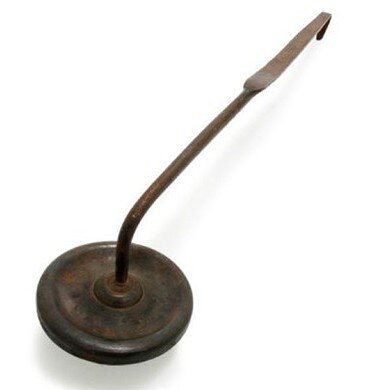
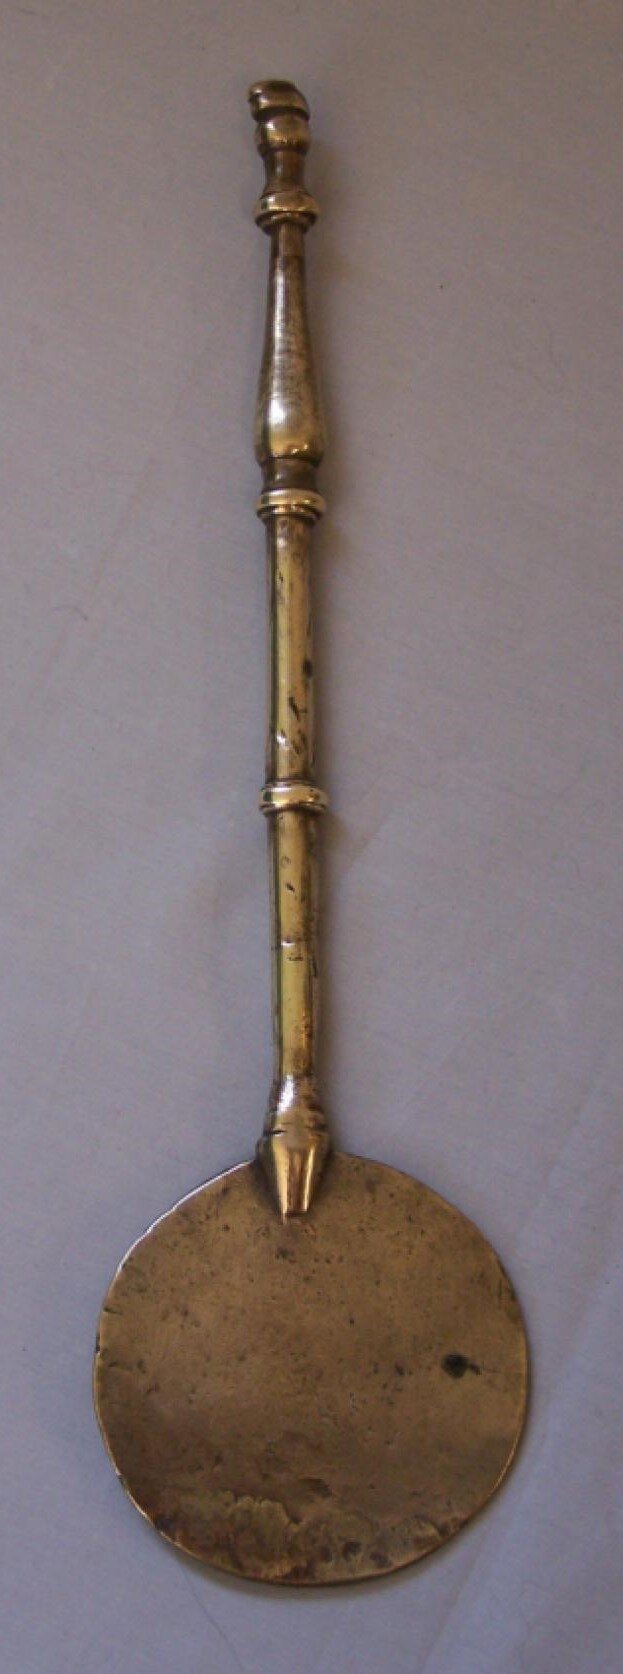
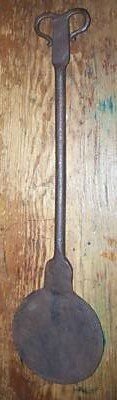
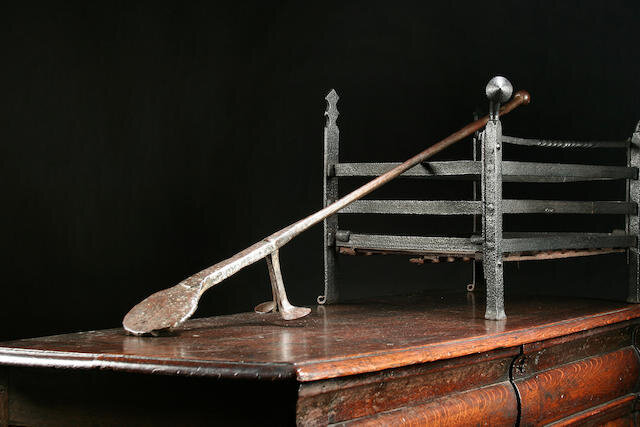
Traditional salamanders have a round metal piece at the end of a long handle. Sometimes salamanders also have little feet to help keep it in place when it’s being heated. If you didn’t have a salamander, you’d also have the option to use a small metal shovel.
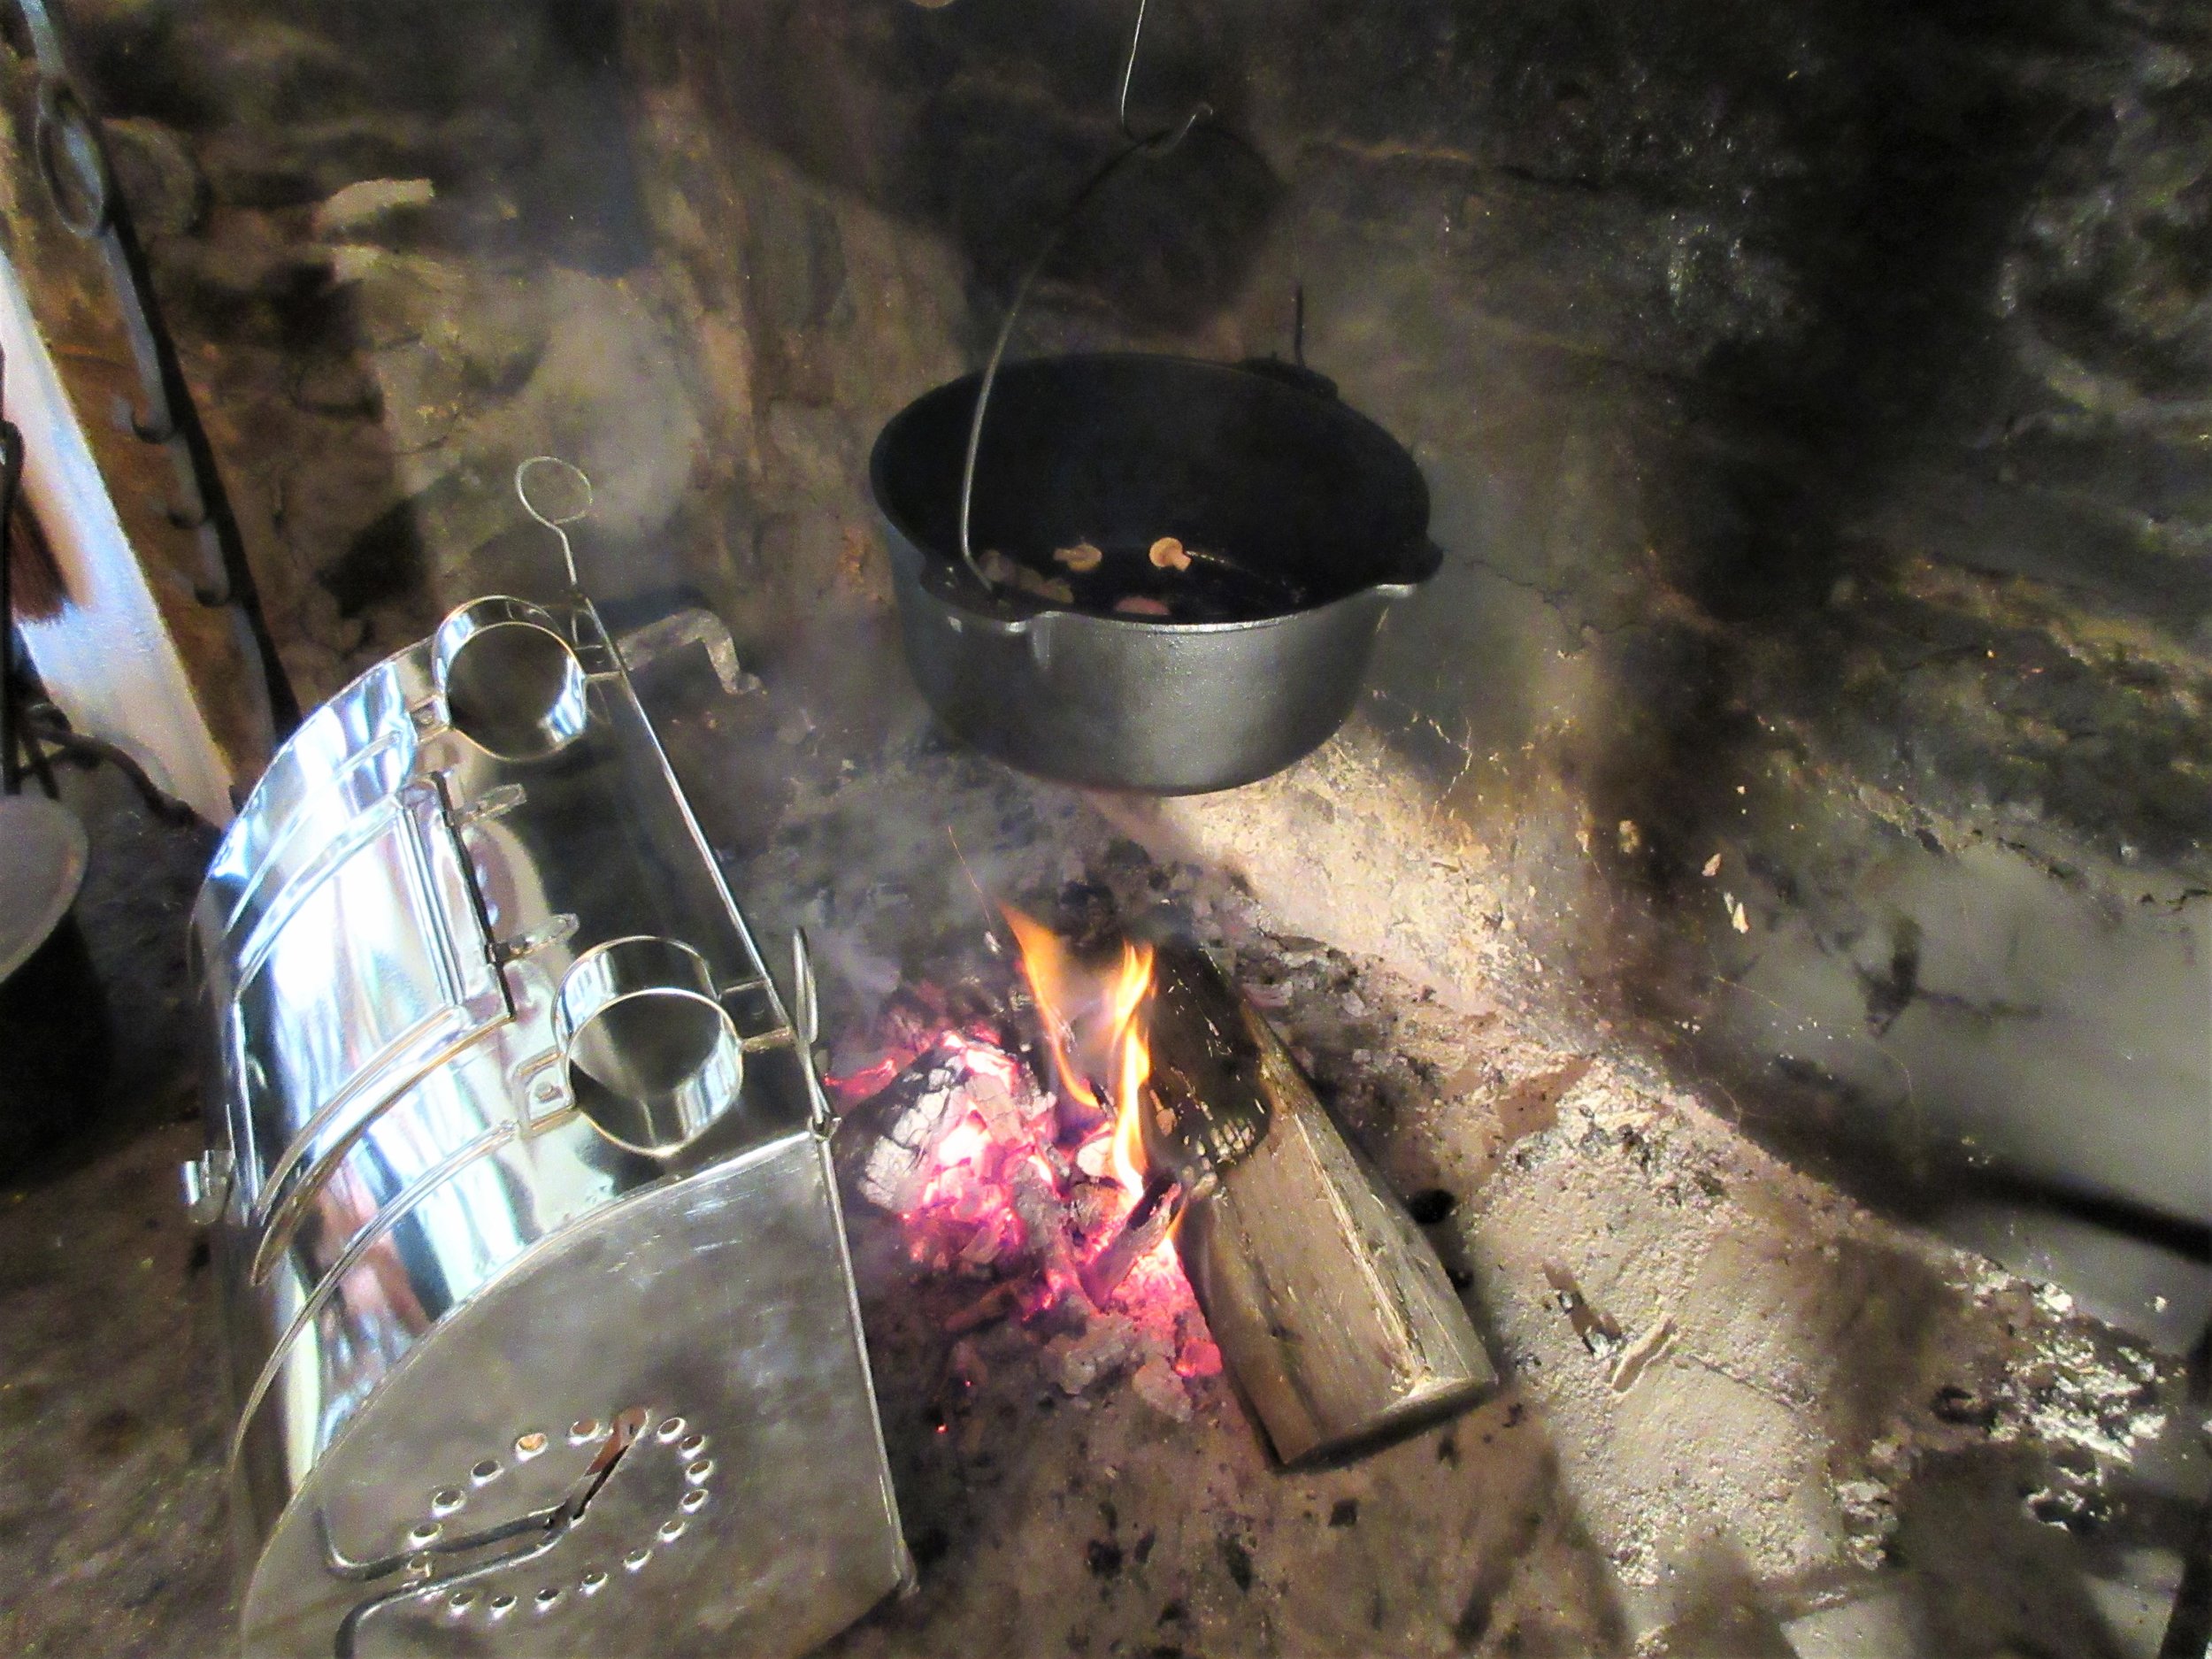
Salamanders (or shovels) would be heated until they’re red hot by either burying the round end in hot coals or sticking its end in the fire. The salamander would be waved overtop or pressed on the area to brown, blacken and caramelize. To see these principals in action, have a look at the videos below from the Townsends youtube channel. Close to the end, he utilizes a salamander to caramelize the top of a bread pudding and in the other video, he uses a hot shovel to blacken the tops of baked apples.
Reflector Ovens
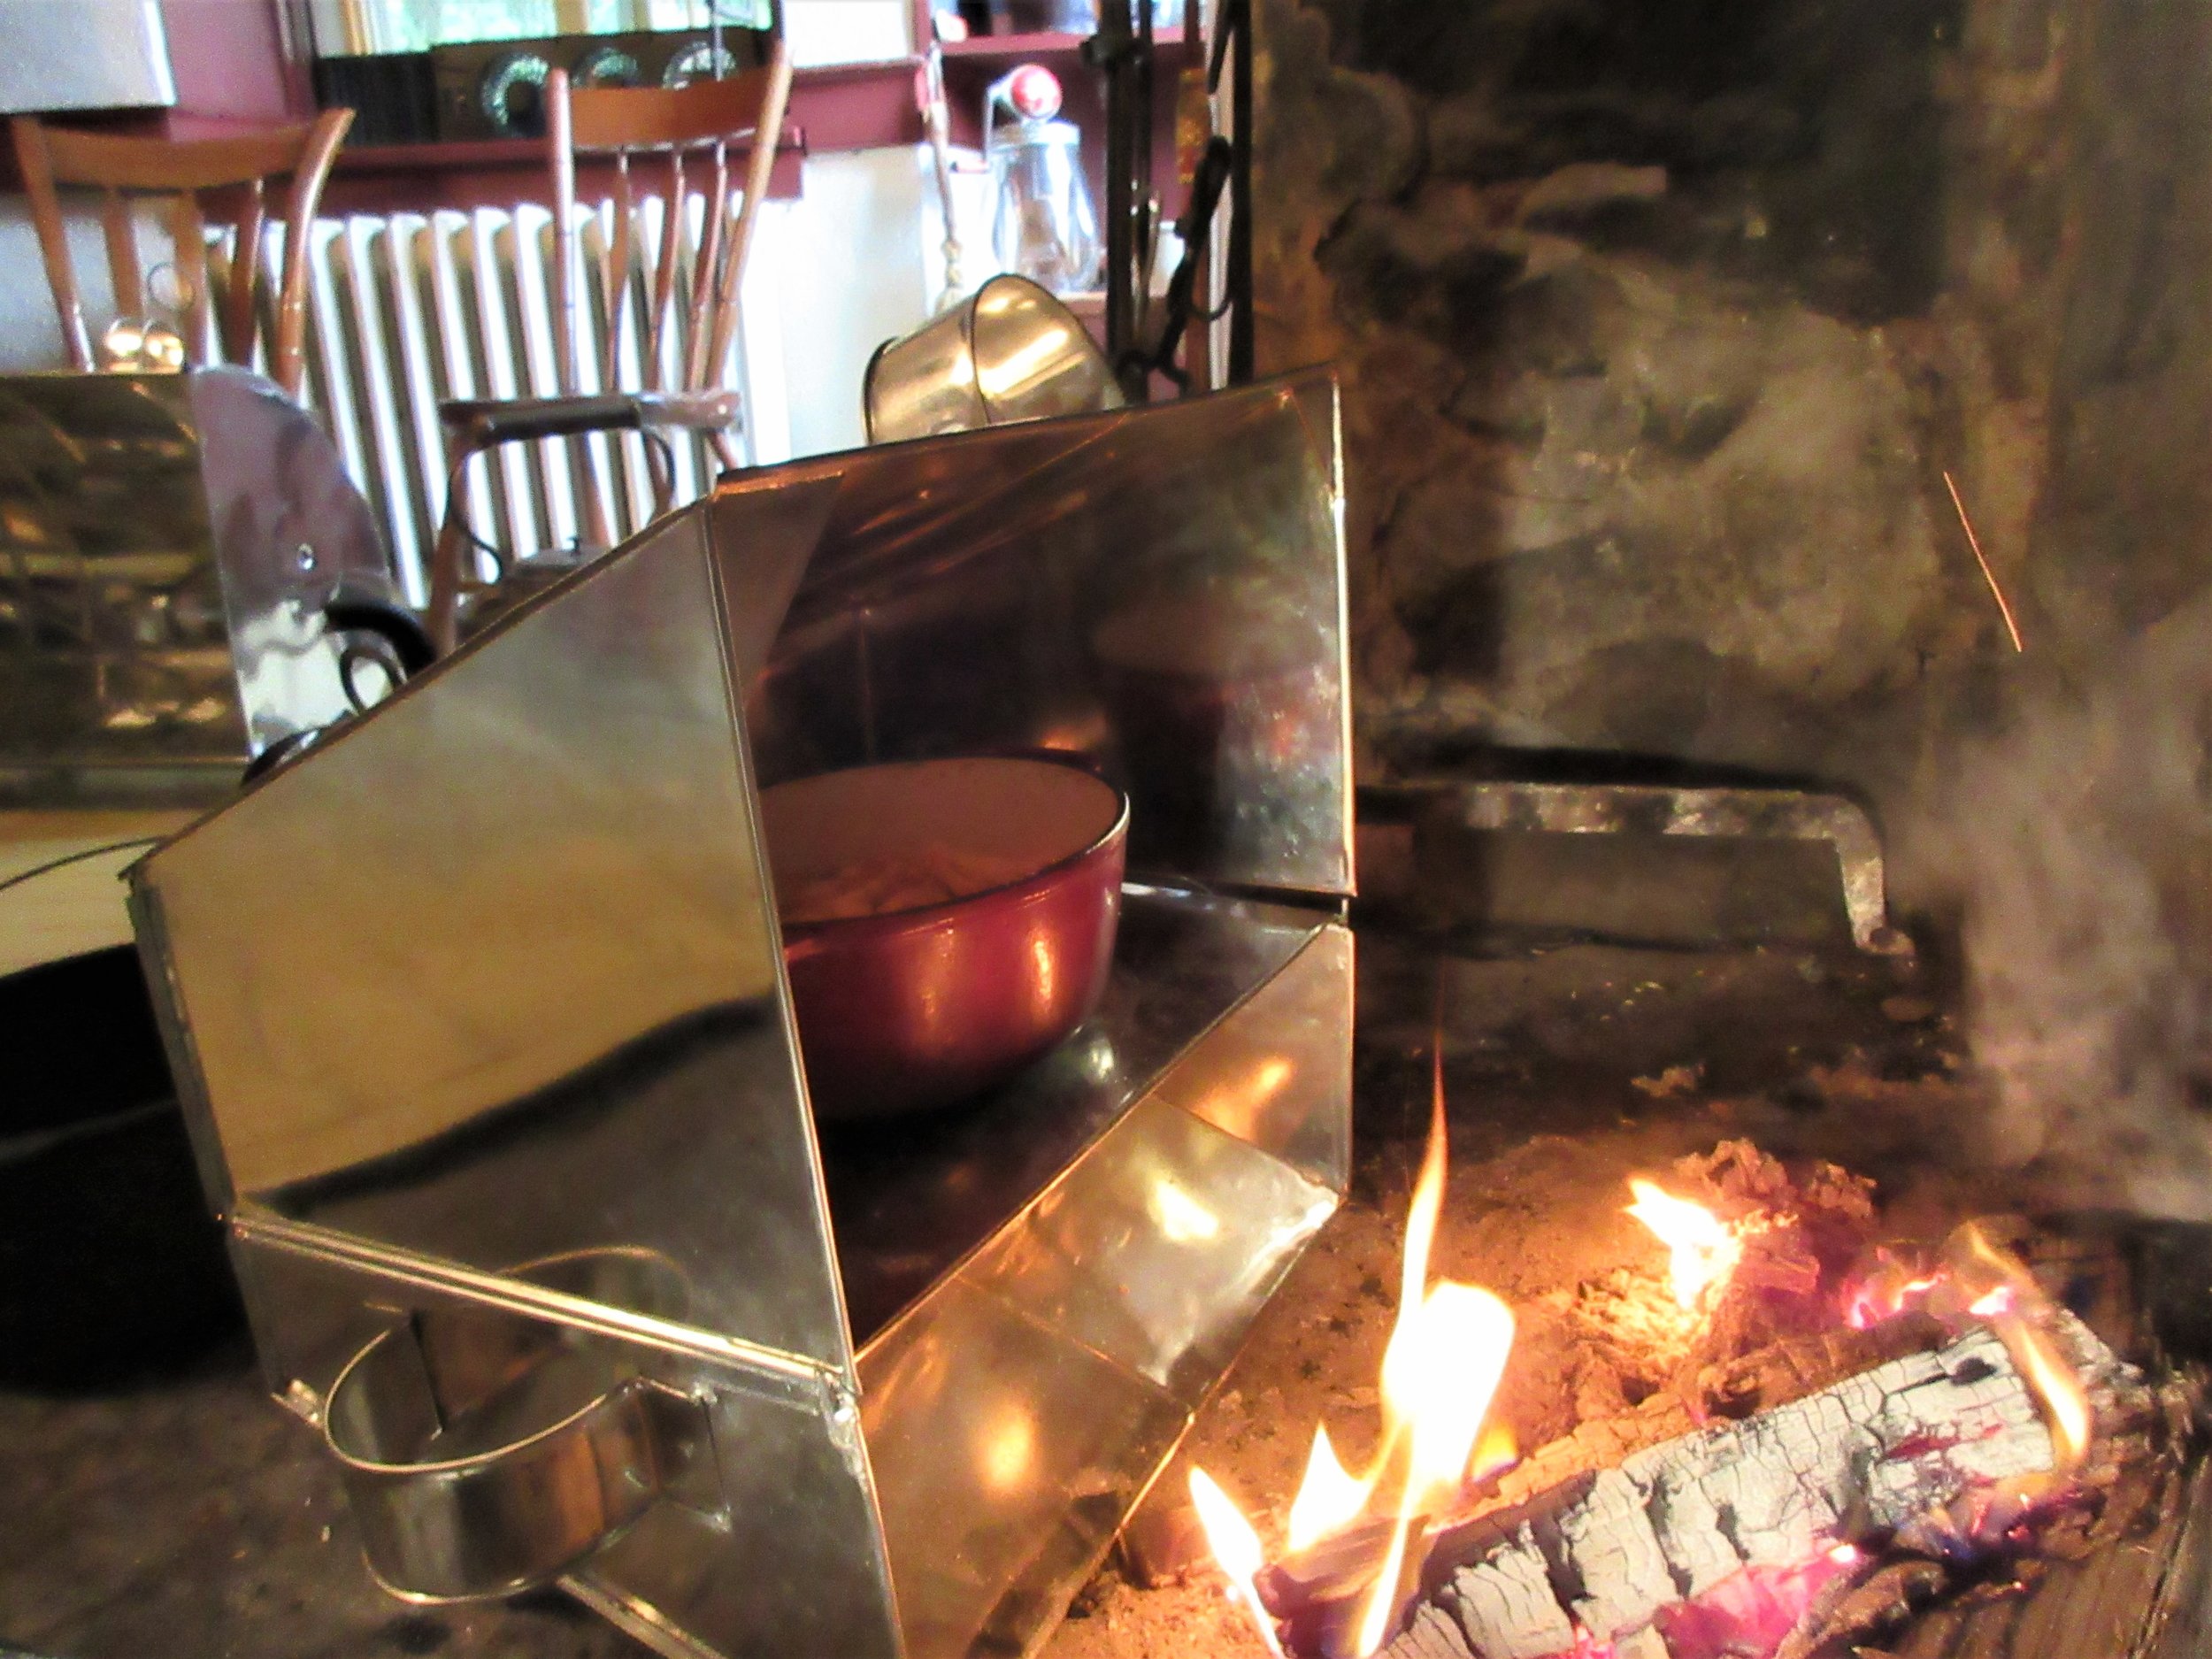
Reflector ovens are sometimes also called hastening ovens or tin kitchens and they are metal containers, traditionally made out of tin, meant for roasting and baking. Tin kitchens amplify, focus and reflect the heat from the fire. I used two types of reflectors to prepare Fillets of Chickens.
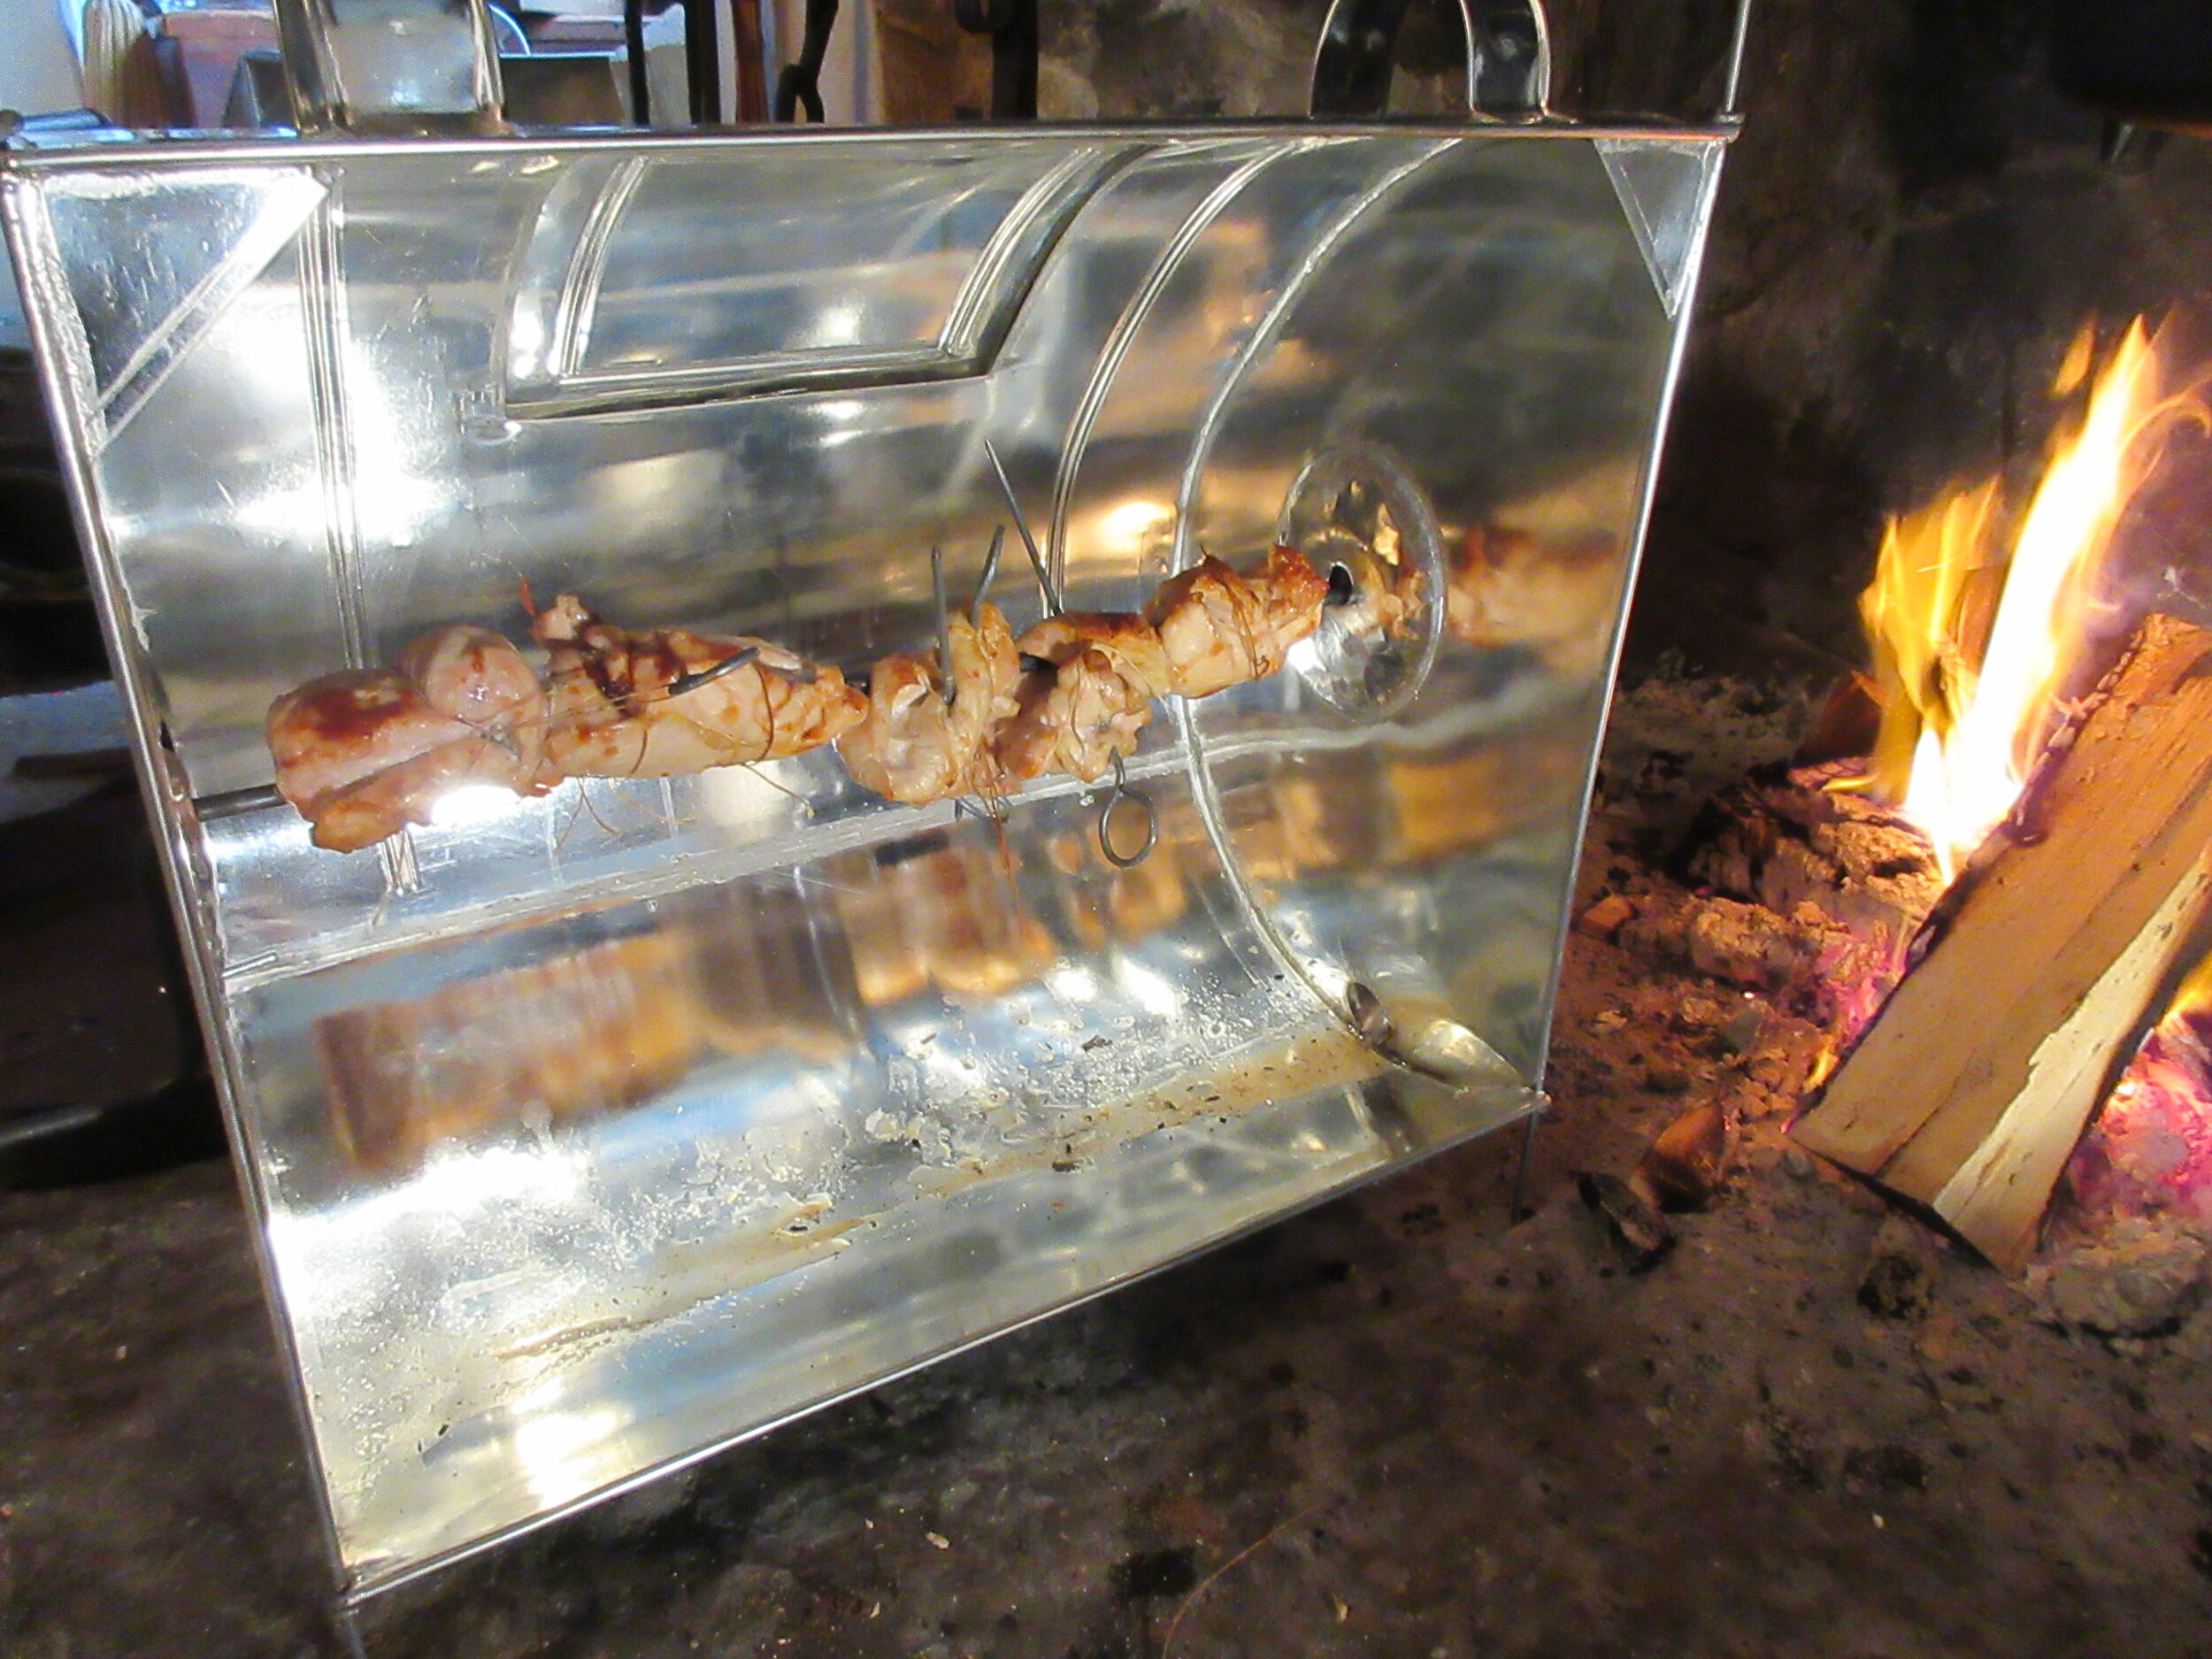
To roast my chicken breasts, I trussed them up to a reflector oven with a spit and at the end of the recipe, I used the more box-like hastening oven to brown the breadcrumb topping. If I didn’t have a rotisserie reflector oven, I would have still been able to roast my chicken breast in a dish or pan in the box reflector oven.


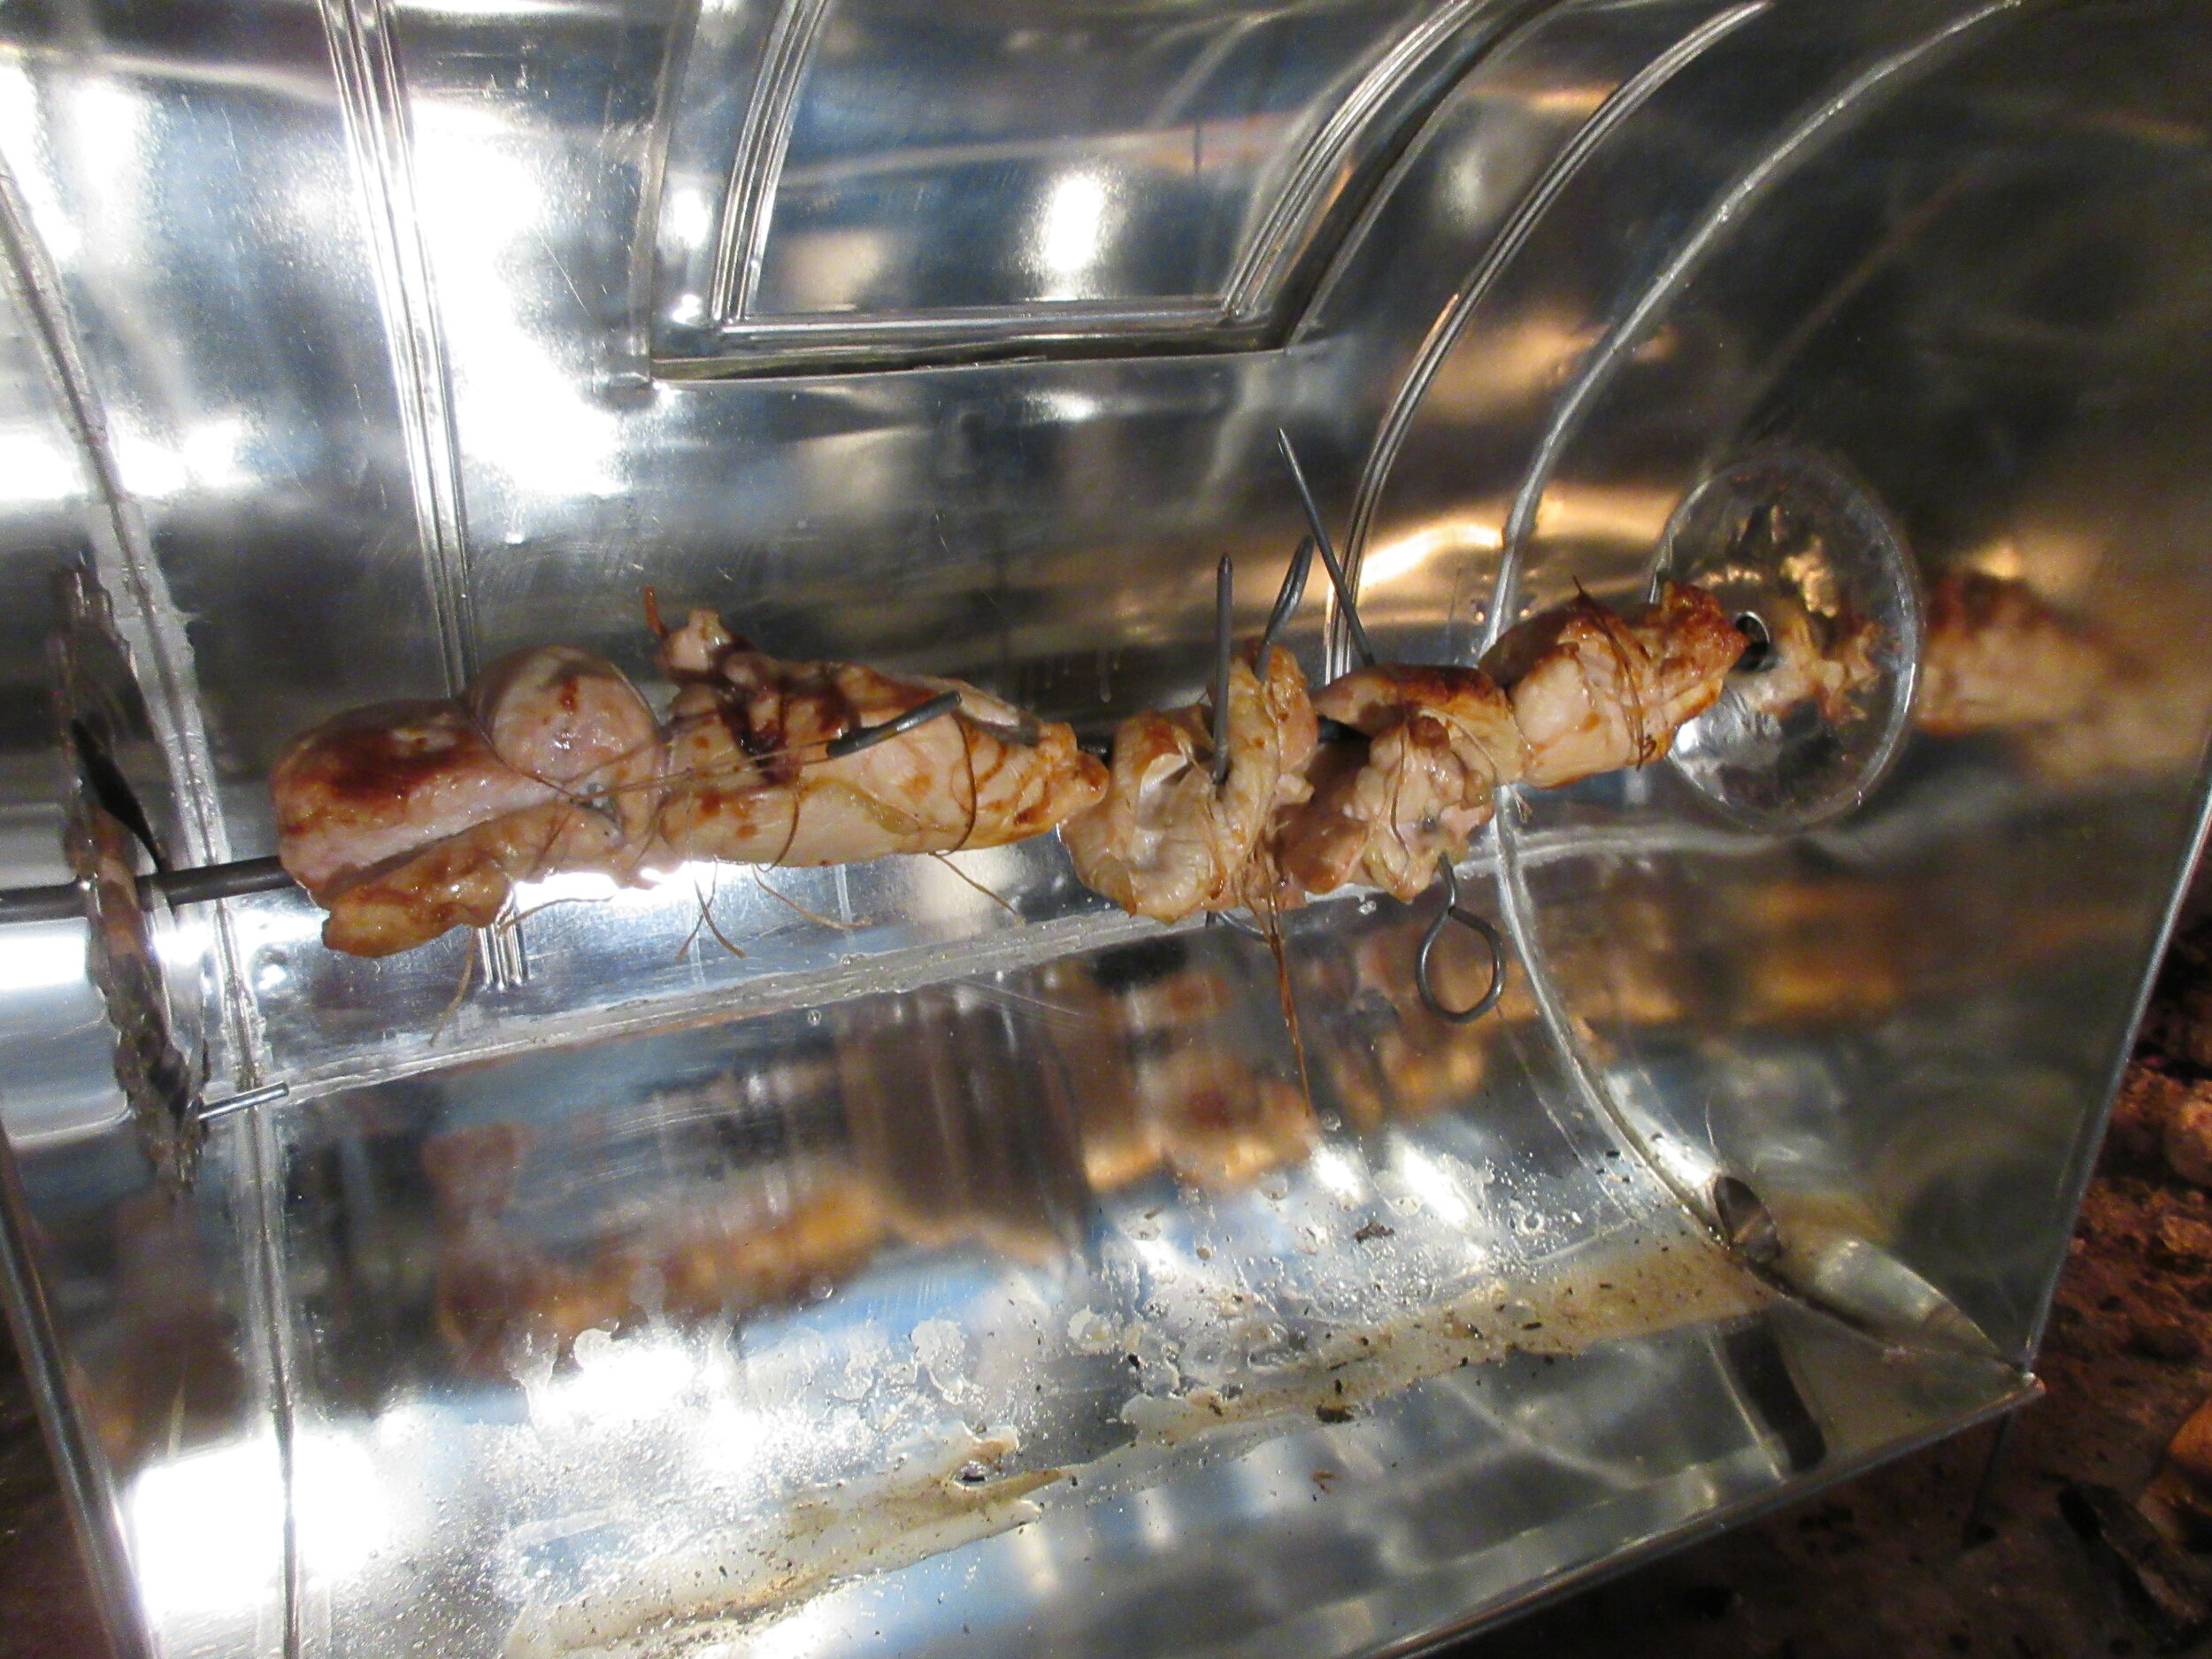
The key to trussing up your meat, vegetable or whatever you’re roasting is to securely attach it to the spit with string. It’s important that when you’re turning the spit, the meat turns with the spit. For even roasting, it’s not great if the spit turns inside the meat and the meat stays in the same position. It’s helpful to have an extra set of hands, tight knots and some good sturdy string to get the job done.
I’ve already mentioned that I forgot string on my recipe testing day, which wasn’t ideal. We found some white embroidery floss in the museum office and some skewers in the prep kitchen and I gave it a go. You’ll see my results on the left. What I ended up with worked, but it definitely wasn’t perfect and tidy.
The picture on the right of me holding the reflector oven was taken on the day of our open hearth cooking class. I wanted to show off what a wonderful job the class participants did of tying those chicken breasts to the spit! If you ever try this out for yourself, aim for what you see in the picture on the right.
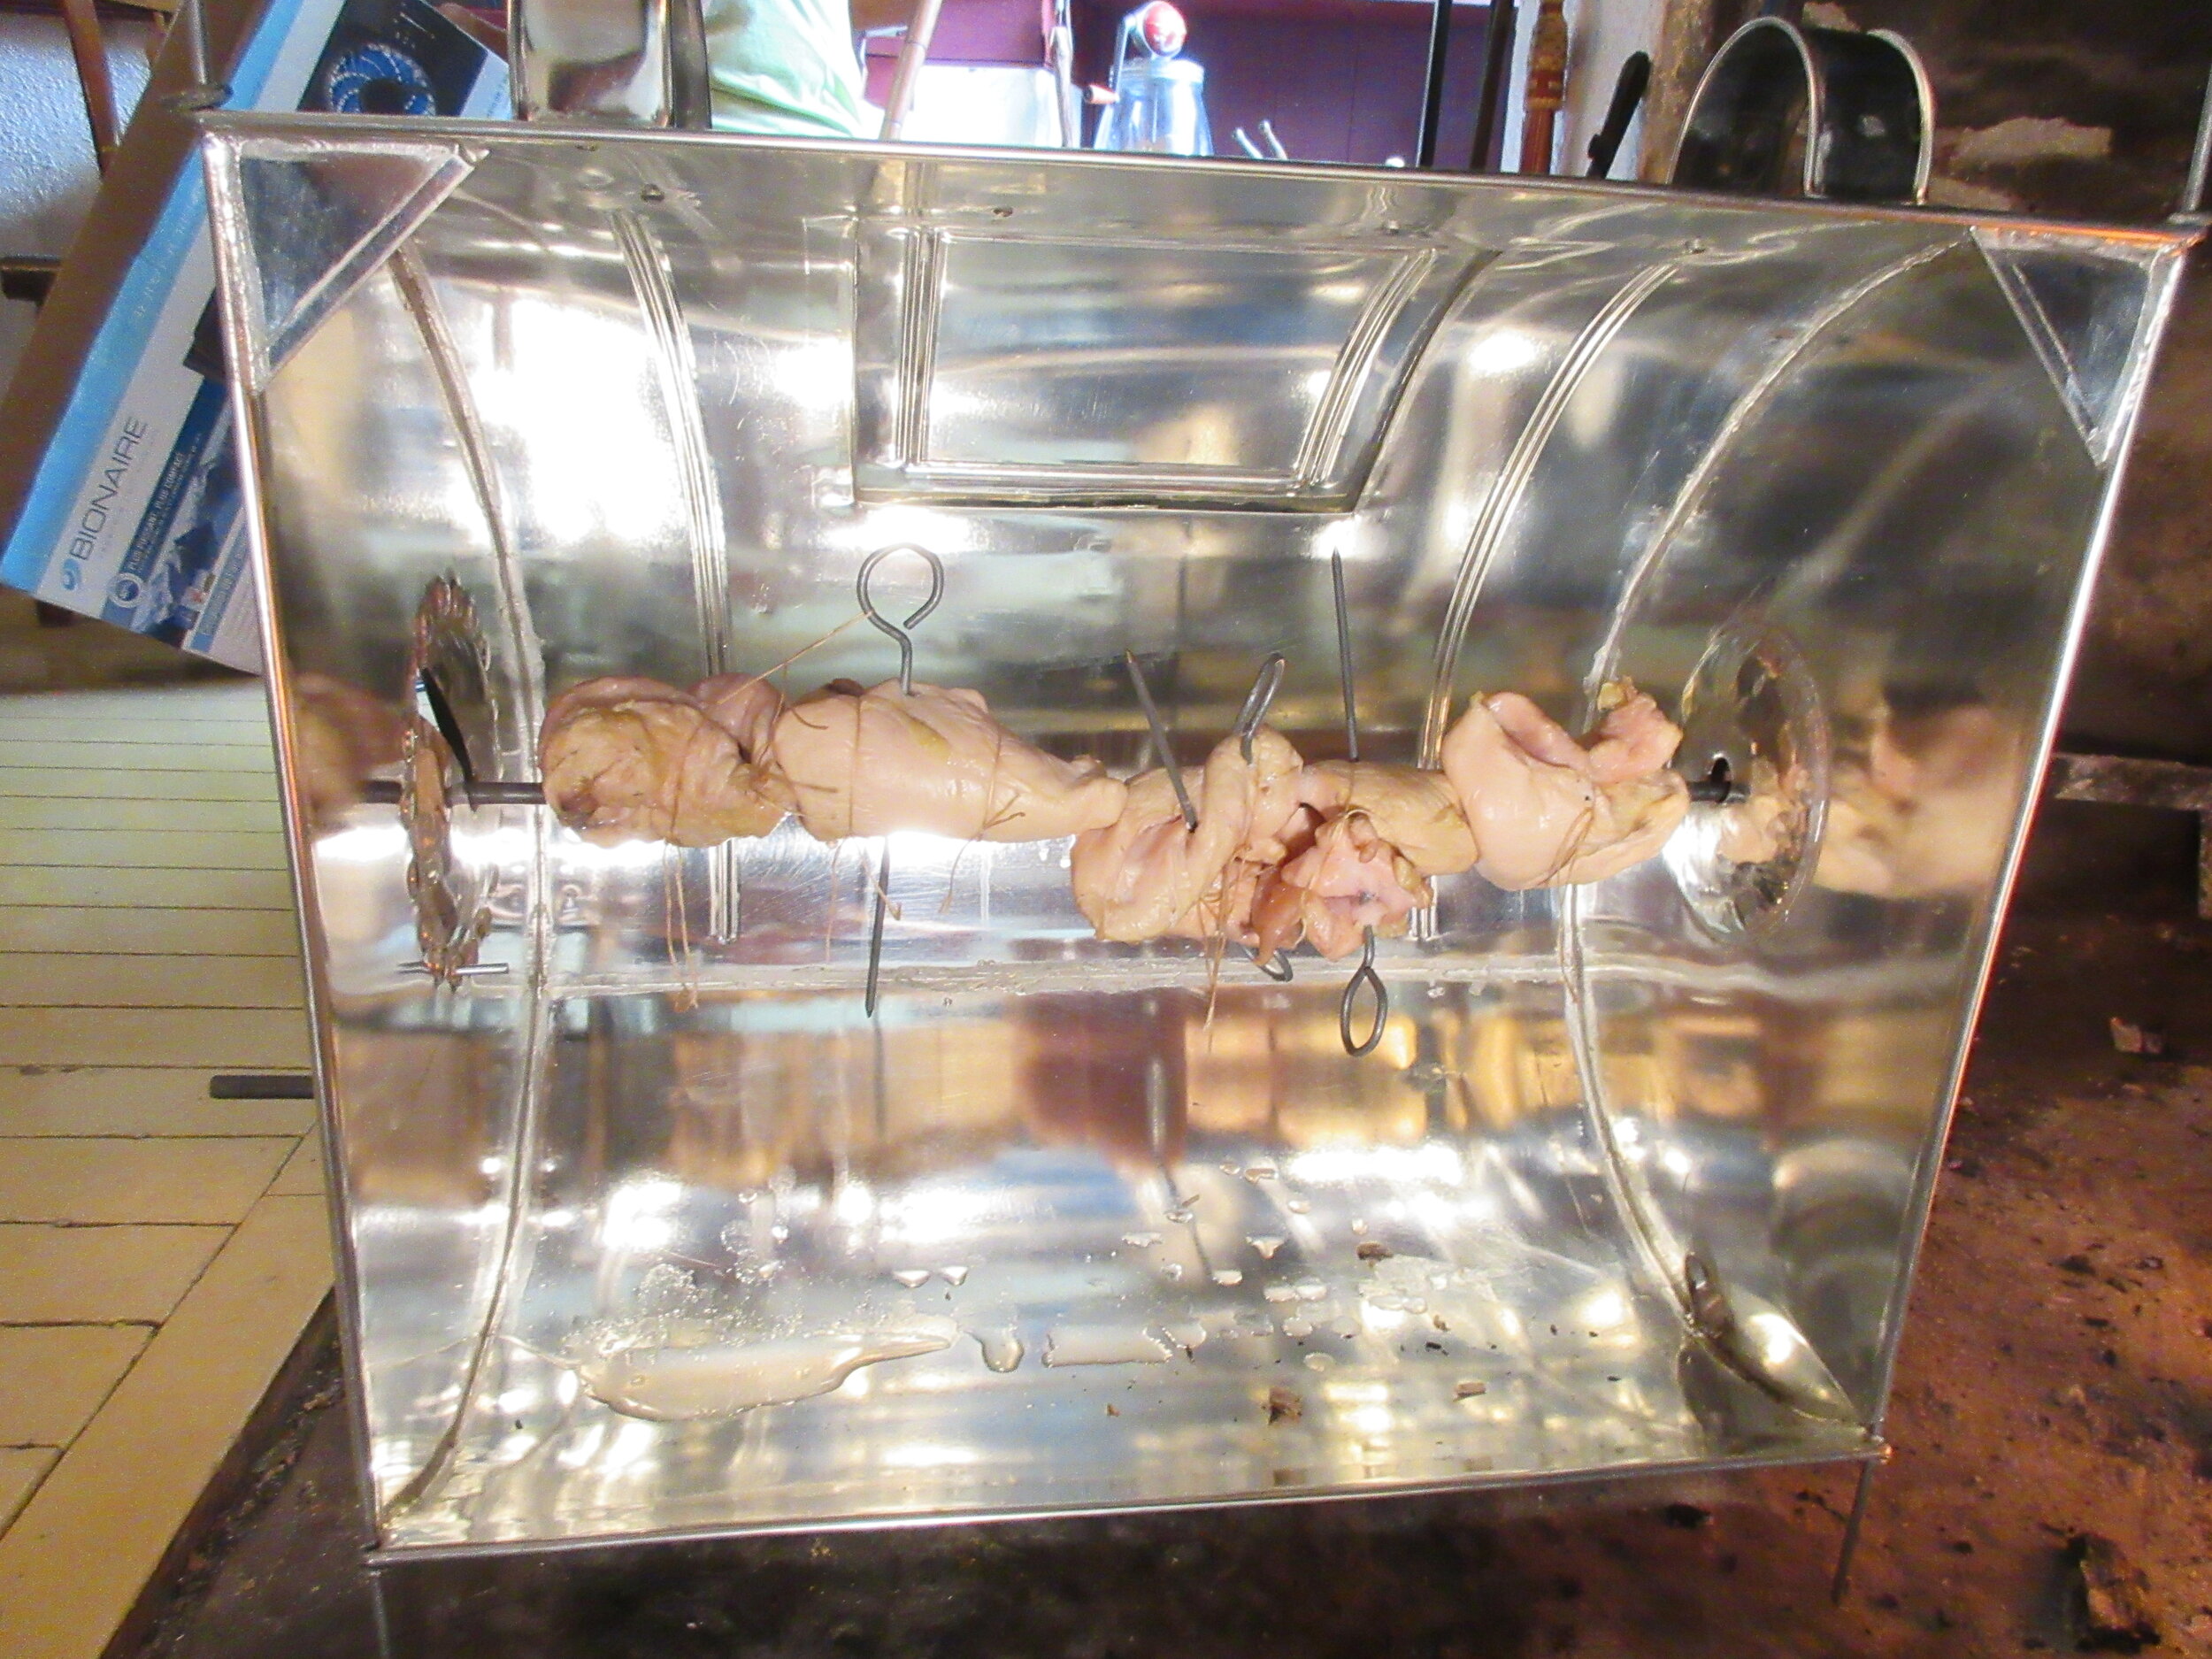
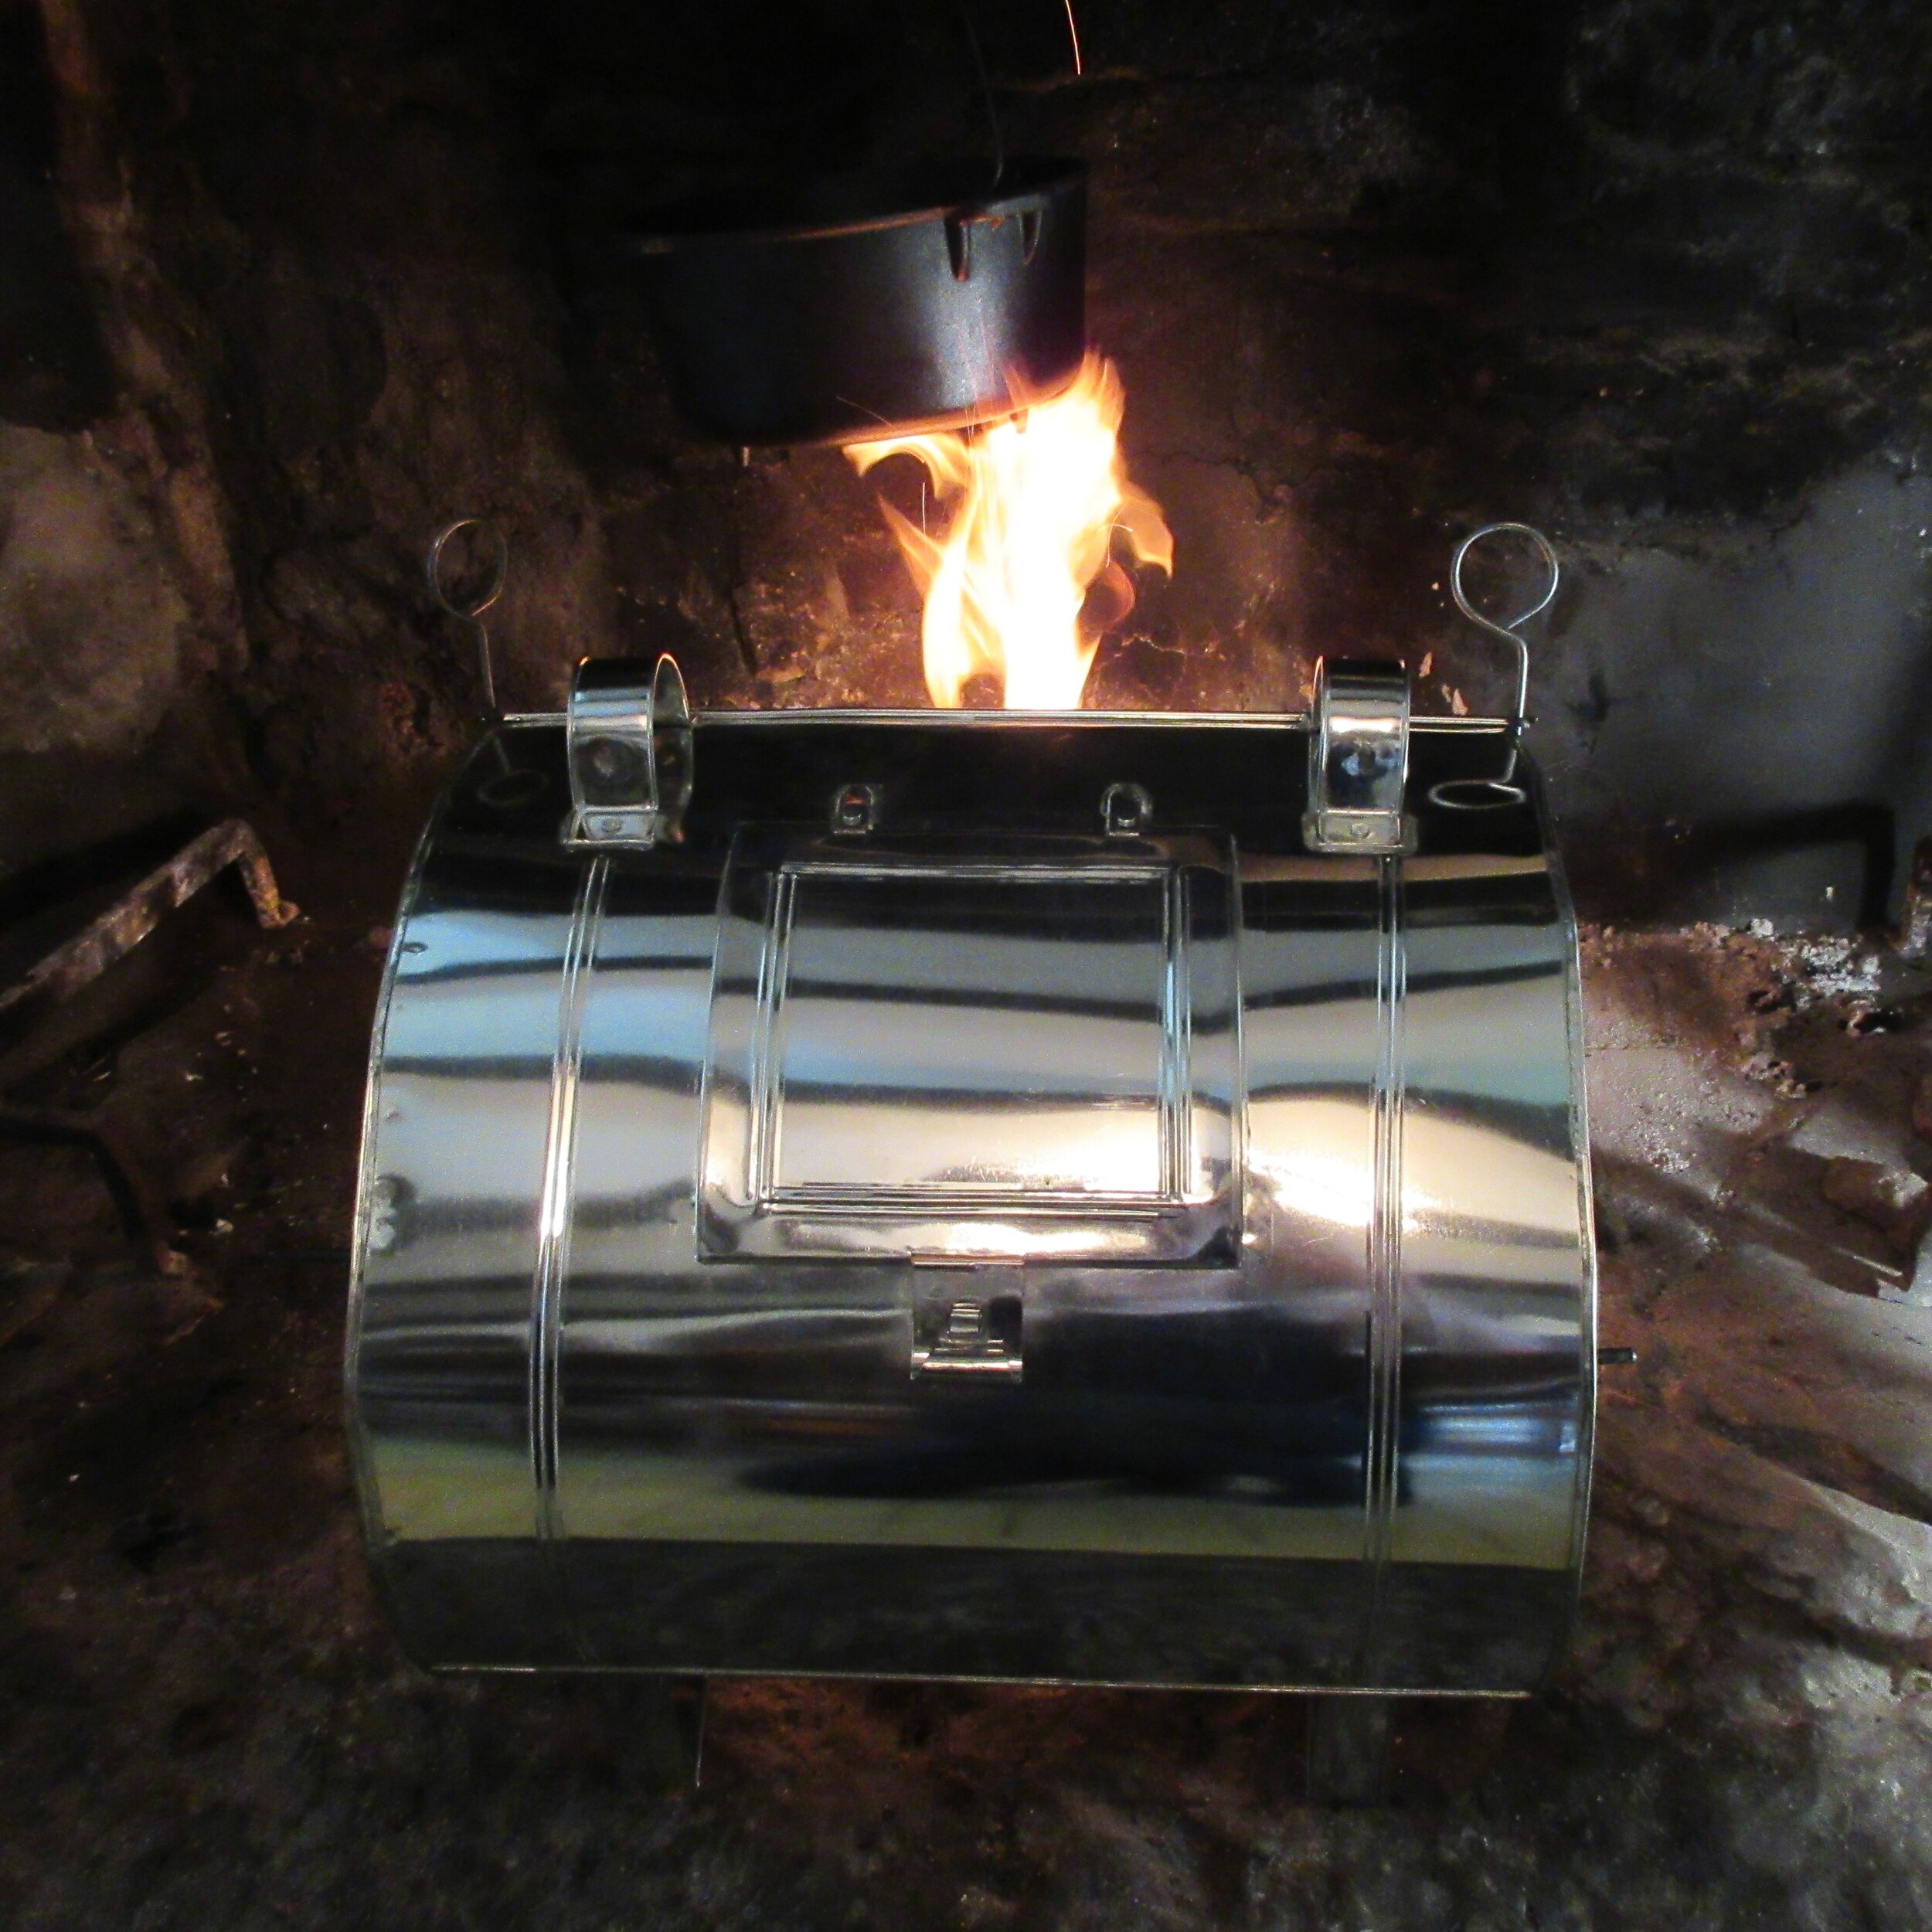
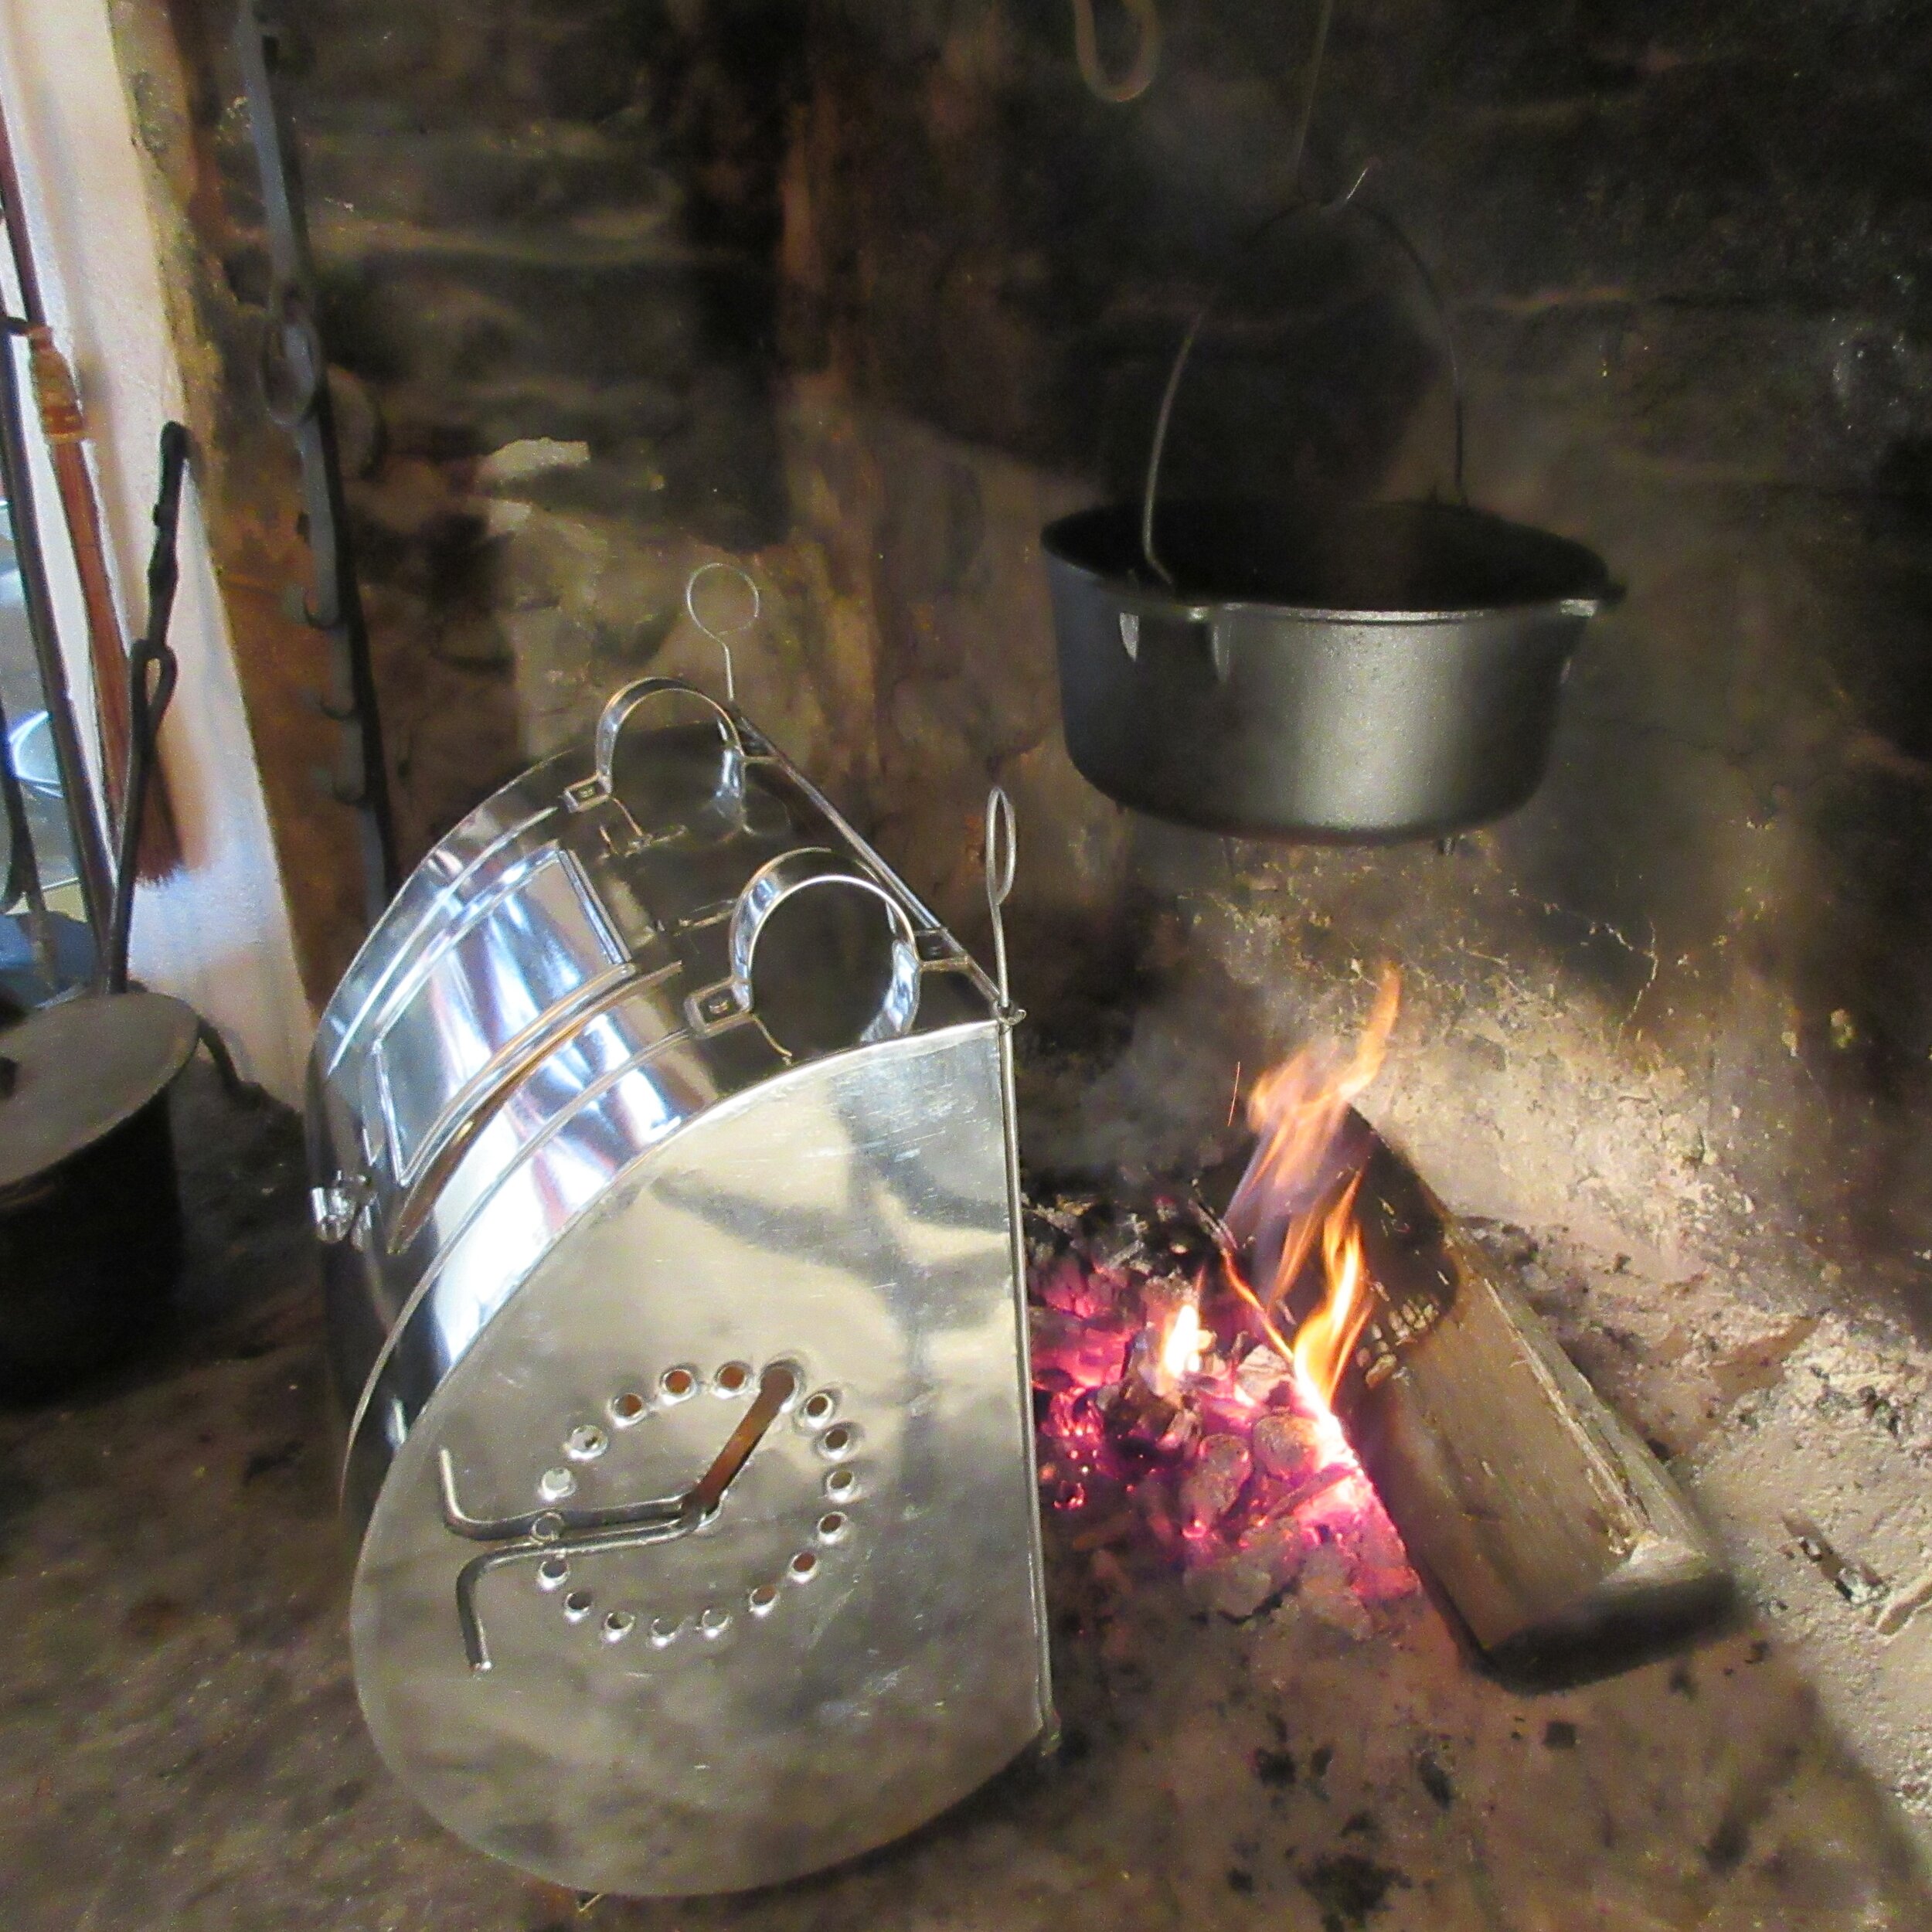
Scroll through the pictures above and see if you can pick out the features of the rotisserie reflector oven. There are handles on top to help you to move it around, which is one of the ways to control the temperature. You’re able to adjust the temperature of a reflector oven by either making adjustments to the fire (adding wood, redistributing the wood in the fire) and by changing how close it is to the fire.
The meat will actually brown the fastest on the side away from the fire because the metal is reflecting the heat, so you’ll see that there often is a little door on the back of the reflector. This allows you to check your food’s progress and helps you to decide when you’d like to change the position of the spit.
You don’t need to continuously turn the spit. On the side, there’s many holes in a clock-like formation where you can slip in a little notch on the end of the rotisserie. Depending on the temperature, you may choose to leave the meat in one position for 5 to 10 minutes before rotating the notch to the next slot.
These rotisserie reflector ovens are roughly half cylinders in shape, which helps to collect the juices that drip from the meat. If you look closely, you’ll see that there is a little hole that lines up perfectly with the bottom of the cylinder. That hole leads to a little spout that can be used to pour the juices out of the reflector oven so they can be used to make gravies and sauces.


Instead of using a salamander, I used the other reflector oven to brown the breadcrumbs on top of Fillets of Chickens. This reflector is box-like in shape and can be used more like a traditional oven. You may use baking dishes or place food directly on the tin surface (but grease the surface first). I’ve also included a picture that I took when I baked some coconut macaroons on another recipe testing day at Nelles Manor Museum.
This reflector oven also features handles on the top and the side so you can move it closer to or further from the fire to adjust the temperature. Be careful about using the handle on the top, though! As you can see from the picture, the entire top of this oven flips back so that you can easily monitor, rearrange and flip your food.
Don’t worry, you don’t need to buy a reflector oven to try out these techniques. Have a look at these videos to glean some ideas about how you could build a DIY reflector oven using common items that you can use in front of a fireplace or campfire.
If you’d like to learn more about open hearth cooking techniques, check out what I wrote about Carrot Fritters. I recommend these fritters for breakfast or brunch and I also explain two different options for frying food over and around an open hearth.

Read The Practice of Modern Cookery :
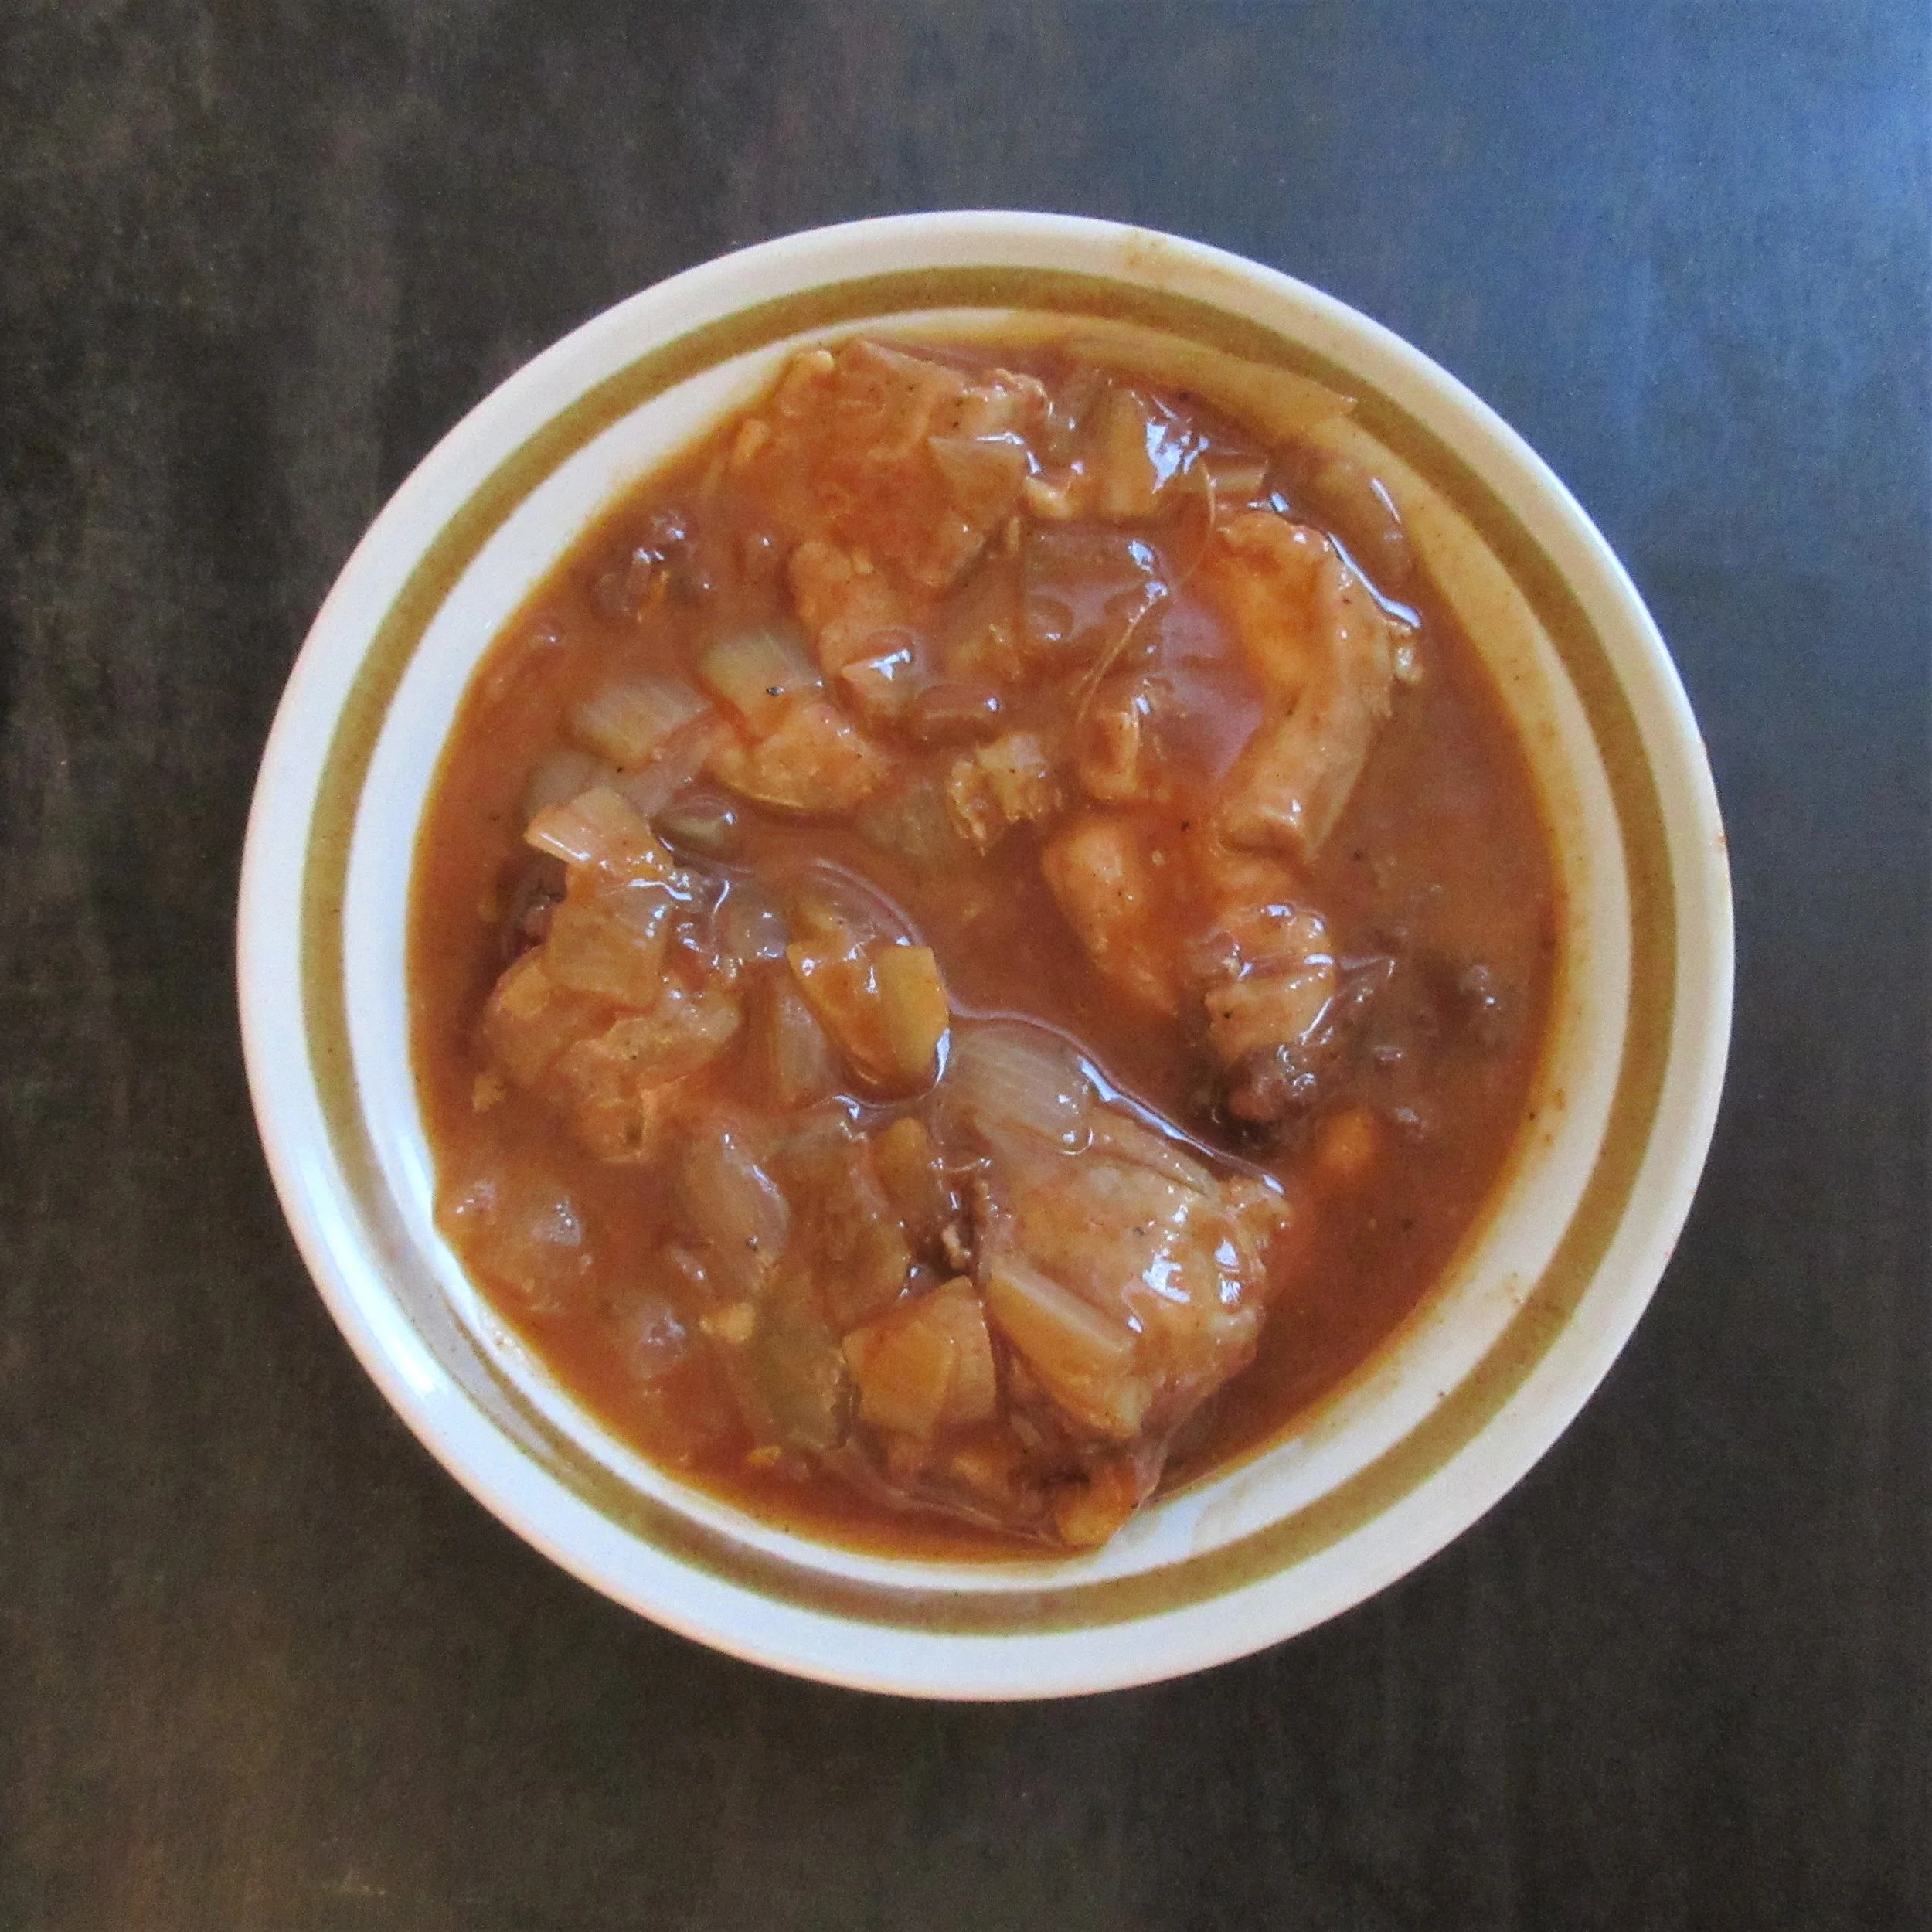
Chicken with Chili
If you ask me over to your house to babysit, I will snoop in your kitchen while your baby sleeps and search for old cookbooks. That’s where I found The Hundred Menu Chicken Cookbook from 1972, which has the tagline “One-pot chicken recipes that are easy-to-make and a treat to serve” and boasts that it contains recipes from over 20 countries.
Chicken with Chili is a warming full-flavoured chicken dish that would be an excellent slow-cooker recipe. I was intrigued by Chicken with Chili because it claimed to be an Ethiopian recipe and I was skeptical about how accurate it would be, but it turns out that it is reasonably similar to Doro Wat! A couple of ingredients that are typically served in Doro Wat are missing and the traditional spices have been substituted for spices that would have been found in the kitchens of most American families in 1972. What you end up with Chicken with Chili is an echo of Doro Wat without the spicy heat.

You’ll find this recipe in:
The Hundred Menu Chicken Cookbook
By: Robert Ackart
New York, 1972
Original Recipe:
Chicken with Chili – I
Ethiopian
Like many dishes requiring several strong spices, this one is of elusive flavor.
You will need…
2 Tbs butter
2 Tbs oil
Serving-pieces of chicken for 6 persons
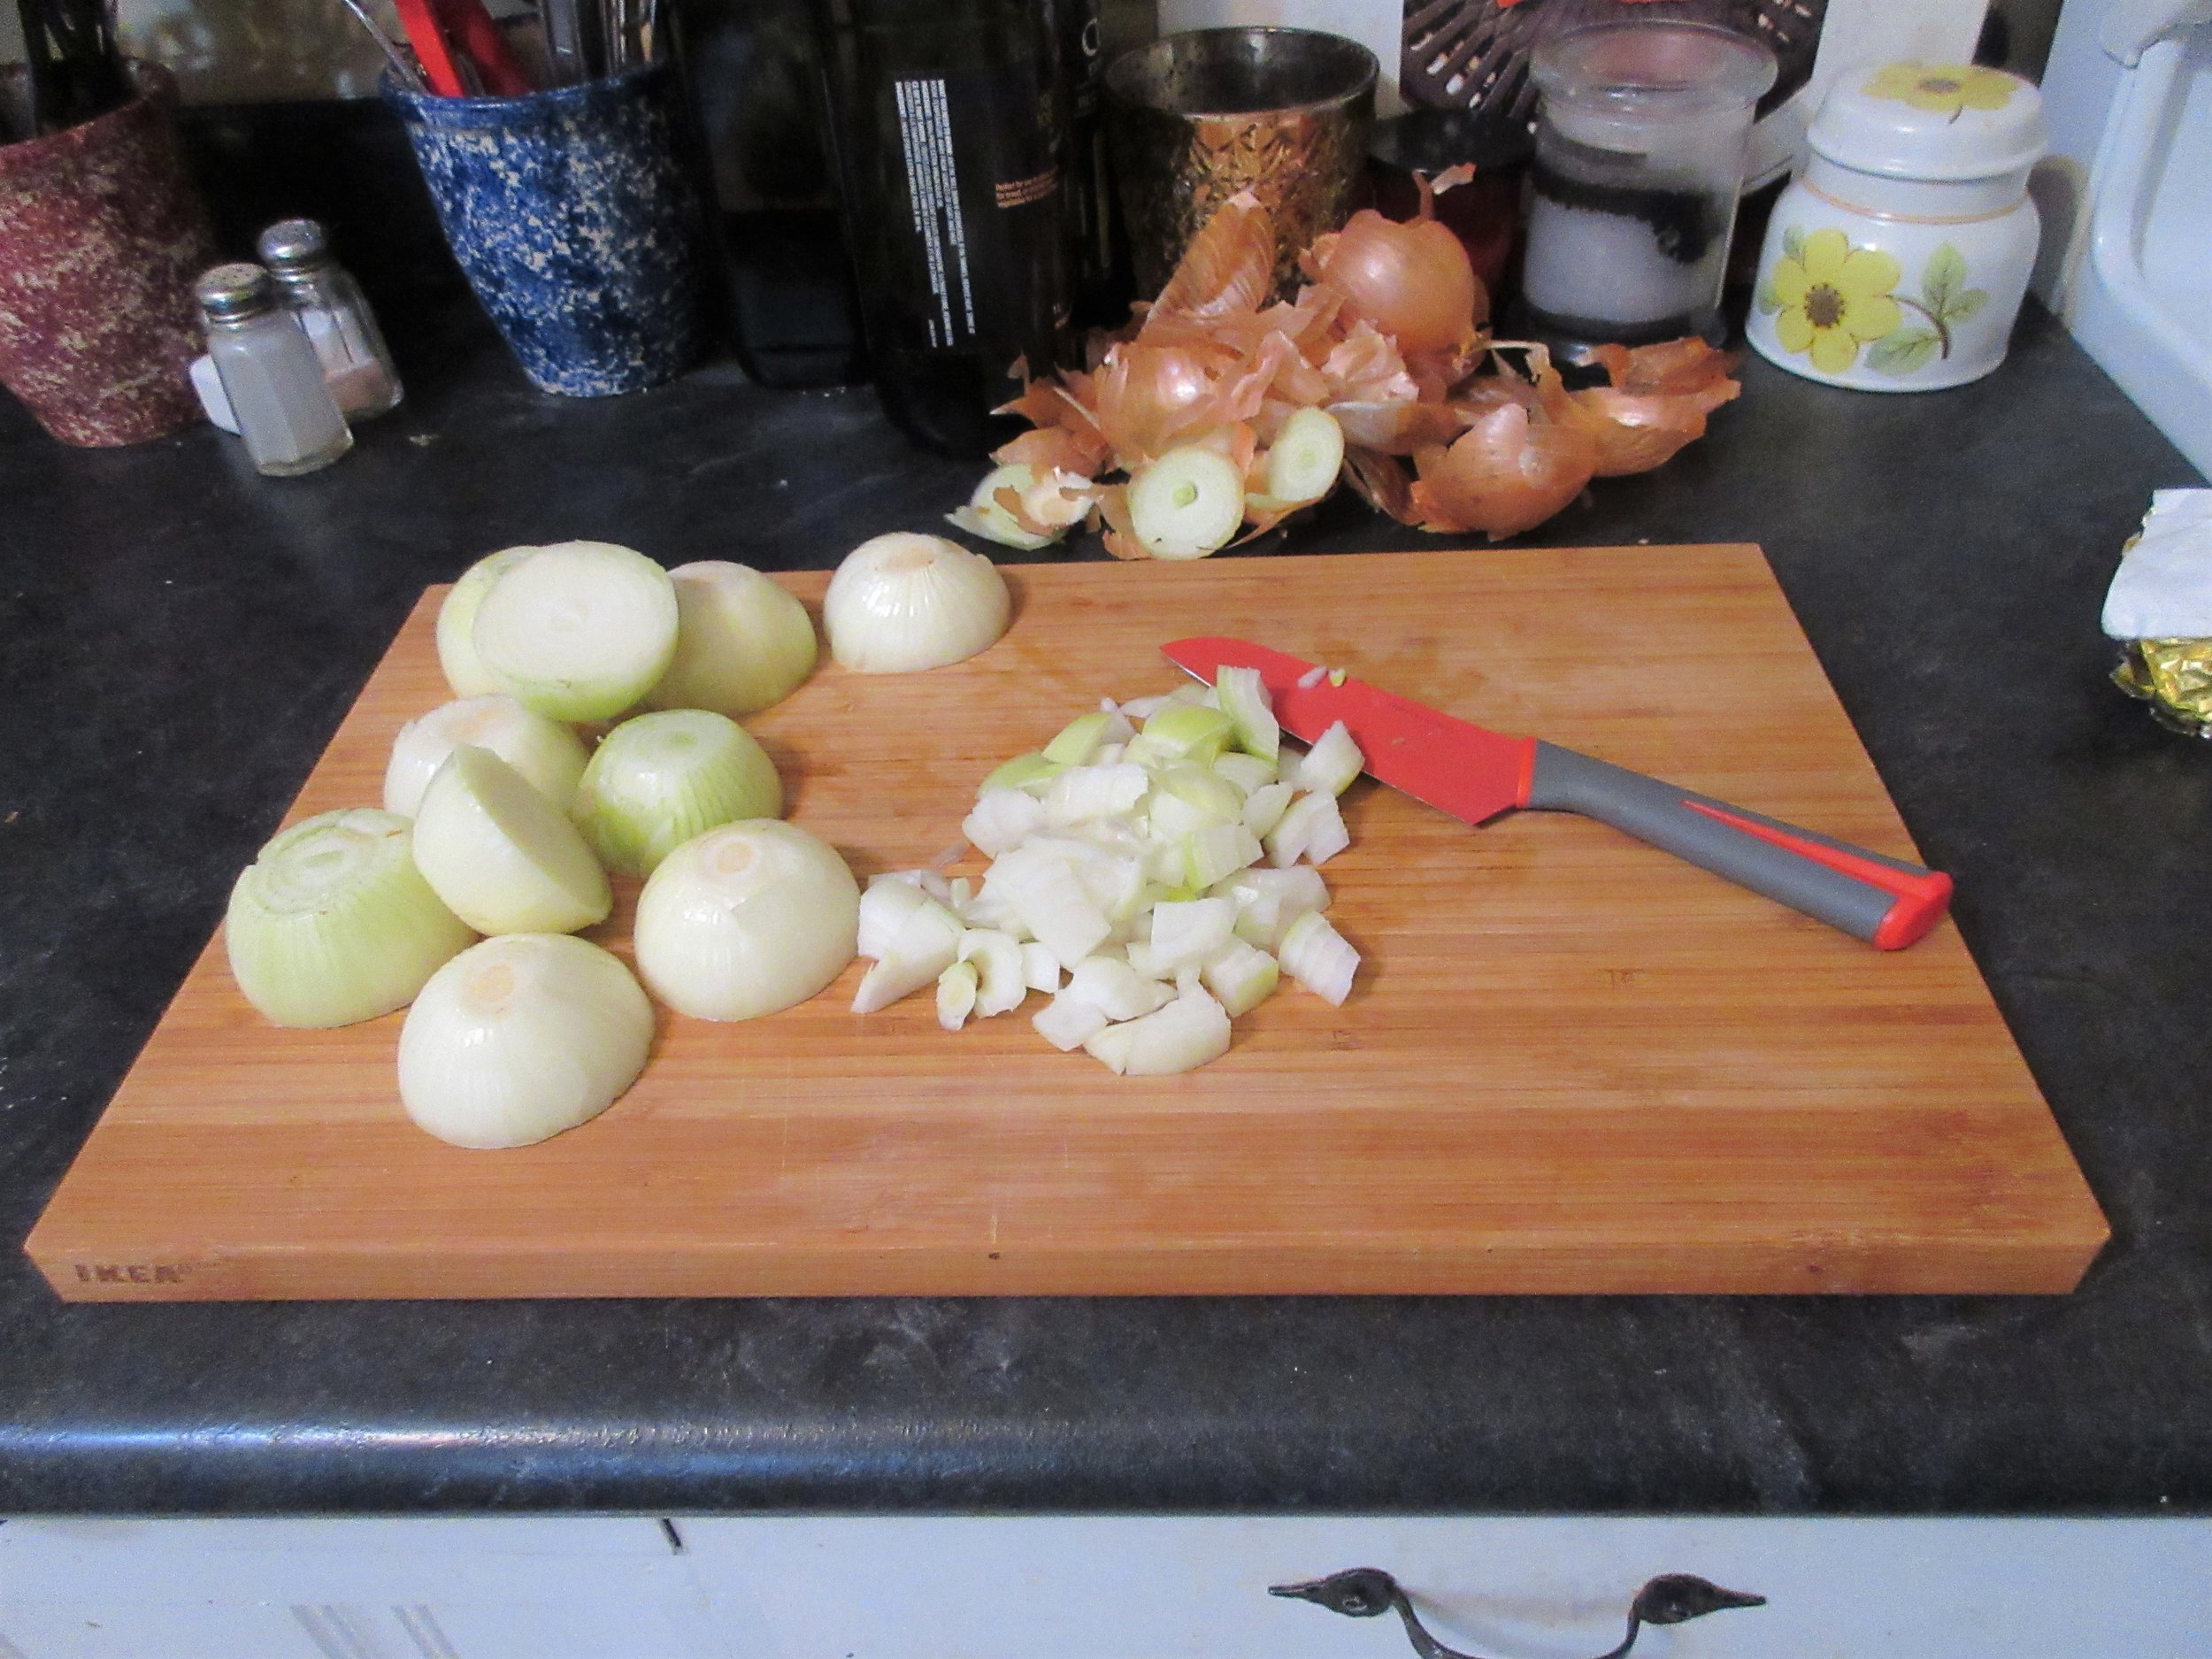
6 onions, chopped
1 - 3” piece stick cinnamon
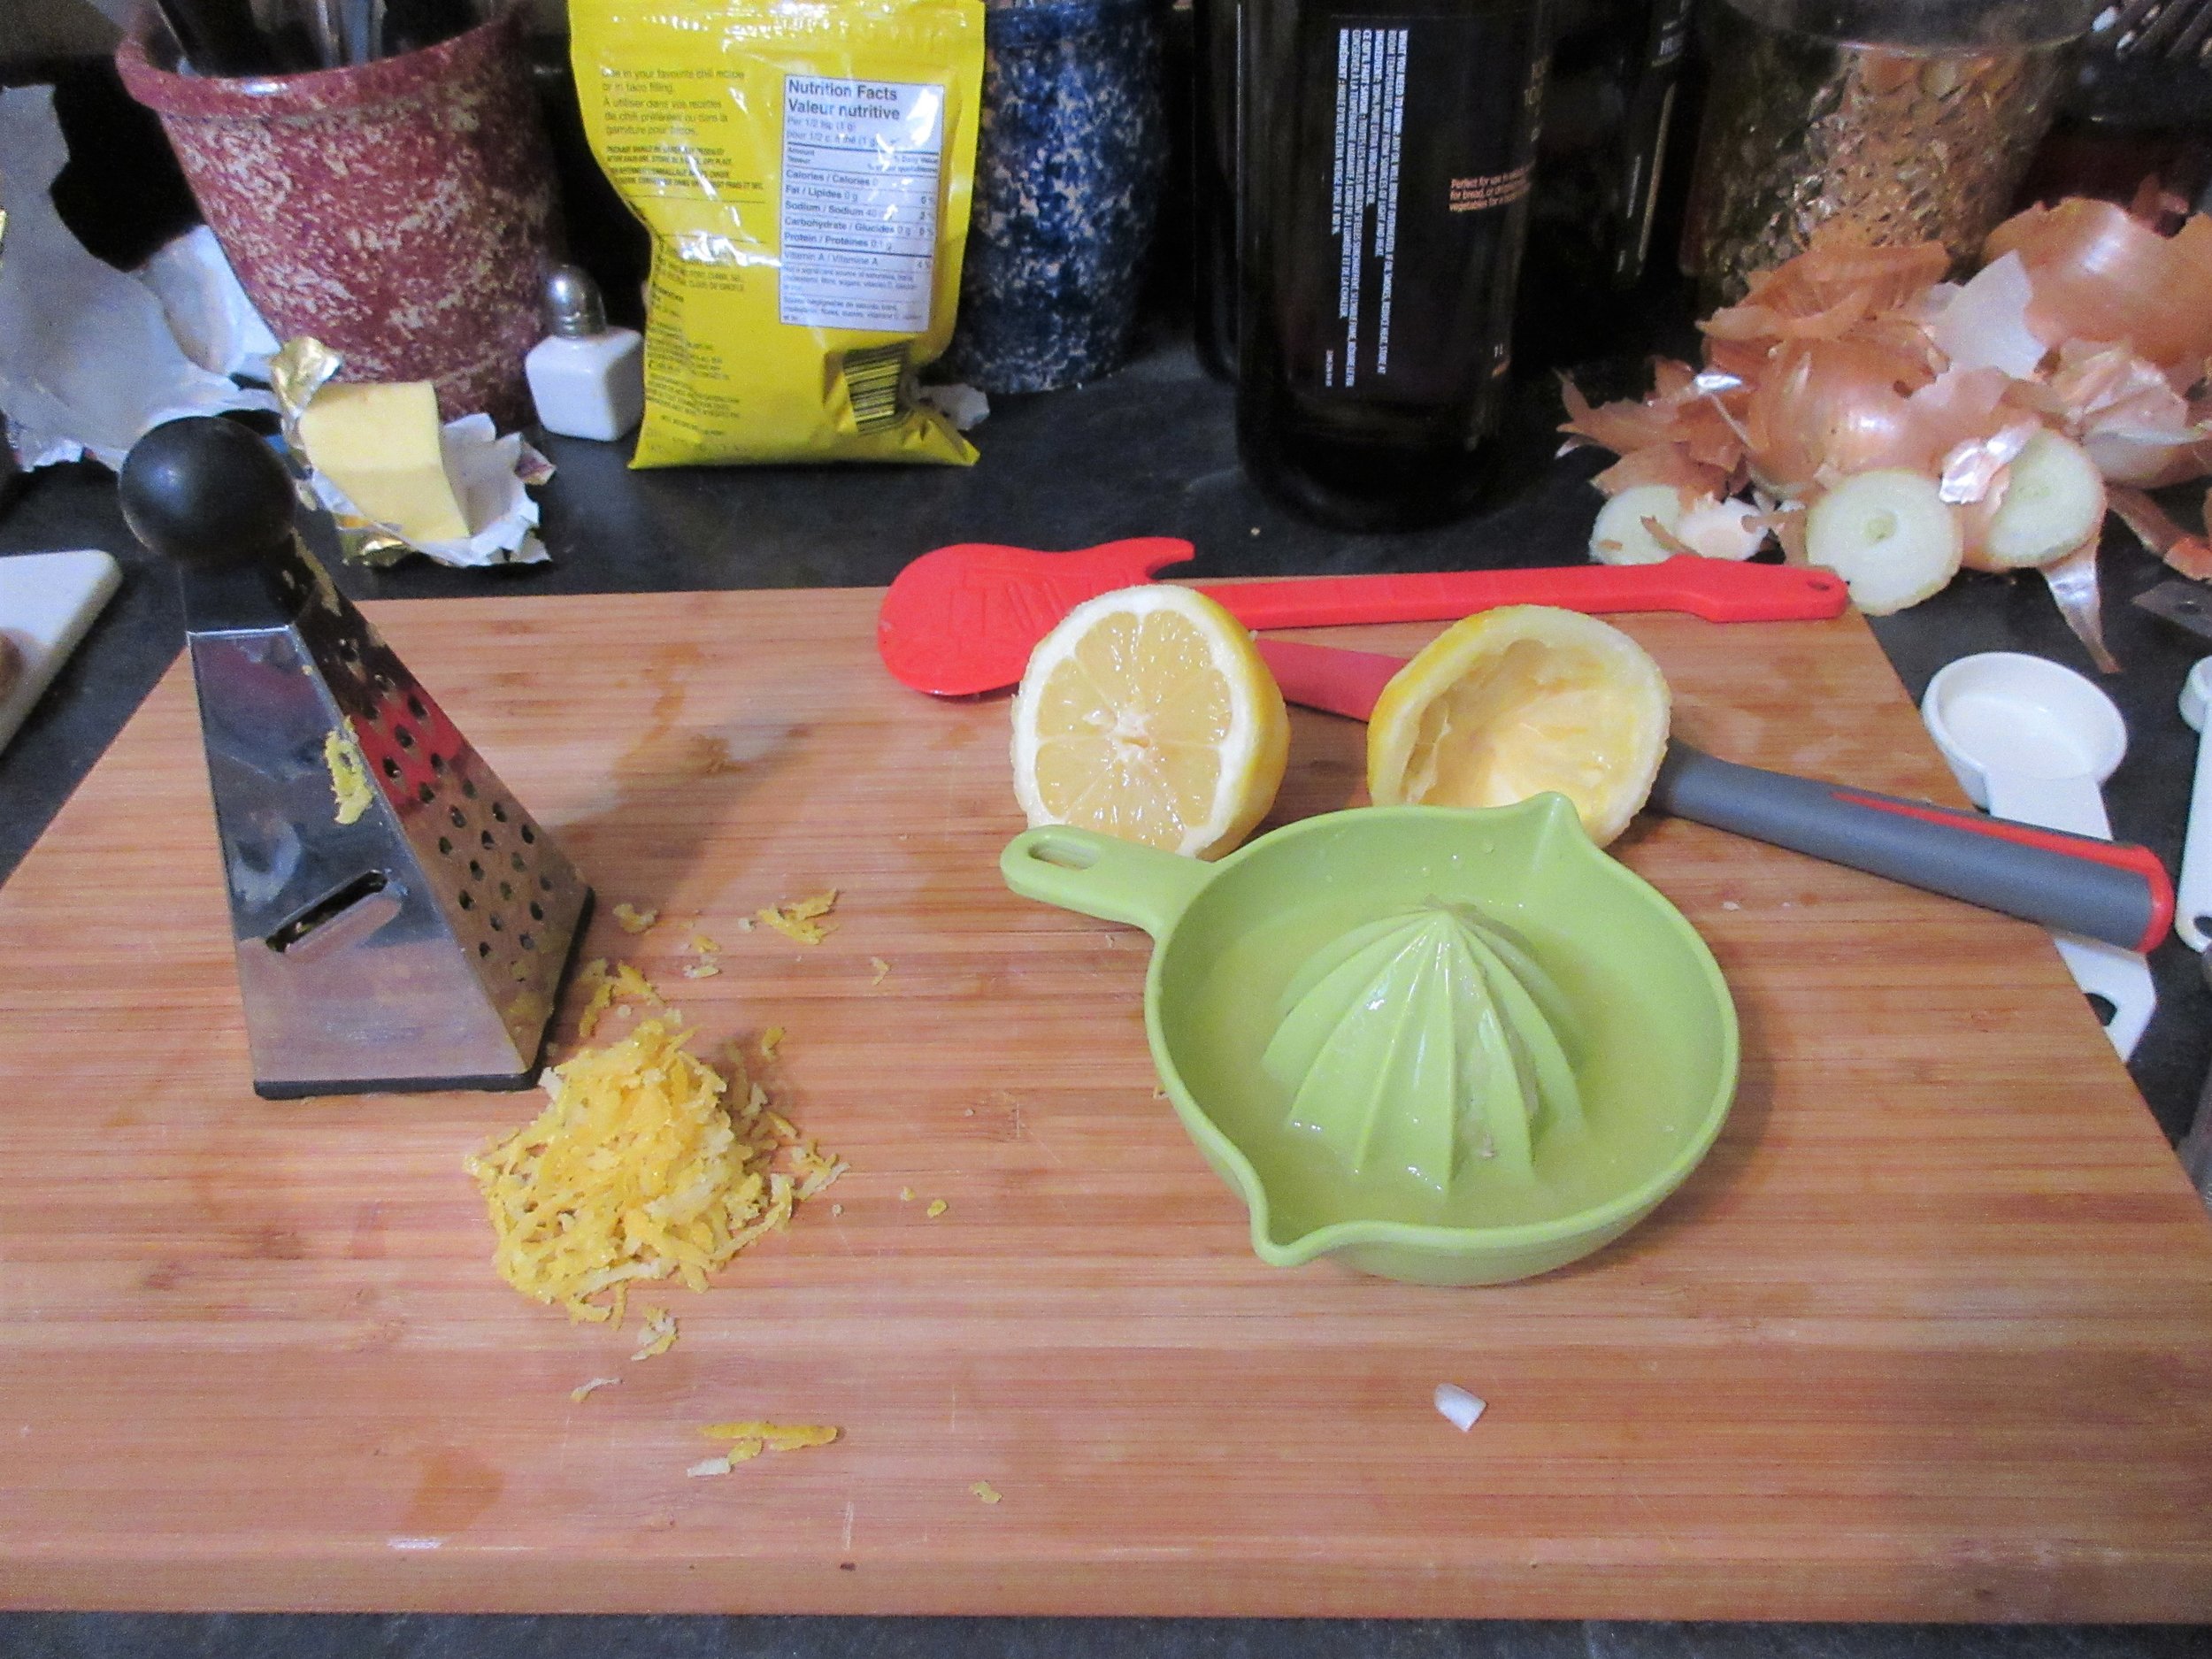
Grated rind and juice of 1 lemon
4 Tbs tomato paste
2 Tbs chili powder
1 tsp ginger
1 tsp salt
½ tsp pepper
½ cup red wine
1 ½ cups chicken broth
2 Tbs cornstarch
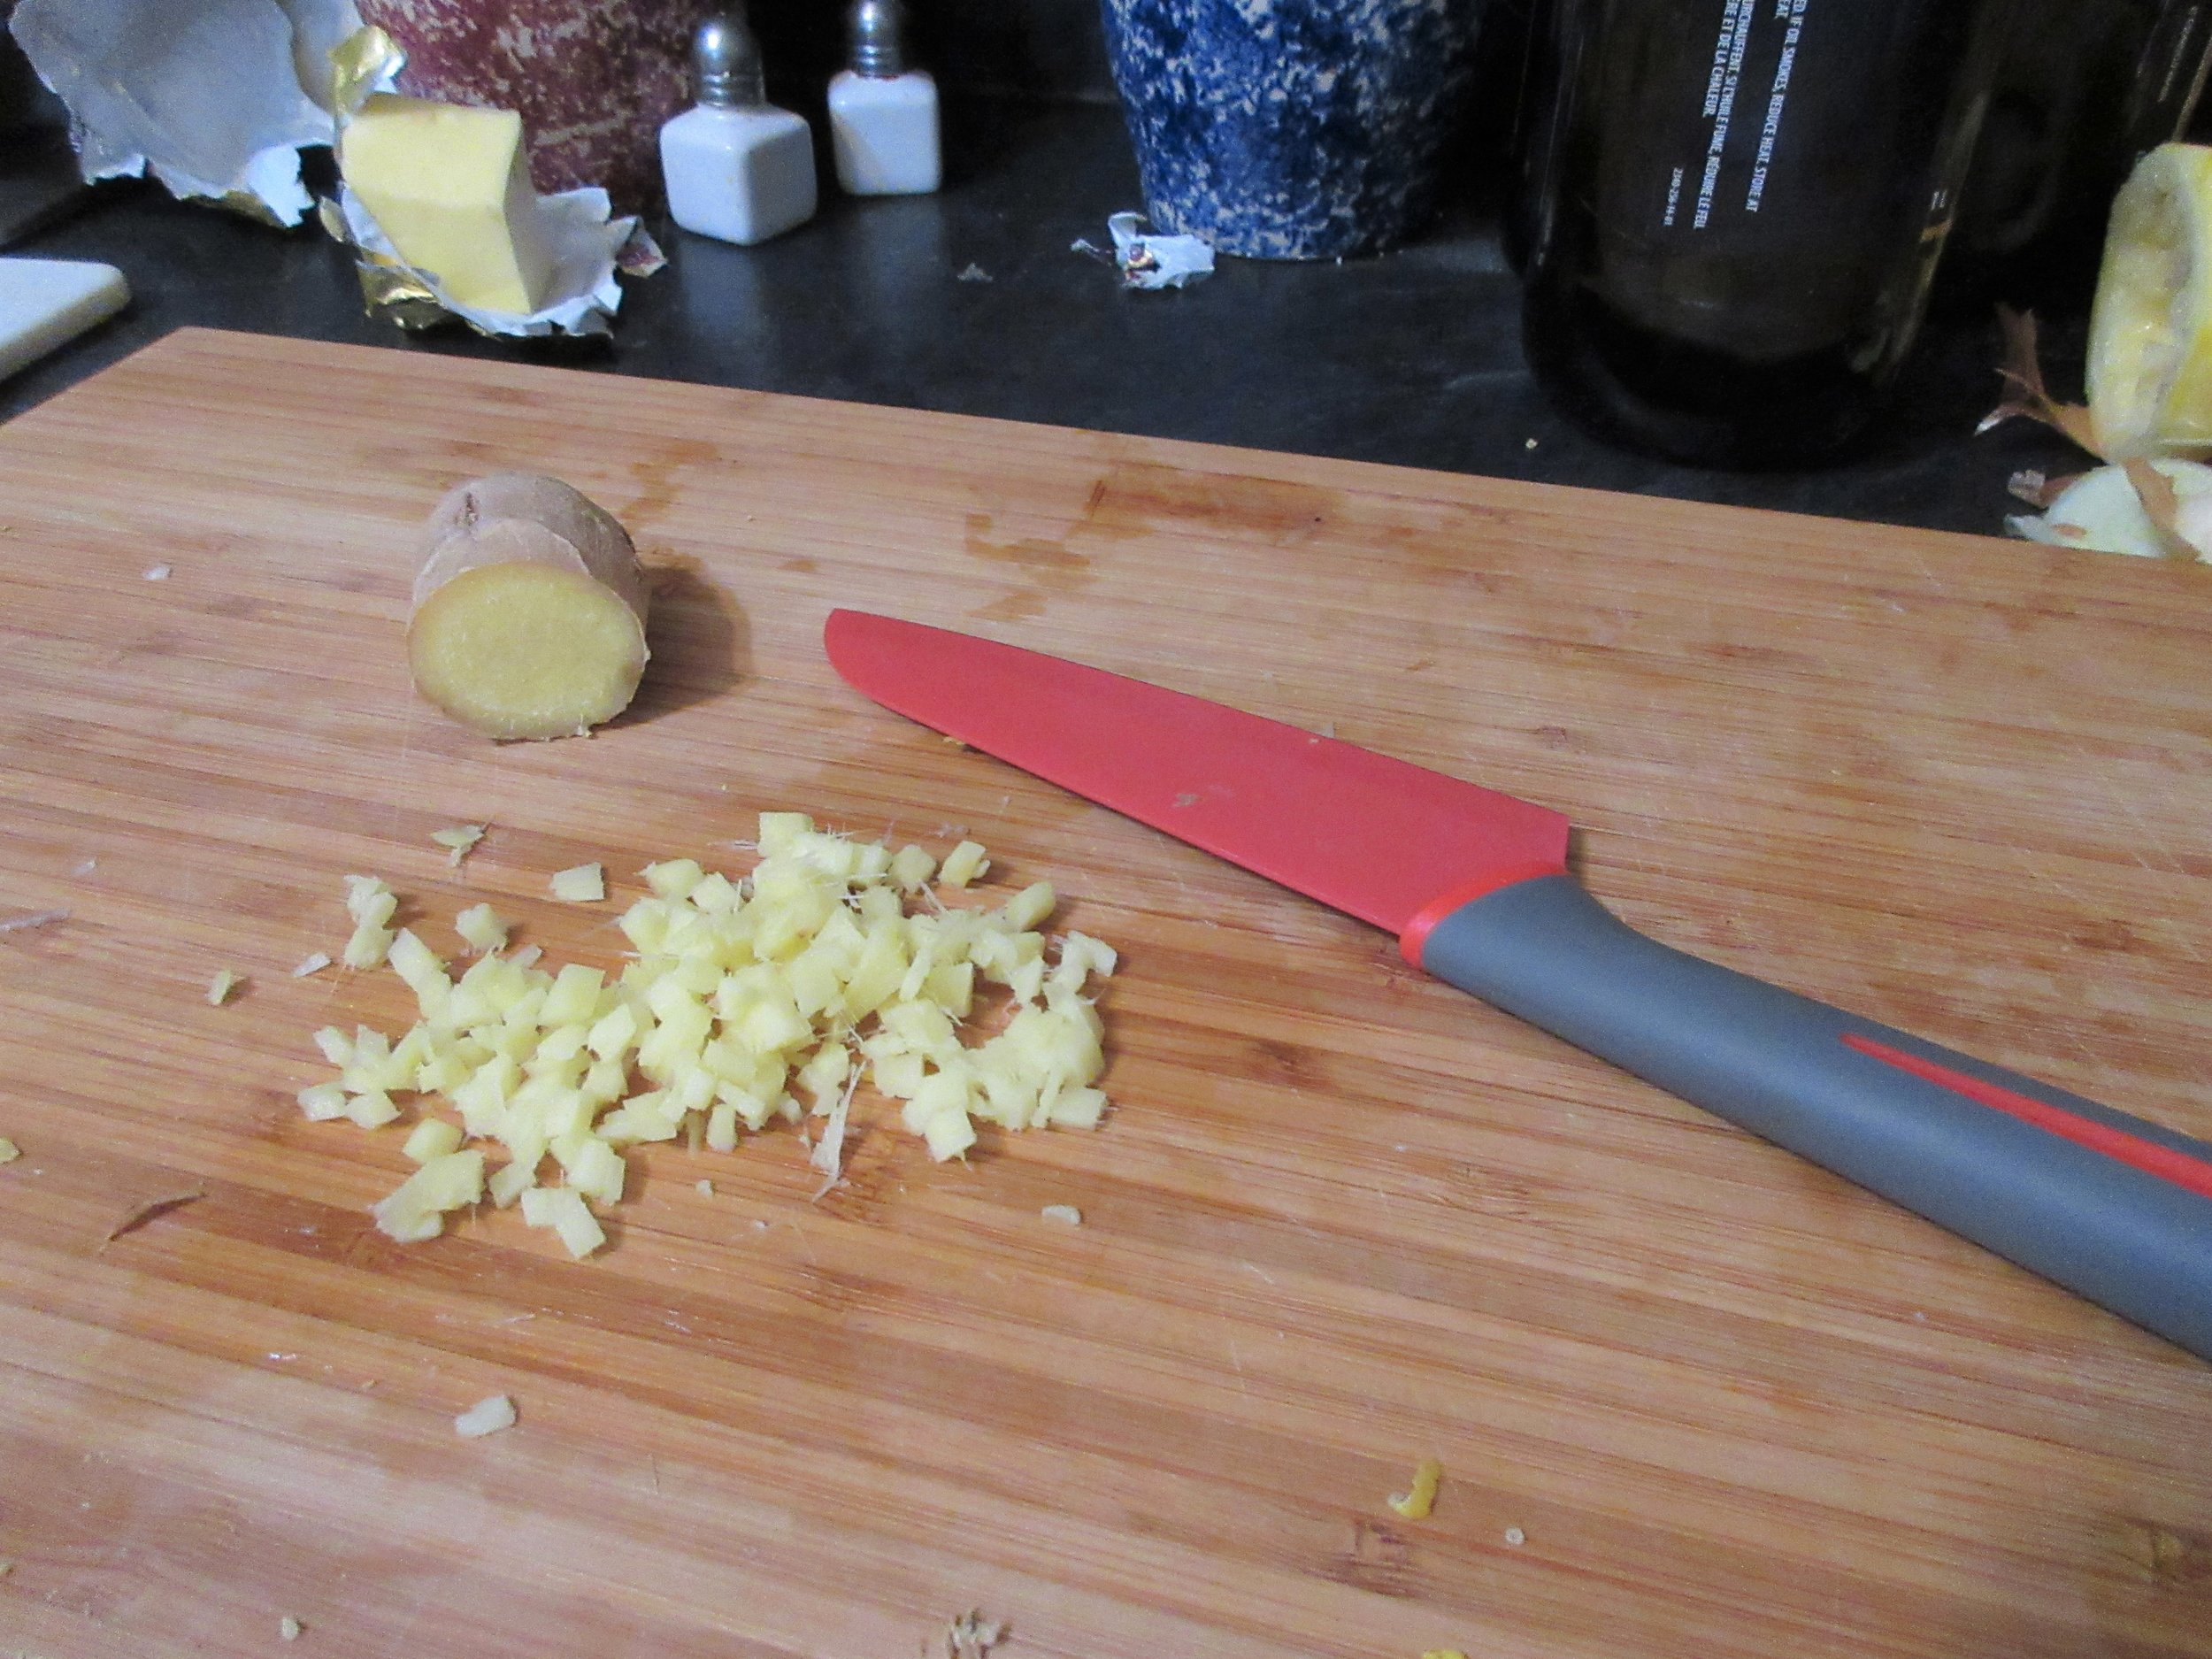
2 Tbs chopped fresh ginger root (optional)
Preparation…
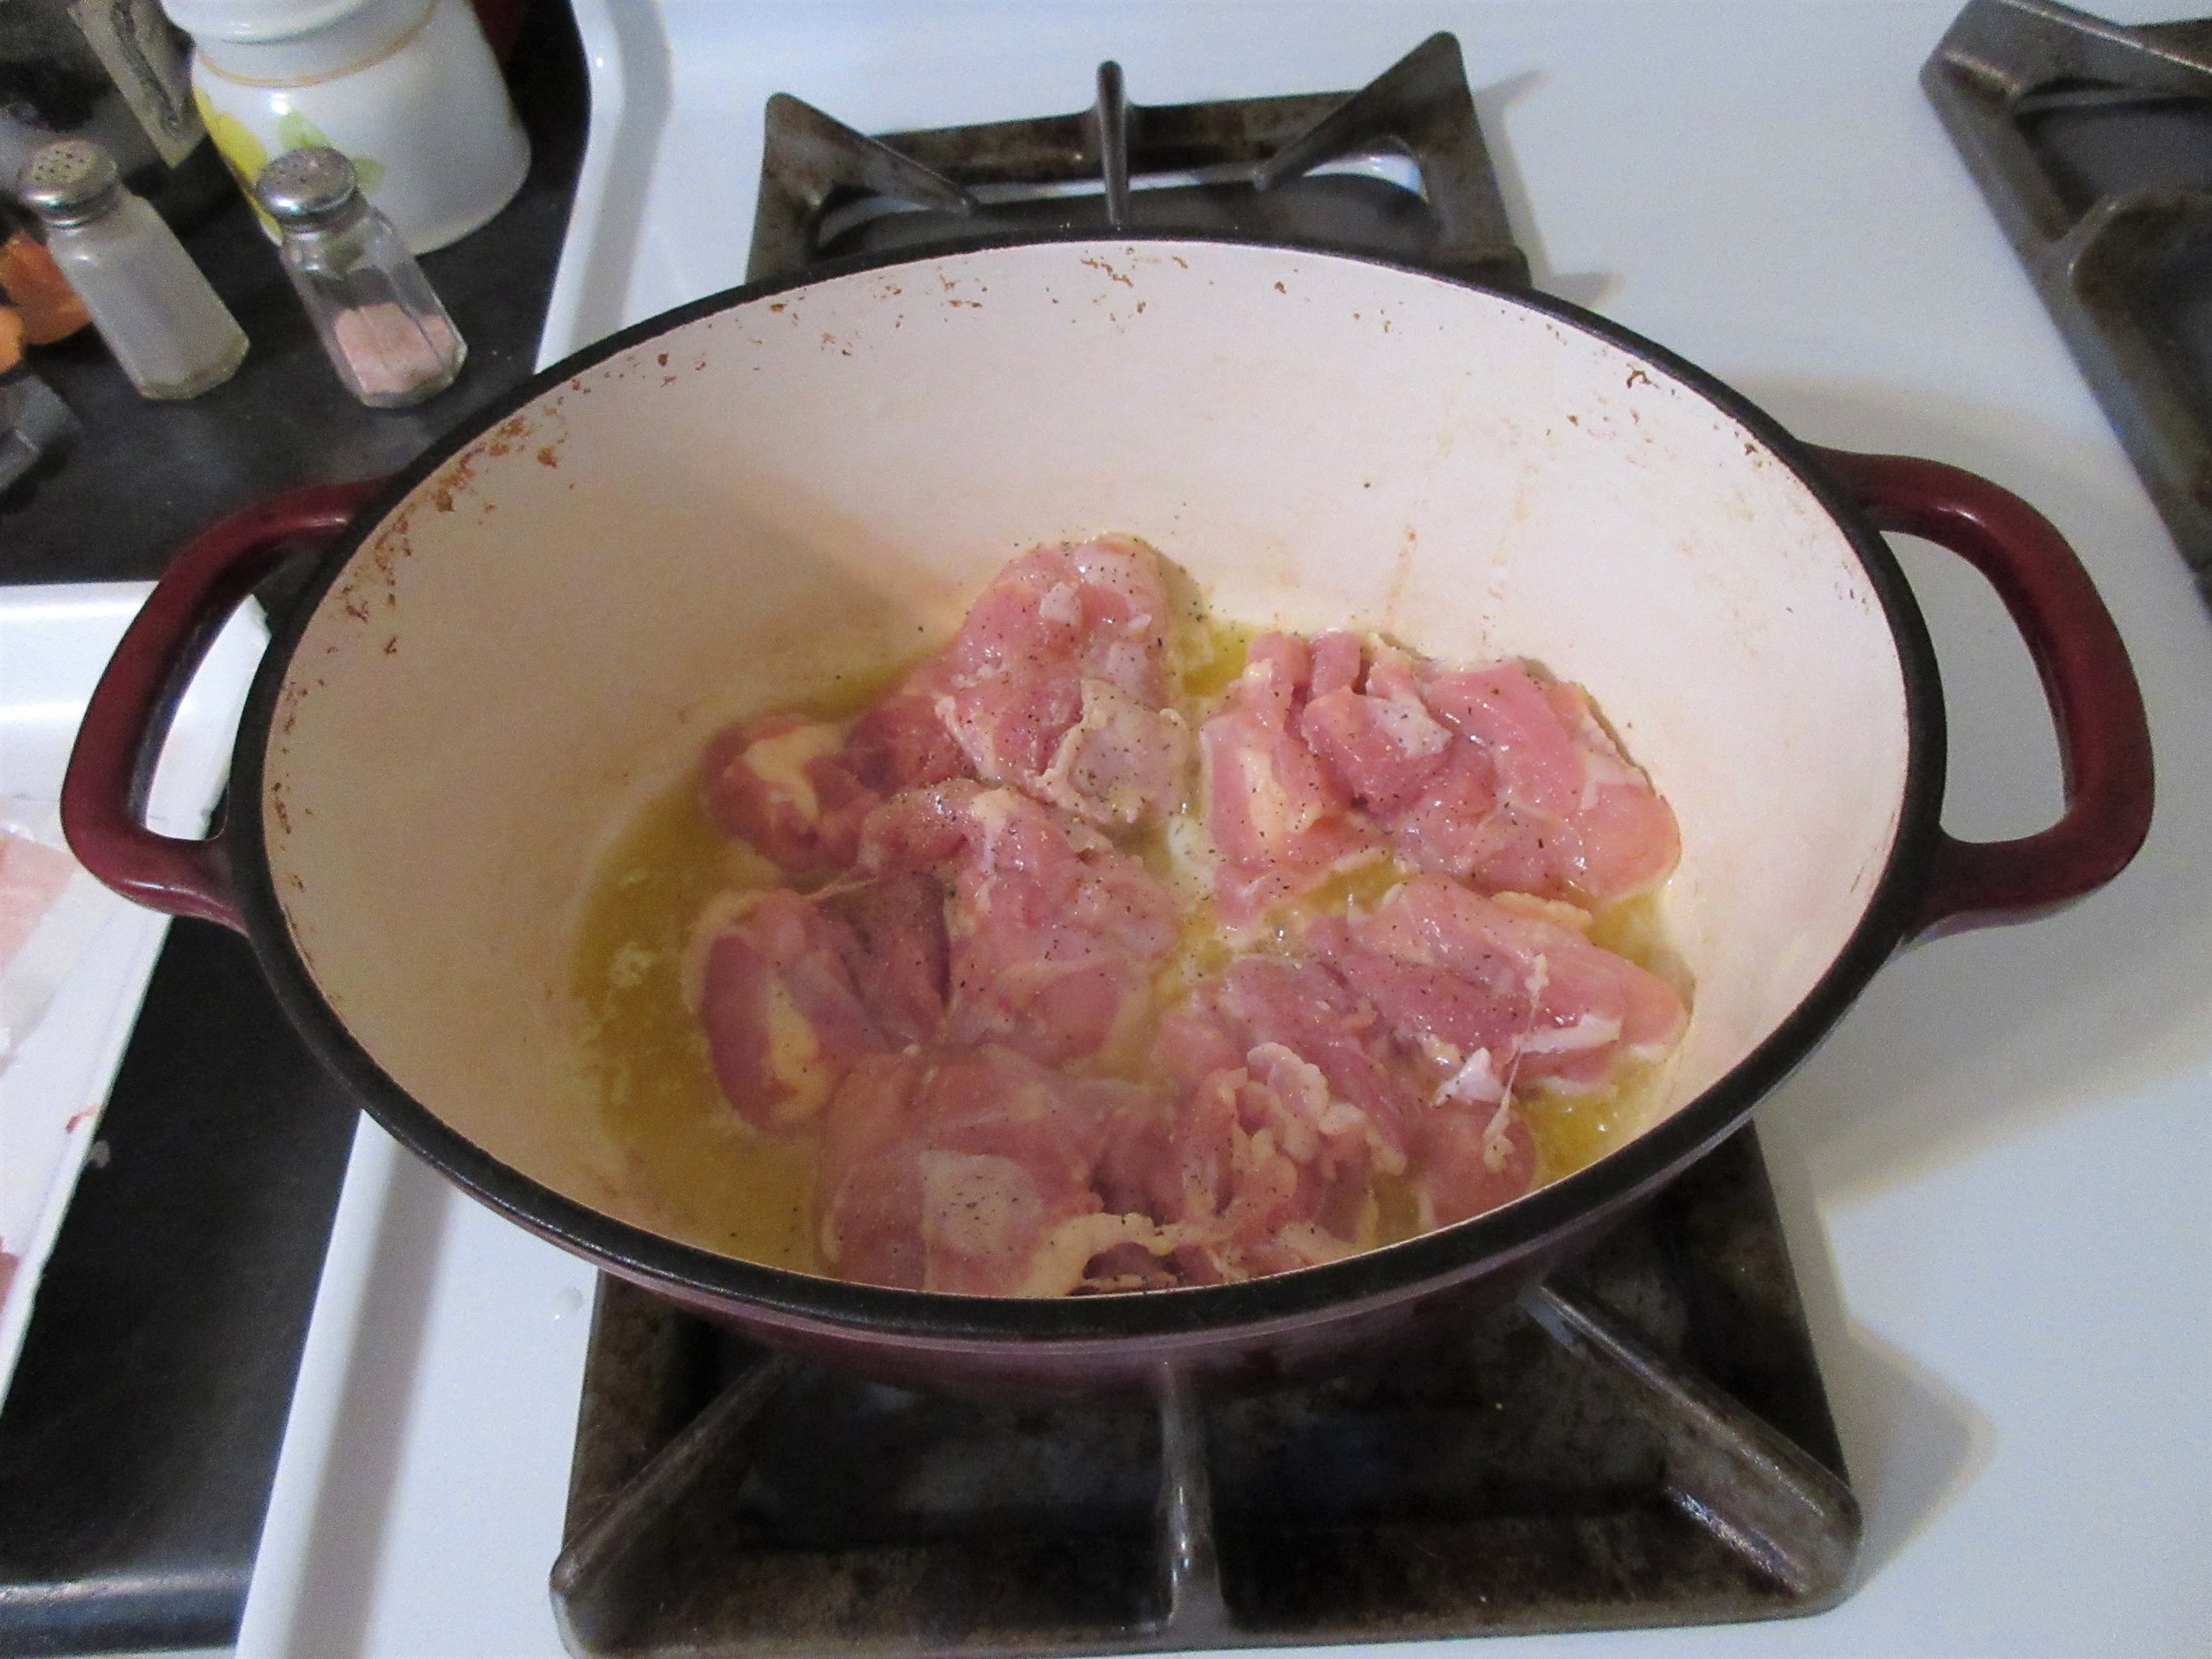
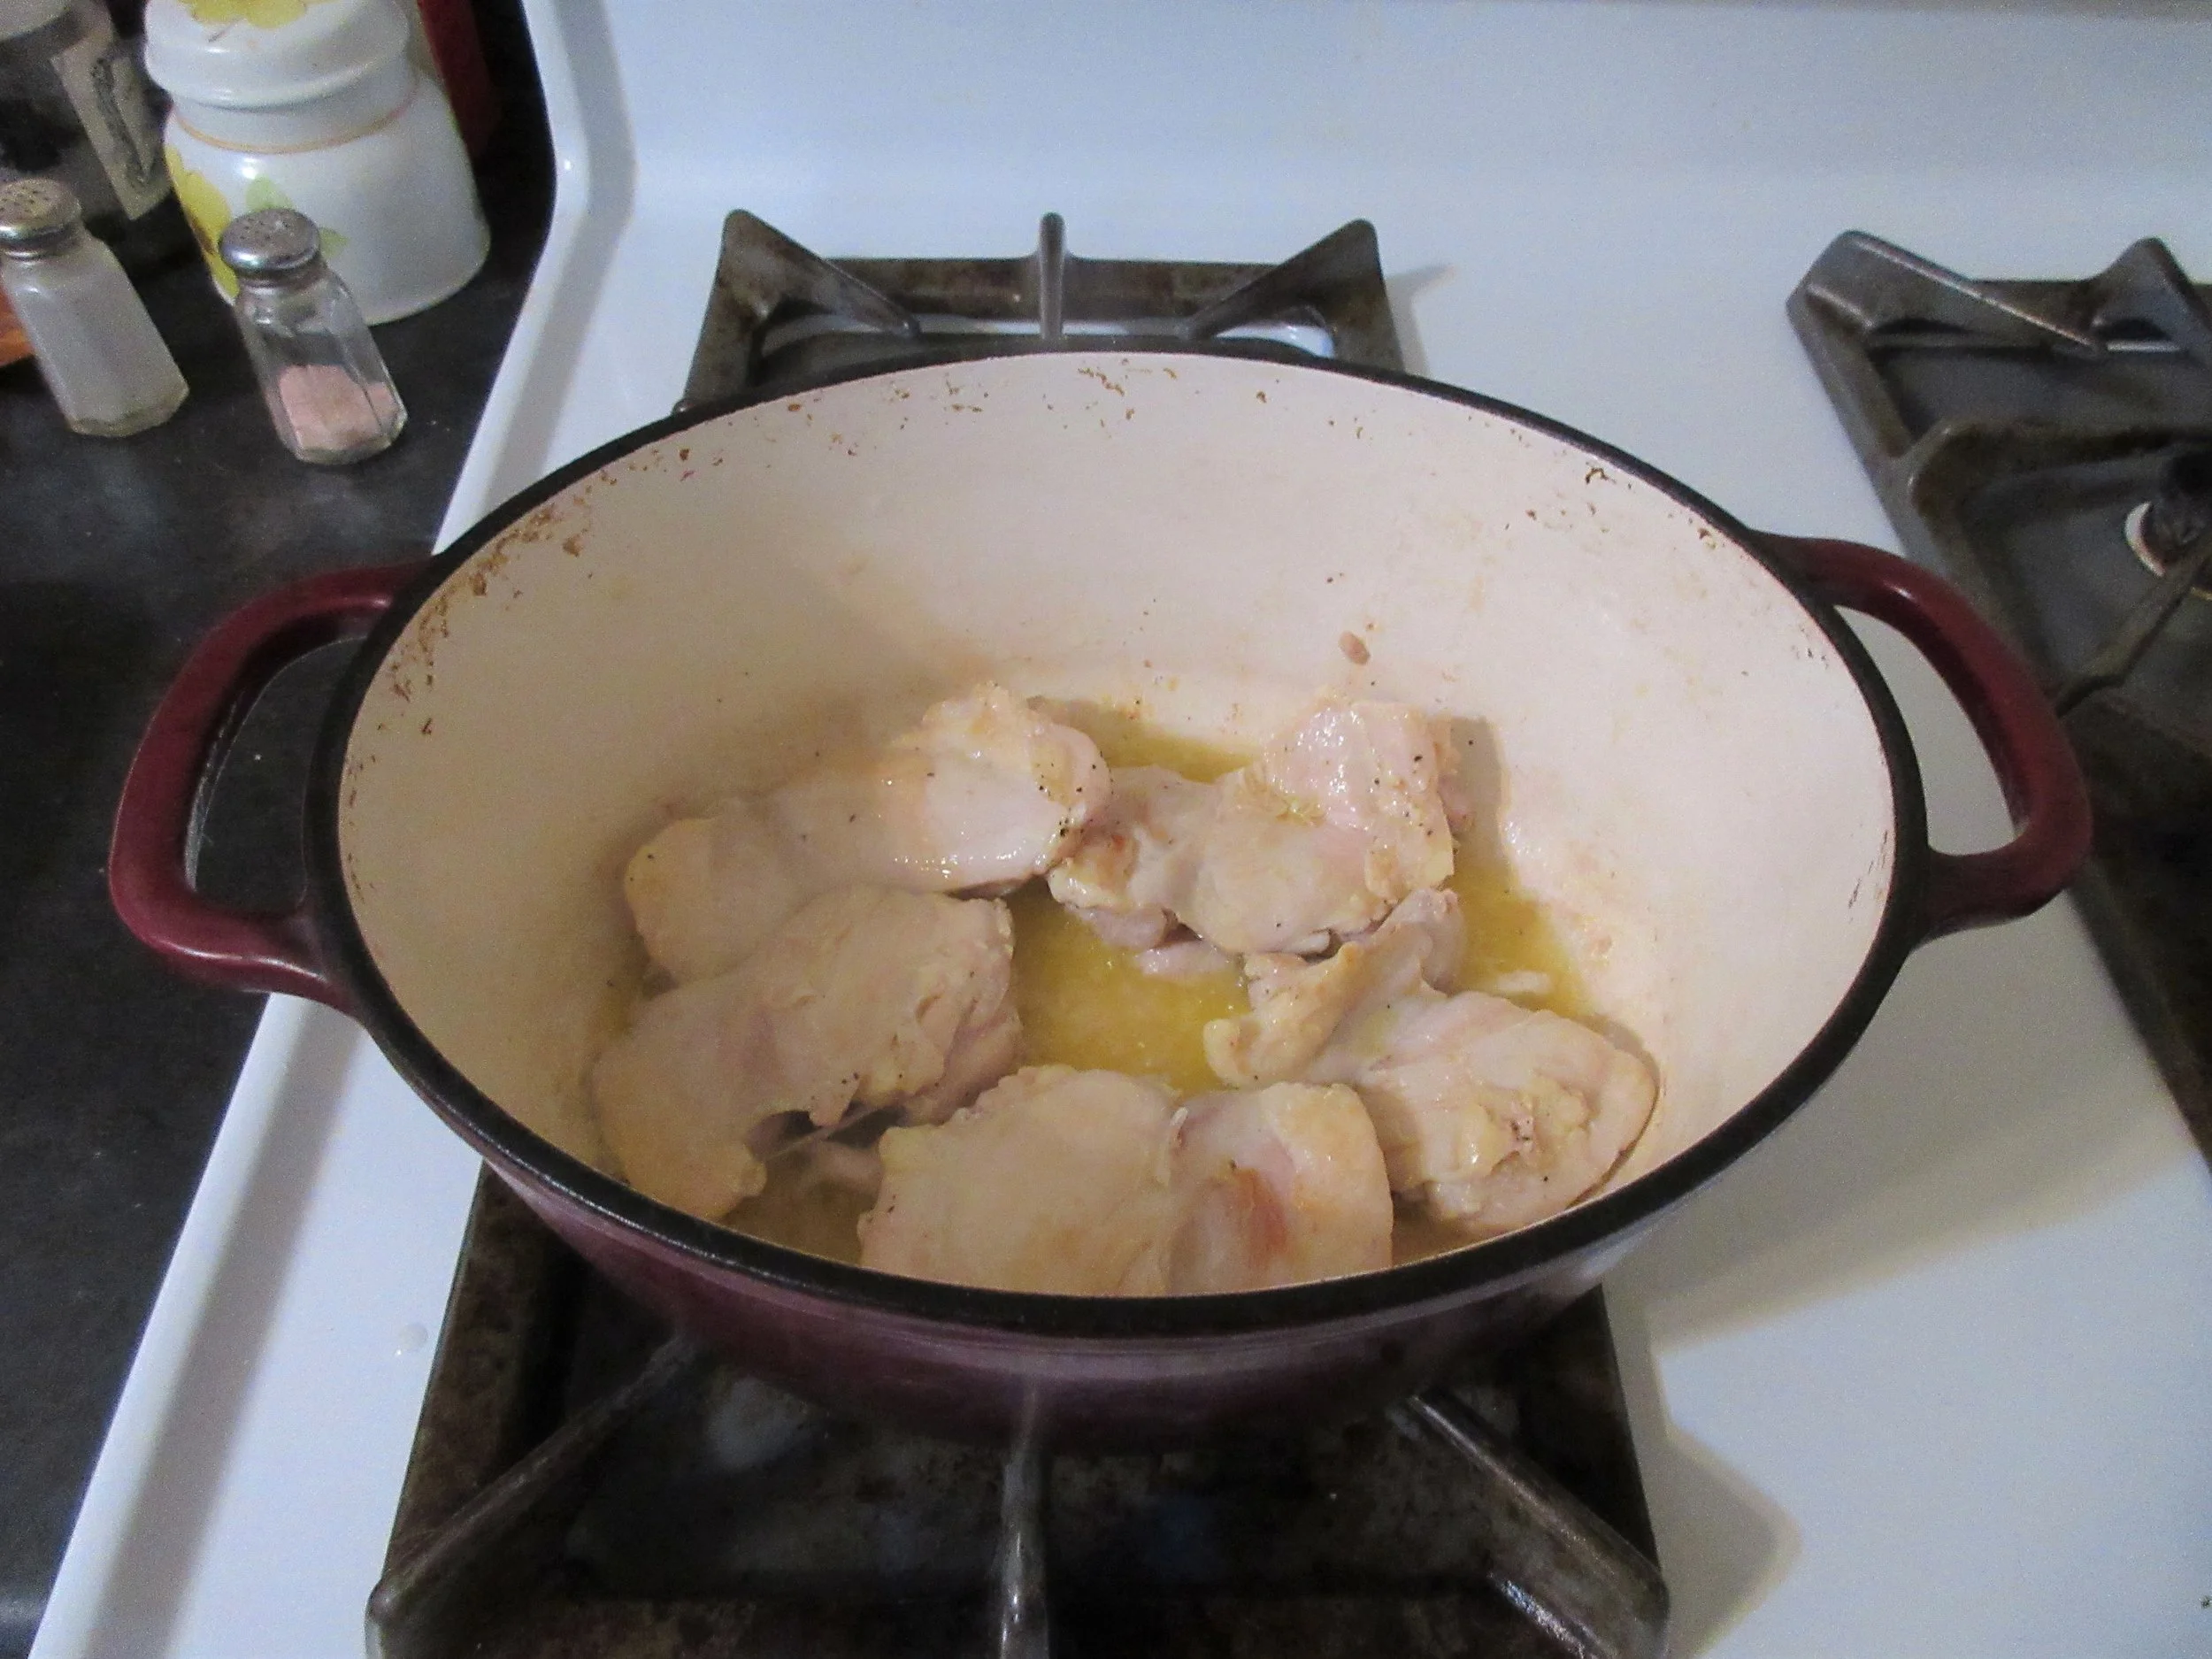
In a casserole, heat butter and oil and brown chicken. Remove.
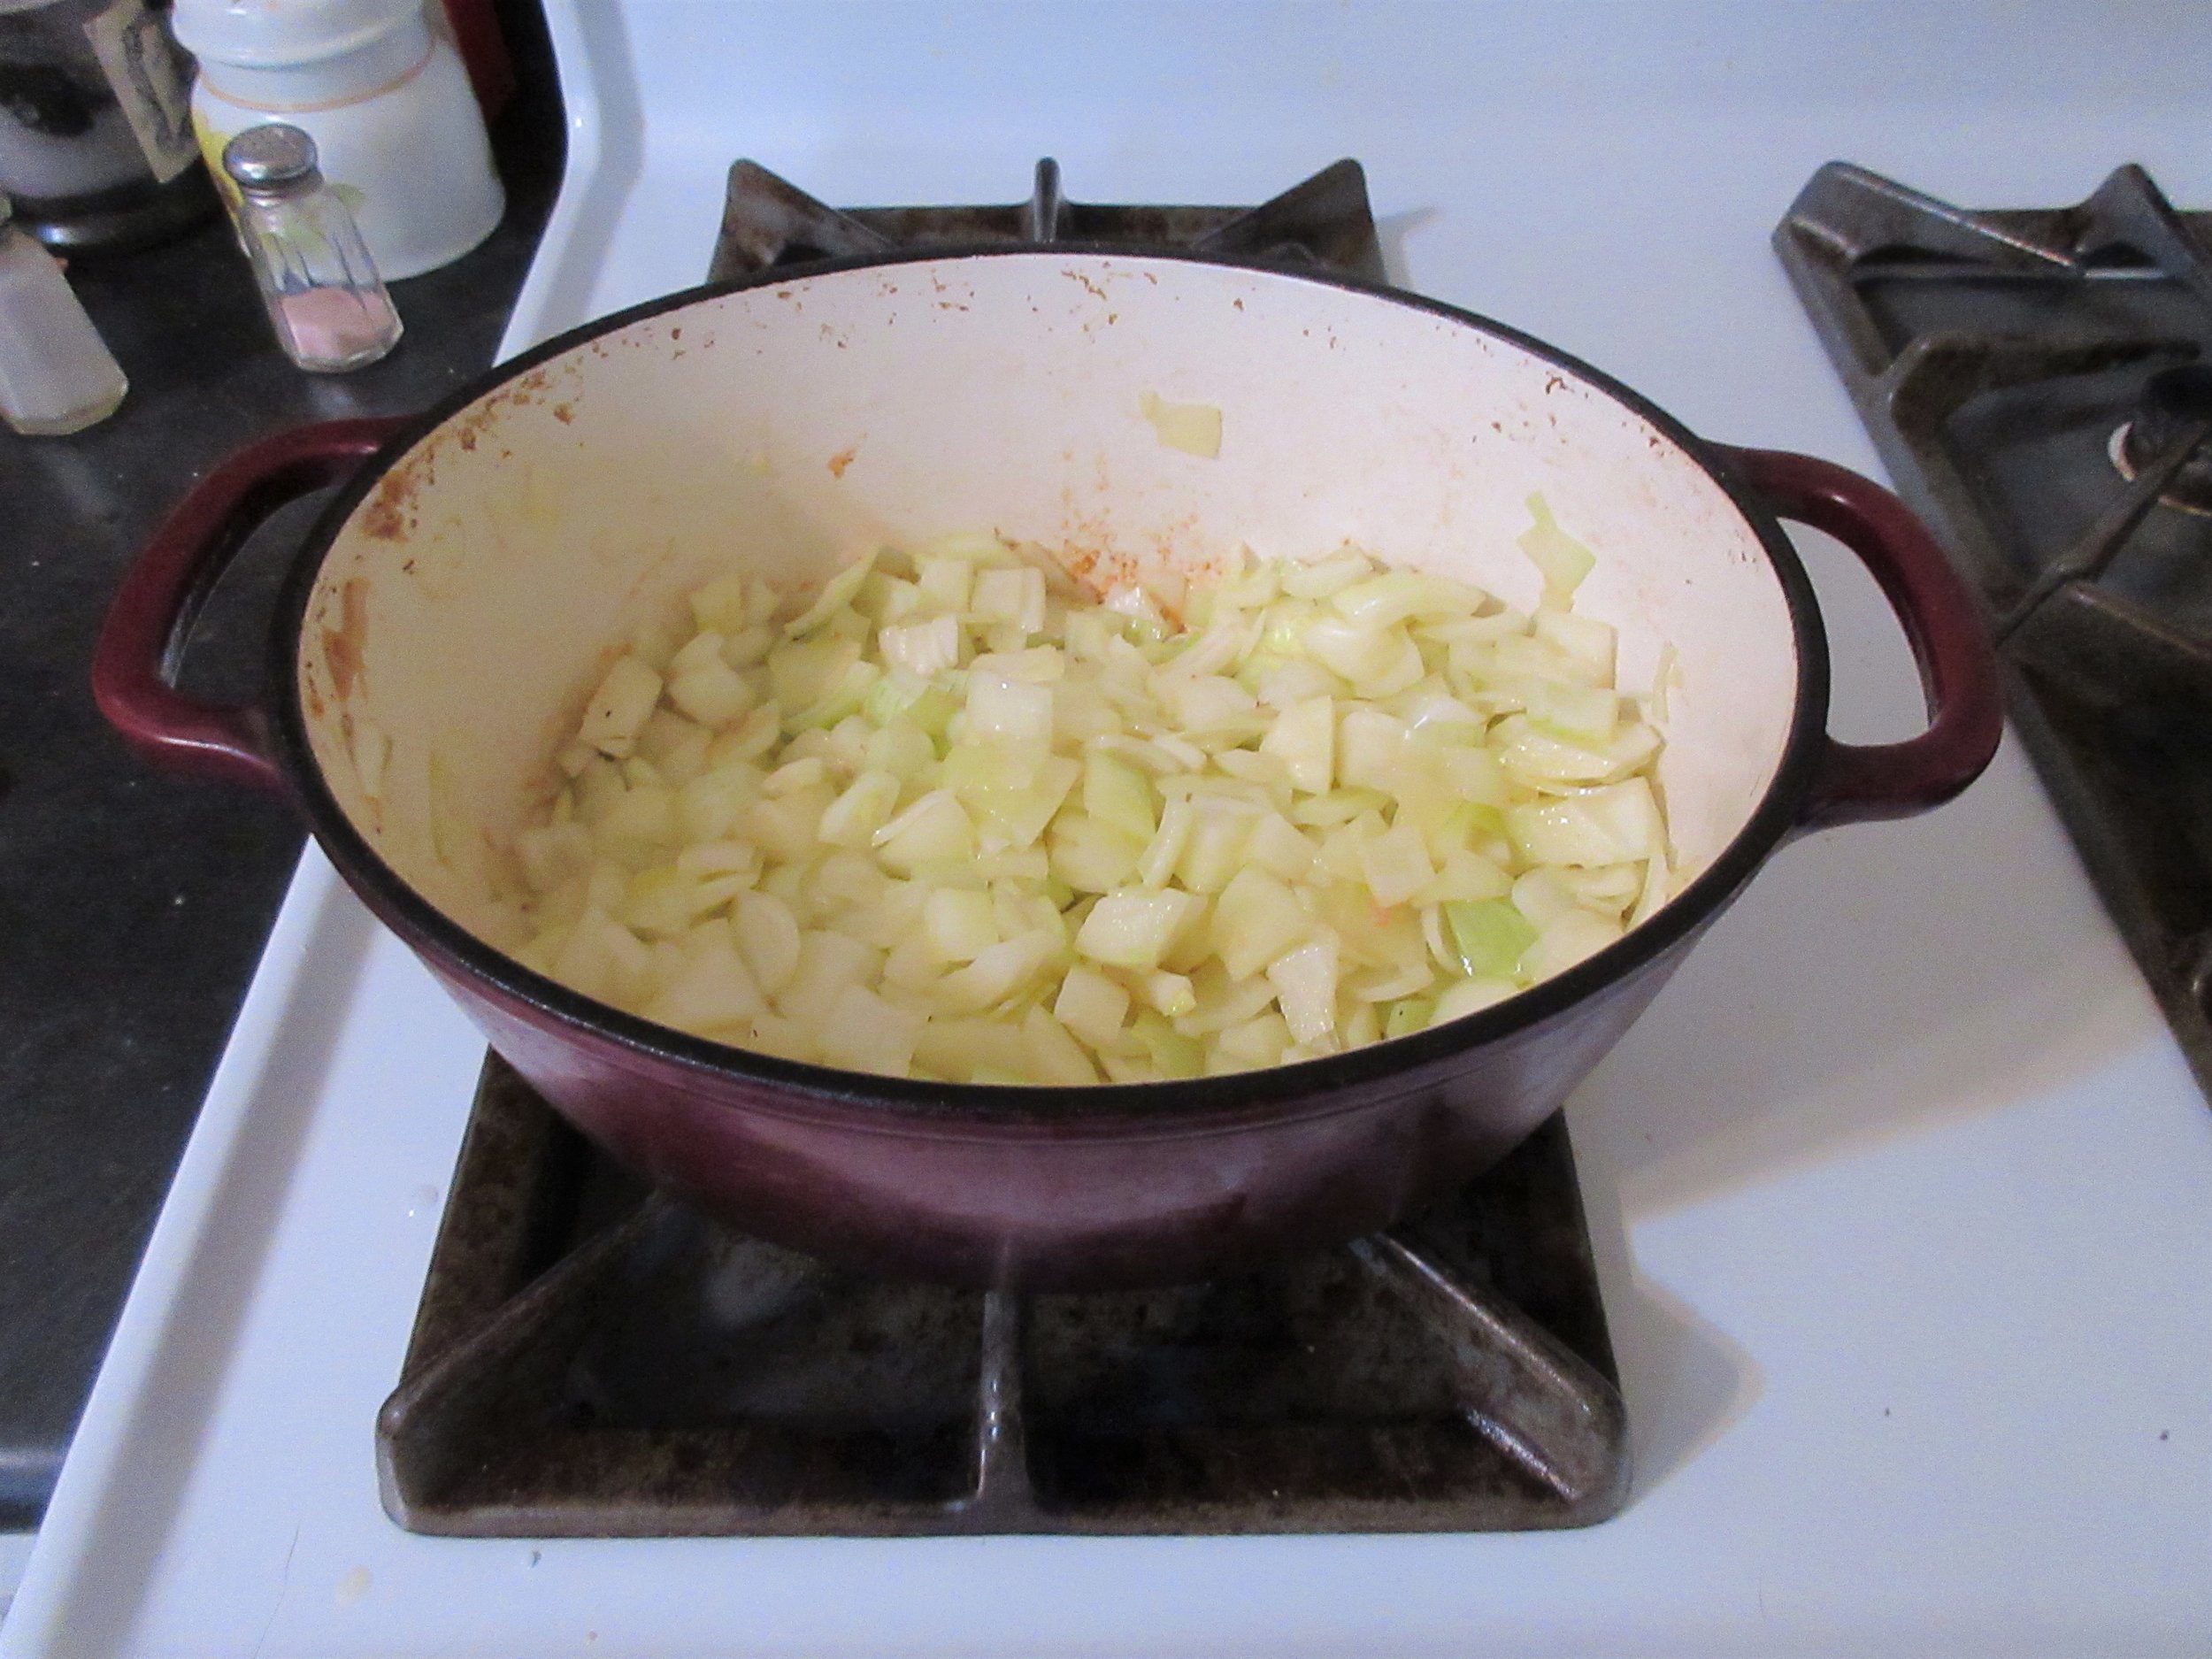
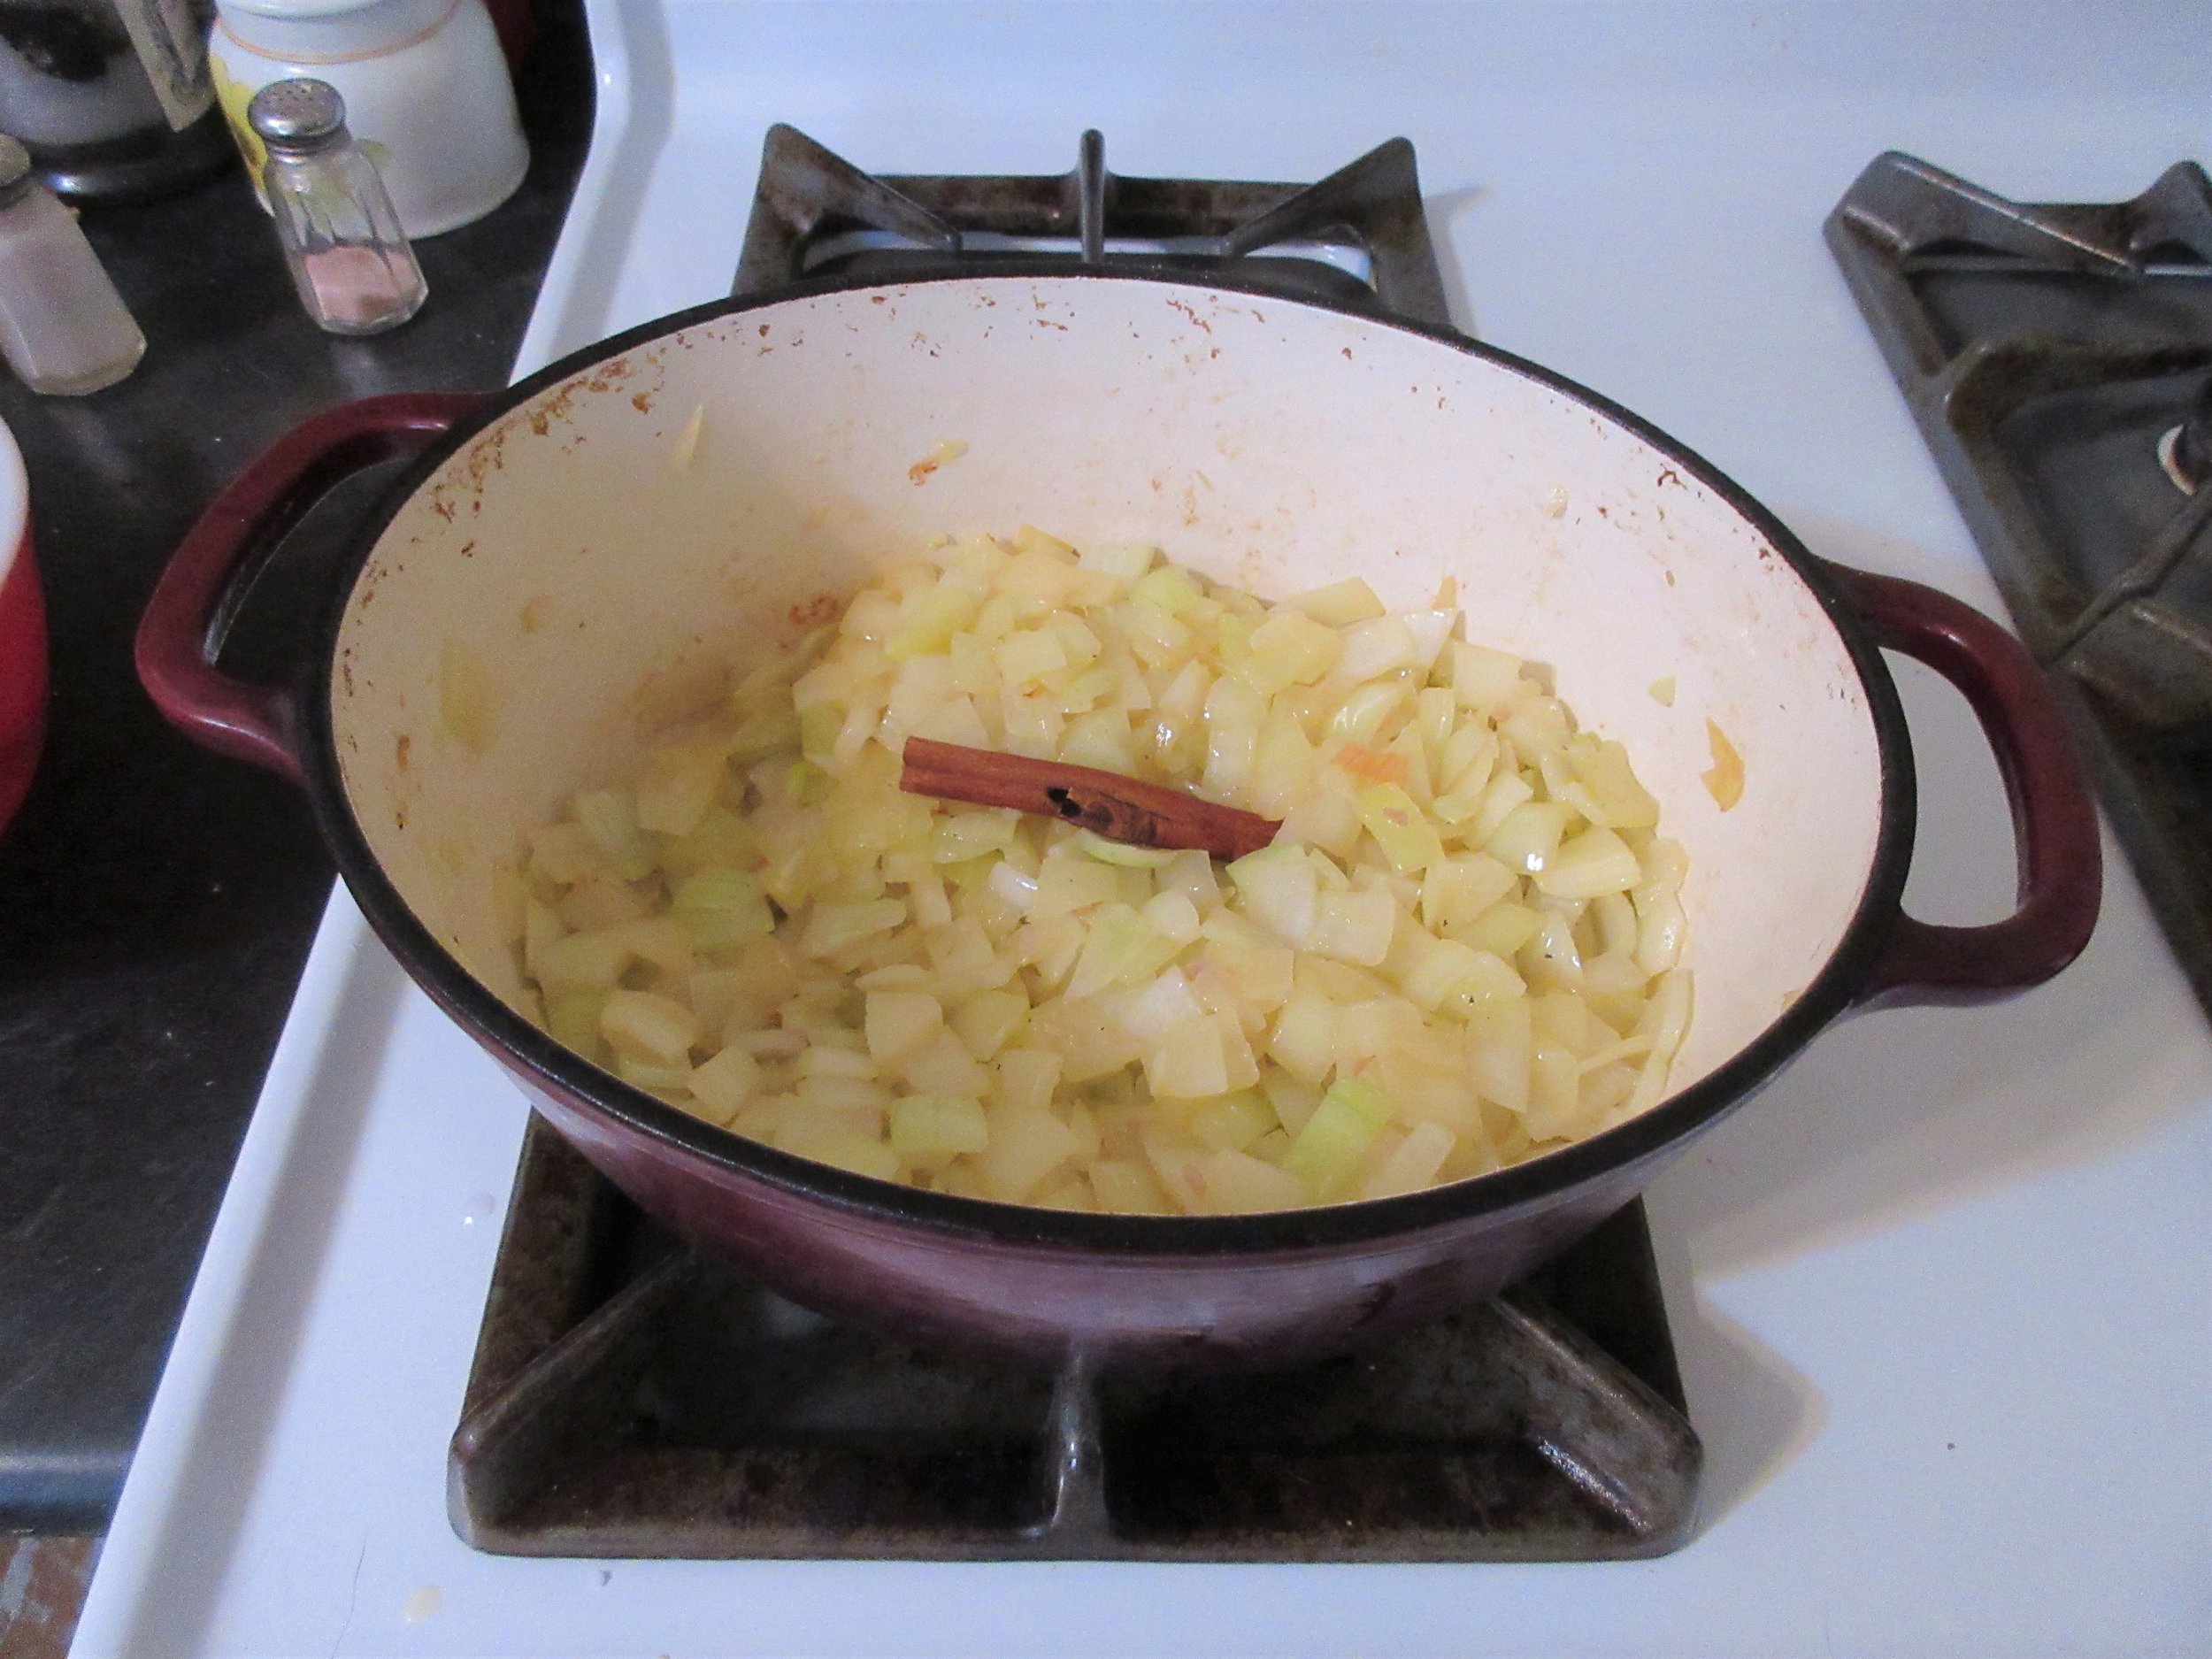
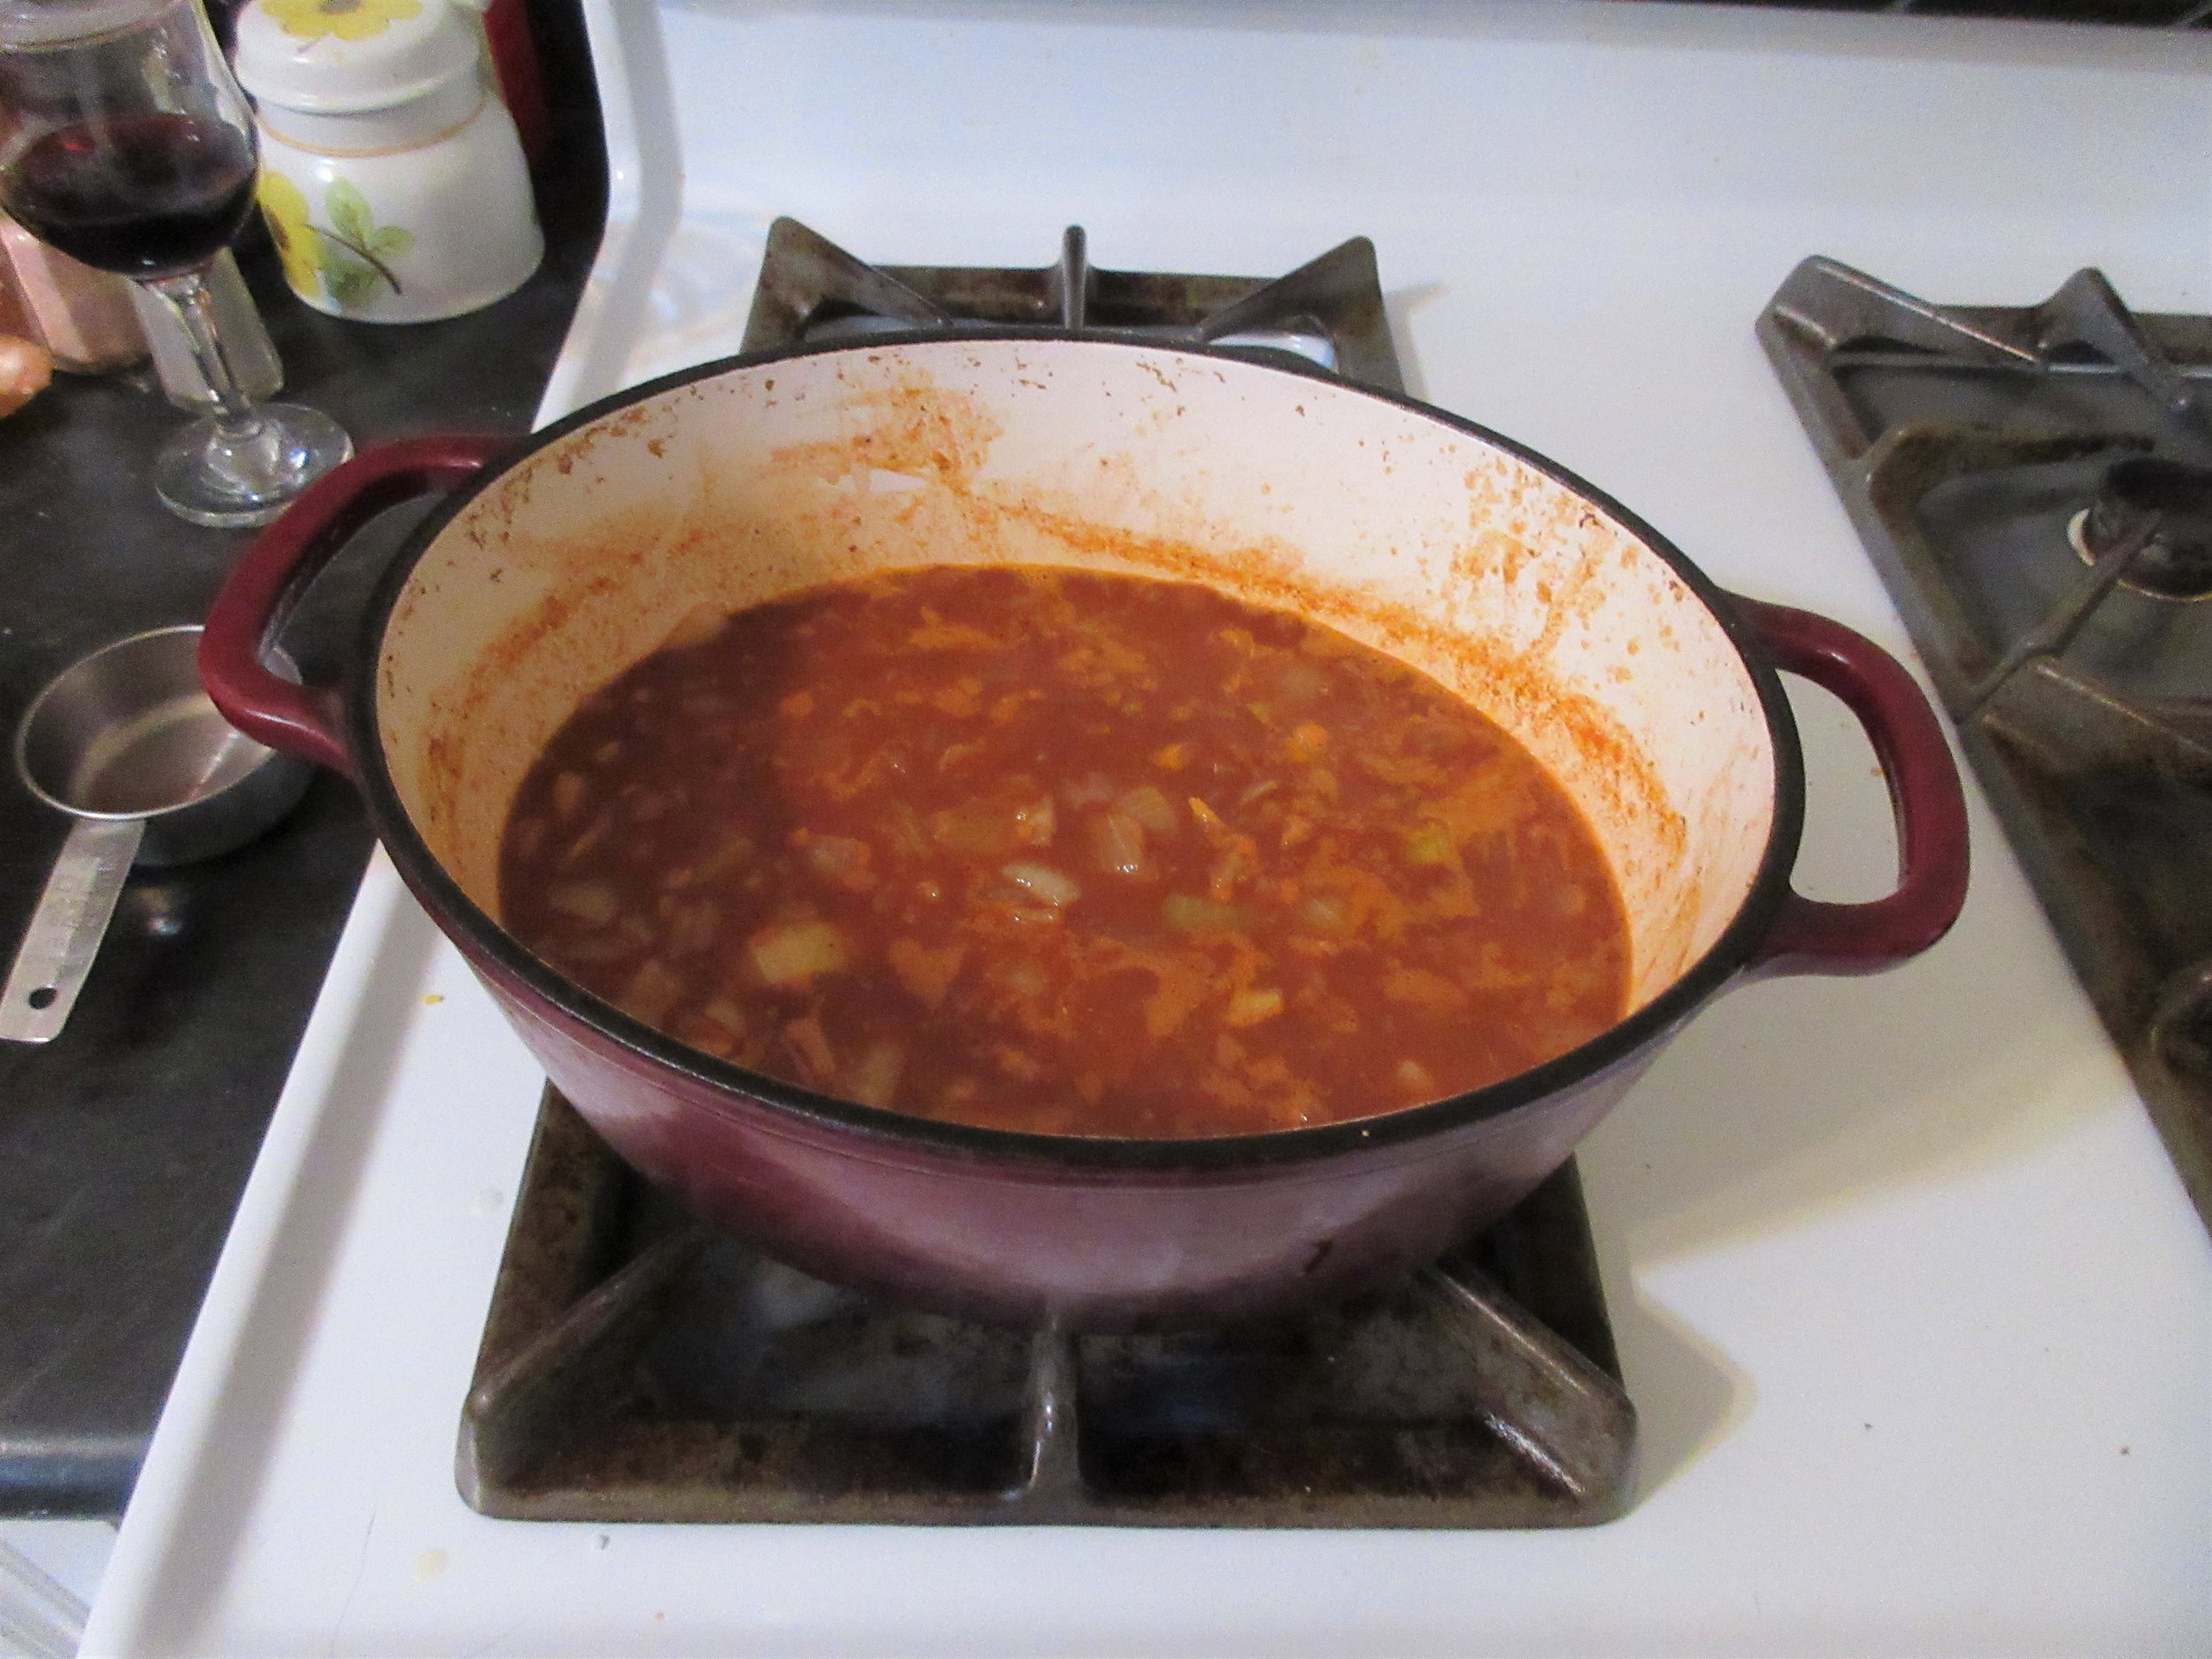
In remaining fat, cook onions until translucent. Add cinnamon stick.
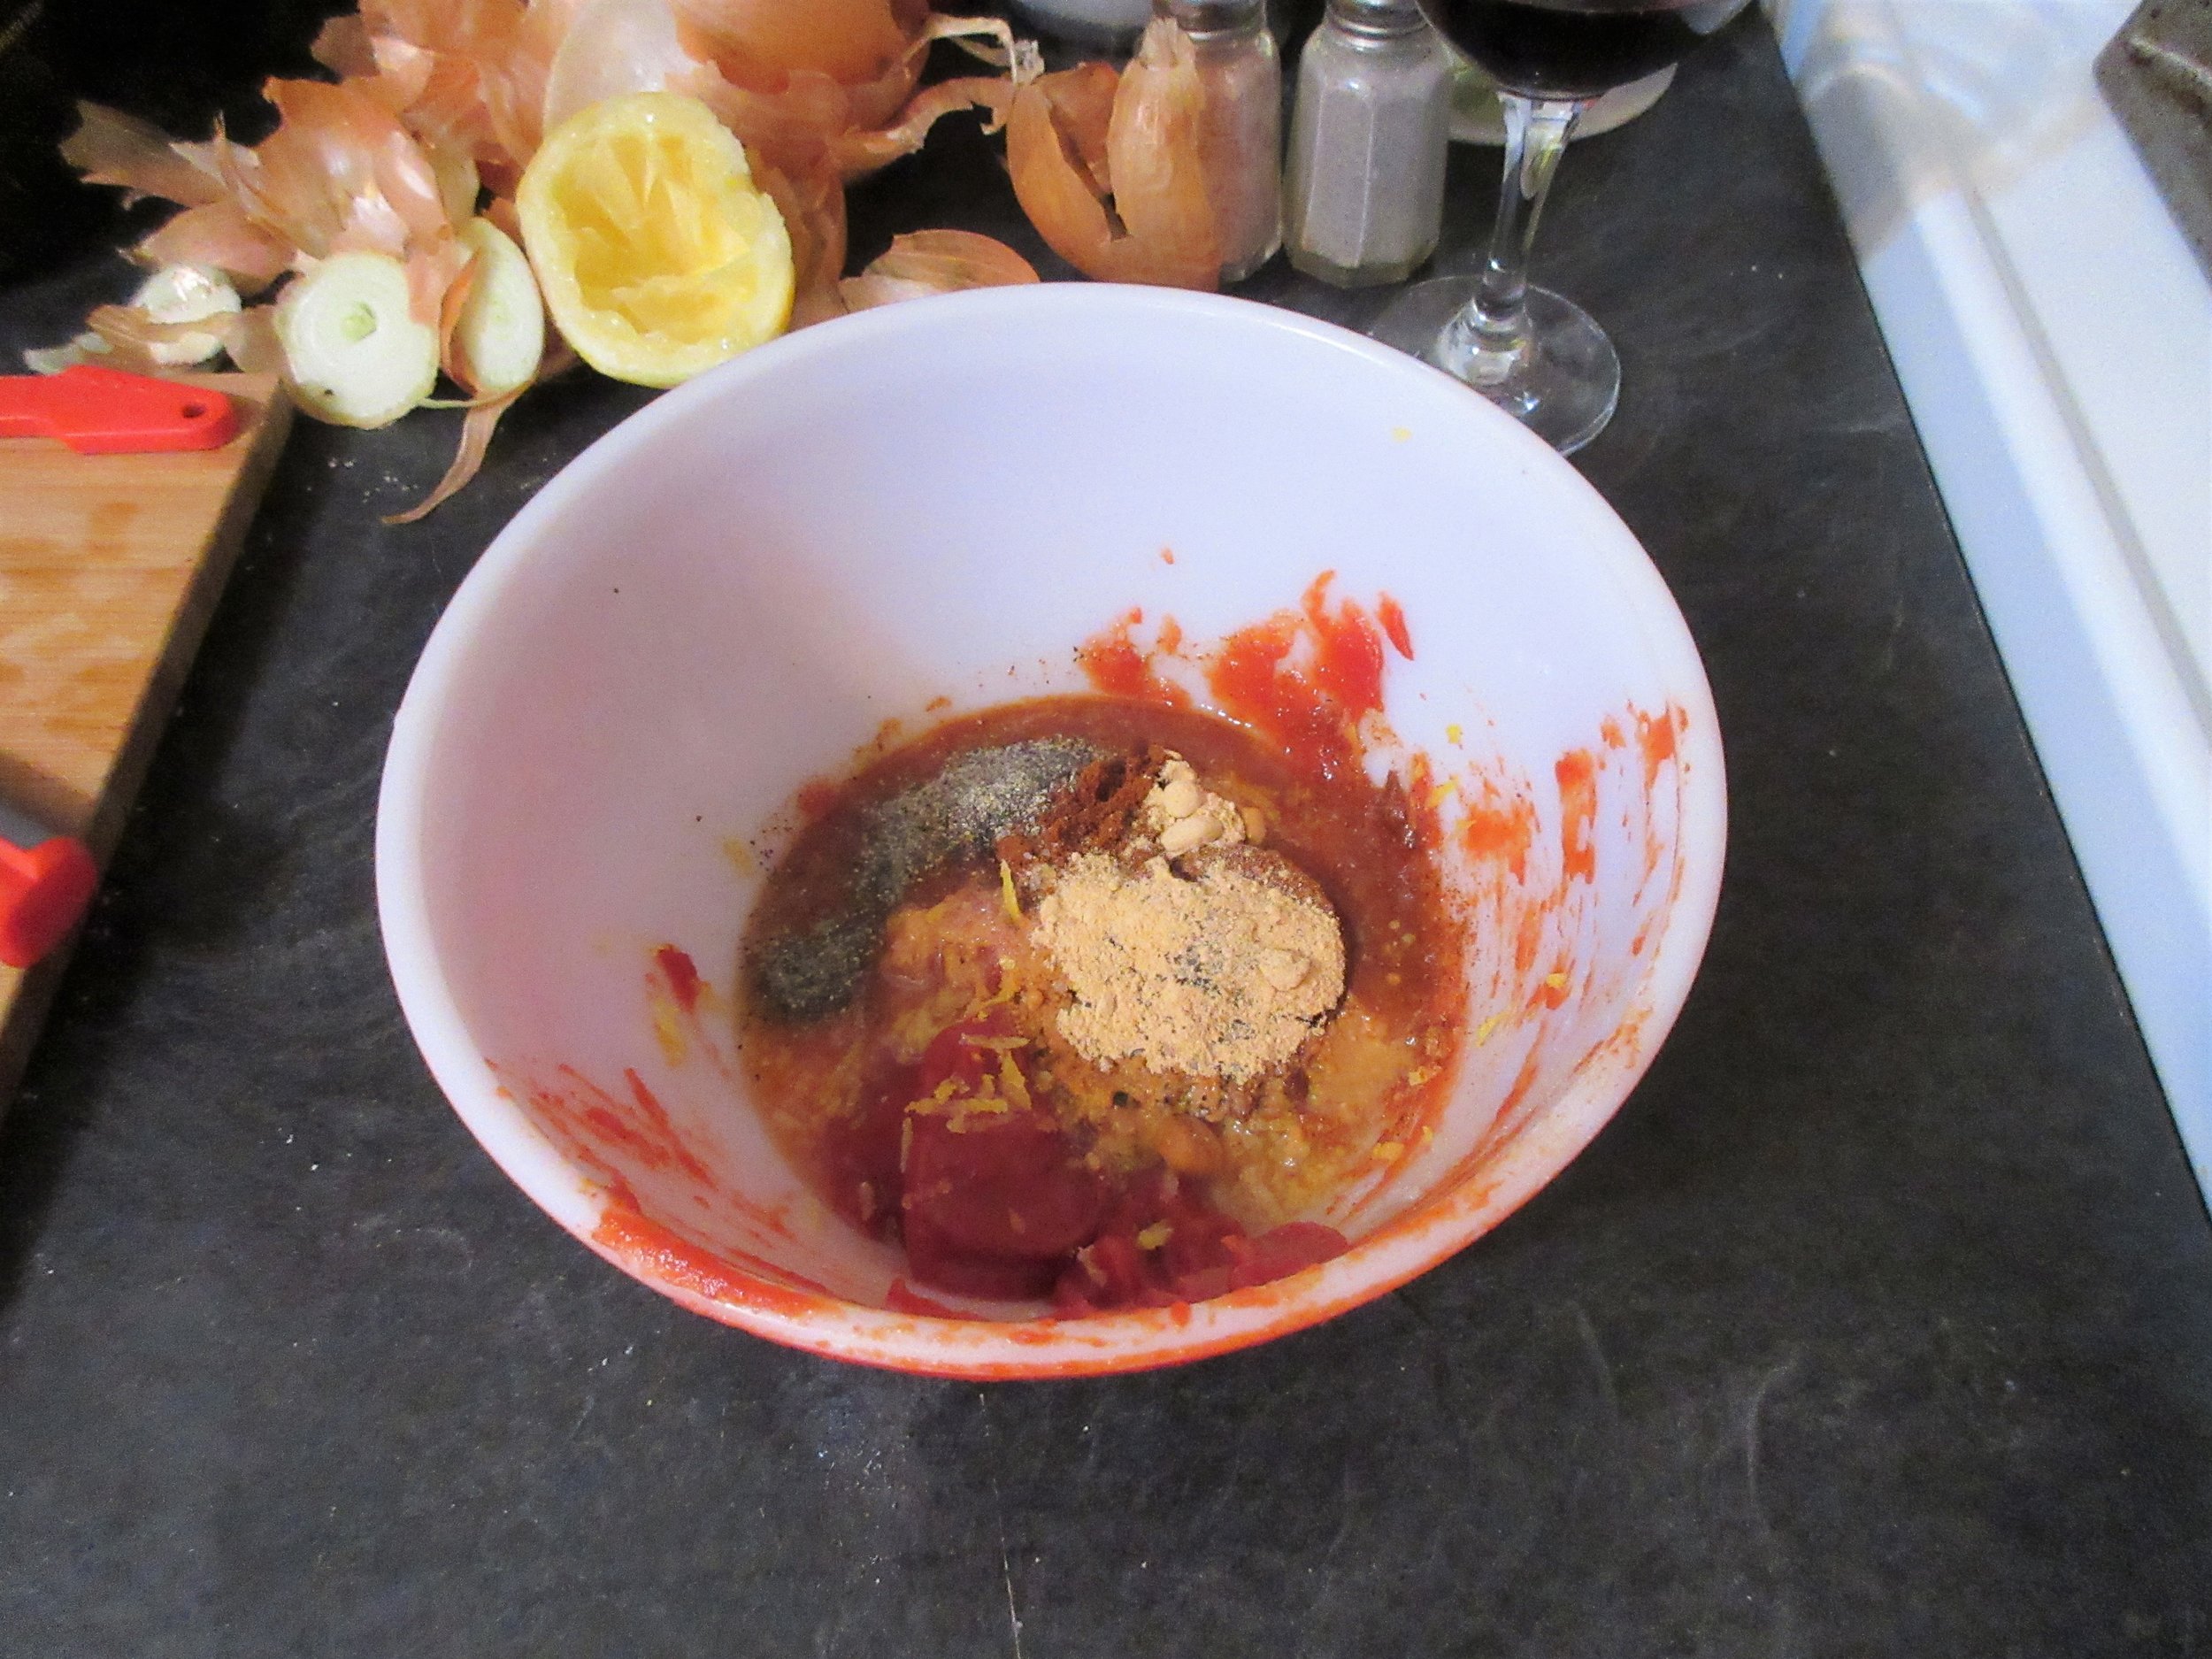
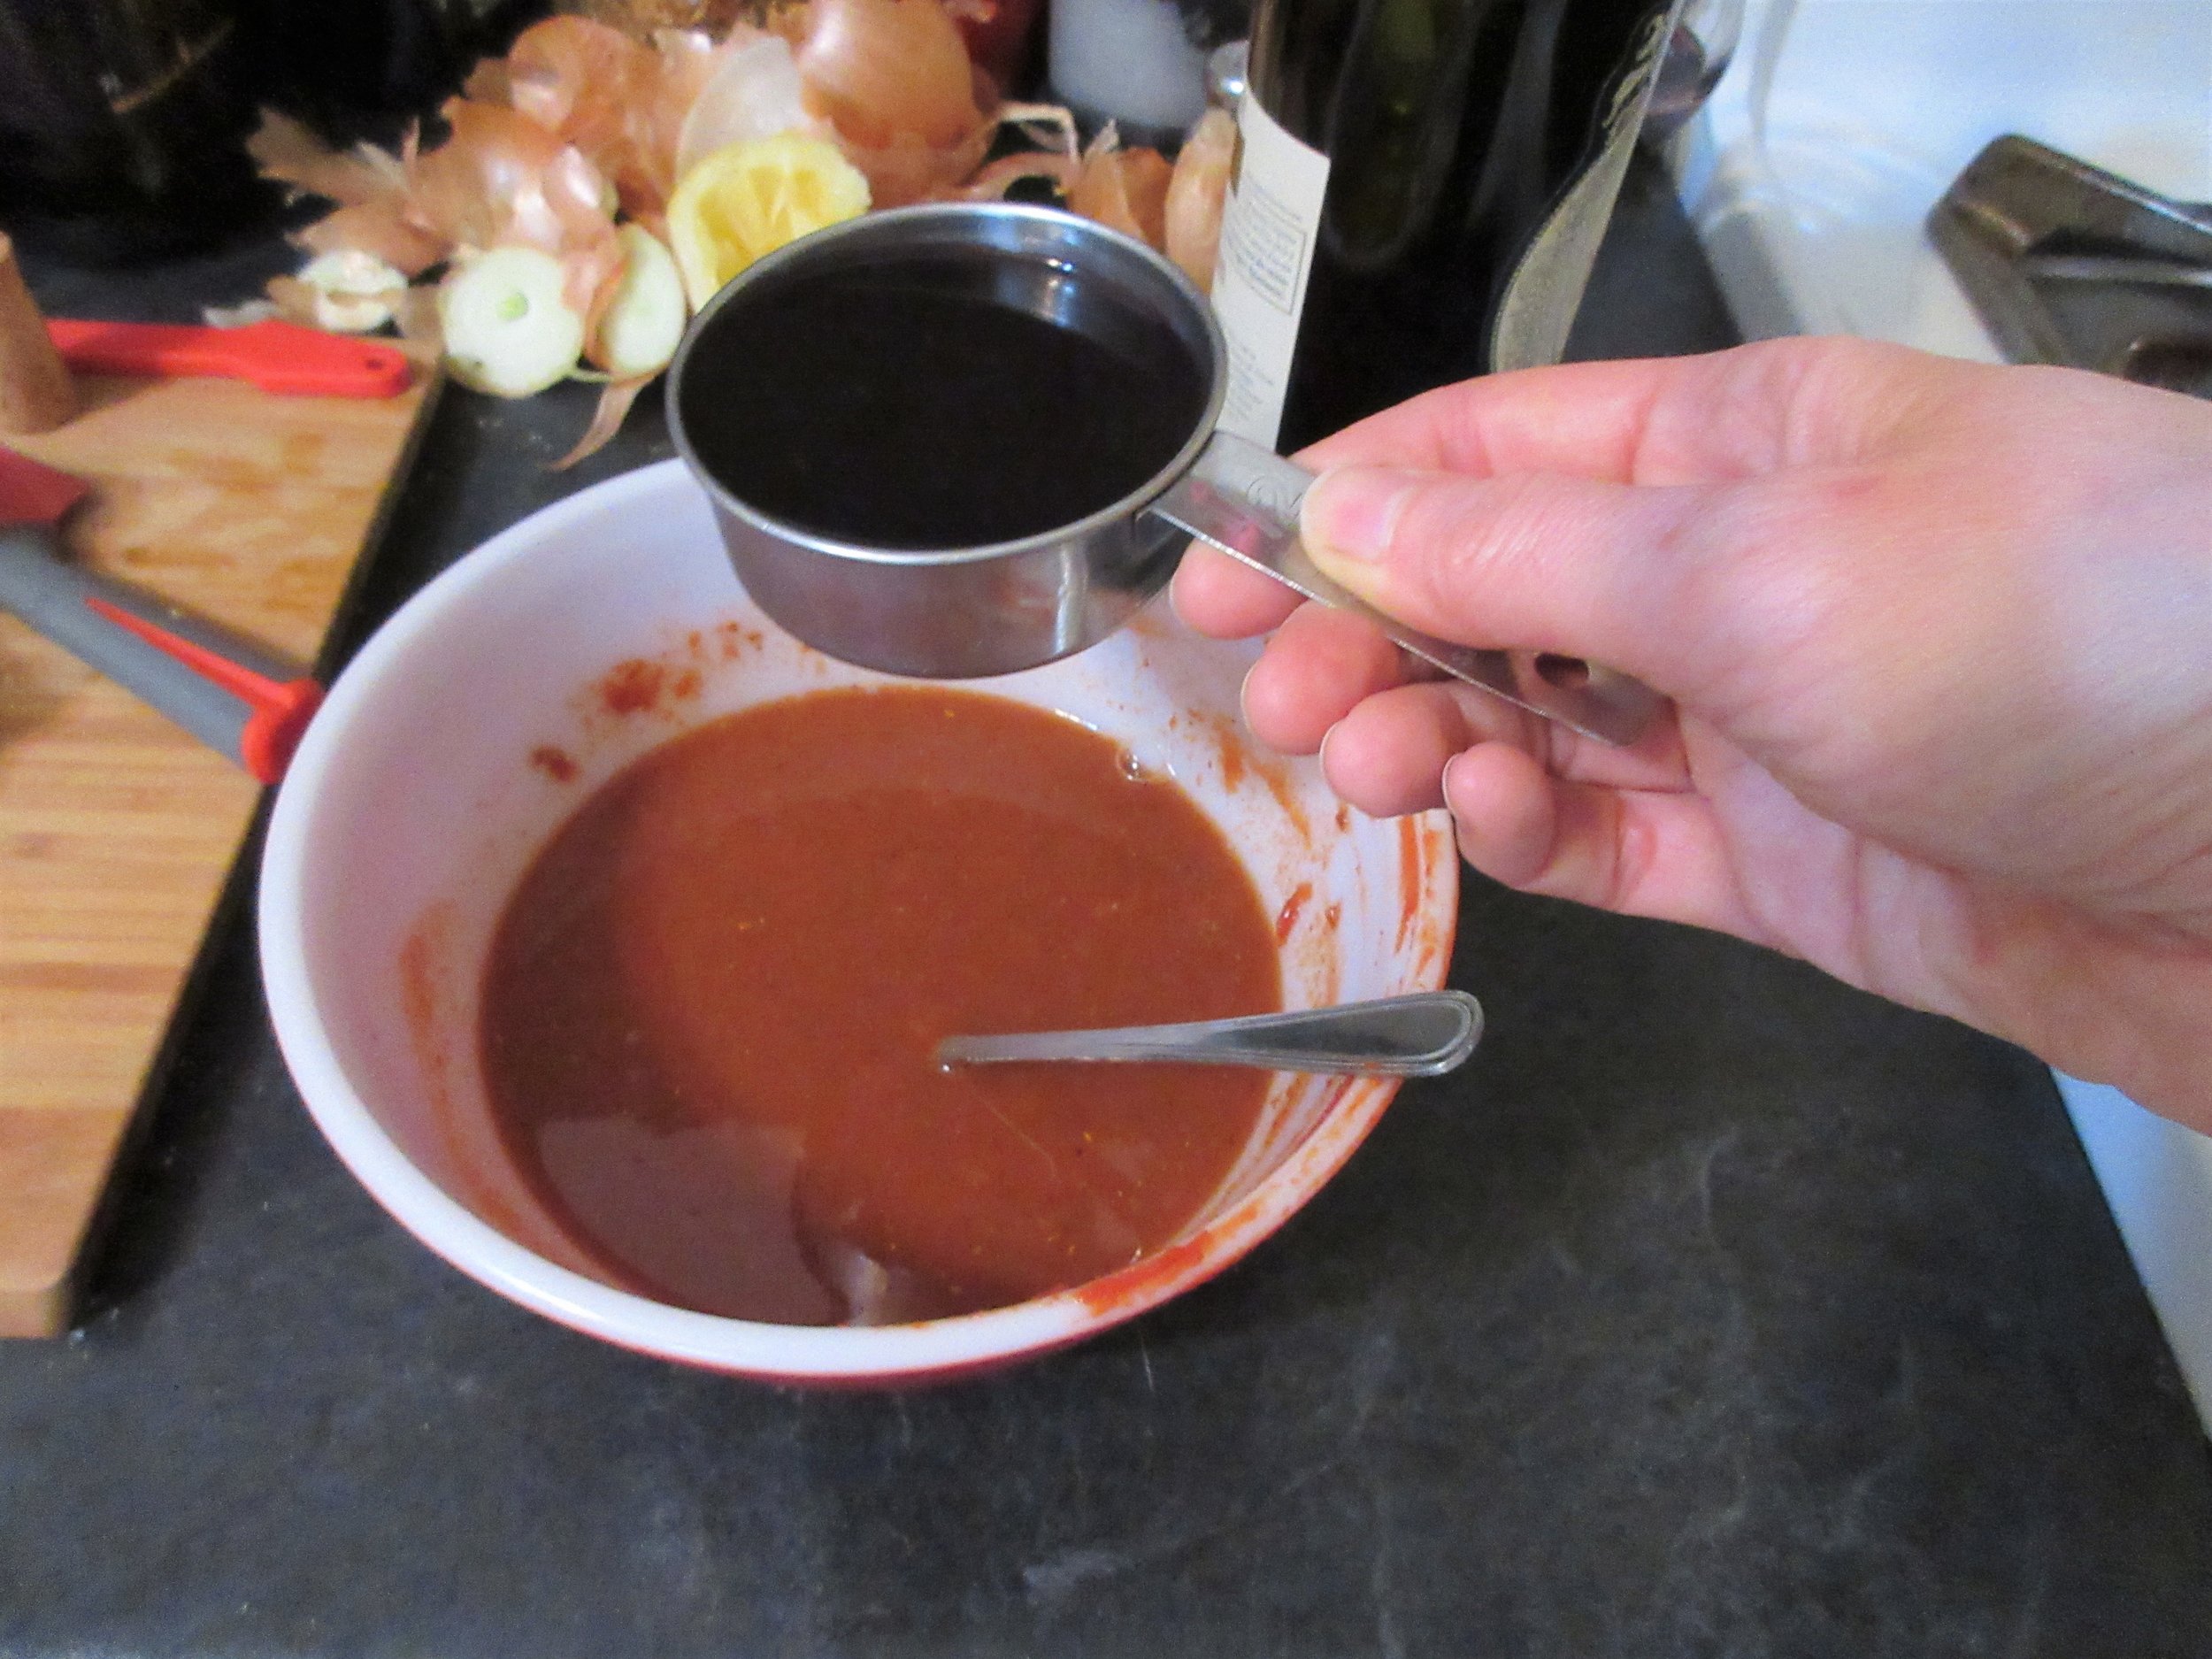
Combine and blend well these ten ingredients.
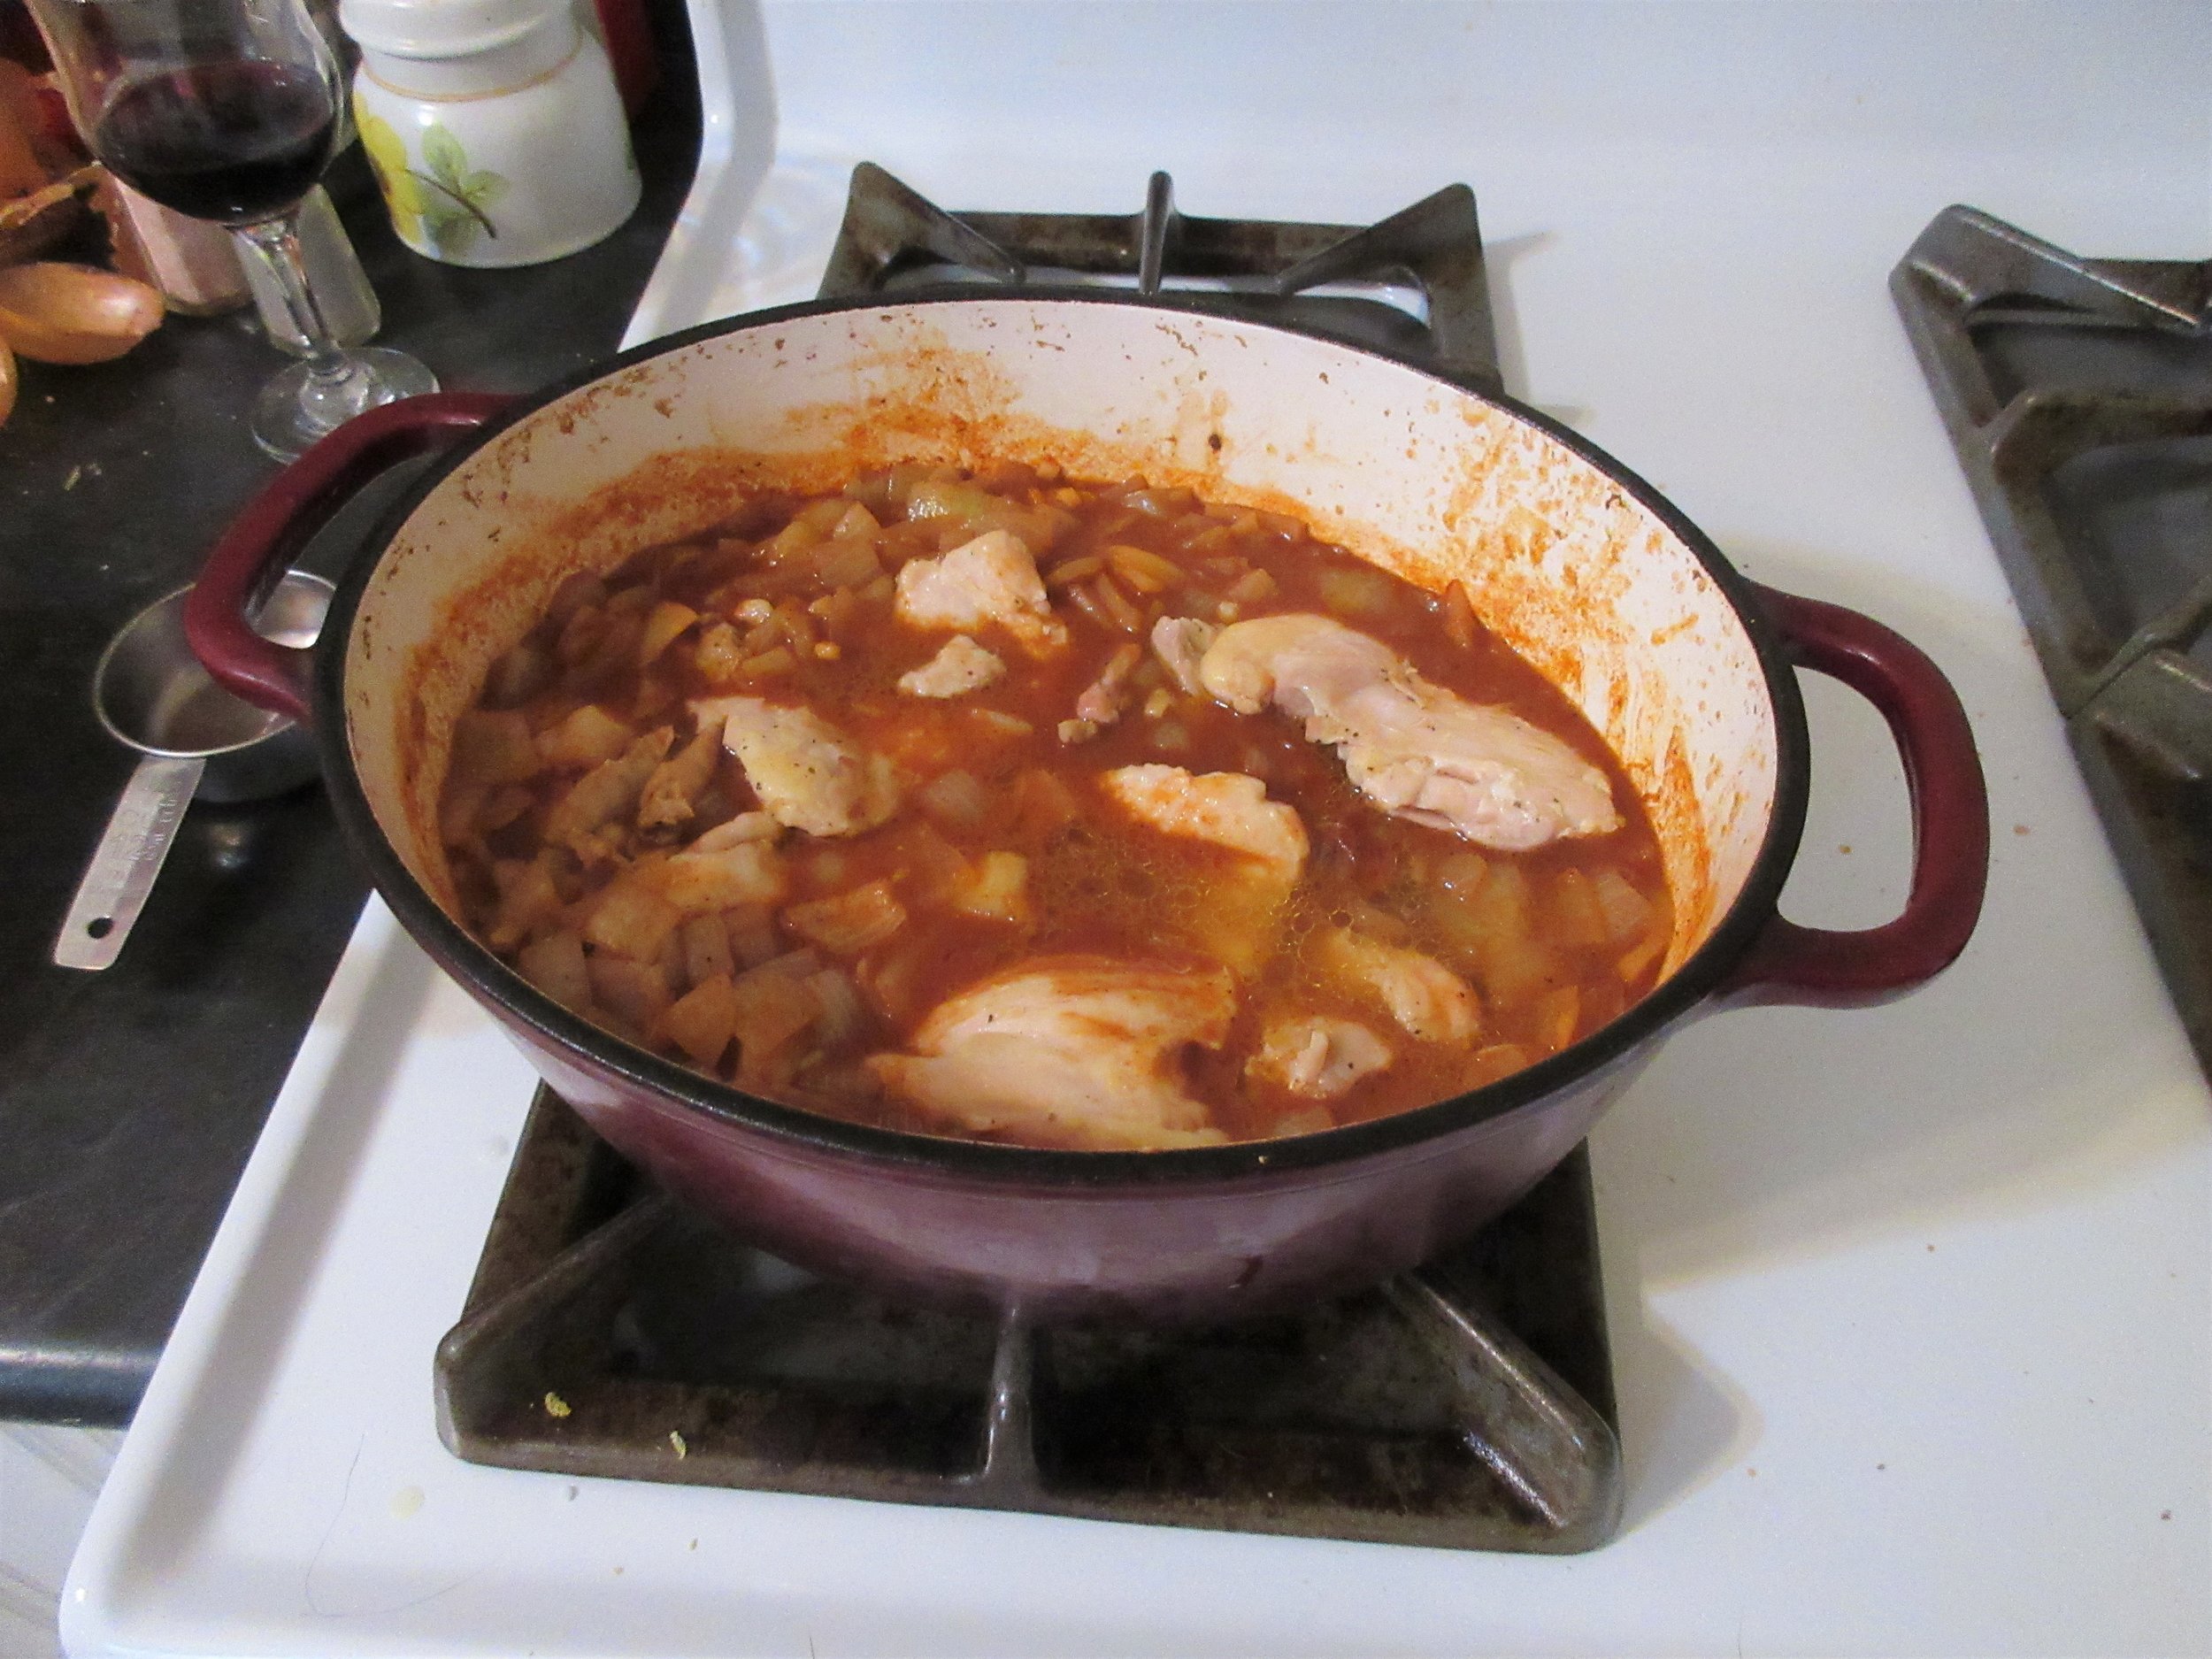
To onions, add liquid mixture and cook over high heat, stirring, until sauce thickens. (Sauce will not be heavy; for thicker sauce, use an additional Tbs cornstarch). Add ginger root. Replace Chicken.
At this point you may stop and continue later.
Cooking…
Bake, covered, at 350º for one hour, or until chicken is tender.
From The Hundred Menu Chicken Cookbook’s Introduction:
I prefer the second joint, or thigh, it is more flavorful and moist than the other parts of the chicken, and much less expensive than the “socially acceptable” breast, which can be dry, stringy and flavorless.
To brown chicken, place the skin side down, season the up side with salt and pepper, when the chicken is turned, the seasoning will cook into the meat.
My Notes:
Following Robert Ackart’s advice, I decided to use chicken thighs for this recipe but “Serving-pieces of chicken for 6 persons” is a vague amount. I ended up purchasing 10 chicken thighs, but could have put 16 to 18 thighs in this recipe. The next day, I bought more chicken thighs, fried them and served them with the extra sauce.

If you ask me over to your house to babysit, I will snoop in your kitchen while your baby sleeps and search for old cookbooks. That’s where I found The Hundred Menu Chicken Cookbook, nestled in my friends’ kitchen while baby Felix dreamt upstairs and I listened to Ralphie the dog’s belly gurgle.
I’ll be making Chicken with Chili again. It’s a warming full-flavoured chicken dish that I think I’d enjoy even more on a dark and cold winter’s night. The Hundred Menu Chicken Cookbook has the tagline “One-pot chicken recipes that are easy-to-make and a treat to serve”, so the recipe instructs us to both fry and bake this recipe in the same dish (I used my enameled Dutch oven), but I think Chicken with Chili would be an excellent slow-cooker recipe.
I was intrigued by Chicken with Chili because it claimed to be an Ethiopian recipe and I was skeptical about how accurate it would be, but it turns out that Chicken with Chili is reasonably similar to Doro Wat! If you compare ingredient lists of the two recipes, you’ll find they are mostly the same. Chicken with Chili doesn’t feature fresh garlic or the hard boiled eggs that are typically served in Doro Wat and the traditional spices have been substituted for spices that would have been found in the kitchens of most American families in 1972.
Chicken with Chili uses Chili Powder instead of Berbere, the Ethopian spice mix. A big difference between these two spice mixes is that Berbere packs the heat and not many people would call Chili Powder spicy. Since you’re putting 2 tablespoons of Chili Powder in Chicken with Chili, it creates a flavourful dish without the heat if you’re not a fan of spicy hot food.
Chili Powder is usually a combination of cayenne pepper, cumin, garlic powder, oregano, paprika and sometimes onion powder. Narrowing down the list of spices you may find in Berbere from English-language sources was a more difficult task. I’ve found Berbere recipes that call for a variety of spice combos containing chili peppers, garlic, ginger, basil, korarima, rue, ajwain, nigella, fenugreek. coriander, cumin, cardamom, allspice, cloves, black pepper, paprika, salt, cinnamon, nutmeg, turmeric, star anise and onion flakes or powder.
Maybe there isn’t a definitive list of what spices to put in “authentic” Berbere. It could be that everyone’s Berbere is slightly different. It may also be the same case that we’ve found in Chicken with Chili: spices that traditionally would have been found in Berbere have been substituted for similar spices that are easier to source.
Feel free to add in your two cents. If you use Berbere powder or paste in your kitchen, comment and let us know what spices you like to use.

Read the Cookbook:
Chicken Terrapin
Chicken Terrapin, from the 1903 Good Housekeeping Everyday Cook Book, is a creamy and decadent casserole dish, perfect for using up leftover chicken. After selecting this recipe, my research began with the question "Why is this dish called Chicken TERRAPIN?" and quickly descended down a rabbit hole. Literally. Before beginning to piece together what I learned about Terrapin recipes, I had pulled my childhood copy of Alice in Wonderland off my bookshelf!
The chicken meat in this recipe is meant to take the place of Terrapin Turtle meat and I'll be delving into how one prepares Terrapin meat, the popularity of Turtle recipes, specialized Turtle Soup Tureens and the replacement of dishes featuring turtle meat with Mock Turtle recipes. I'll also explain the appearance of the Mock Turtle character in Alice in Wonderland, and why he is so melancholy in the story.

You'll find this recipe in:
Good Housekeeping Everyday Cook Book
New York, 1903
By: Isabel Gordon Curtis, Associate Editor of Good Housekeeping
Historic Recipe:
Chicken Terrapin
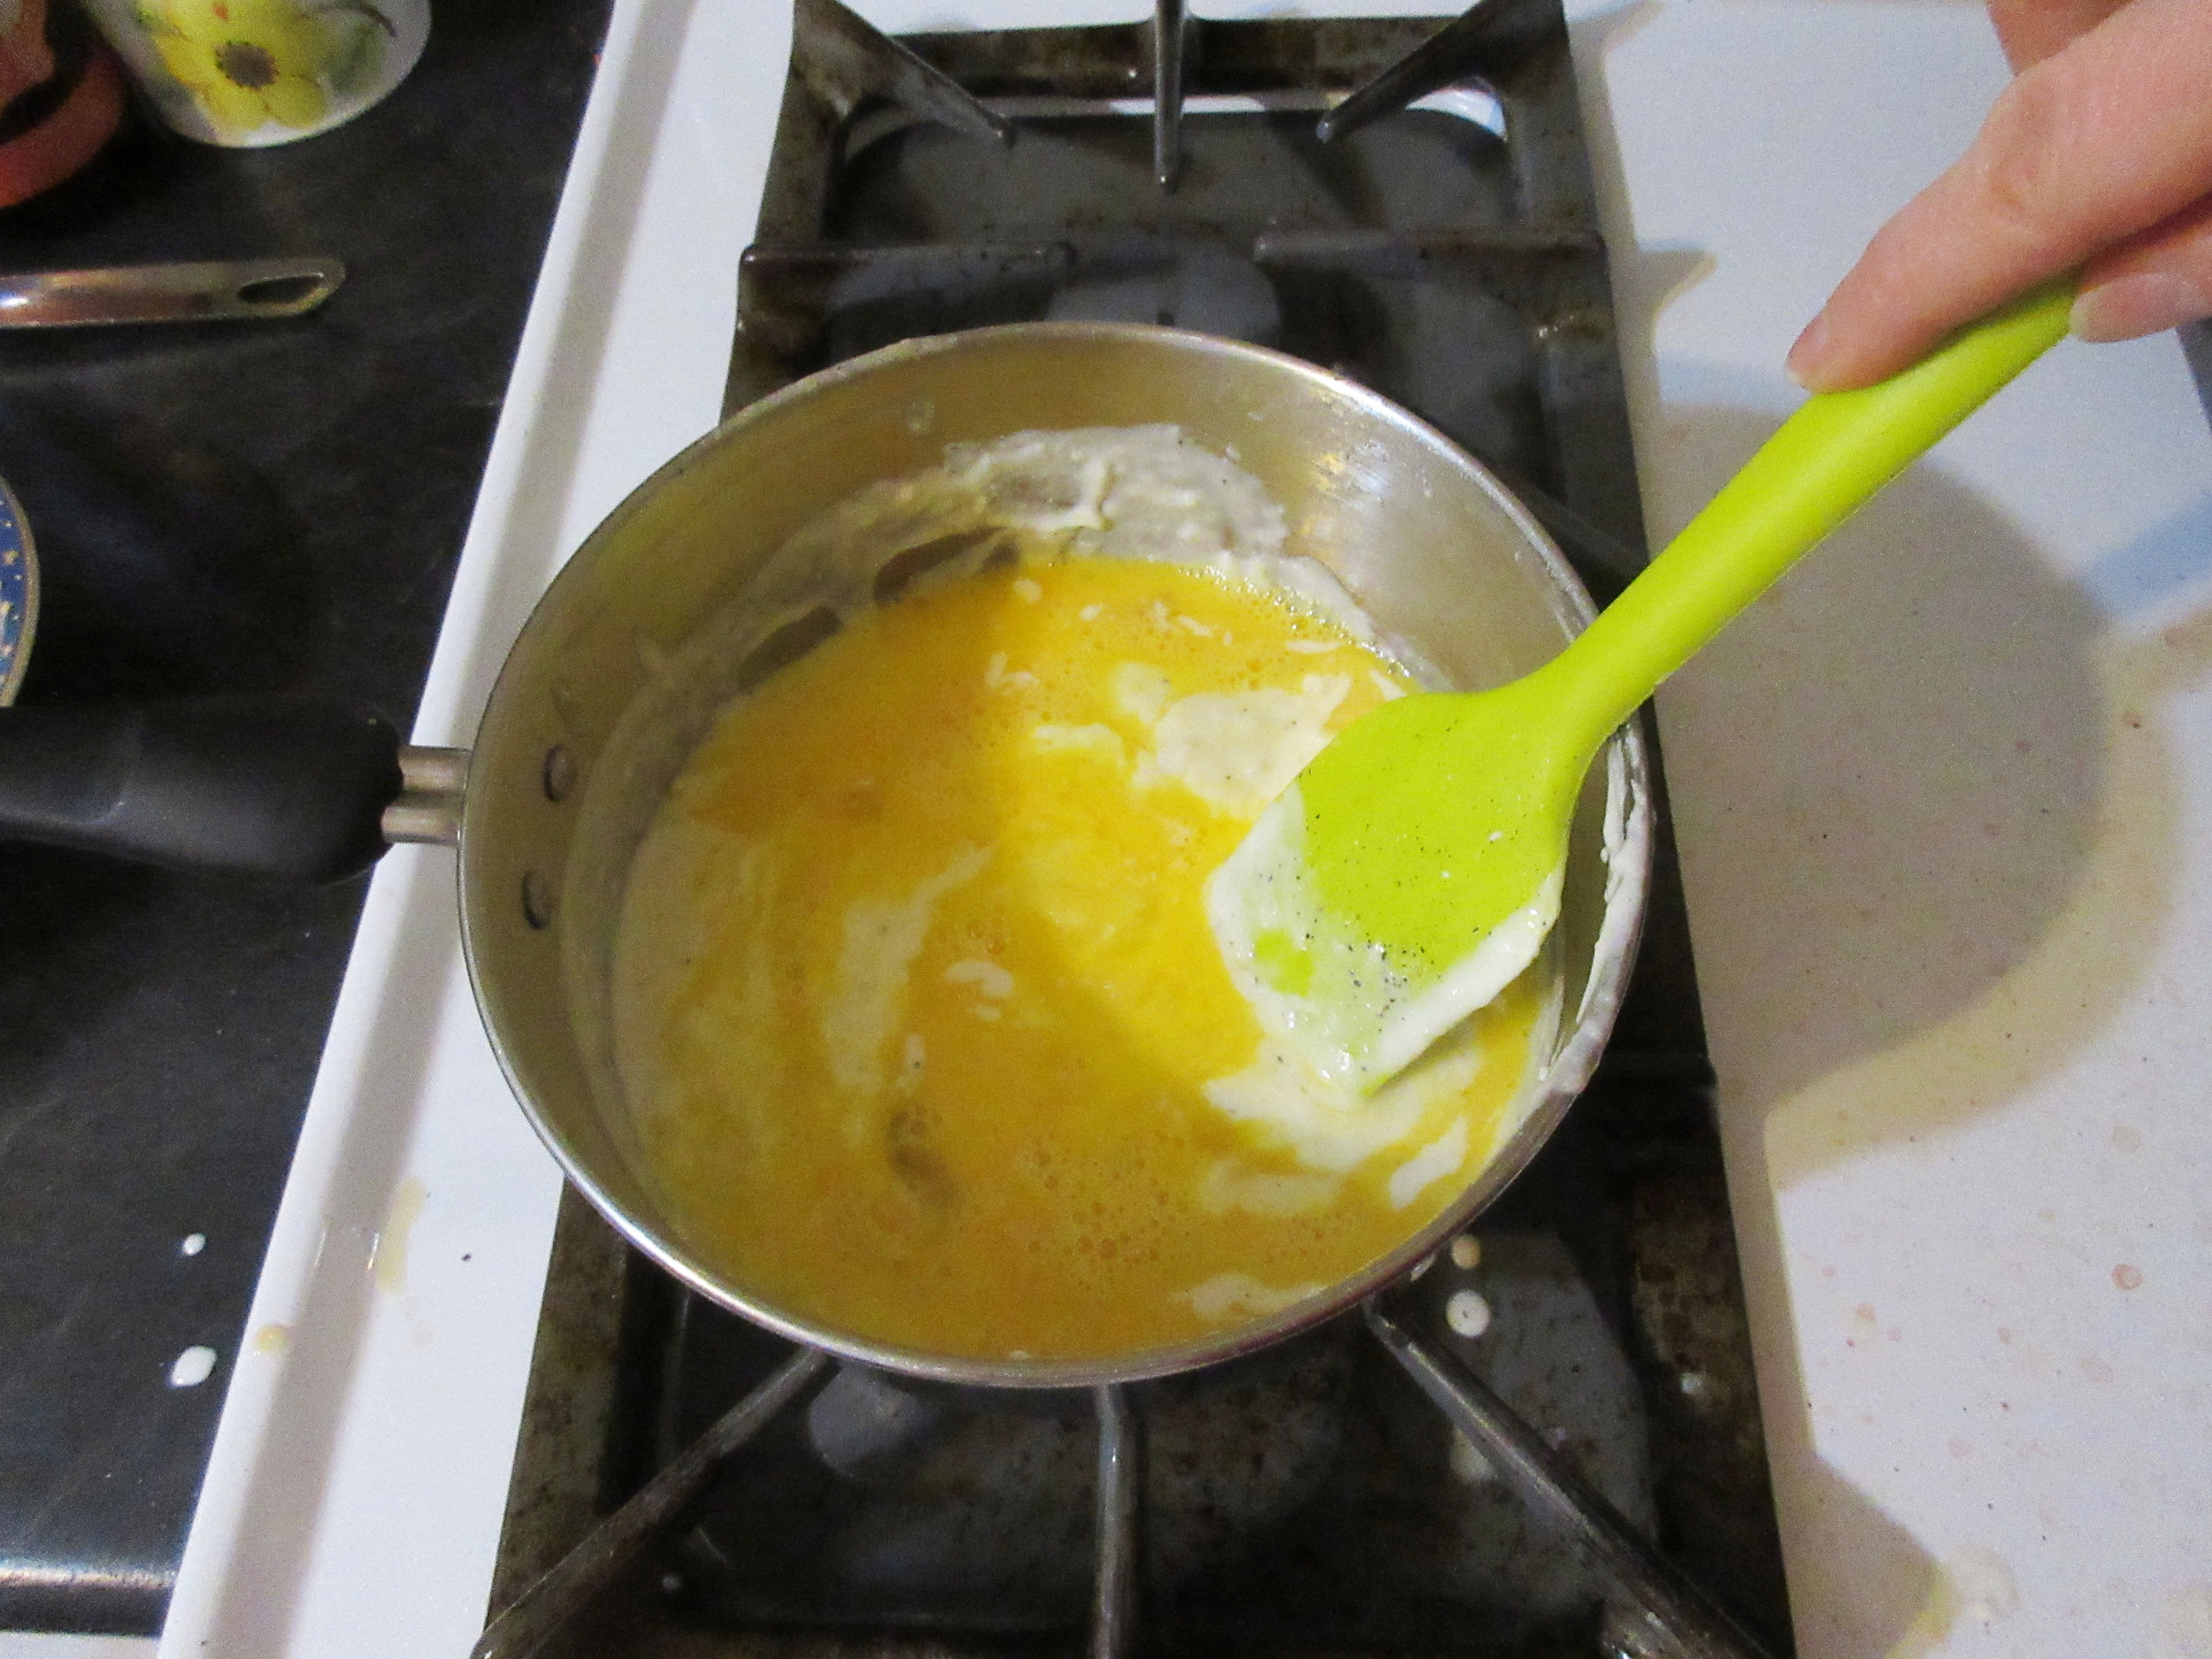
Make a sauce with two level tablespoons of butter, two of flour and one cup of cream, or half cream and chicken stock. Season with salt and pepper. When boiling hot remove from the fire, add two well-beaten eggs and one pint of chopped cold chicken. Butter individual dishes or one baking dish, pour in the chicken mixture and place the dishes in a pan of hot water. Spread crumbs on the top and bake in a moderate oven for twenty minutes. Serve at once.
My Recipe:
2 cups chicken meat, chopped - 350 g
2 tbsp butter
2 tbsp flour
1 cup (236 mL) cream, or 1/2 cup cream & 1/2 cup chicken stock
2 eggs
breadcrumbs
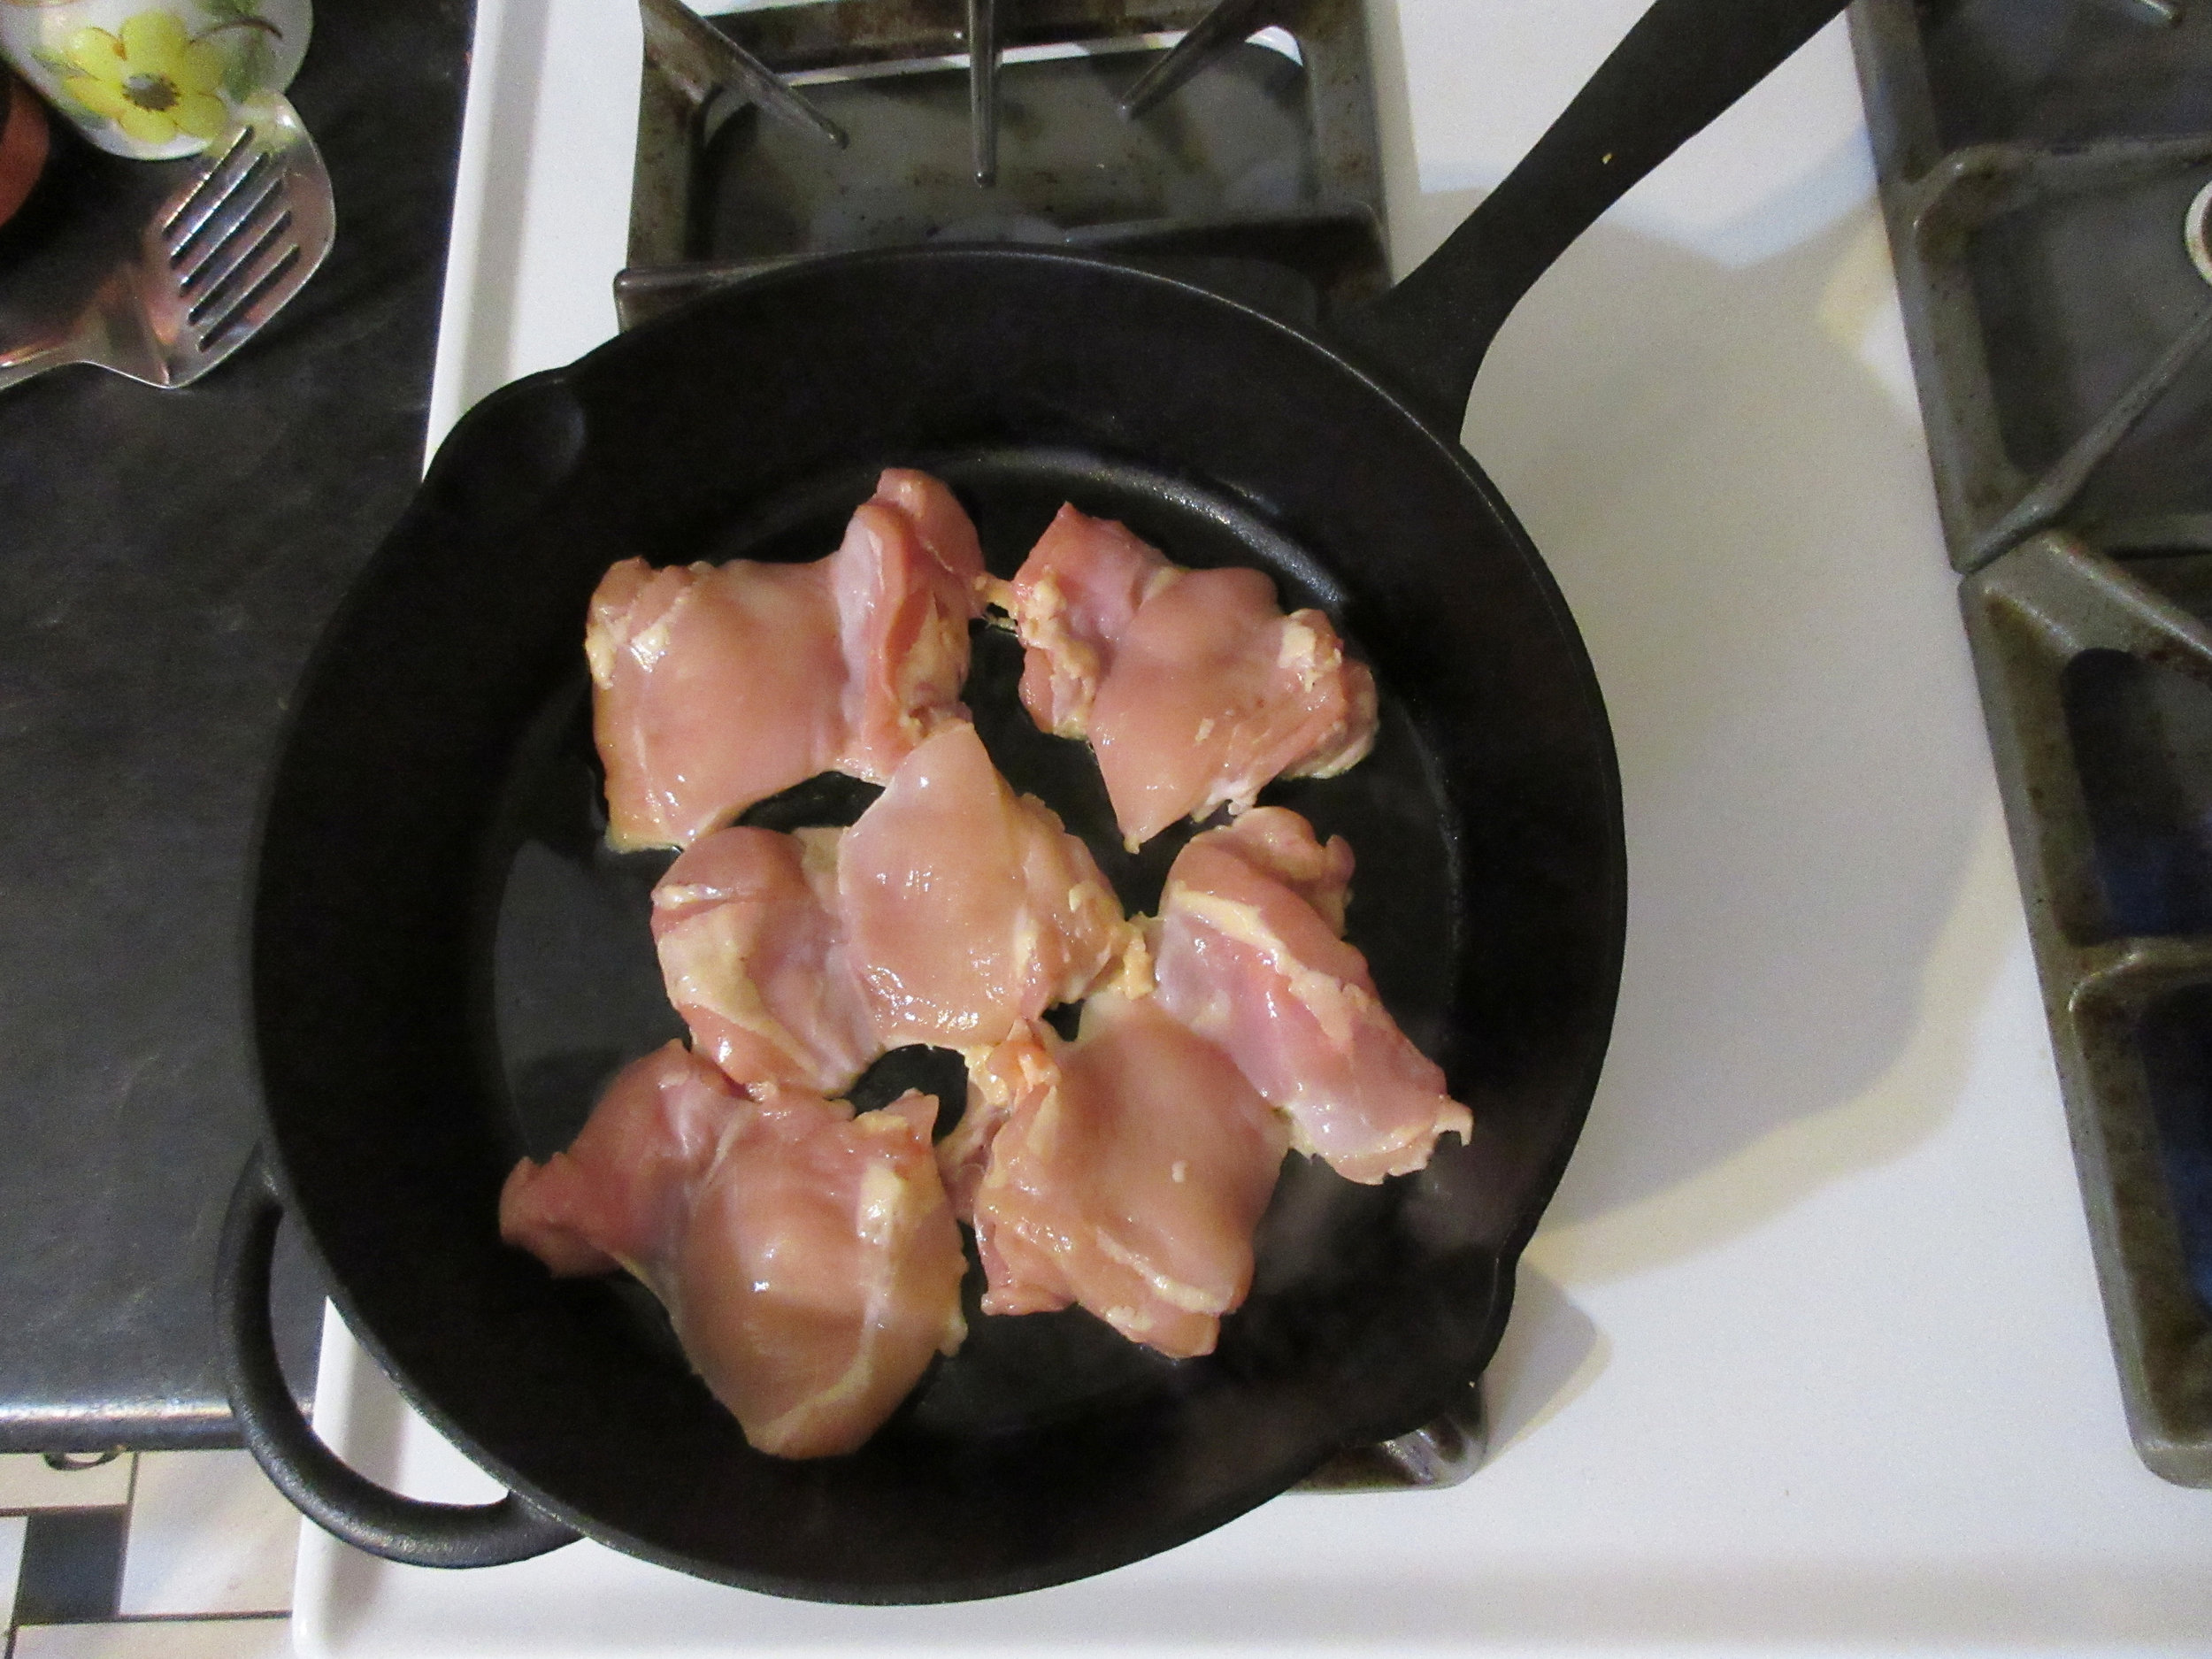
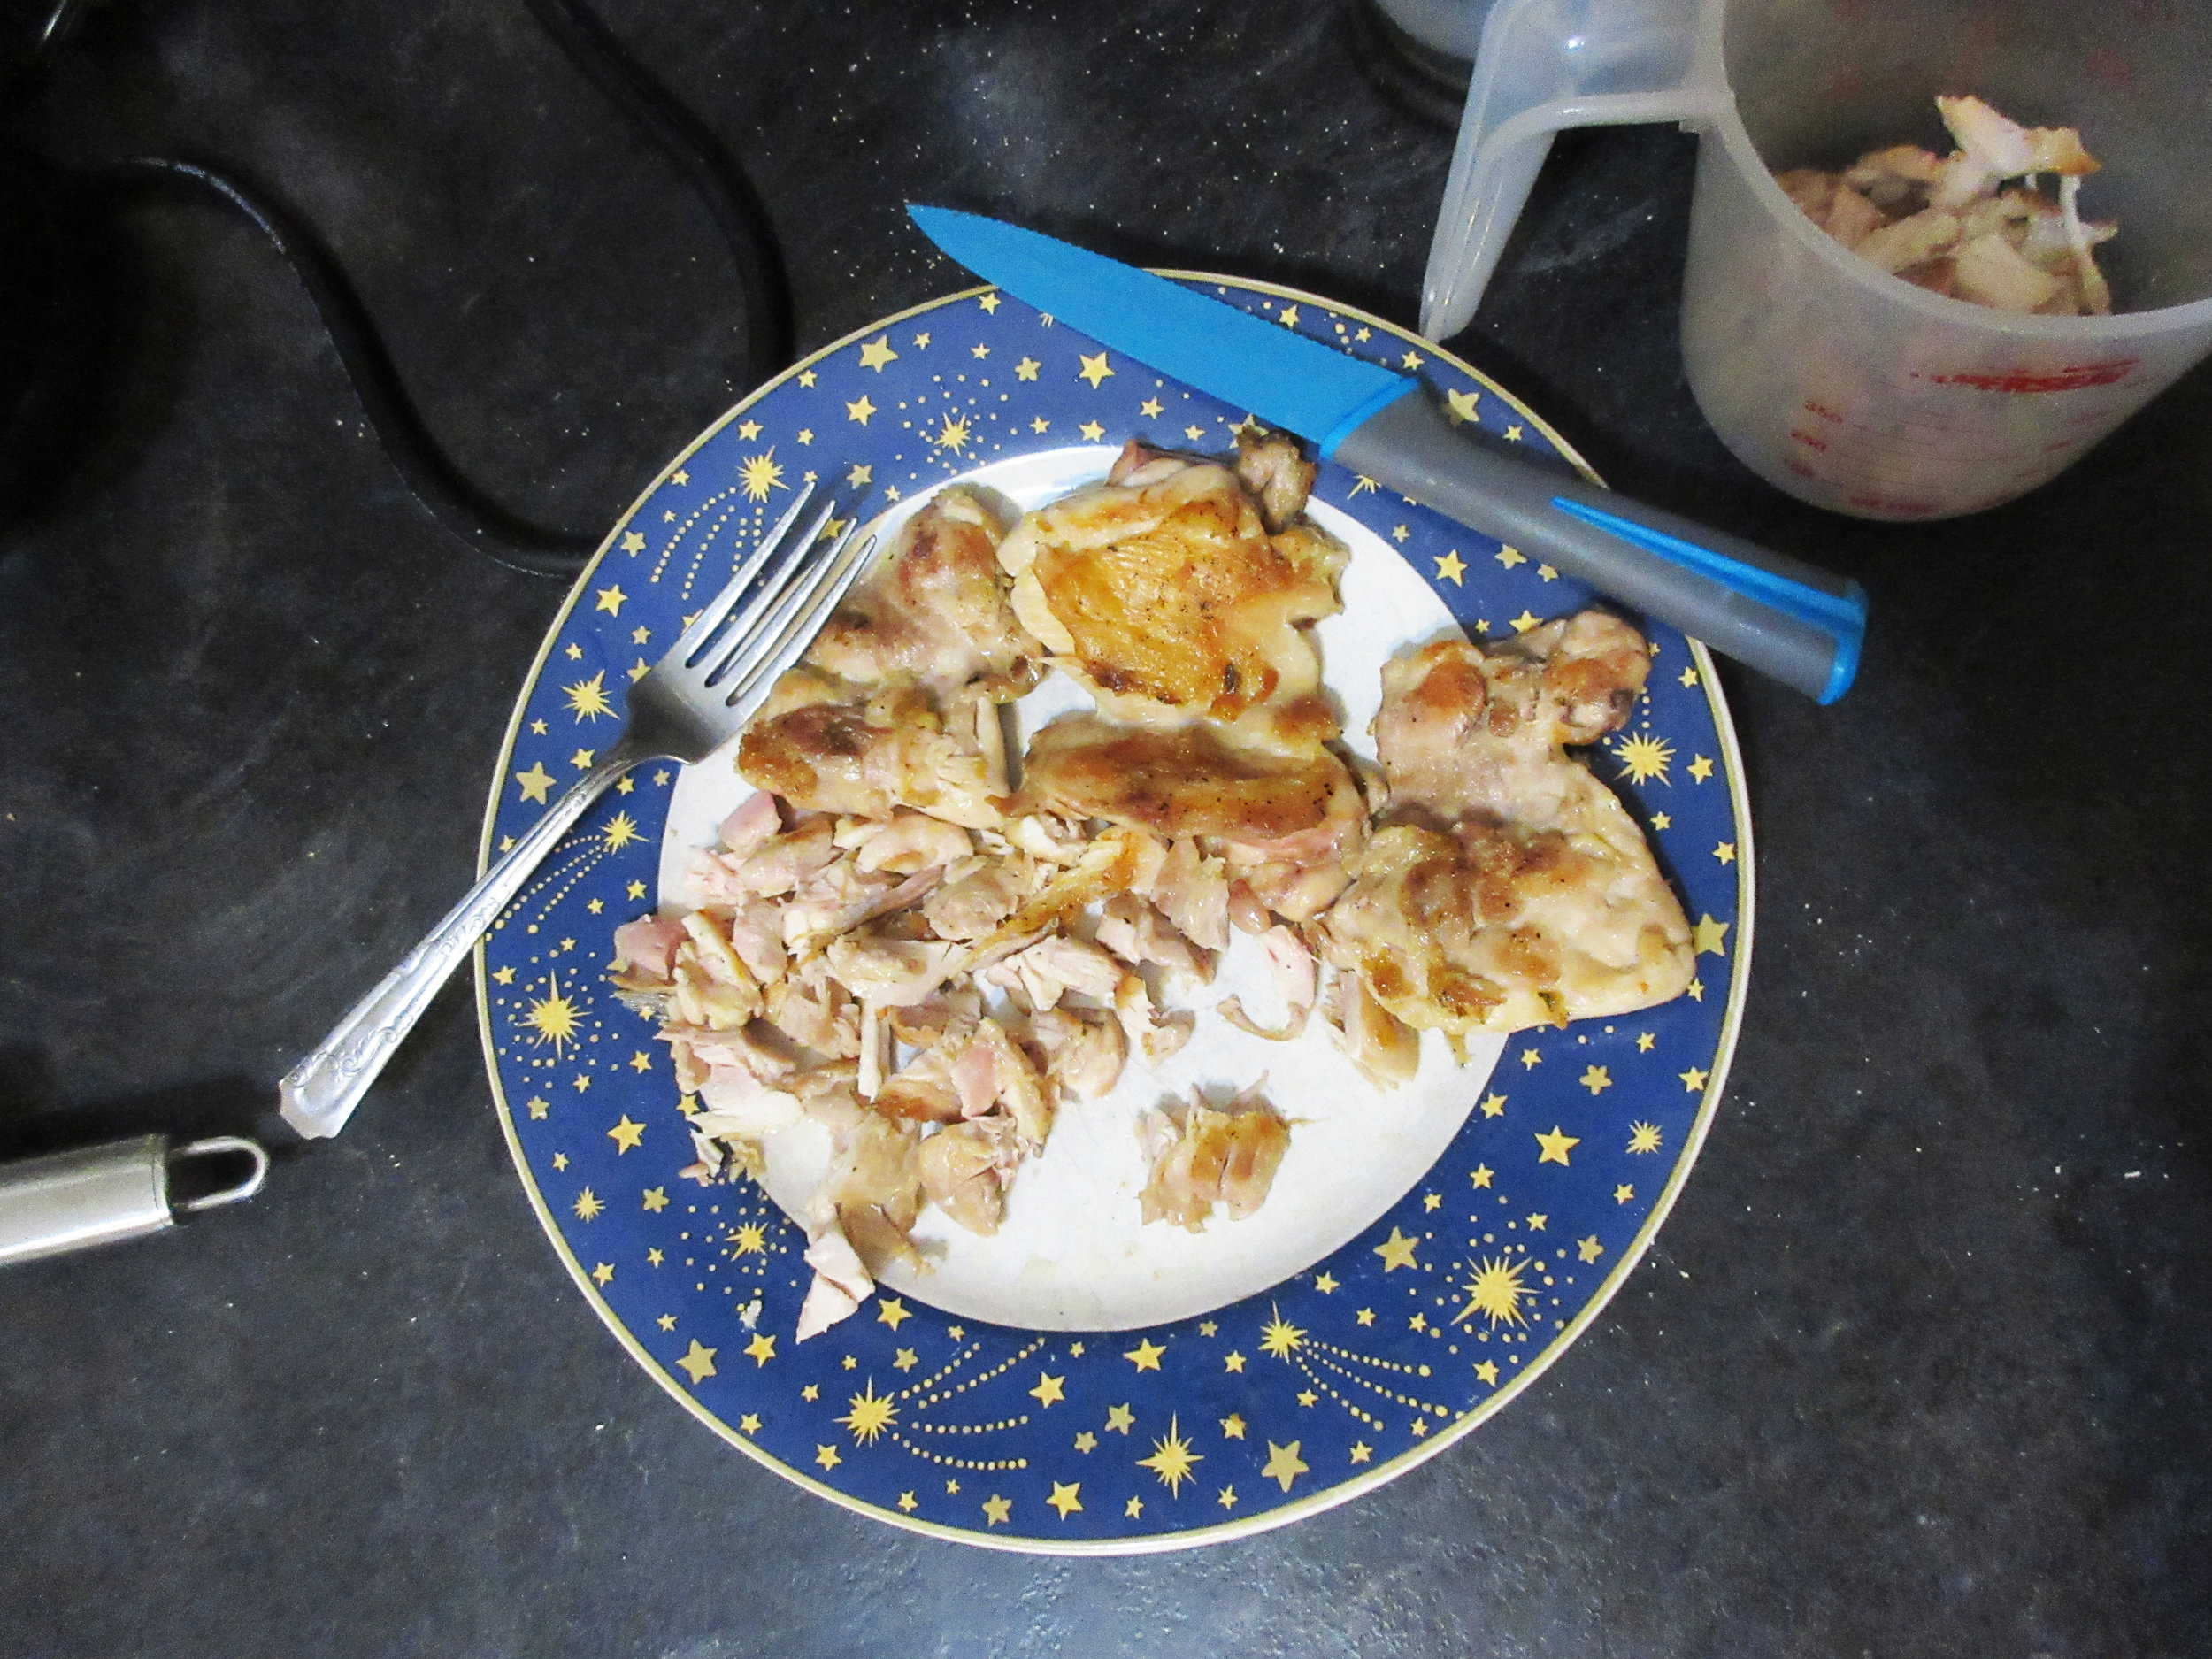
If you don't already have leftover chicken, begin by cooking and chopping the chicken meat. I fried chicken thighs in a frying pan.
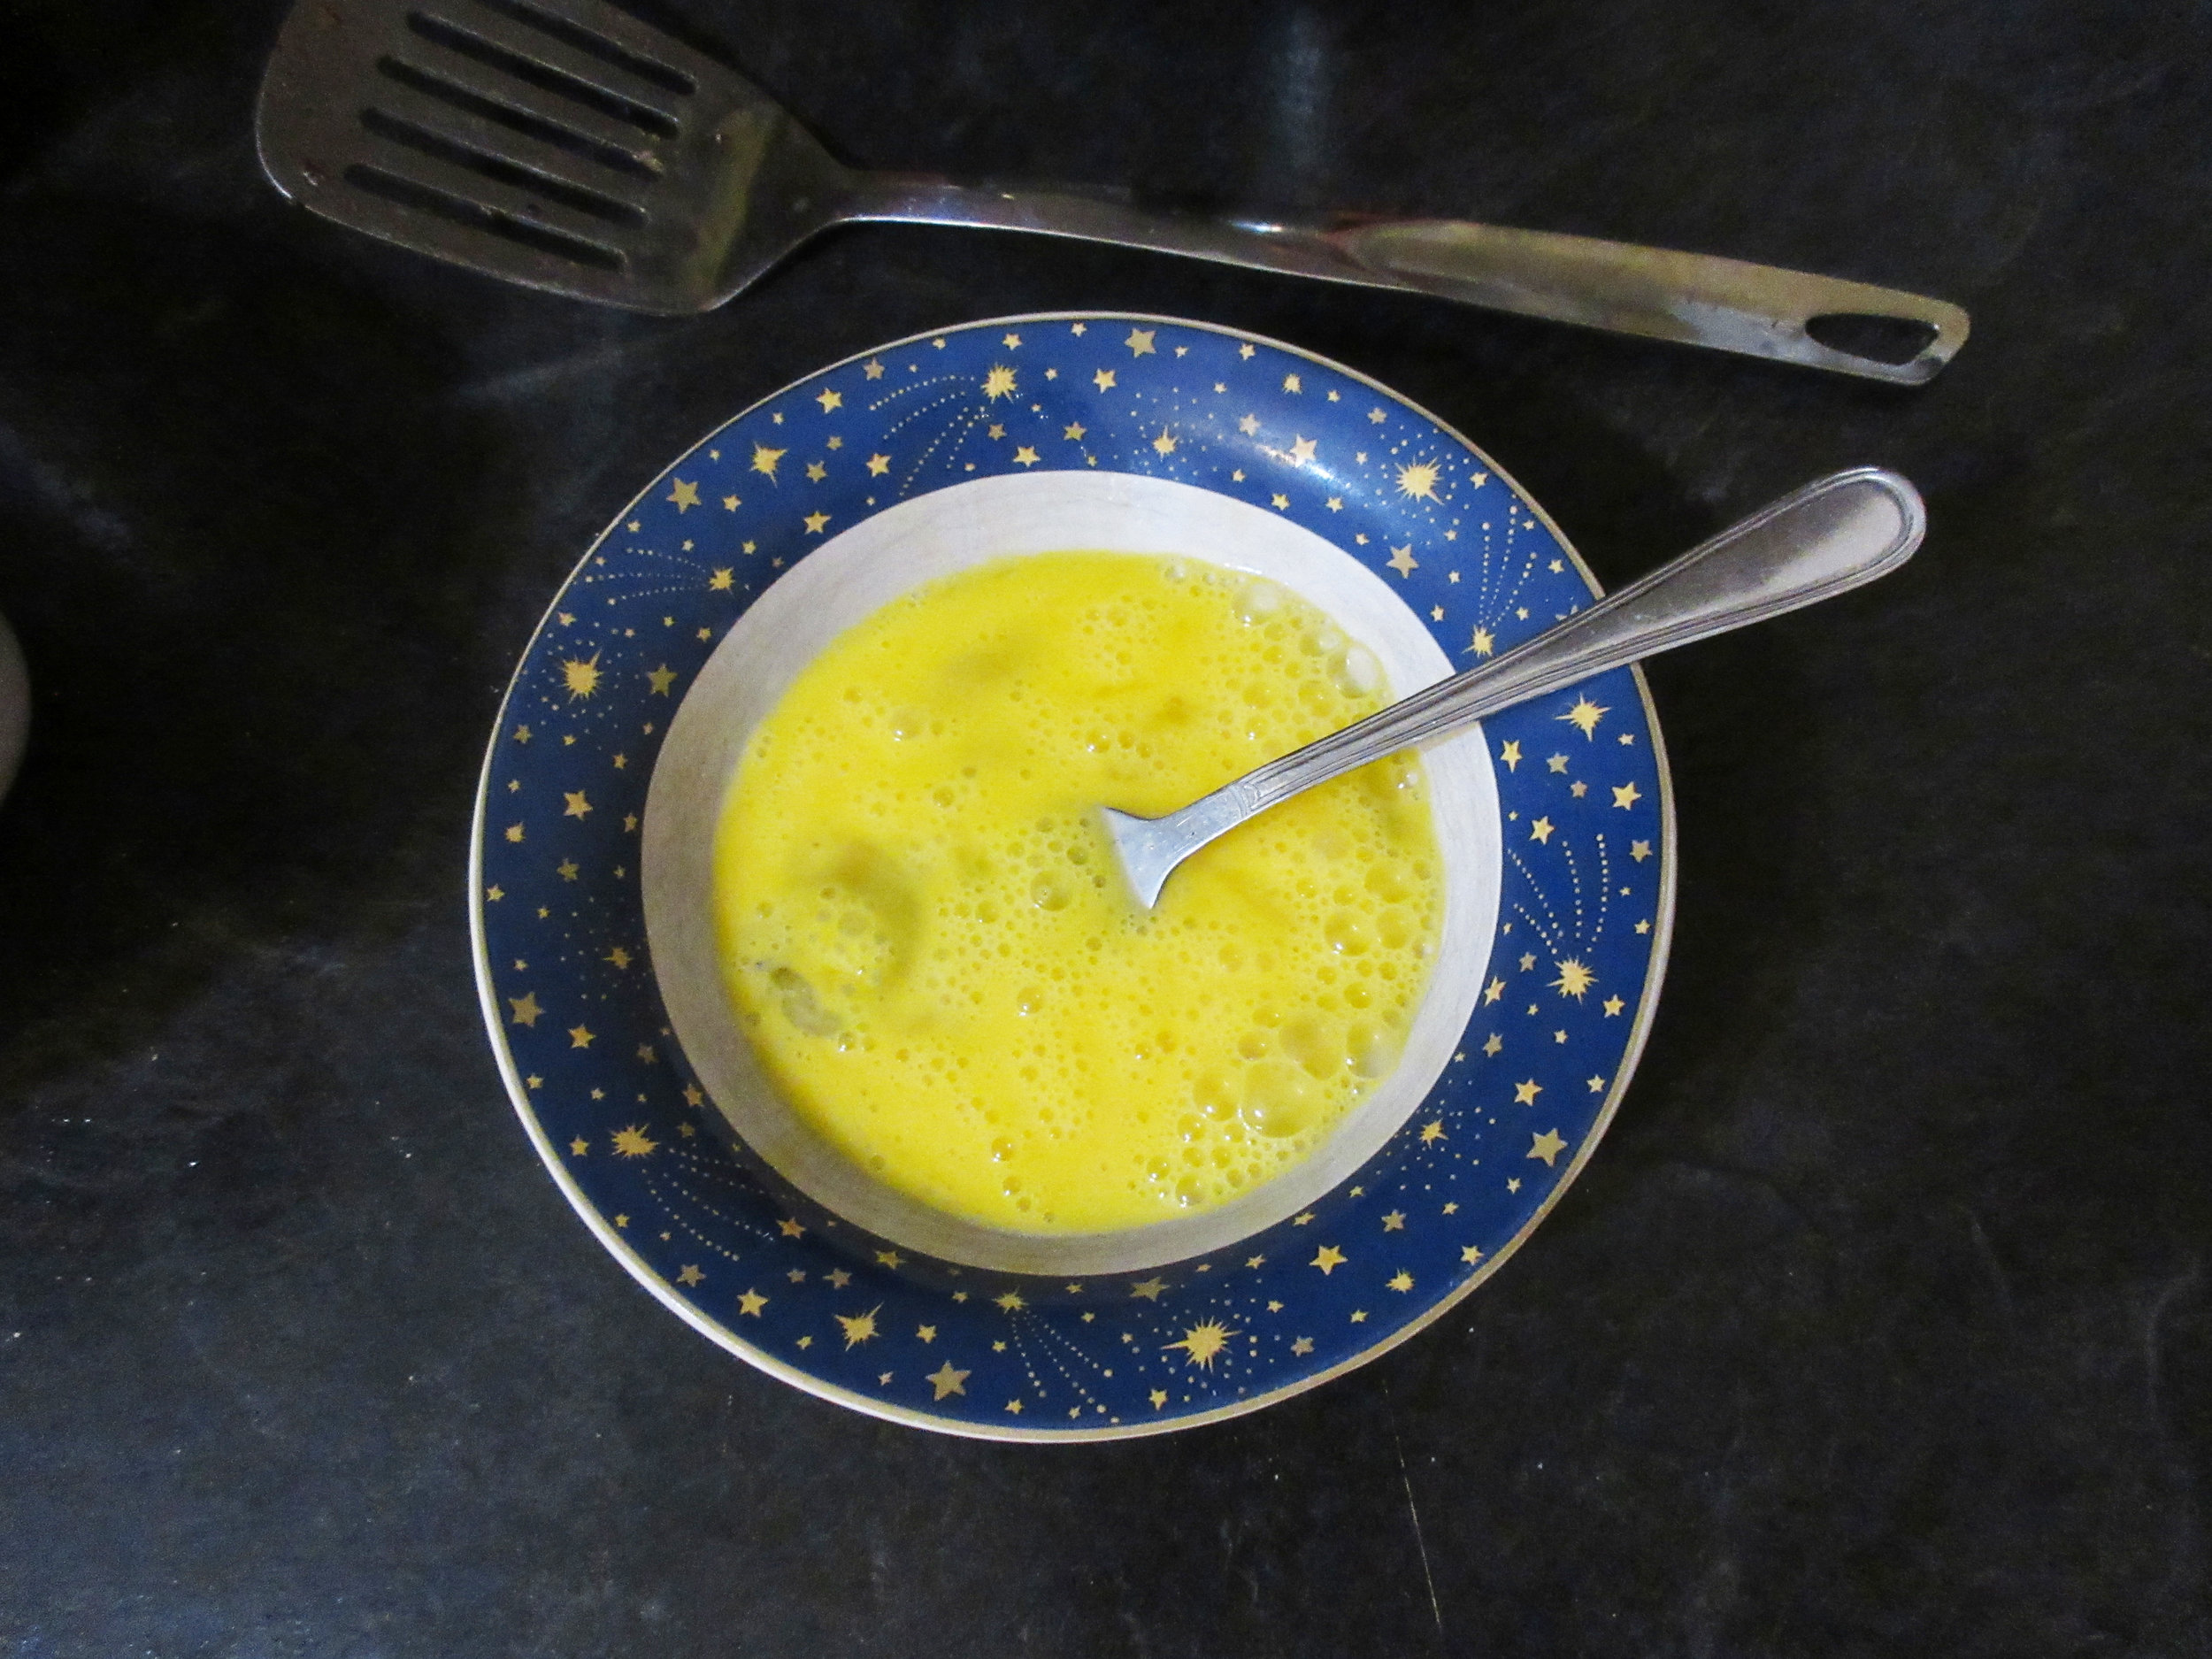
Preheat oven to 350 F/175 C. This recipe recommends either using one large casserole dish or individual ramekins. Grease your baking dish(es) and select a large baking dish or pan for your water bath that will fit the casserole dish or ramekins. Heat water in a kettle. Beat two eggs in a bowl.
To make the sauce, melt the butter in a saucepan, add the flour while stirring constantly, then gradually stir in the cream or cream and chicken stock. Stir until bubbling, then remove from heat. Stir in the eggs and chopped chicken. Pour the chicken mixture into your baking dish(es) and spoon breadcrumbs on top.
Place the casserole dish or ramekins in the water bath pan and pour about 1 inch (2.5 cm) of hot water from the kettle into the pan surrounding your baking dish(es). Ideally, you want to fill the water bath to cover roughly the bottom half of the chicken mixture in your casserole or ramekins. The water bath will prevent the eggs from curdling and will also prevent browning.
Bake for about 20 minutes. I lost track of time, so my Chicken Terrapin was cooked for about half an hour, and it turned out just fine.

After selecting this recipe, my research began with the question "Why is this dish called Chicken TERRAPIN?" and quickly descended down a rabbit hole. Literally. Before beginning to pull together what I learned about Terrapin dishes, I had pulled my childhood copy of Alice in Wonderland off my bookshelf!
The chicken meat in this recipe is meant to take the place of Terrapin Turtle meat. Turtle recipes were especially popular from the mid nineteenth-century to the early twentieth-century and partially fell out of popularity because the turtle population couldn't support the demand due to over-hunting and lost habitat.
Turtle recipes were also replaced with mock turtle recipes such as Chicken Terrapin because turtles were expensive, tricky to source and very difficult to cook! In the 1851 Miss Leslie's Directions for Cookery , Eliza Leslie writes at the end of her Mock Turtle Soup recipe that "We omit a receipt for real turtle soup, as when that expensive, complicated, and difficult dish is prepared in a private family, it is advisable to hire a first-rate cook for the express purpose. An easy way is to get it ready-made, in any quantity you please, from a turtle-soup house."
How does one prepare Terrapins? Eliza Leslie tells us in the same cookbook. She instructs us to put them alive in a pot of boiling water "and let them remain in until quite dead". The cook would then remove them from the water to pull off the skin and toenails, then boil them again in a pot of salted water until "the flesh becomes quite tender so that you can pinch it off". Once out of the water, the cook should "take them off the shell, remove the sand-bag, and the gall, which you must be careful not to break, as it will make the terrapin so bitter as to be uneatable."
Miss Leslie suggests seasoning the chopped terrapin meat with cayenne pepper, nutmeg and mace, then continues on to suggest serving the terrapin with sauce made with butter, flour, Madeira wine and two beaten eggs. Sound familiar?
300 ways to cook and serve shellfish : terrapin, green turtle, snapper, oysters, oyster crabs, lobsters, clams, crabs and shrimp , 1901, is a source closer to the 1903 publishing date of the Good Housekeeping Everyday Cookbook, and author H. Franklyn Hall gets quite specific about preparing all the shellfish listed in the title. Terrapins have their own chapter in this cookbook.
If boiling terrapins alive makes you feel squeamish, you'll be relieved to find out that Hall suggests killing them in advance. In fact, he advises that cooks leave the slaughtered terrapins "in clear running water from twelve to thirty-six hours" before cooking.
"Wash them in luke-warm water, then dip them in scalding hot water several times; place them one at a time on their back on a table and take a small clean towel and quickly but gently, so as not to tear the flesh, rub all of the outer skin from the head, neck, legs and tail. After all are prepared in the above manner, place them in a pot of boiling water and boil steadily until the legs can be easily separated from the body without any effort. It usually takes from thirty to seventy-five minutes to boil terrapin, sometimes a little longer it all depends upon the age and condition of the terrapin."
Our Chicken Terrapin recipe is similar to the Stewed Terrapin a la Virginia recipe in 300 ways to cook and serve shellfish, and it is suggested that stewed terrapin dishes should use "salt water or diamond back terrapin only...providing they are fat". Stewed Terrapin a la Virginia features a sauce made of butter, broken crackers, cream and chopped parsley. Hall suggests serving the Stewed Terrapin in individual silver tureens or fine china dessert plates. Turtle recipes were popular enough that specific turtle-inspired tureens were created for those who could afford that bit of whimsy. Have a look below at a couple of gorgeous turtle tureens, as well as a photograph of a diamondback terrapin before meeting its end in somebody’s kitchen.


Left to right: Diamondback Terrapin and Turtle Soup Tureens from the Collections of Colonial Williamsburg (c. 1815) and Cooper Hewitt, Smithsonian Design Museum (c. 1880-90)
Then the Queen left off, quite out of breath, and said to Alice, "Have you seen the Mock Turtle yet?"
"No," said Alice, "I don't even know what a Mock Turtle is."
"It's the thing Mock Turtle Soup is made from," said the Queen.
"I never saw one or heard of one," said Alice.
"Come on then," said the Queen, "and he shall tell you his story."
I've heard of Mock Turtle Soup since i was a girl, thanks to the Mock Turtle character in Alice in Wonderland, but I never was fully in on the joke until I started my career in museums. I clearly remember the shock I felt the first time I flipped through a historic cookbook and came across a recipe for Mock Turtle Soup, and suddenly this character made much more sense to me!
Lewis Carroll doesn't actually physically describe the Mock Turtle in the book, other than the fact that he has flappers and is constantly sobbing because "Once...I was a real Turtle." Illustrations depict the Mock Turtle with the body of a sea turtle, hooved hind legs and the head & tail of a calf.

Alice in Wonderland illustration by John Tenniel (1865), depicting the Gryphon, Alice and the Mock Turtle
Let's return to Miss Leslie's Directions for Cookery for a sample Mock Turtle Soup recipe, shall we? I can't imagine how complicated making Turtle soup is, if Mock Turtle Soup is supposed to be simpler. Miss Leslie begins the recipe by stating that "This soup will require eight hours to prepare."
The cook begins with a large calf's head, which she will have prepared by cleaning and soaking. The calf's head, bacon, a knuckle of veal and a ham hock are covered in water in a large pot. The meats are boiled slowly for about four hours, making sure to skim the foam off the top regularly.
Then root vegetables and herbs are added and the pot is boiled for three more hours: "As soon as no more scum rises, put in six potatoes, and three turnips, all sliced thin; with equal proportions of parsley, sweet marjoram, and sweet basil, chopped fine; and cayenne pepper to your taste. The ham will salt it sufficiently."
At hour seven, the cook is instructed to make veal meatballs, which she rolls in flour and fries in butter. After the meatballs are completed, she removes all the meat from the pot and "Cuts the meat from the head in small pieces, and return it to the soup", along with the meatballs. When the soup is close to completion, stir in some Madeira wine, the juice of a lemon and about a dozen egg balls "in the form and size of boy's marbles", made of hard boiled egg yolks held together with raw egg yolks. Bring to a boil again and serve in a soup tureen. What a marathon!
The Mock Turtle sighed deeply and began, in a voice sometimes choked with sobs, to sing this:
"Beautiful Soup, so rich and green,
Waiting in a hot tureen!
Who for such dainties would not stoop?
Soup of the evening, beautiful Soup!"
I remember that day about a decade ago when I was sitting in the museum office, flipping through reprints of Victorian cookbooks to find recipes to make with campers at our Day Camp. When I came across my first Mock Turtle Soup recipe, before reading it I thought that it would be very interesting to make with the campers, knowing that some of them would be familiar with Alice in Wonderland. Then I read the ingredients and how long it would take to prepare and that idea went out the window! How many crying children and complaining parents would be born out of cooking with a calf's head at Day Camp?
Once I understood the Mock Turtle Soup recipe, I understood the Mock Turtle's appearance and why he felt melancholy. With time, the Turtle transformed into a Mock Turtle with body parts of the livestock that came to replace turtle meat in soups. Between tears, the Mock Turtle regales Alice with songs, stories and dance about the better days when he was a Real Turtle - his studies in school, the glorious Lobster Quadrille and finally a ballad about a Beautiful Soup idealized in his memory. Maybe this character mirrors Lewis Caroll's sentiments about a better time when Turtle Soup was available in abundance, and had mostly been replaced by a soup that sadly and vaguely mirrored the original.

Read the Cookbook:

Piquant Beets
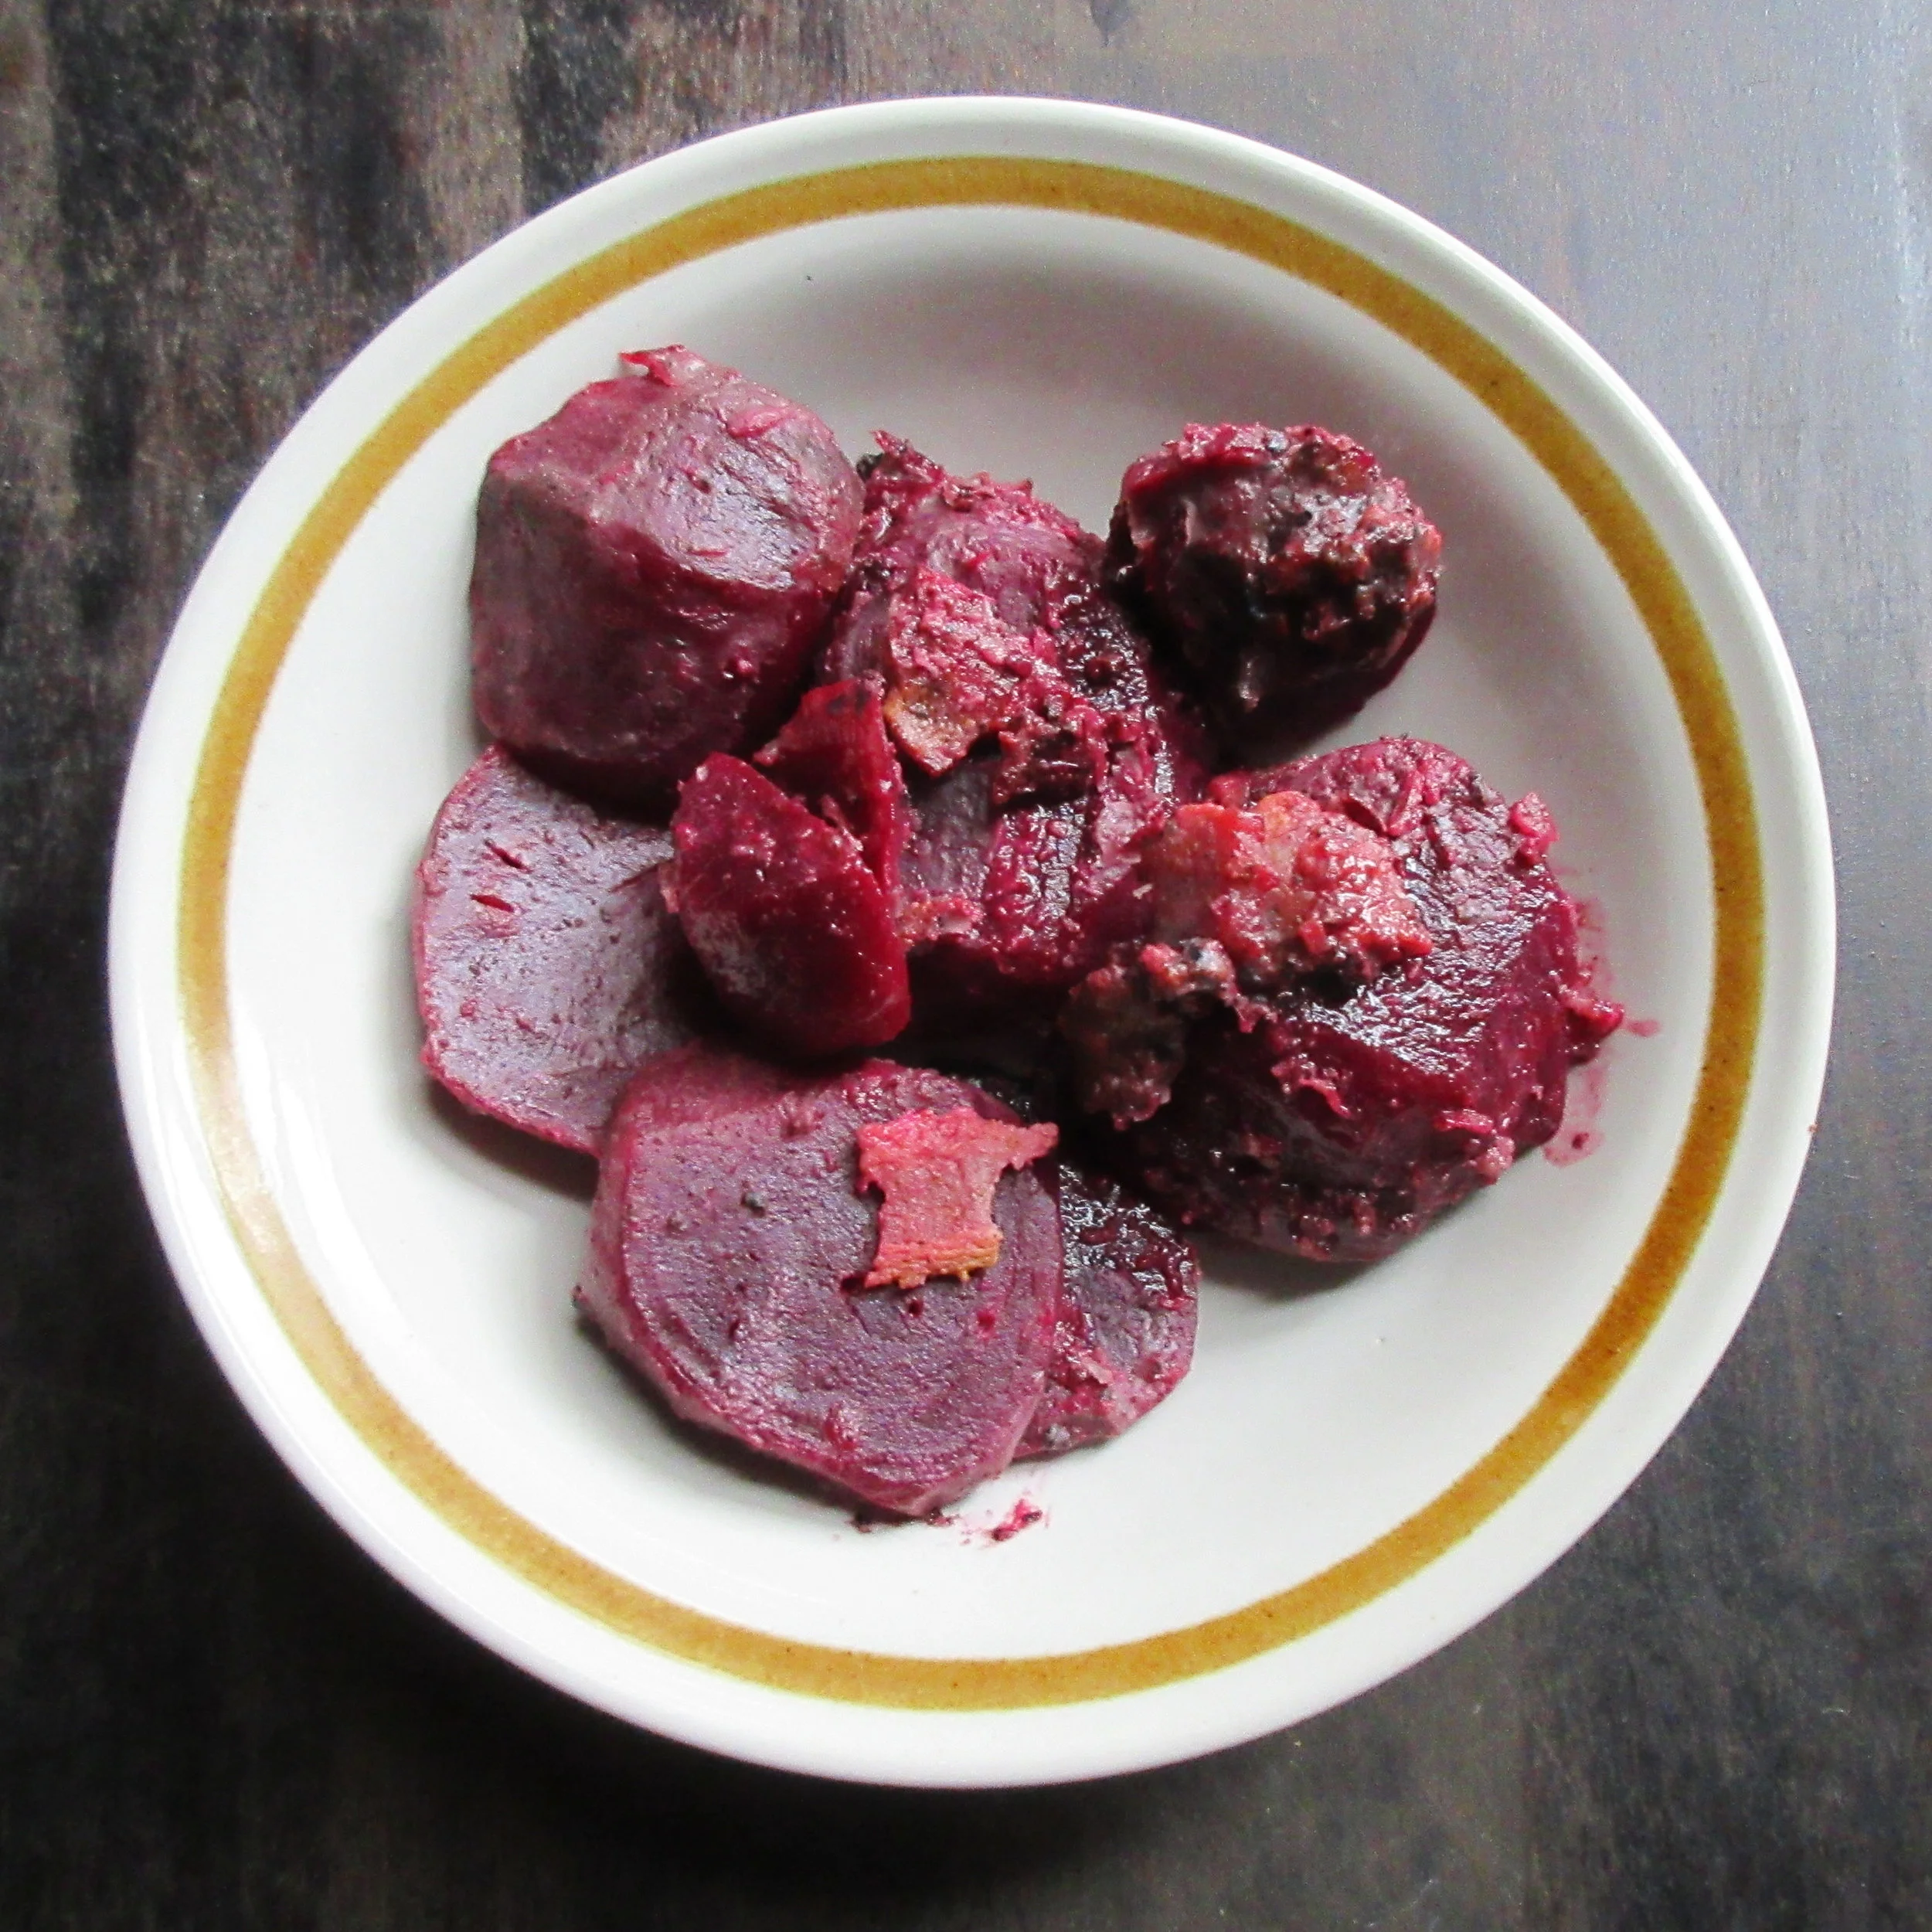
I'm not a fan of the taste of beets, although I have evolved enough to abide roasted and pickled beets on occasion. I liked Piquant Beets, though, and I can't say that I've ever thought that about a recipe made with boiled beets! This recipe takes those (in my mind at least) repulsive boiled beets and jazzes them up with horseradish, honey, lemon juice and...wait for it...bacon. Steve's response to tasting this dish was, "I don't even mind the beets", which is probably the highest praise he could give to this recipe. We can thank Elaine Collett and Mary-Etta Macpherson, who compiled the 1965 Canadian classic The Chatelaine Cookbook, for this culinary miracle.

You'll find this recipe in:
The Chatelaine Cookbook
Toronto, 1965
By: Elaine Collett
Edited by: Mary-Etta Macpherson
PIQUANT BEETS
3 slices side bacon, diced
2 tsp prepared horseradish
2 tsp honey
2 tsp lemon juice
4 cups sliced cooked beets
½ tsp salt
Sauté bacon in saucepan until crisp. Turn heat low and add next three ingredients. Stir in beets, sprinkle with salt, cover; let heat thoroughly. Serves 8.


My thoughts:
To cook the beets, I sliced off the ends and boiled in a pot of water. Begin this process well in advance, because it took 1 hour and 15 minutes until the beets were cooked. After I drained them, I submerged them in cold water until they were cool enough to handle and they were easy to peel and slice. For those of you who are accustomed to measuring beets by weight, 4 cups of cooked and sliced beets amounts to 650 g.
I did ere on the side of accuracy and initially only added the 3 slices of diced bacon in the recipe. It was good, but I have to admit that as I was eating the beets, I did sprinkle more bacon on top and it was even better.

I'm not a fan of the taste of beets, although I have evolved enough to abide roasted and pickled beets on occasion. I liked Piquant Beets, though, and I can't say that I've ever thought that about a recipe made with boiled beets! This recipe takes those (in my mind at least) repulsive boiled beets and jazzes them up with horseradish, honey, lemon juice and...wait for it...bacon. Steve's response to tasting this dish was, "I don't even mind the beets", which is probably the highest praise he could give to this recipe.
We can thank Elaine Collett and Mary-Etta Macpherson, who compiled the 1965 Canadian classic The Chatelaine Cookbook, for this culinary miracle. Chatelaine magazine is a Canadian woman's magazine that began publication in 1928, and is still a top magazine in Canada today. The book jacket explains that the editors narrowed down the contents of the book to roughly 1600 recipes from the over 10, 000 recipes that appeared in Chatelaine in its firsts 30 years of publication.
In her Introduction, Elaine Collett credits the collective effort responsible for the cookbook: "The old saying 'Too many cooks spoil the broth' just must be wrong. Because this first (and only) CHATELAINE Cookbook is the work of hundreds of Canadian cooks. For over thirty years in our CHATELAINE Institute kitchens we have created recipes for the homemakers of Canada and we have been guided in our planning by your letters, your questions and by the recipes you have shared with us year by year in our Family Favourites Recipe Contests."
I lucked out and found my copy at my favourite place to find vintage cookbooks in Hamilton, Bibles for Missions Thrift Store. I was lucky because not only is my copy in great condition, but it has the first owner's name and address written inside, and also came along with bonus newspaper clippings and handwritten recipes, as well as a bandaid and a plastic bag that must have been used as bookmarks. It's a treasure trove!
I have enough ideas for blog posts to tide me over until sometime in 2020 right now, but you know you're going to see at least one of those clipped and handwritten recipes on here at some point.
Want to read more?
Read the latest from Chatelaine Magazine: https://www.chatelaine.com/
The Special Collections & Archives at the University of Waterloo (my alma mater) has a blog post with a succinct summary of the editorial focus of the magazine over the years and some scans from a 1971 edition of Chatelaine.
There's a book written by Valerie J. Korinek about this era of the magazine called Roughing it in the Suburbs: Reading Chatelaine Magazine in the Fifties and Sixties
I normally link to digitally-archived copy of the featured cookbook so you're able to read the book yourself, but I couldn't find one this time around. Let me know if you know where to find a scanned copy online – I'd love to link to it
To Fry Fish
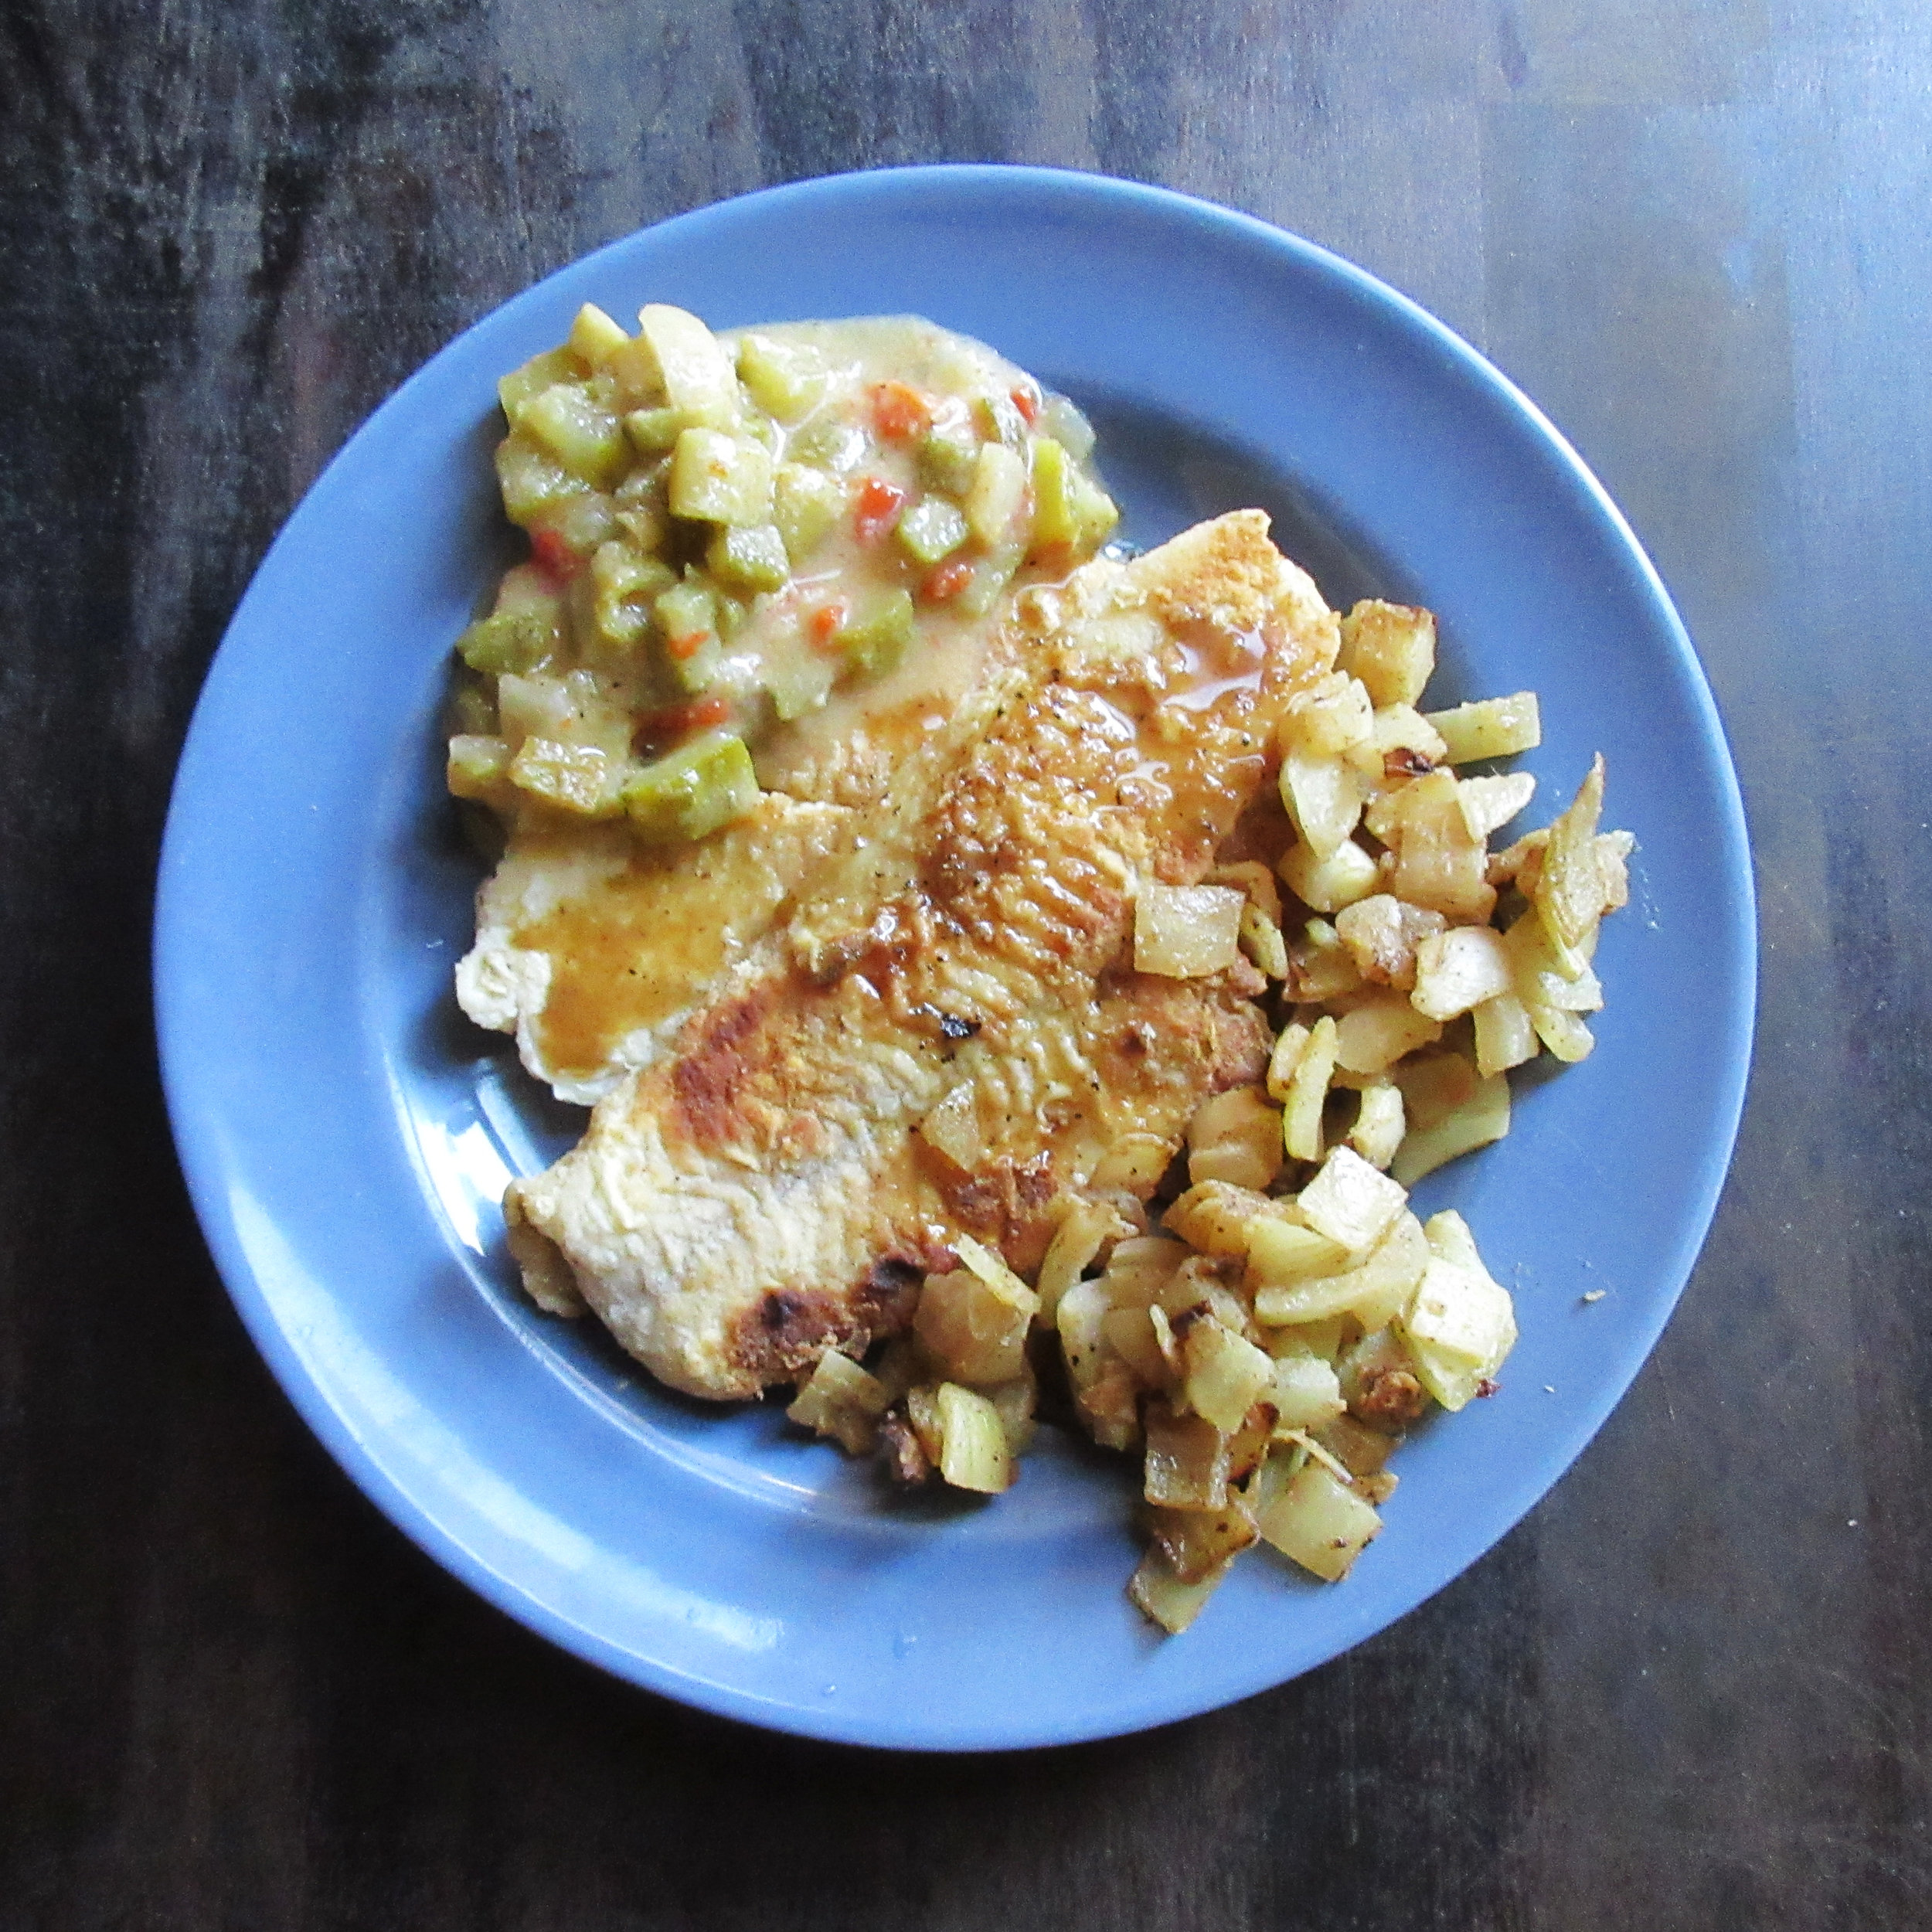
To Fry Fish is found in A Plain Cookery Book for the Working Classes, written by Charles Elmé Francatelli in London in 1852. Fortunately, I had some bacon fat in my fridge, so that's what I used to fry my fish. Let me tell you, fish dredged in flour and fried in bacon fat is scrumptious, and so were the fried onions that we ate on the side. I paired the fish with Sharp Sauce for Broiled Meats from the same cookbook. The main component of this sauce is a variety of pickles and it reminds of relish, albeit without the sweetness. I round out this blog post by delving a little bit into the Fish Slice, a serving utensil for fish.

You'll find this recipe in:
A Plain Cookery Book for the Working Classes
By Charles Elmé Francatelli
”Late Maître d’hôtel and Chief Cook to Her Majesty the Queen Victoria”
London, 1852
The Sauce:
'Sharp Sauce for Broiled Meats' goes very well with the fried fish recipe (which you'll find below). The main component of this sauce is a variety of pickles and it reminds of relish, albeit without the sweetness. I ended up with a double batch of this sauce, so before it was finished, I had eaten it with fish, sausages, chicken and pierogies. It paired well with everything, but it was especially delicious with the sausages.
No. 21. SHARP SAUCE FOR BROILED MEATS
Chop fine an onion and a pennyworth of mixed pickles; put these into a saucepan with a half-a-gill of vinegar, a tea-spoonful of mustard, a small bit of butter, a large table-spoonful of bread-raspings, and pepper and salt to season; boil all together on the fire for at least six minutes; then add a gill of water and allow the sauce to boil again for ten minutes longer. The sauce will give an appetizing relish to the coarsest meats or fish when broiled or fried, and also when you are intending to make any cold meat into hash or stew. In the latter case, the quantity of water and raspings must be doubled.


My Recipe:
1 small onion
1 ¼ cups mixed pickles – 225 g
(I used pickled green beans, cucumbers and red peppers)
⅔ cup apple cider vinegar – 156 mL
1 tsp mustard powder
1 tbsp butter
2 heaping tbsp breadcrumbs (this is double the historic recipe)
Salt and pepper to taste
1 ¼ cups water – 300 mL
Honey to taste (optional – not in the historic recipe)
Finely chop the onion and the pickles. Put in a small saucepan with the vinegar, mustard powder, butter, breadcrumbs, salt and pepper. Simmer over medium for 5-10 minutes, then add the water. Allow to bubble for at least another 10 minutes. Add honey to taste, if desired.
My thoughts:
A big issue with this recipe is the measurement of using "a pennyworth of mixed pickles", which literally means "an amount of pickles worth a penny" and is not very instructive for those of us living today! I just guessed and I think it was a good ratio for pulling an amount out of the air. I did find that I needed to double the breadcrumbs to thicken the liquid enough for a sauce, and maybe I wouldn't have had to if I had put more chopped pickles in the pot.
I'm usually a stickler for historical accuracy, but I HAD to add a bit of honey to this recipe to cut the edge from the extreme vinegariness of this sauce! When I sampled it from a spoon when it was cooking, I would immediately start coughing: not a desirable trait for a sauce. I didn't add enough honey to sweeten the sauce , just enough so I could actually eat it. You may like it without the honey, though.

The Fish
Fortunately, I had some bacon fat from when I made Piquant Beets, so that's what I used for frying my fish. Let me tell you, fish dredged in flour and fried in bacon fat is scrumptious, and so were the fried onions that we ate on the side.
No. 121. TO FRY FISH.
For this purpose you must have some kind of fat. Either lard, butter, or dripping fat, would be excellent; but they must be bought, and cost a little money. True; but then, if you can afford yourselves a bit of meat occasionally, by dint of good thrift you should save the fat from the boiled meat, or the dripping from your baked meats, and thus furnish yourselves with fat for frying your fish twice a-week; and let me tell you that by introducing fish as an occasional part of your daily food, your health, as well as your pockets would feel the benefit of such a symptom of economy. Suppose, then, that you have bought some cheap kind of fish, such as herrings, large flounders, plaice, small soles, or any other small or flat fish. First of all, let the fish be washed and wiped dry, and rubbed all over with a little flour. Next, put about two ounces of fat, free from water, in a frying-pan on the fire, and, as soon as it us hot, put the fish in to fry, one or two at a time, according to their size, as, unless they have room enough in the frying-pan they do not fry well; this must be carefully attended to, and when the fish is a little browned on one side, turn it over with a tin fish-slice, that it may be fried on the other side also; and, as soon as done, place the fried fish on a dish and then fry the others. When all your fish are fried, with what fat remains in the pan fry some onions, and place the round the fish, and, by way of adding an extra relish to your meal, just throw a few table-spoonfuls of vinegar, some pepper and salt, into the frying-pan, give it a boil up, and pour this round the fish.


My Recipe:
Fish fillets – herring, flounder, sole or plaice
Flour
Butter, oil or fat (I used bacon fat)
Onions
Vinegar (I used apple cider vinegar)
Salt and pepper
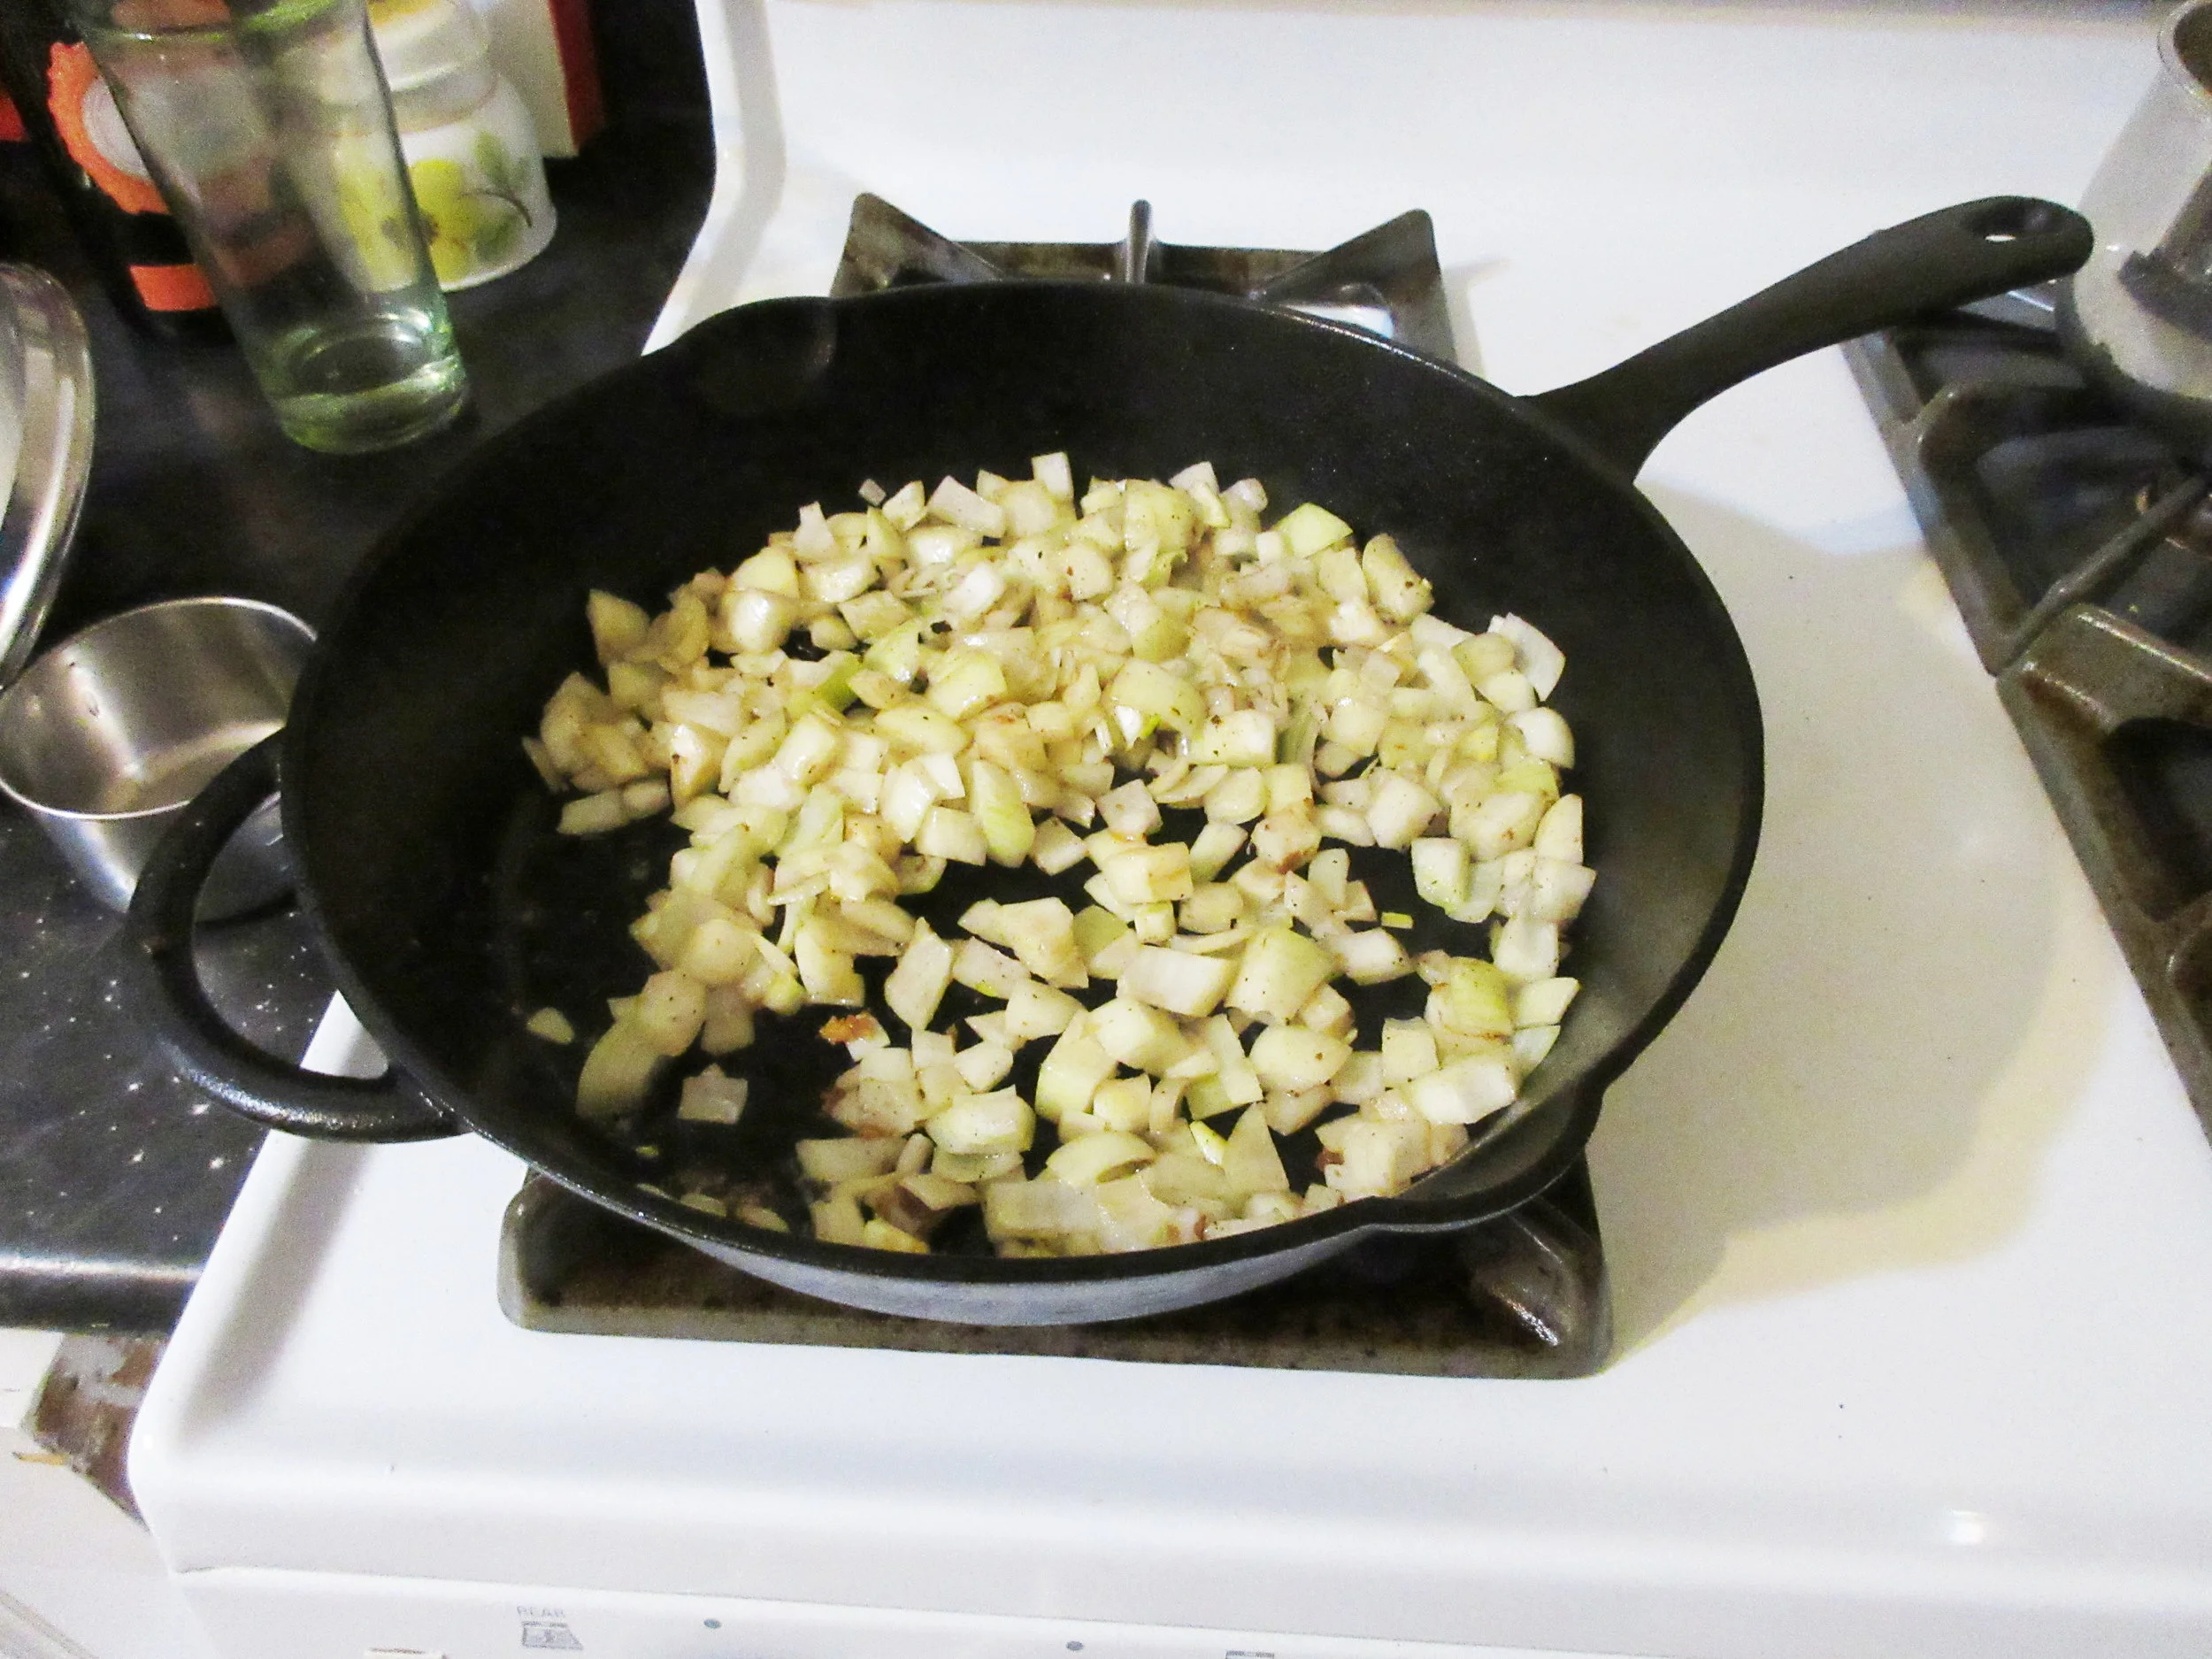
1) Chop the onions – how much depends on your love of onions and how many people you're serving. I cut up 3 medium & small onions for 6 sole fillets and it was a good amount for us.
2) Rinse the fillets with water and pat dry with a tea towel or paper towels. Lightly coat the fish in flour.
3) Warm up the butter, oil or fat in a frying pan over medium heat, then add the fish. Flip over when slightly browned on the bottom. When nicely browned on both sides, put the fillets on a plate to the side and fry the remaining fillets, adding butter/oil/fat as necessary.
4) When the fish is done, fry the onions in the same pan. Serve the onions on the side of the fish.
5) Remove the frying pan from the heat, then pour in some vinegar into the same pan. Stir, add salt and pepper and pour on top of the fish.

Our historic To Fry Fish recipe instructs us "and when the fish is a little browned on one side, turn it over with a tin fish-slice, that it may be fried on the other side also". I've never encountered anyone calling a fish slice by that name in Canada, but today a fish slice is considered an extra long or wide flipper with drainage holes or slots.

My understanding is that fish slices of this era were usually made of silver, not tin, and were used for serving, not flipping. The Encyclopaedic Dictionary (1887) describes a fish-slice as "A broad-bladed silver knife used for serving fish at table. The trowel-shaped blade enables a portion of fish to be removed from the backbone without breaking it into unsightly fragments".
Cassel's Household Guide (1869) delves even further into fish slices: "A silver or plated slice or knife...is used for this, as for other kinds of fish, because steel spoils the flavour of fish. A knife needs to be broad to divide the flakes without breaking them. A fish-knife has a sharp curved point to disengage the bones, and is perforated with holes to allow any water retained about the fish to run off. A fork is not used in helping fish." There's also very specific instructions for using a fish slice to carve different types of fish, so if learning that skill interests you, have a look at Cassel's Household Guide for some fish-carving tips fit for a Butler.
Nineteenth-century silver fish slices are gorgeous, often featuring the shape of a fish and intricately designed perforations. I had a look at the Royal Ontario Museum's online collections and found four beautiful Canadian examples of Fish Slices created from c.1815-1840 in Montreal and Quebec City, crafted by Nelson Walker, Laurent Amiot, James Ellis and Henri Polonceau; and I'll leave you with this little slice of fish-slice eye candy.


Read the Cookbook:

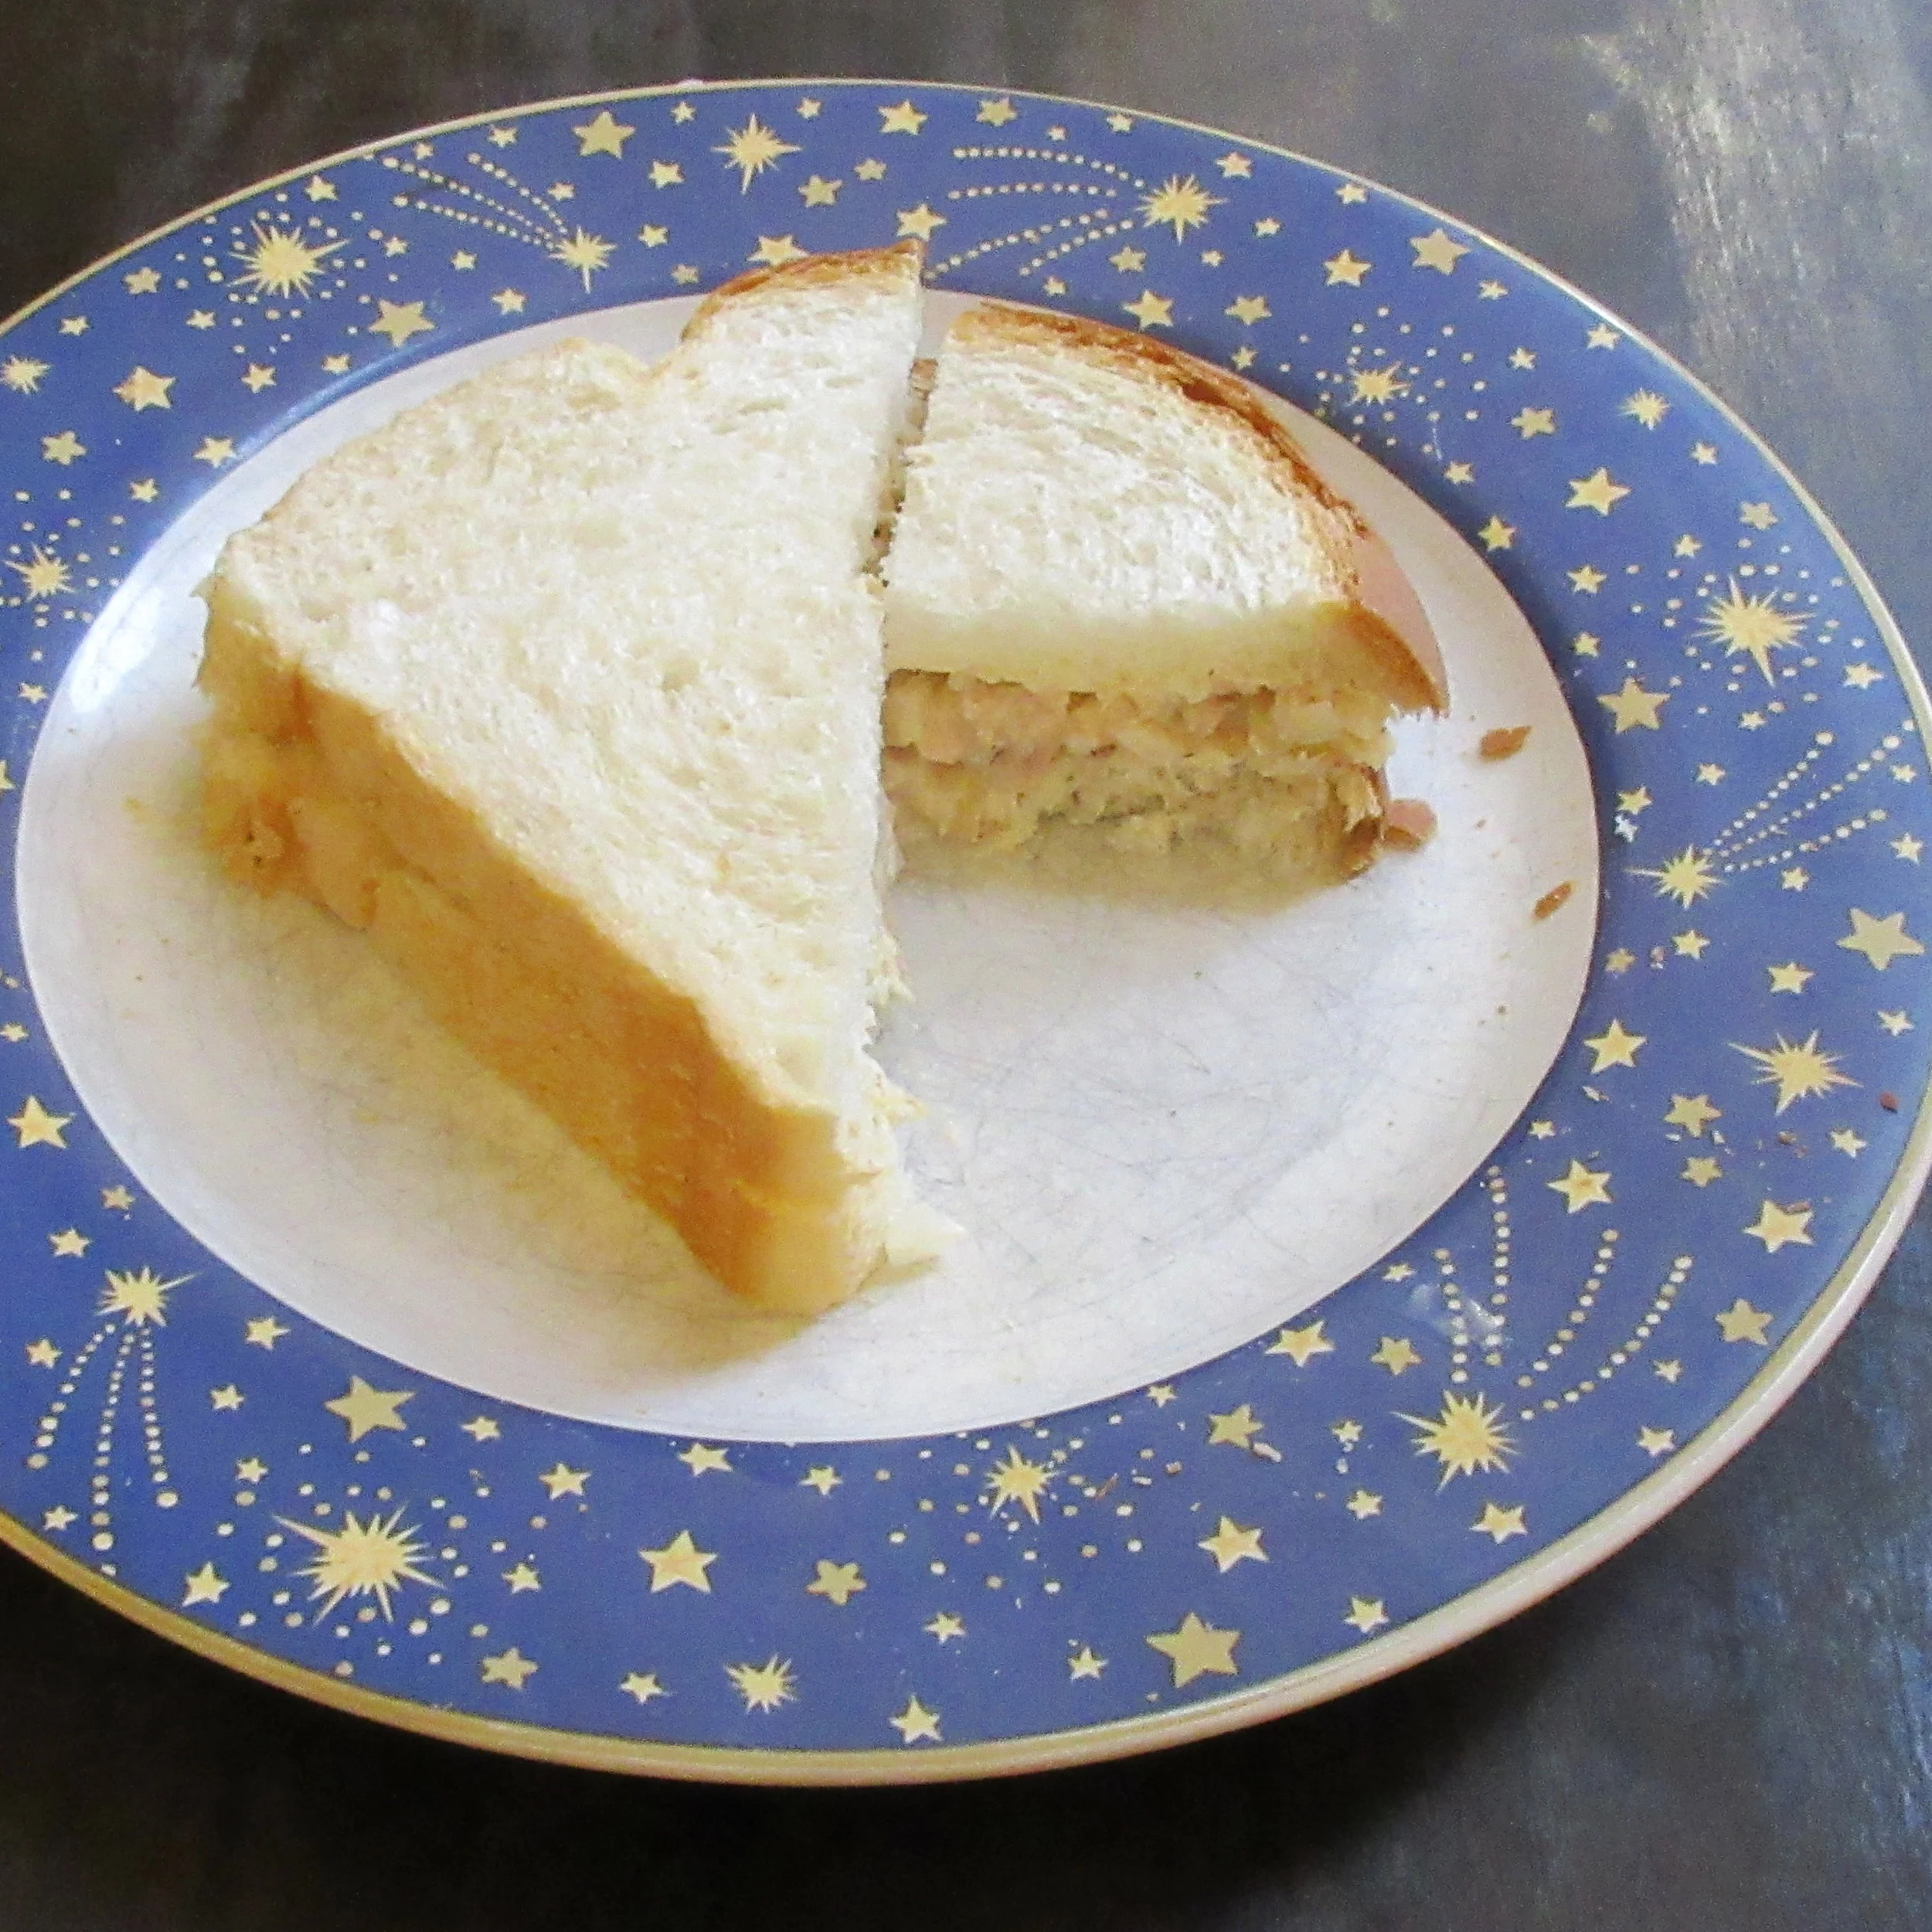
Tuna Sandwiches
This Tuna Sandwich recipe comes from the Peanuts Lunch Bag Cookbook (1974), which is a cookbook that was in our house when I was growing up. I don't remember anyone ever making a recipe from this cookbook when I was a kid, but I remember flipping through this book to read the Peanuts comics that are nestled amongst the recipes. About 6 months ago, I found this book in an antiques market...and all the memories flooded back.
In this sandwich filling, you'll find flaked tuna, crushed pineapple and chopped water chestnuts. When I selected this recipe, my hunch was that it would either be delicious or disgusting and I had no idea which way it would go! I'm happy to report that it was delicious. The pineapple is very subtle. You can taste something a little bit sweet in there but you aren't quite sure what that is, and the water chestnuts add a nice crunch to the sandwich filling. The pineapple and water chestnuts cut the fishiness of the tuna, so you end up with a low-key tuna flavour (and smell), so this recipe would make tunafish sandwiches more palatable for someone who isn't a fan.

You'll find this recipe in:
Peanuts Lunch Bag Cookbook
Cartoons by Charles M. Schulz
Recipes by June Dutton
New York, 1974
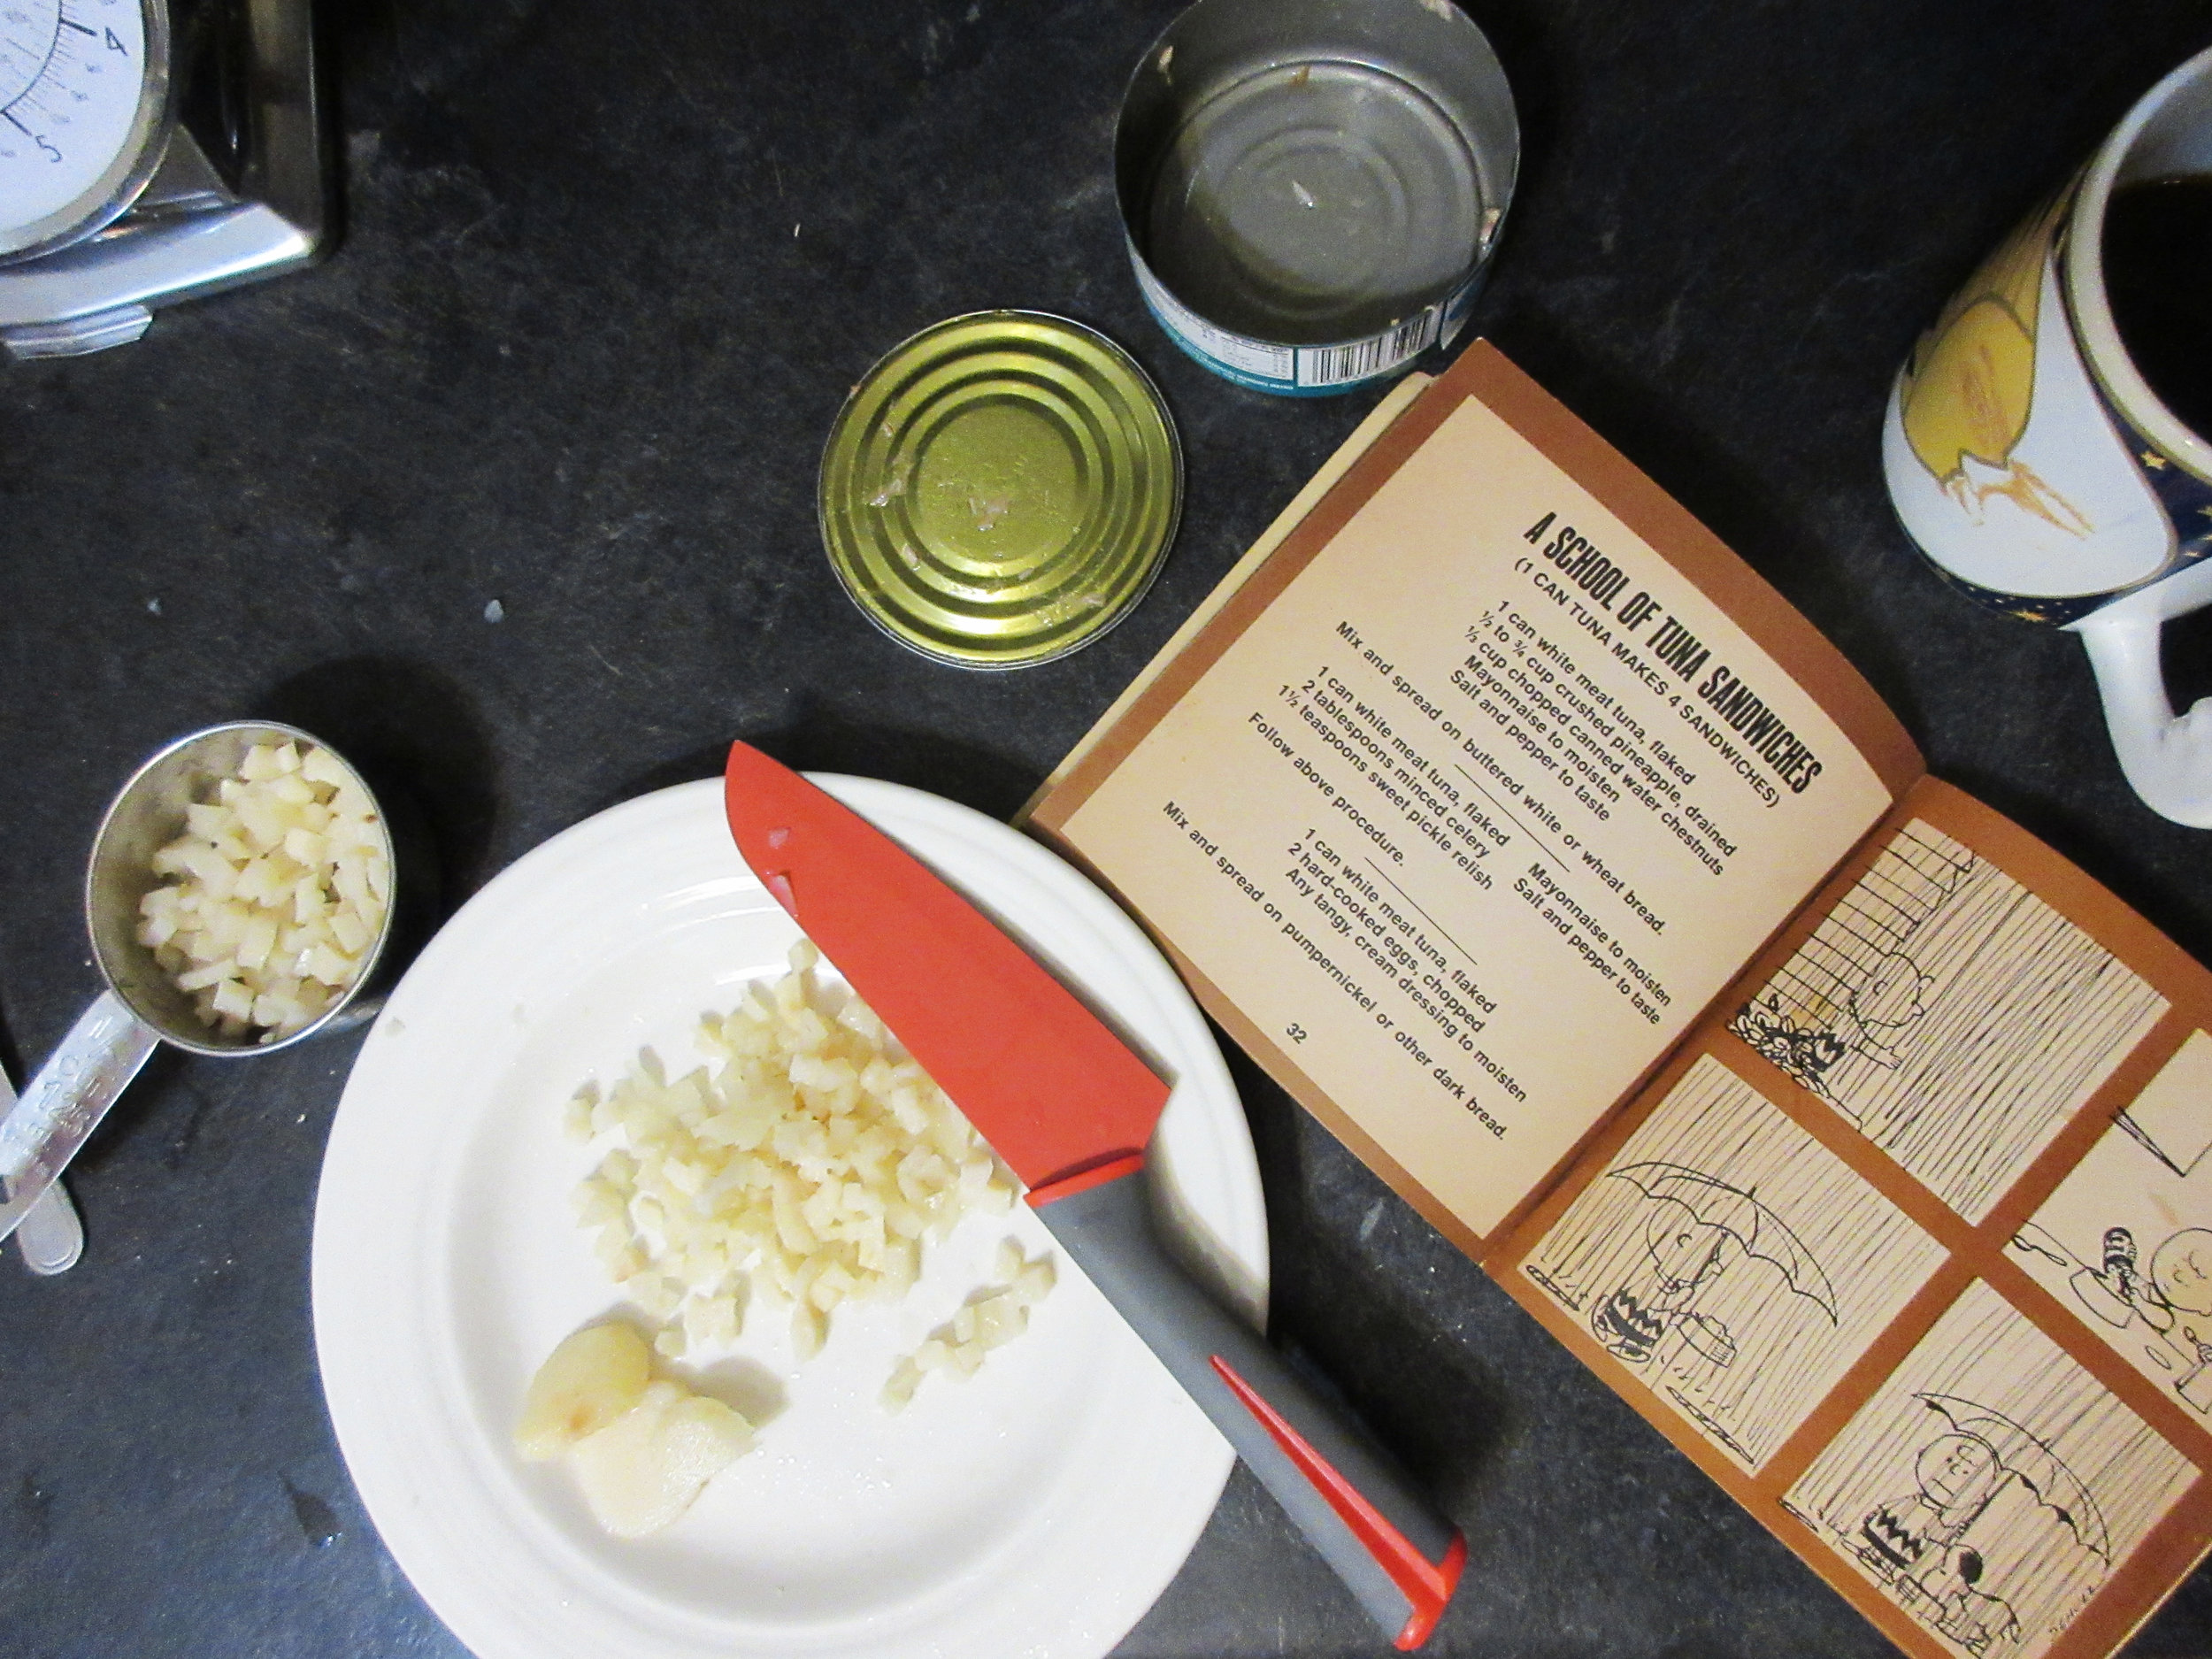
The original recipe:
1 can white meat tuna, flaked
½ to ¾ cup crushed pineapple, drained
½ cup chopped canned water chestnuts
Mayonnaise to moisten
Salt and pepper to taste
Mix and spread on buttered white or wheat bread.


My Experience:
This Tuna Sandwich recipe comes from the chapter entitled "A School of Tuna Sandwiches" (very punny) and when I selected this recipe, my hunch was that it would either be delicious or disgusting and I had no idea which way it would go! I'm happy to report that it was delicious. I made them to take to a potluck at a staff meeting and one of my coworkers gave them the review of being "delightful". I ended up coming home with only one little sandwich in my container.
Since I was suspicious of how the sandwiches would turn out, I only added ½ cup of the crushed pineapple. I also made sure that I had some really good bread by taking an early morning scroll to the bakery down the street to pick up a fresh loaf. The taste of the pineapple is very subtle. You can taste something a little bit sweet in there, but you aren't quite sure what that is, and the chopped water chestnuts add a nice crunch to the sandwich filling. The pineapple and water chestnuts cut the fishiness of the tuna, so you end up with a low-key tuna flavour (and smell), so this recipe would make tunafish sandwiches more palatable for someone who isn't a fan.

Last March, right about the time that I was working on getting this blog up and running, Steve and I went on a daytrip to Waterford, Ontario where we checked out the Waterford Antiques Market and Steve discovered his favourite vintage musical instrument store, Fishin' Musician in the same building. There's also a lot of great hiking trails in the area – we'll probably be back in the winter to do some cross country skiing there.
Of course in all the booths filled with antiques, I went straight to the books to search for old cookbooks or interesting history books. Nothing really stuck out to me until I spotted a thin faded book spine that said Peanuts Lunch Bag Cookbook. When I pulled it out and saw the book cover, I was greeted by an old friend who I honestly had forgotten about over the years...but all the memories flooded back.
We had a copy of Peanuts Lunch Bag Cookbook in our house when I was growing up. I don't remember anyone ever making a recipe from this cookbook when I was a kid, but I do remember spending time slowly flipping through the pages to read the Peanuts comics that are nestled amongst the recipes.
The chapters are organized by main ingredient and the titles are quite cute: Lucy's Crabby Sandwiches, Full of Baloney Sandwiches and Linus Loves Liverwurst Sandwiches. I love that this is a recipe book geared towards children to teach them how to make their own lunches. The first page starts off with the title 'READ THESE TIPS!', and is followed by a list of handy tips such as to wash your hands, read the recipe before beginning and to ask permission before using a sharp knife.
I have always been surprised by how many children have never prepared food or have never used a sharp knife in their lives when doing museum cooking programs with schoolchildren, so I appreciate the respectful tone of the book. Peanuts Lunch Bag Cookbook is funny, but the recipes aren't dumbed down for the children, and it's assumed that a child is capable of using a sharp knife & can figure out a recipe with a bit of adult help.
