

Fillets of Chickens, with Bechamel-ſauce and Bread-crumbs
It’s been a while since I made Fillets of Chickens, with Bechamel-ſauce and Bread-crumbs at Nelles Manor Museum. I made it twice in the summer of 2019, which was the last time that I was able to teach an open hearth cooking class there. The recipe’s from the 1781 cookbook The Practice of Modern Cookery by George Dalrymple and at this class, we made recipes that would have been popular when the house was newly constructed using fresh garden produce and some newly purchased open hearth cooking implements.
Keep reading after the recipe to learn about some open hearth cookery techniques using a salamander and a couple of different styles of reflector ovens. I also share some ideas for creating DIY reflector ovens using common items that you can use in front of a fireplace or campfire.

You’ll find this recipe in:
The Practice of Modern Cookery
By: George Dalrymple
Edinburgh, 1781
Historic Recipes:
Filets des Poulettes á la Bechamel pannée.
Fillets of Chickens, with Bechamel-ſauce and Bread-crumbs.
CUT the hind part of two or three chickens off, meaning the legs and the rumps, they will ſerve for another diſh; roaſt the breaſts; when done and cold, cut the meat in fillets, mix them with a bechamel ſauce, and put it in the diſh that you intend for table; ſtrew bread-crumbs over it; baſte with a little melted butter, and give it a colour in a oven or with a ſalamander. You will find the ſauce in Sauce-articles. The breaſts of cold roaſted chickens, fowls, capons, or turkies, will anſwer the ſame.
Sauce à la Bechamel. Begamel Sauce.
PUT in a ſtew-pan a few ſlices of veal, ham, a few muſhrooms and ſhallots, two cloves, a laurel-leaf, a little good butter; ſoak all together without letting it take colour; add a little good broth and cream, according to the quantity of ſauce you want; ſimmer it half an hour, and ſift it through a ſieve; you may add ſcalded parſley chopped very fine.
If you’re wondering about the letter that looks a bit like an ‘f’, but appears sometimes where an ‘s’ would go, head over to my To boil green Peas recipe, where I wrote a short history of the Long S.

My version of the recipe:
Chicken Fillets with Bechamel Sauce and Breadcrumbs
5 chicken breasts (or leftover chicken or turkey)
2 or 3 slices of ham and/or veal
4 or 5 mushrooms
1 or 2 shallots
2 whole clove buds
1 bay leaf
1/3 cup butter – 75 g
3 cups cream – 710 mL
3 cups broth – 710 mL
1 cup breadcrumbs – 125 g
A handful of fresh parsley
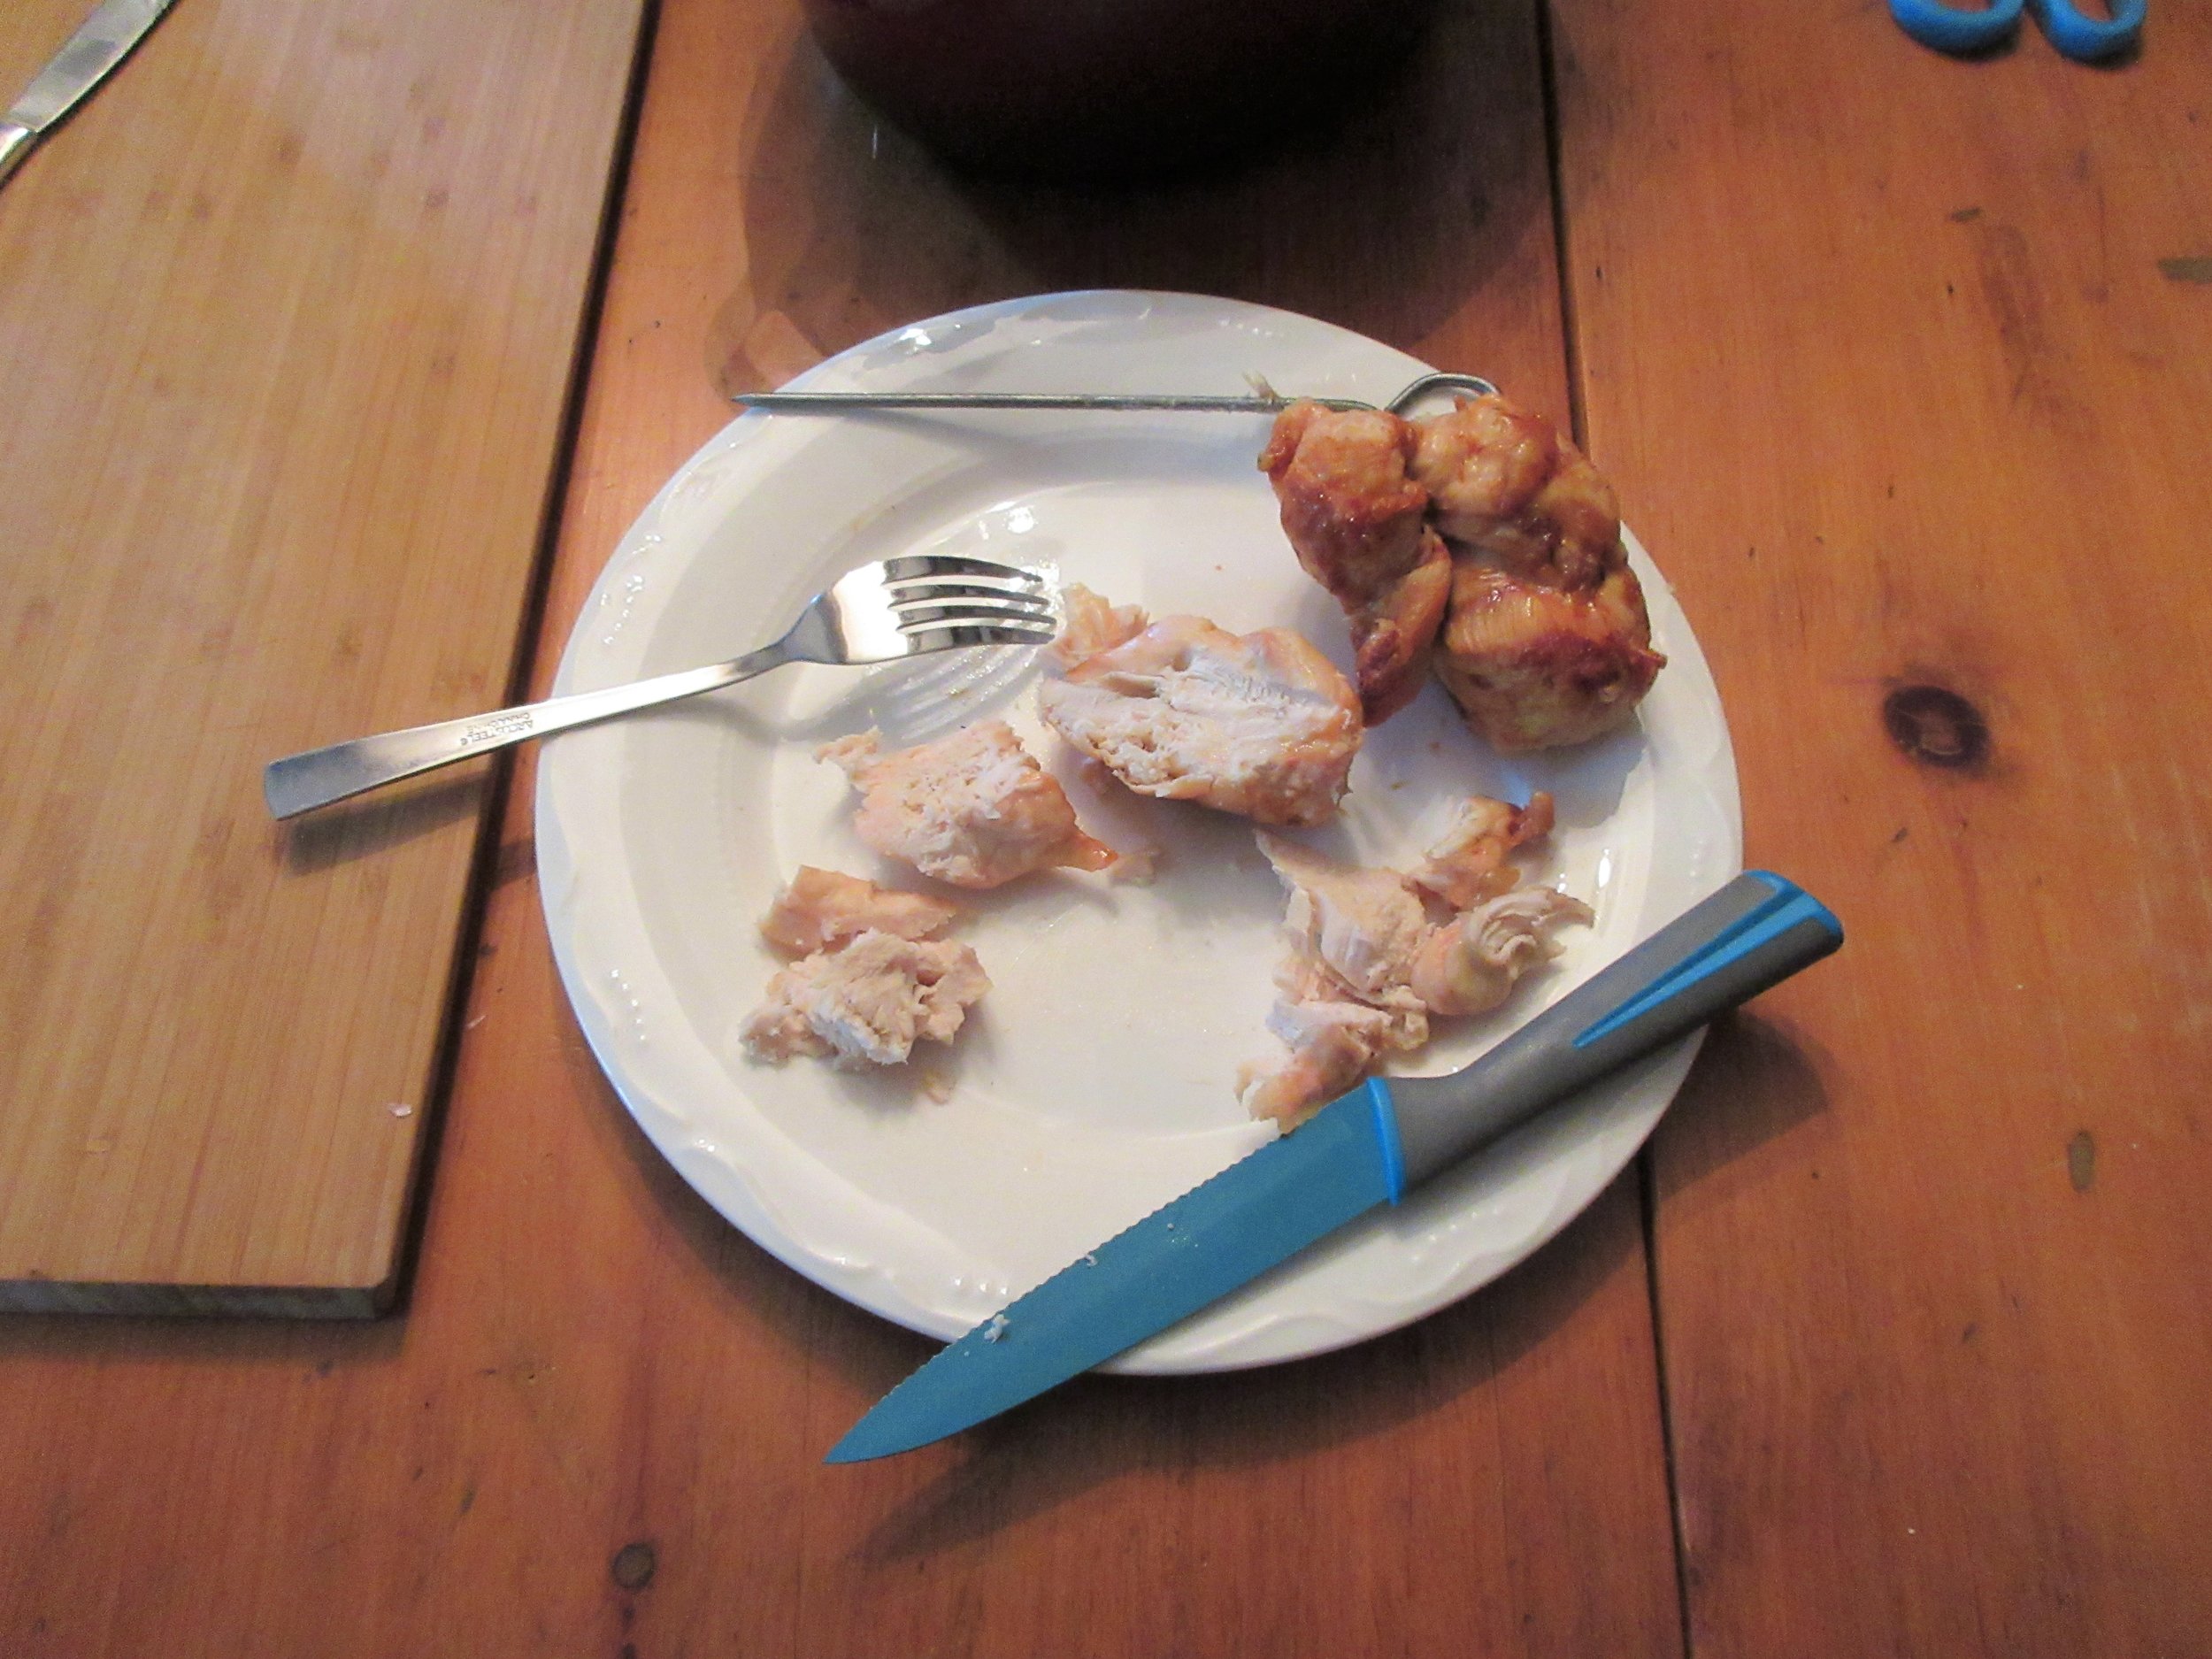
1) Roast the chicken breast or use leftover chicken or turkey in this recipe. Slice into fillets, place in your serving dish and set aside until you’ve made the sauce.
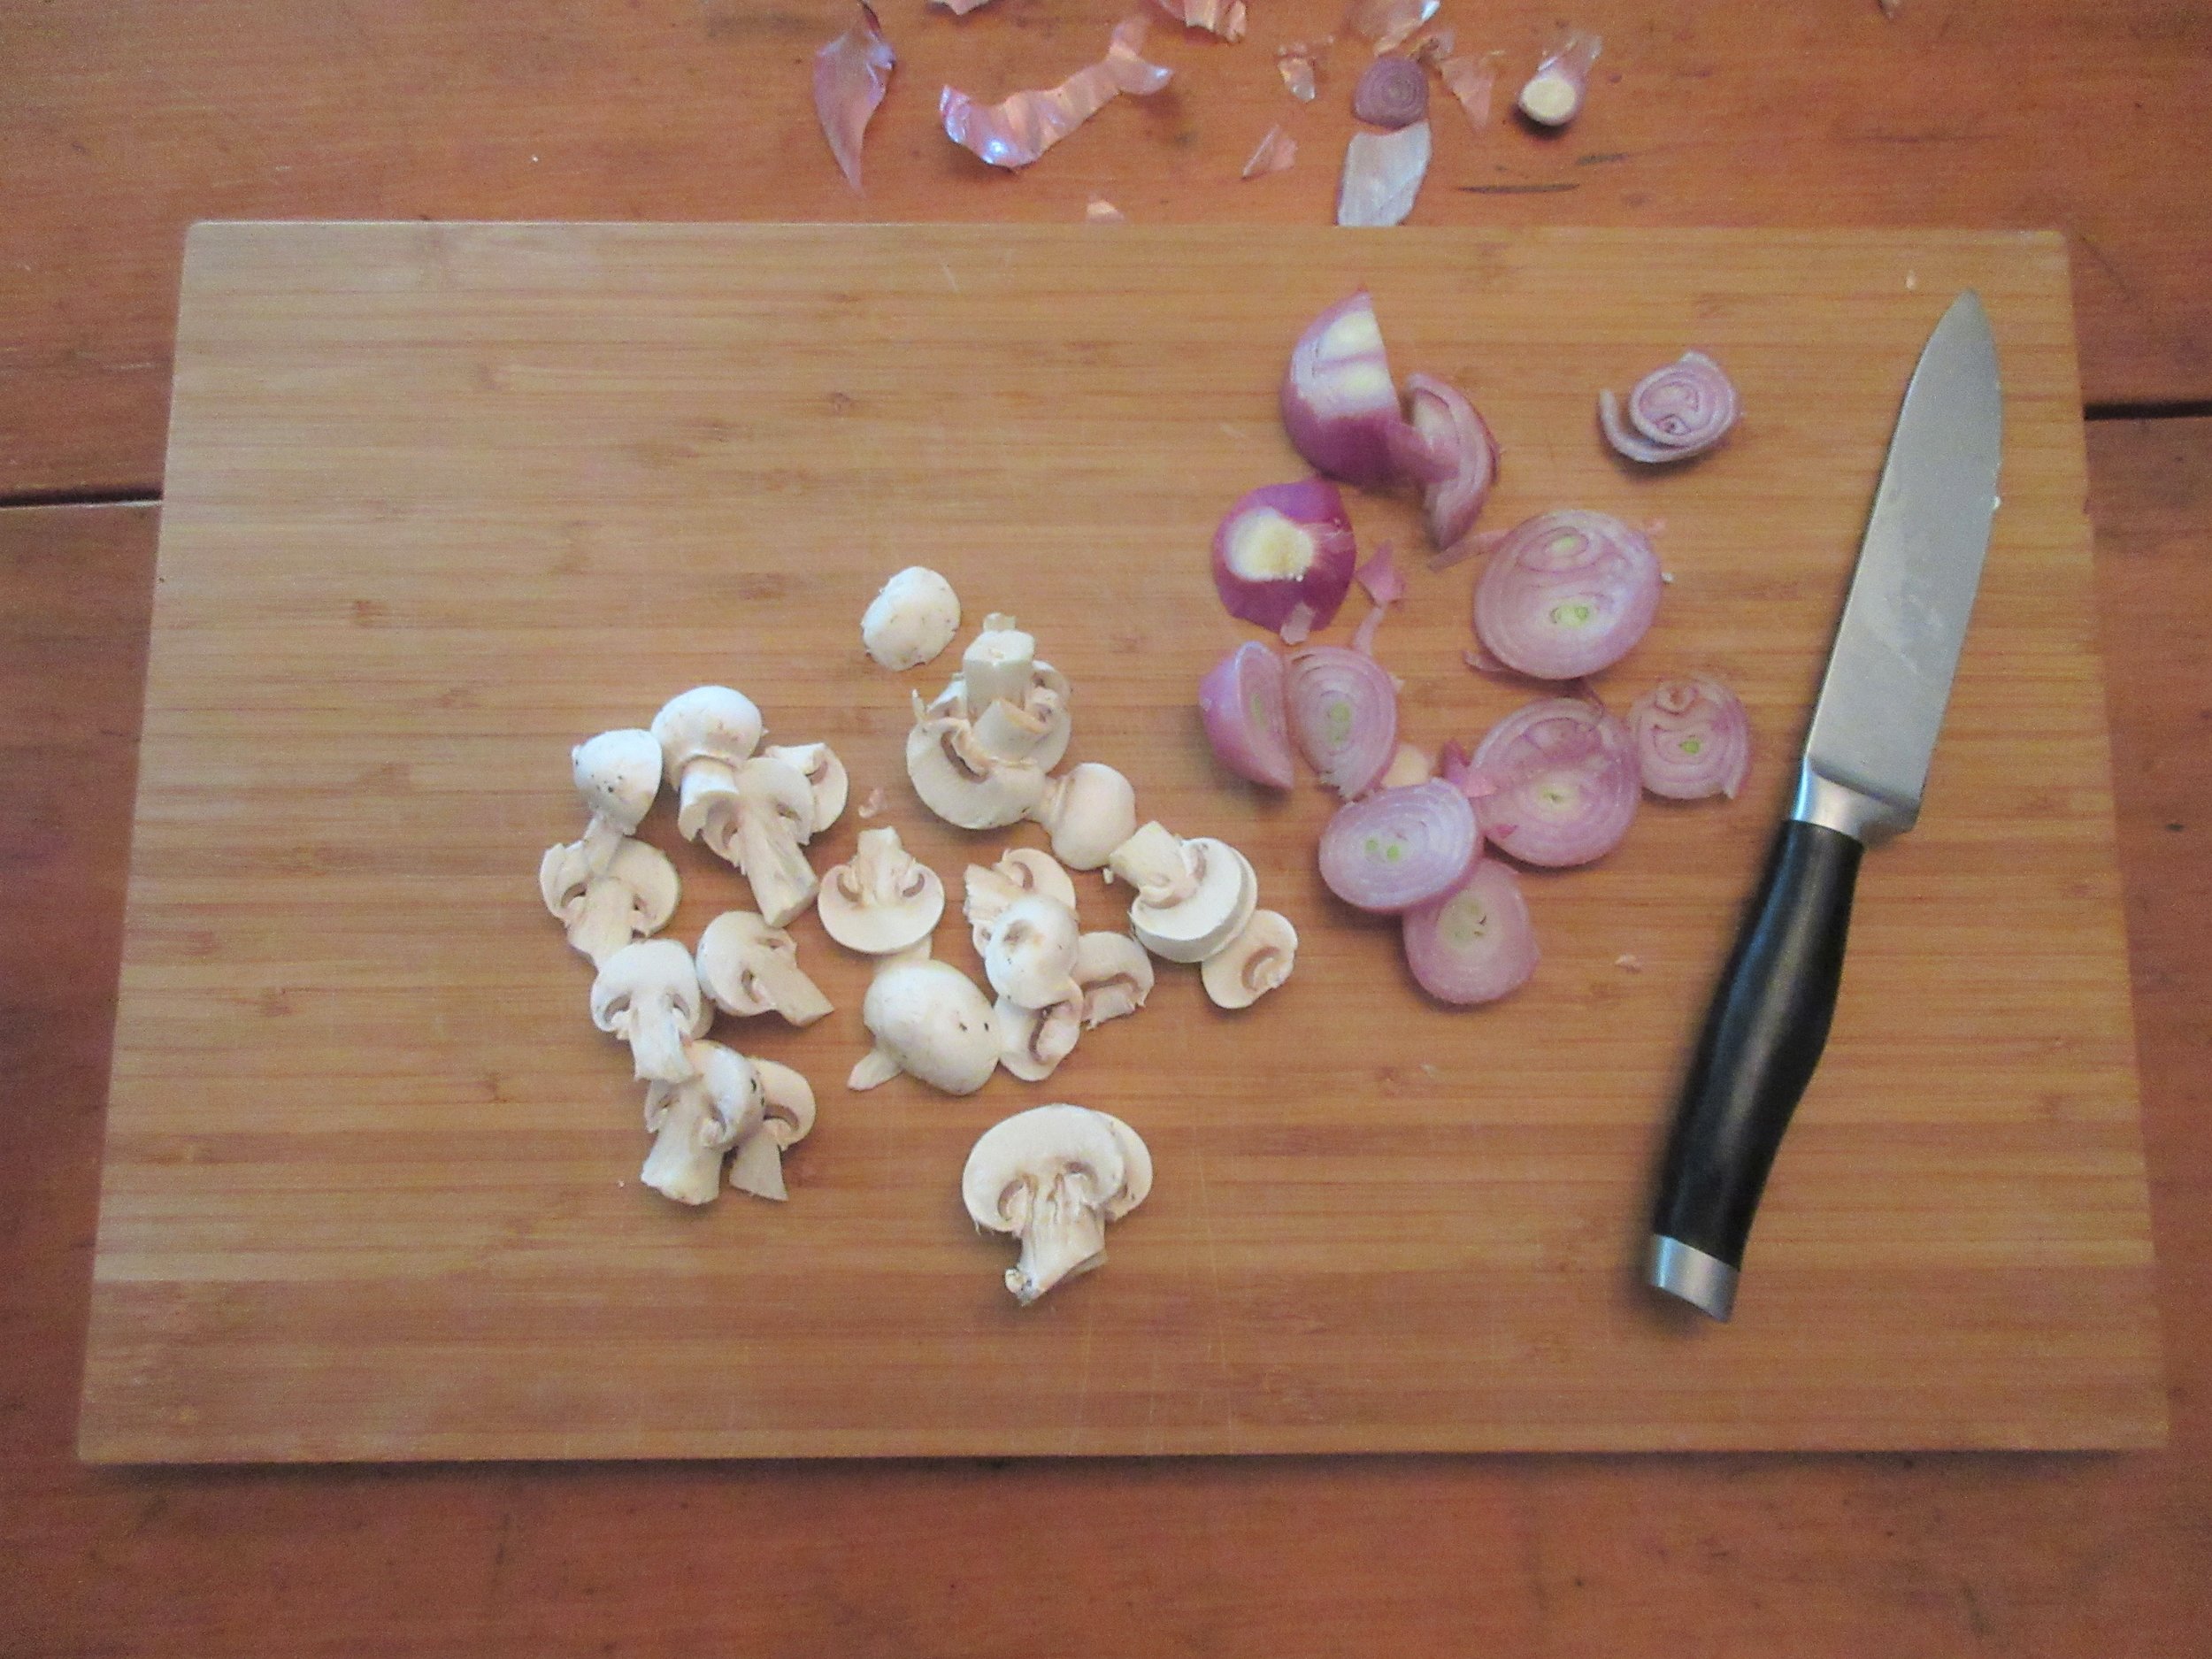
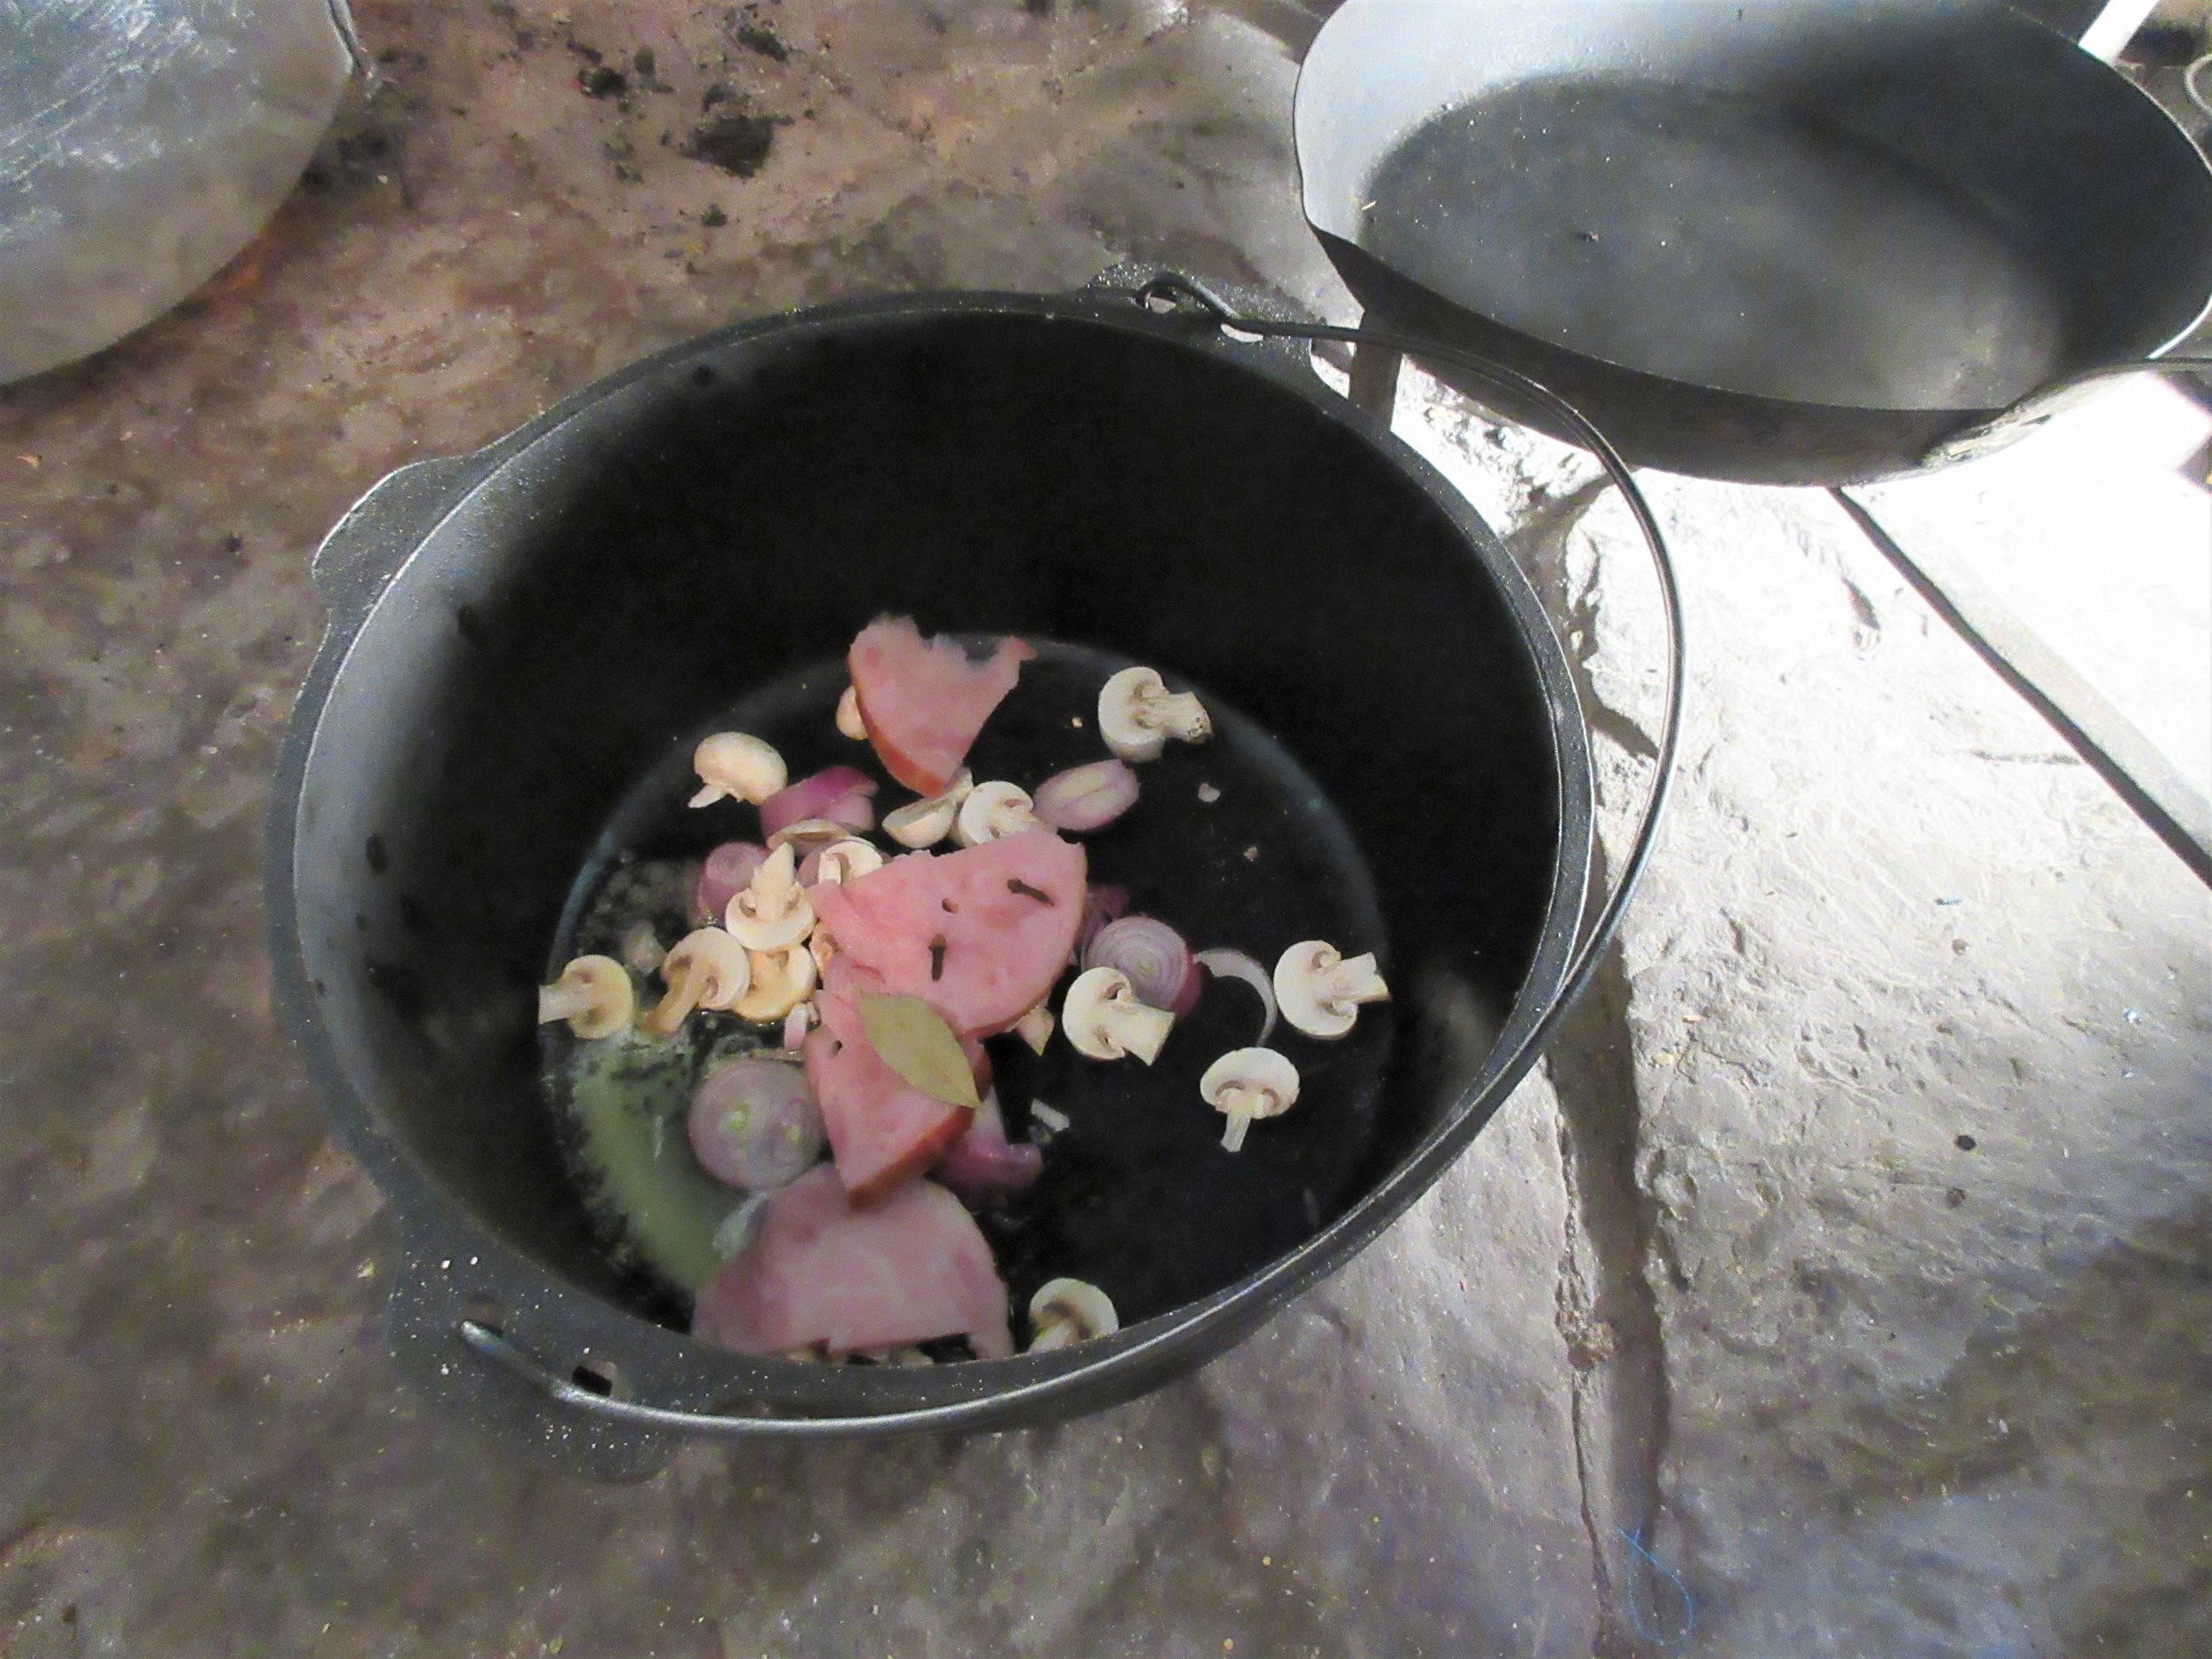
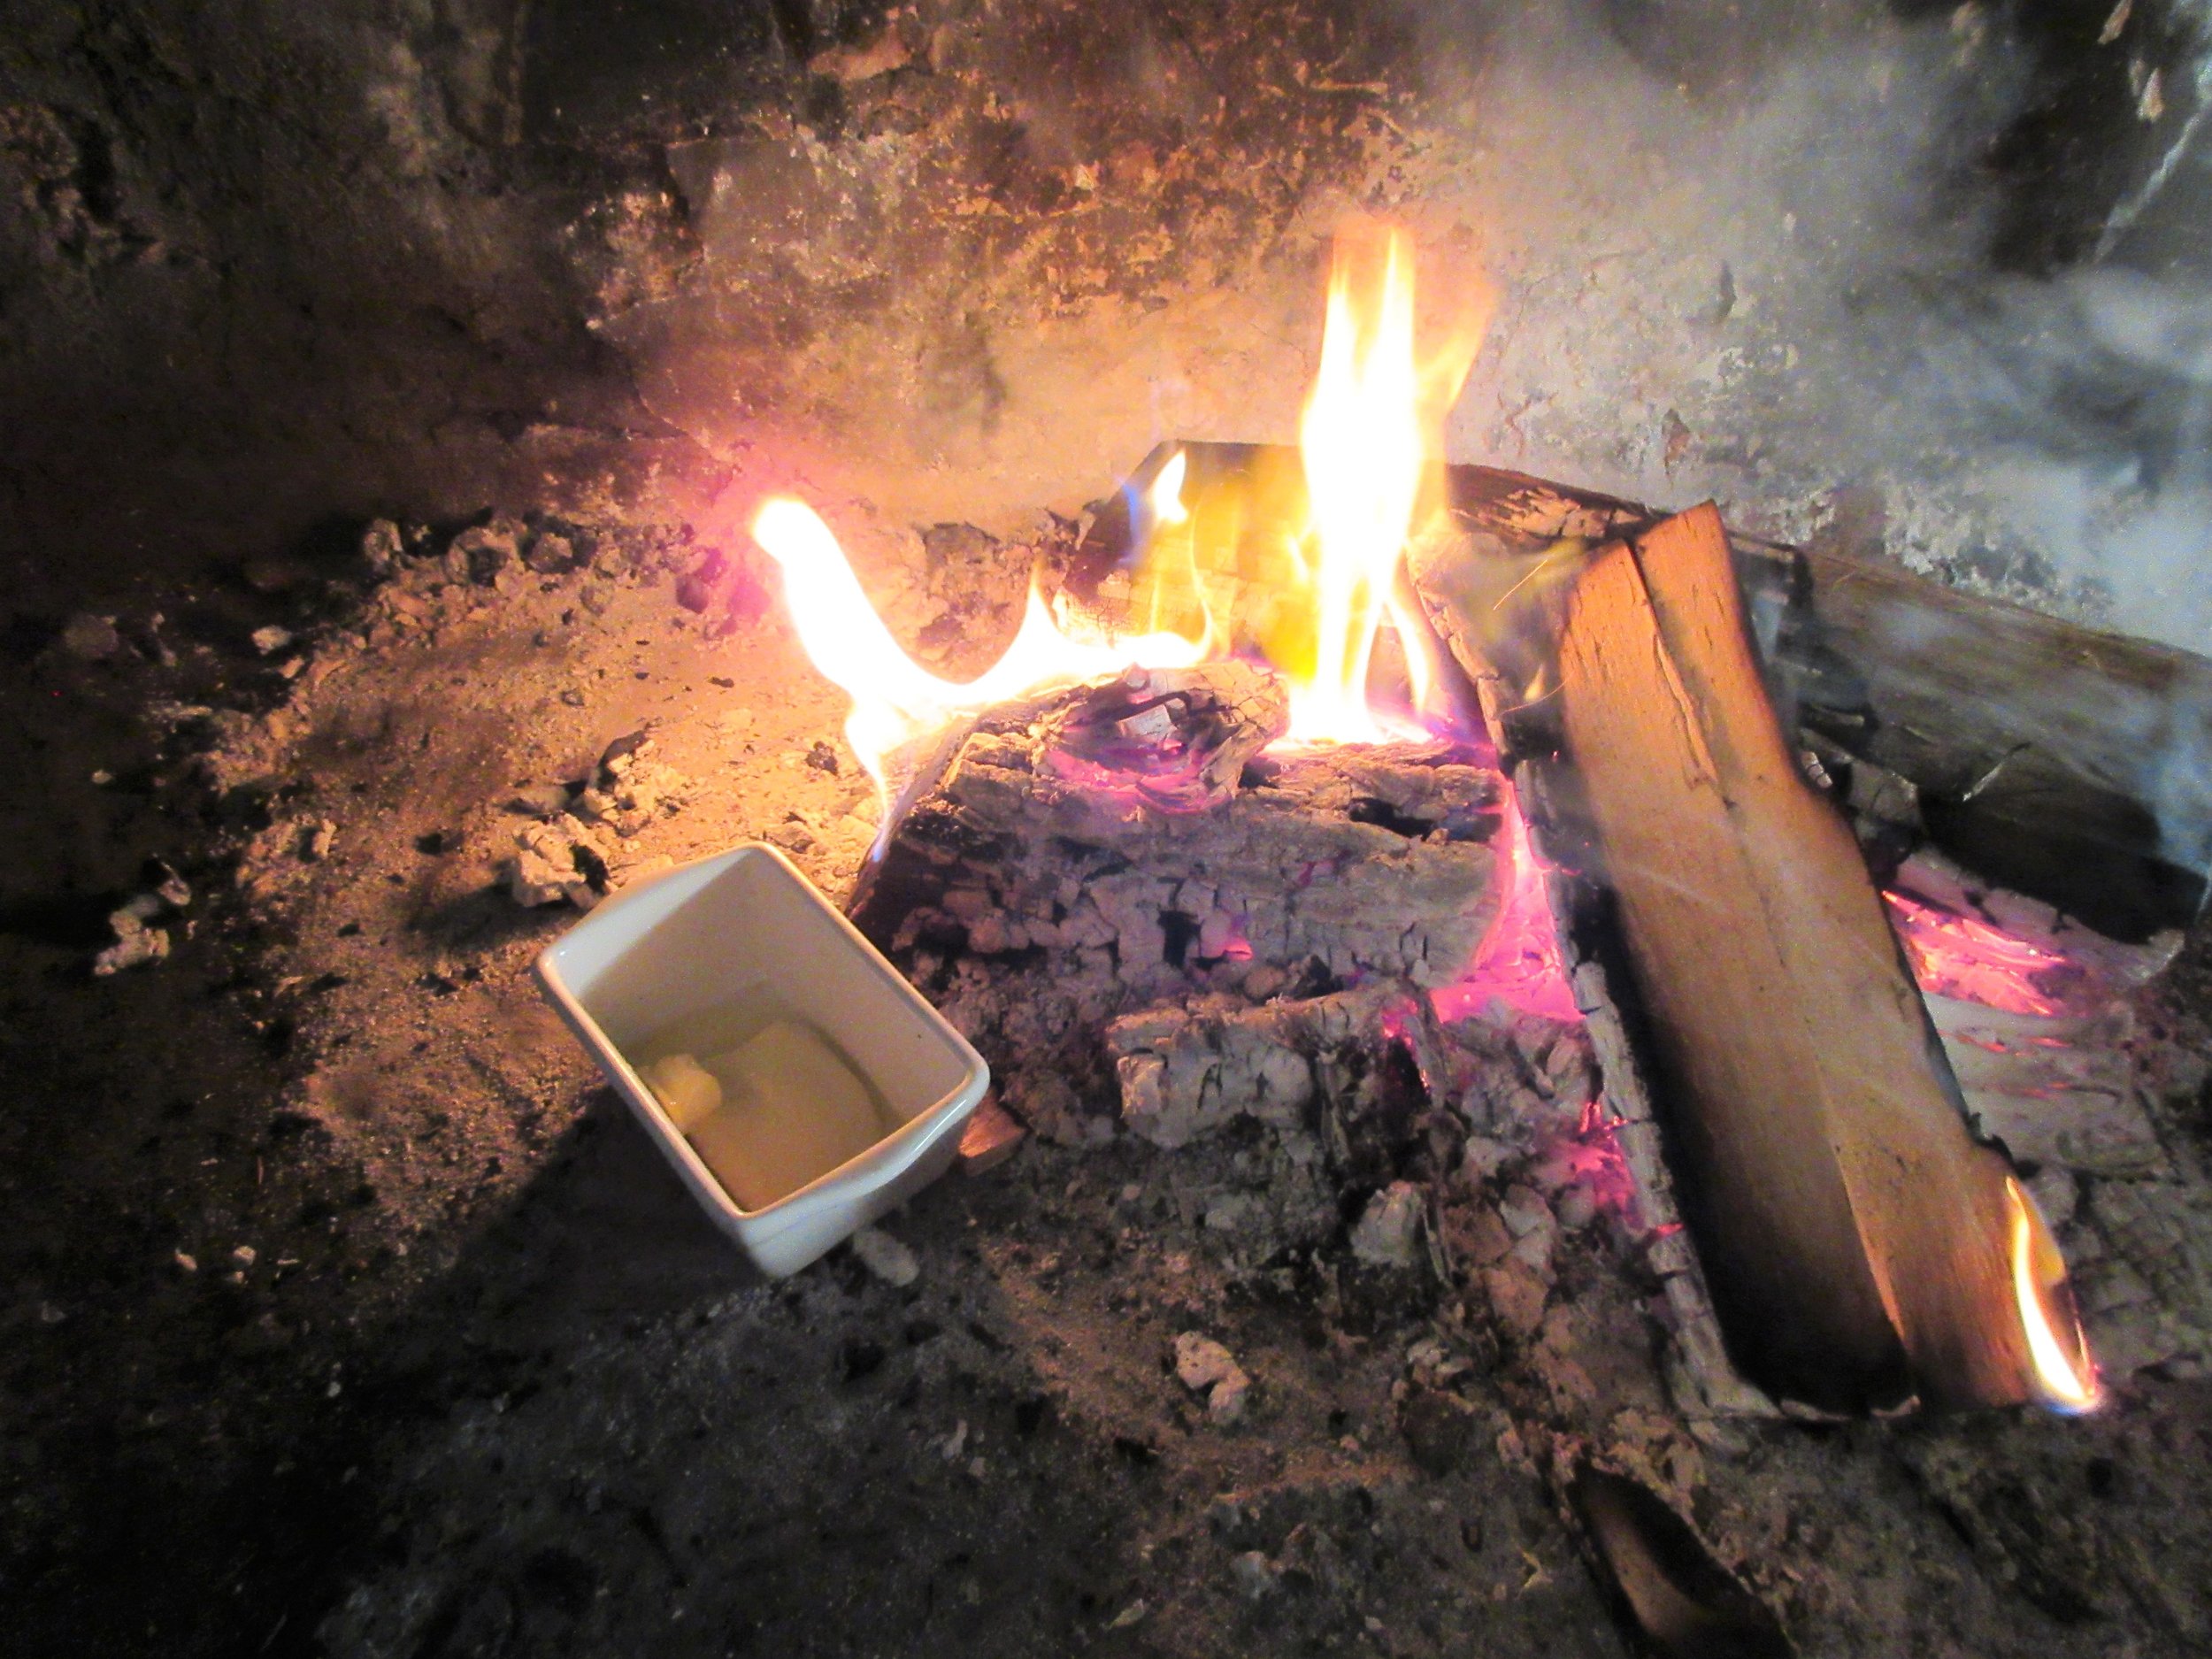
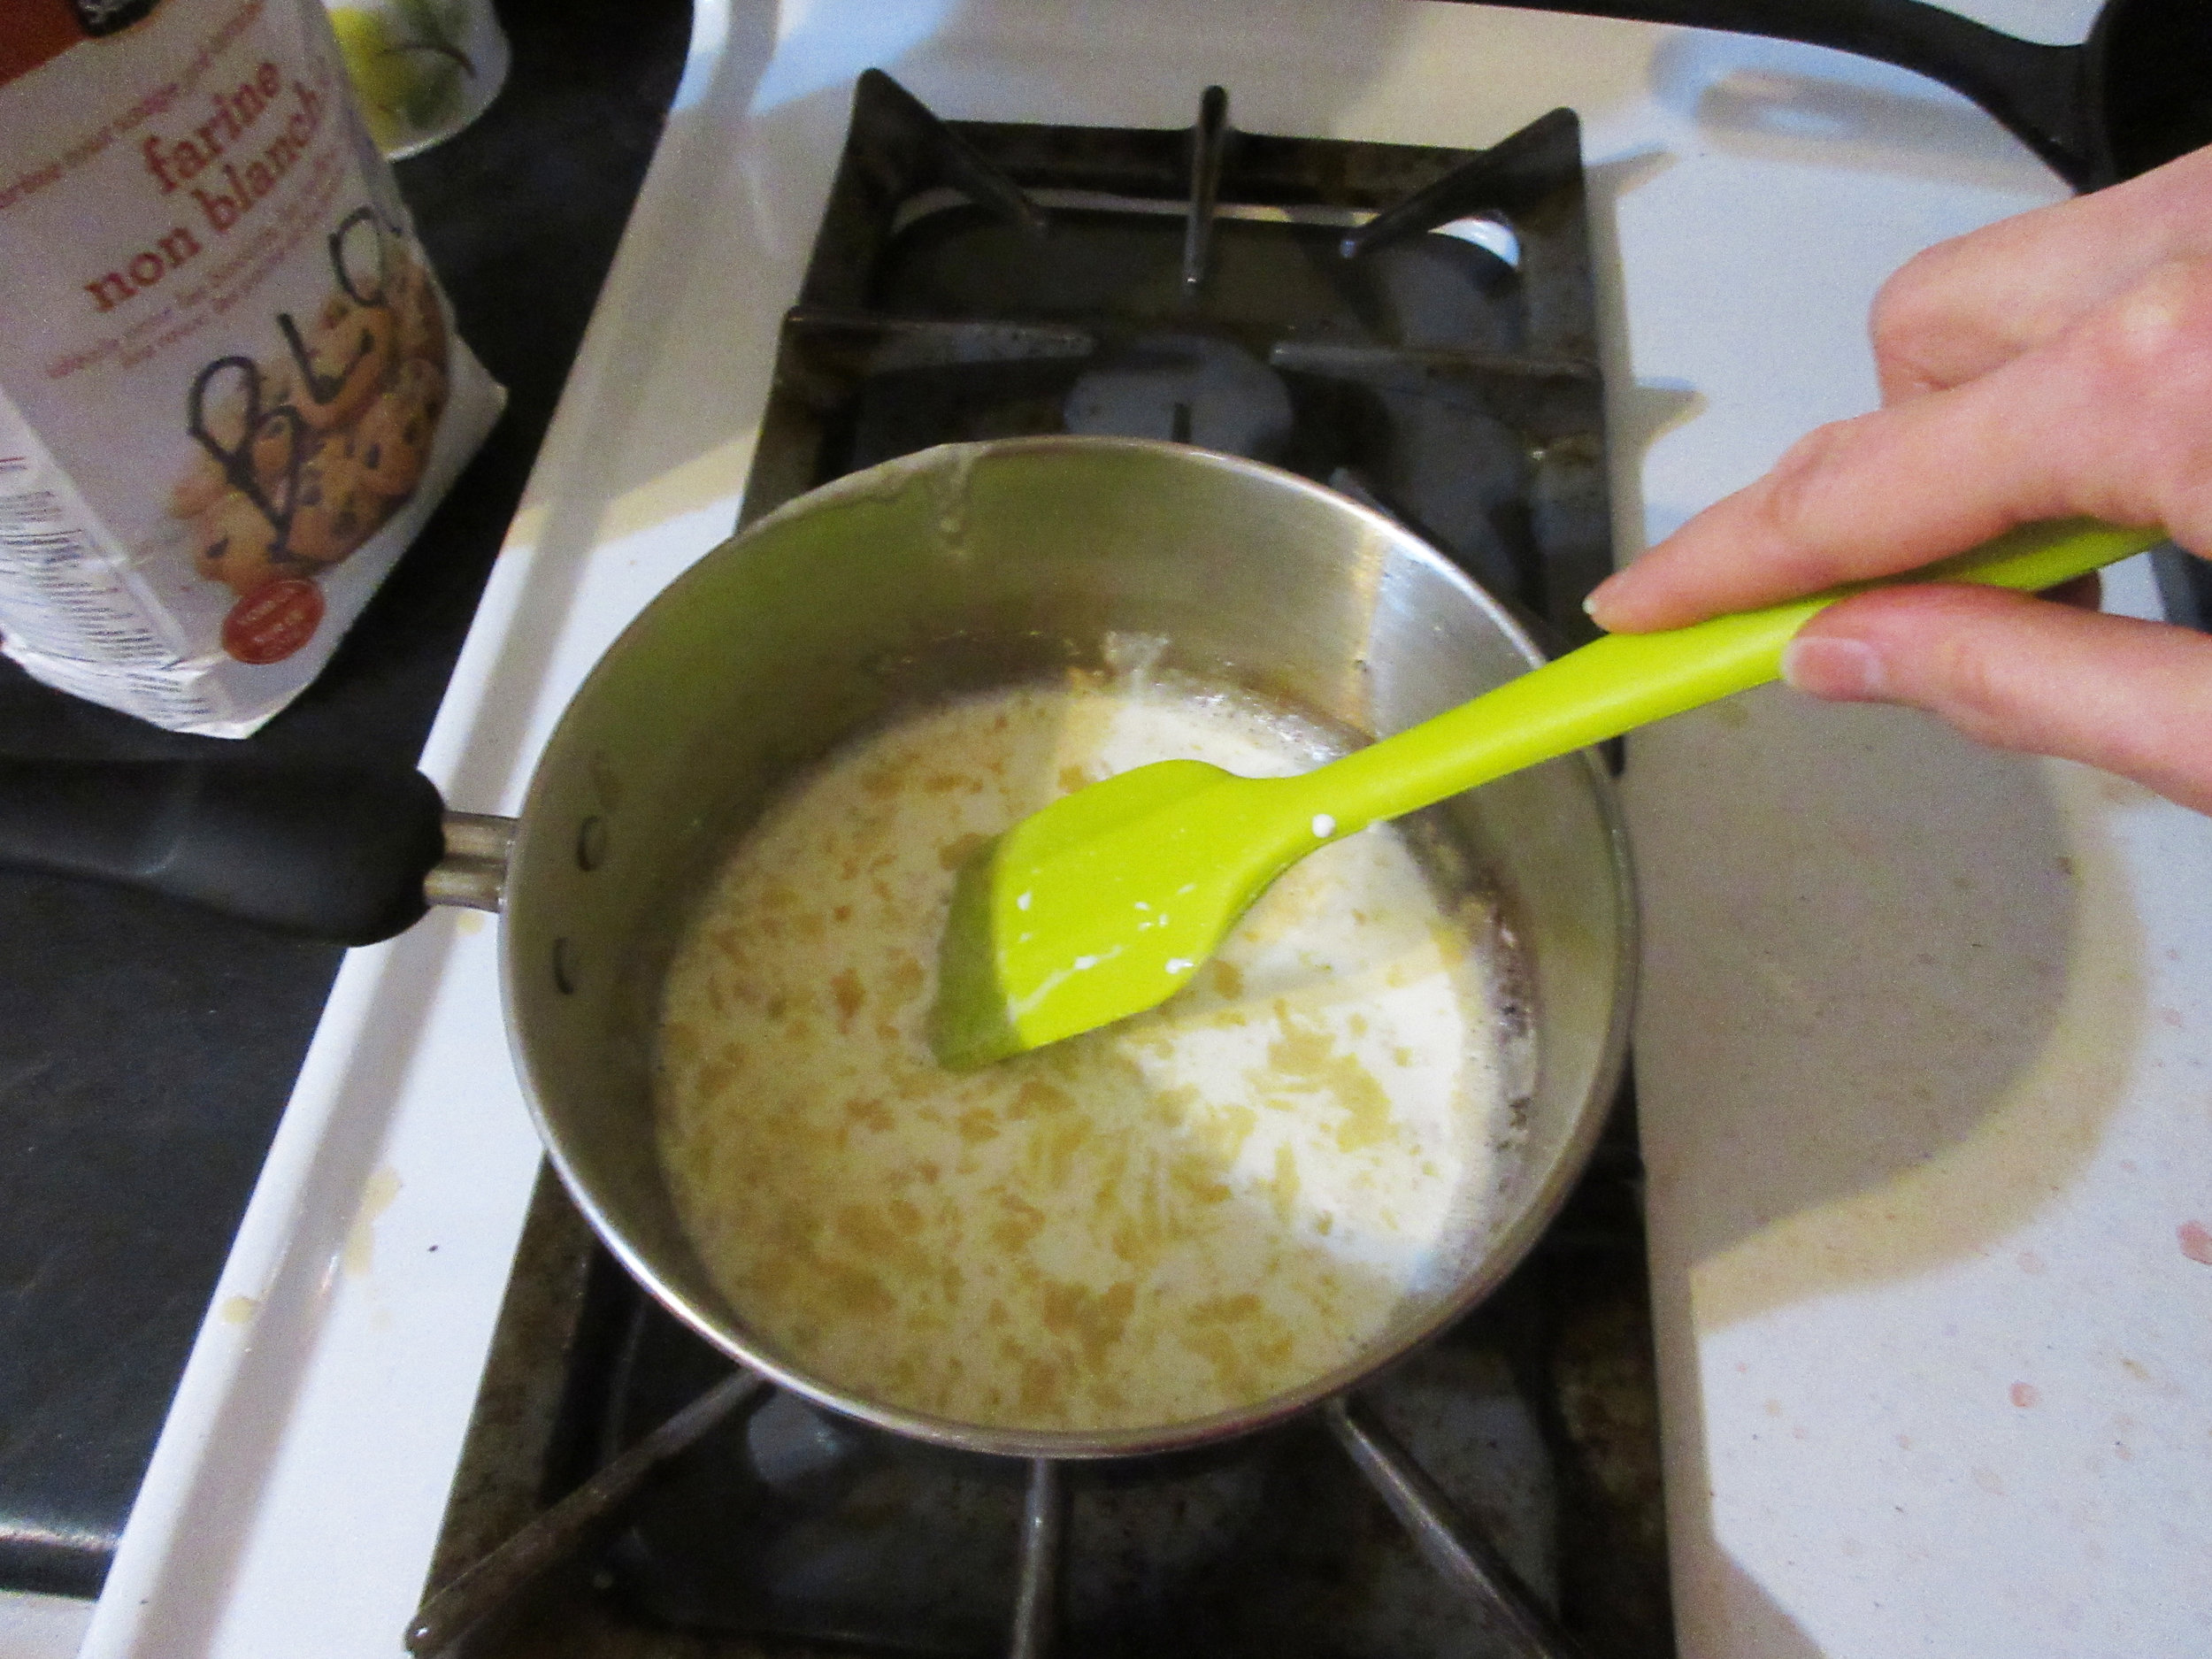
2) While roasting the chicken, slice the veal, ham, mushrooms and shallots. Melt 2 tablespoons of the butter in a large sauce pan and add the veal, ham, mushrooms, shallots, cloves and bay leaf. Simmer gently over low heat until the shallots and mushrooms are soft.
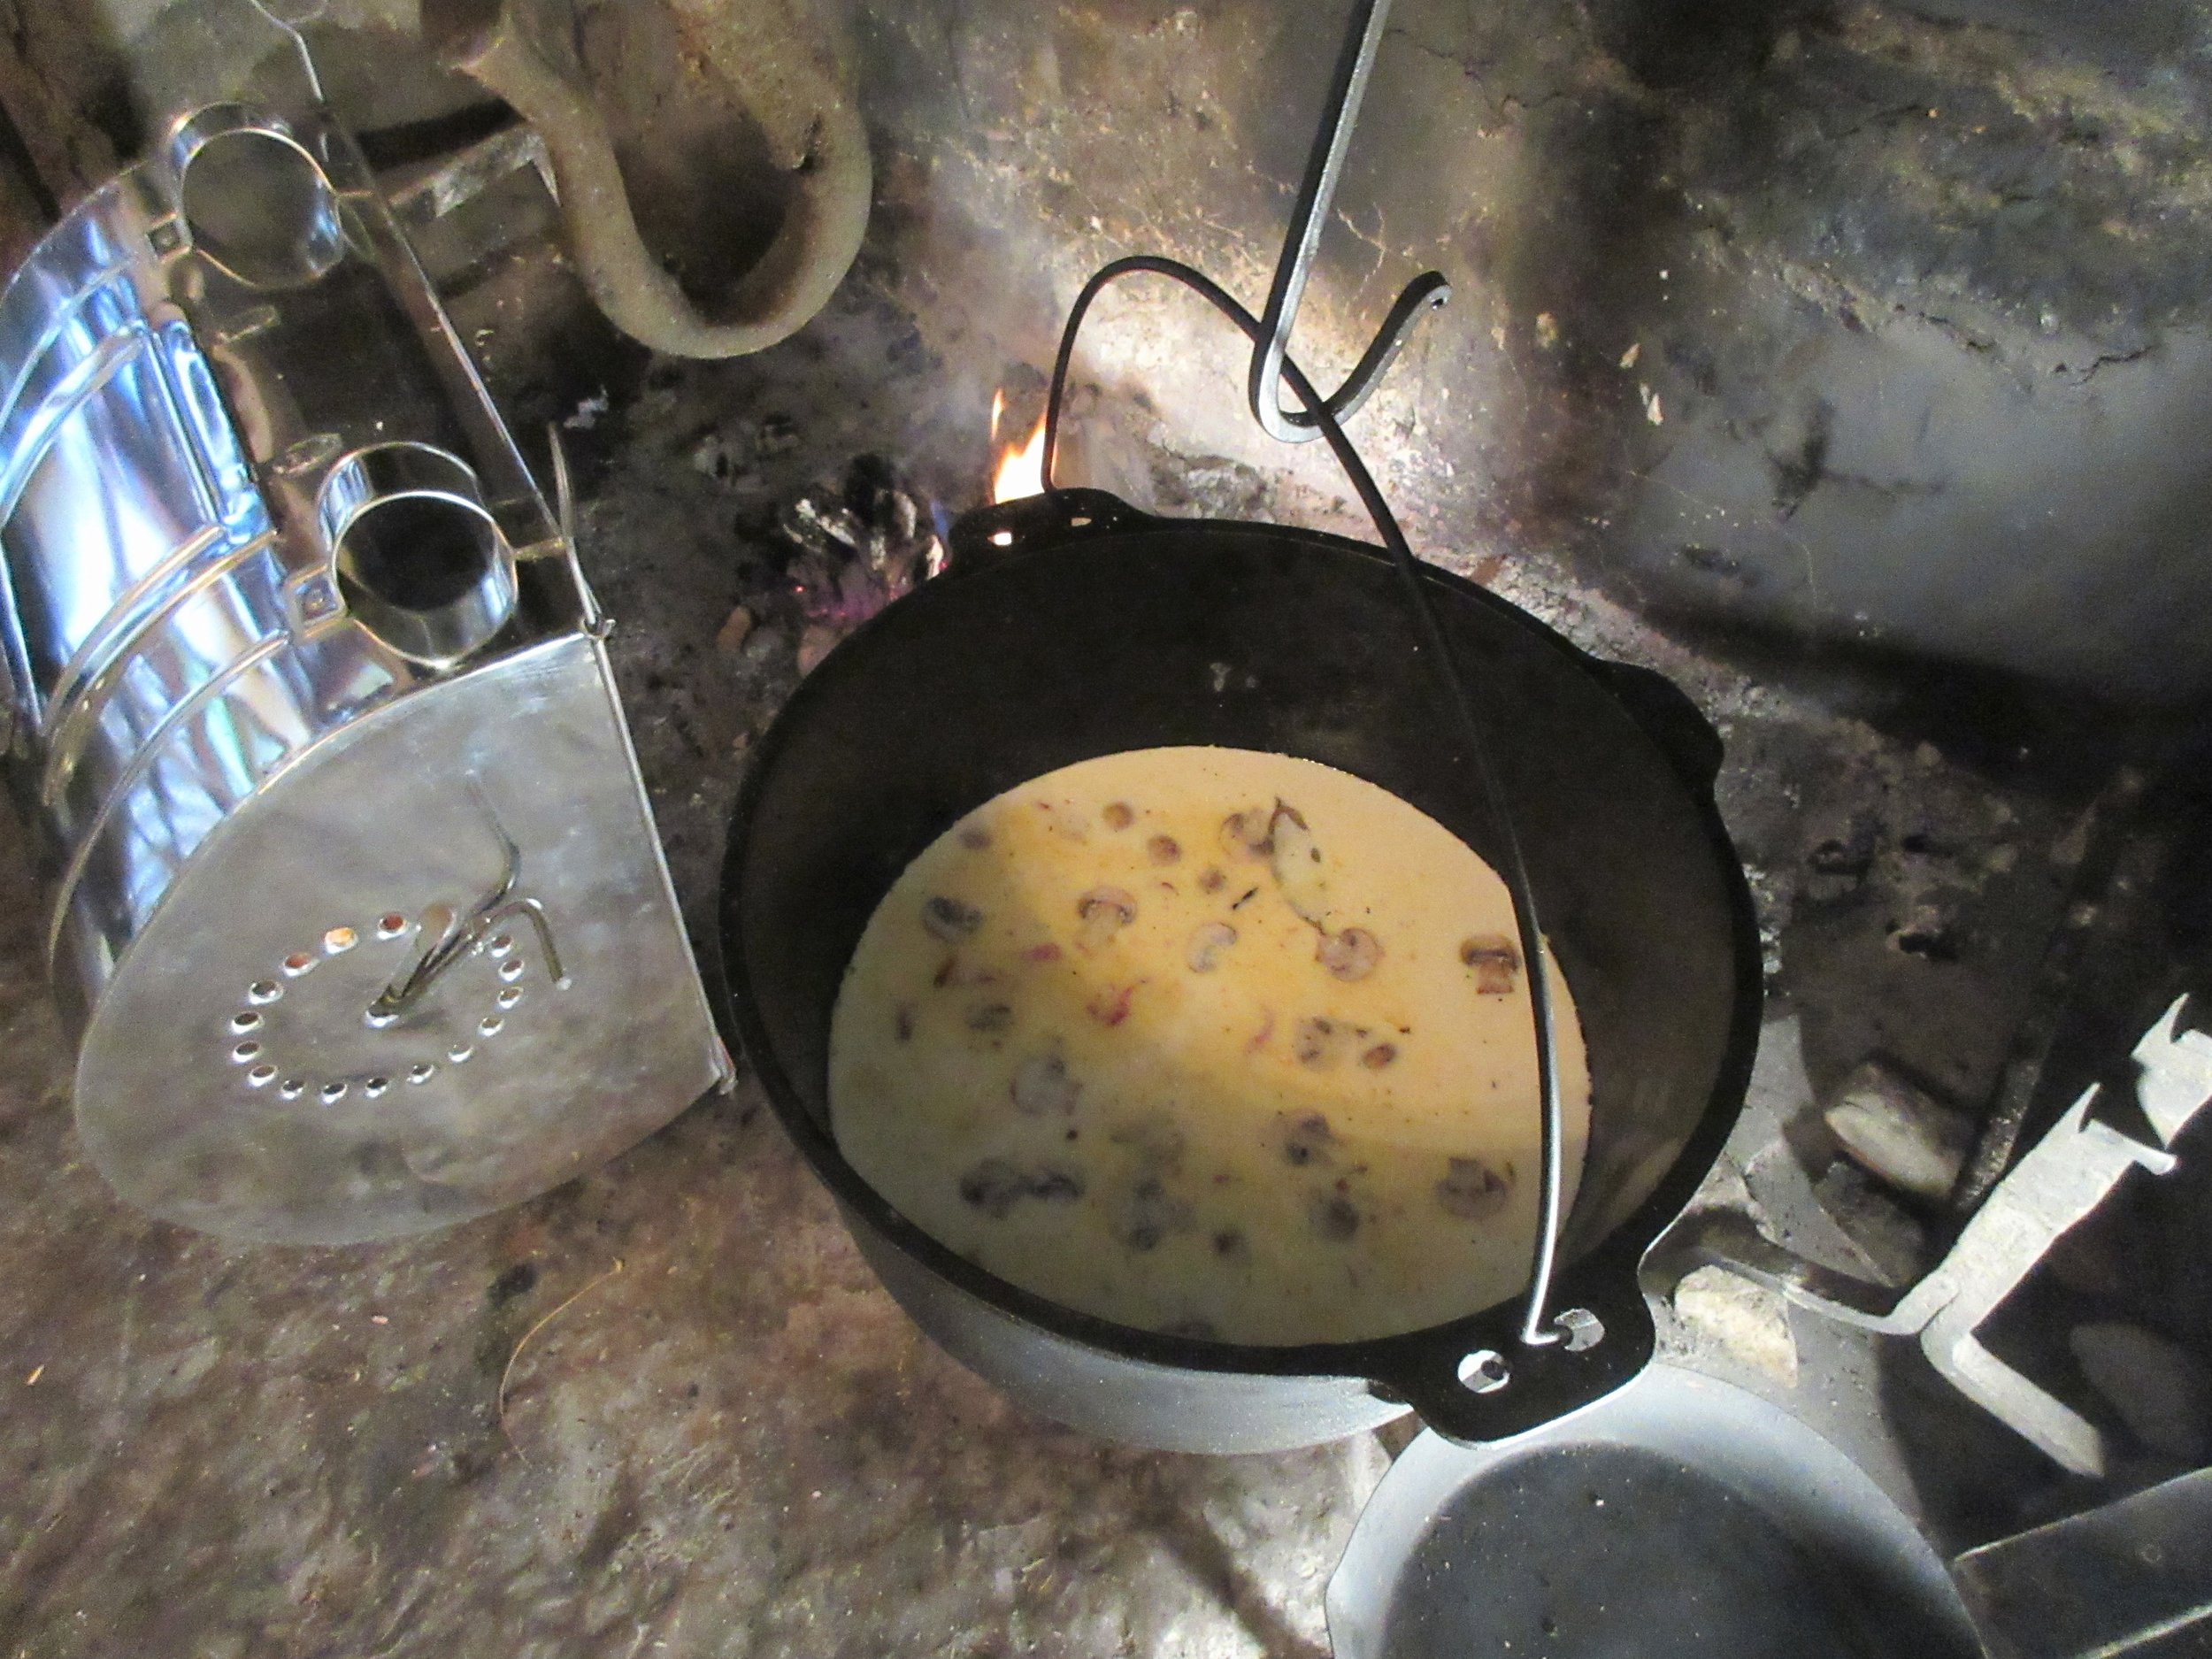
3) Add the cream and broth to the sauce pan and turn the heat up to medium. Allow it to bubble away for about 30 minutes to reduce and allow the flavours to mix. Chop a handful of fresh parsley and melt the remainder of the butter.
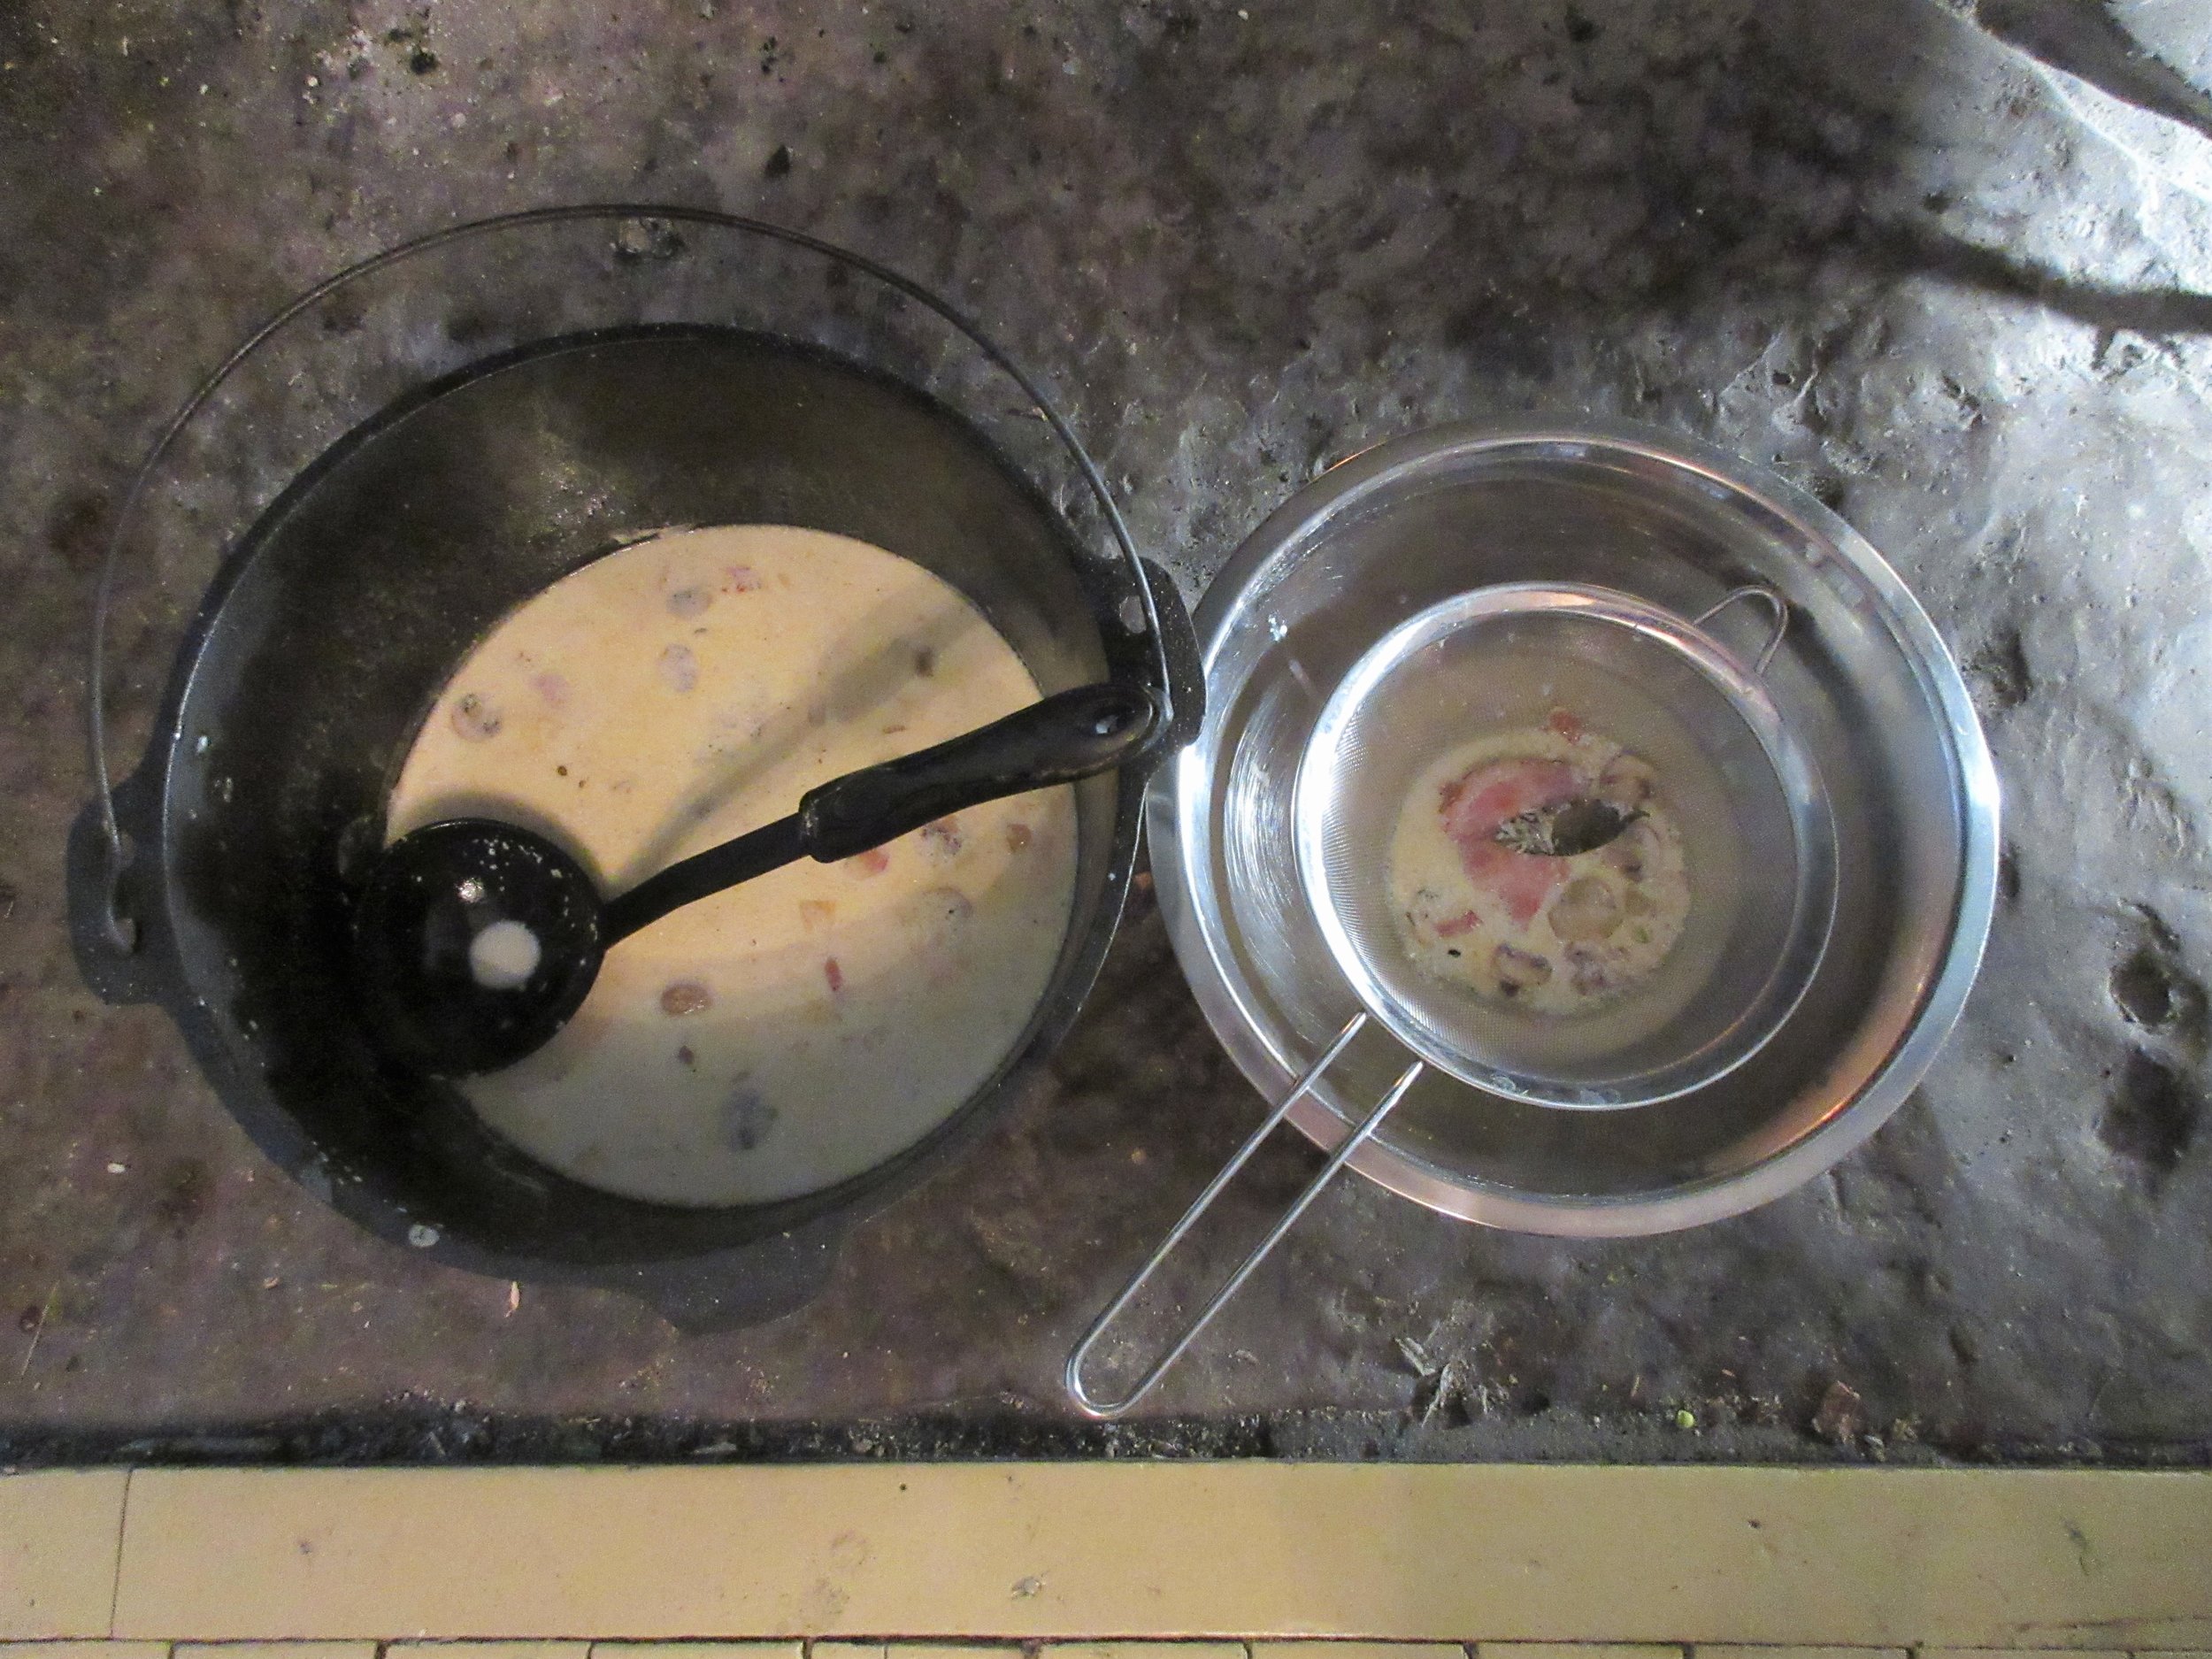
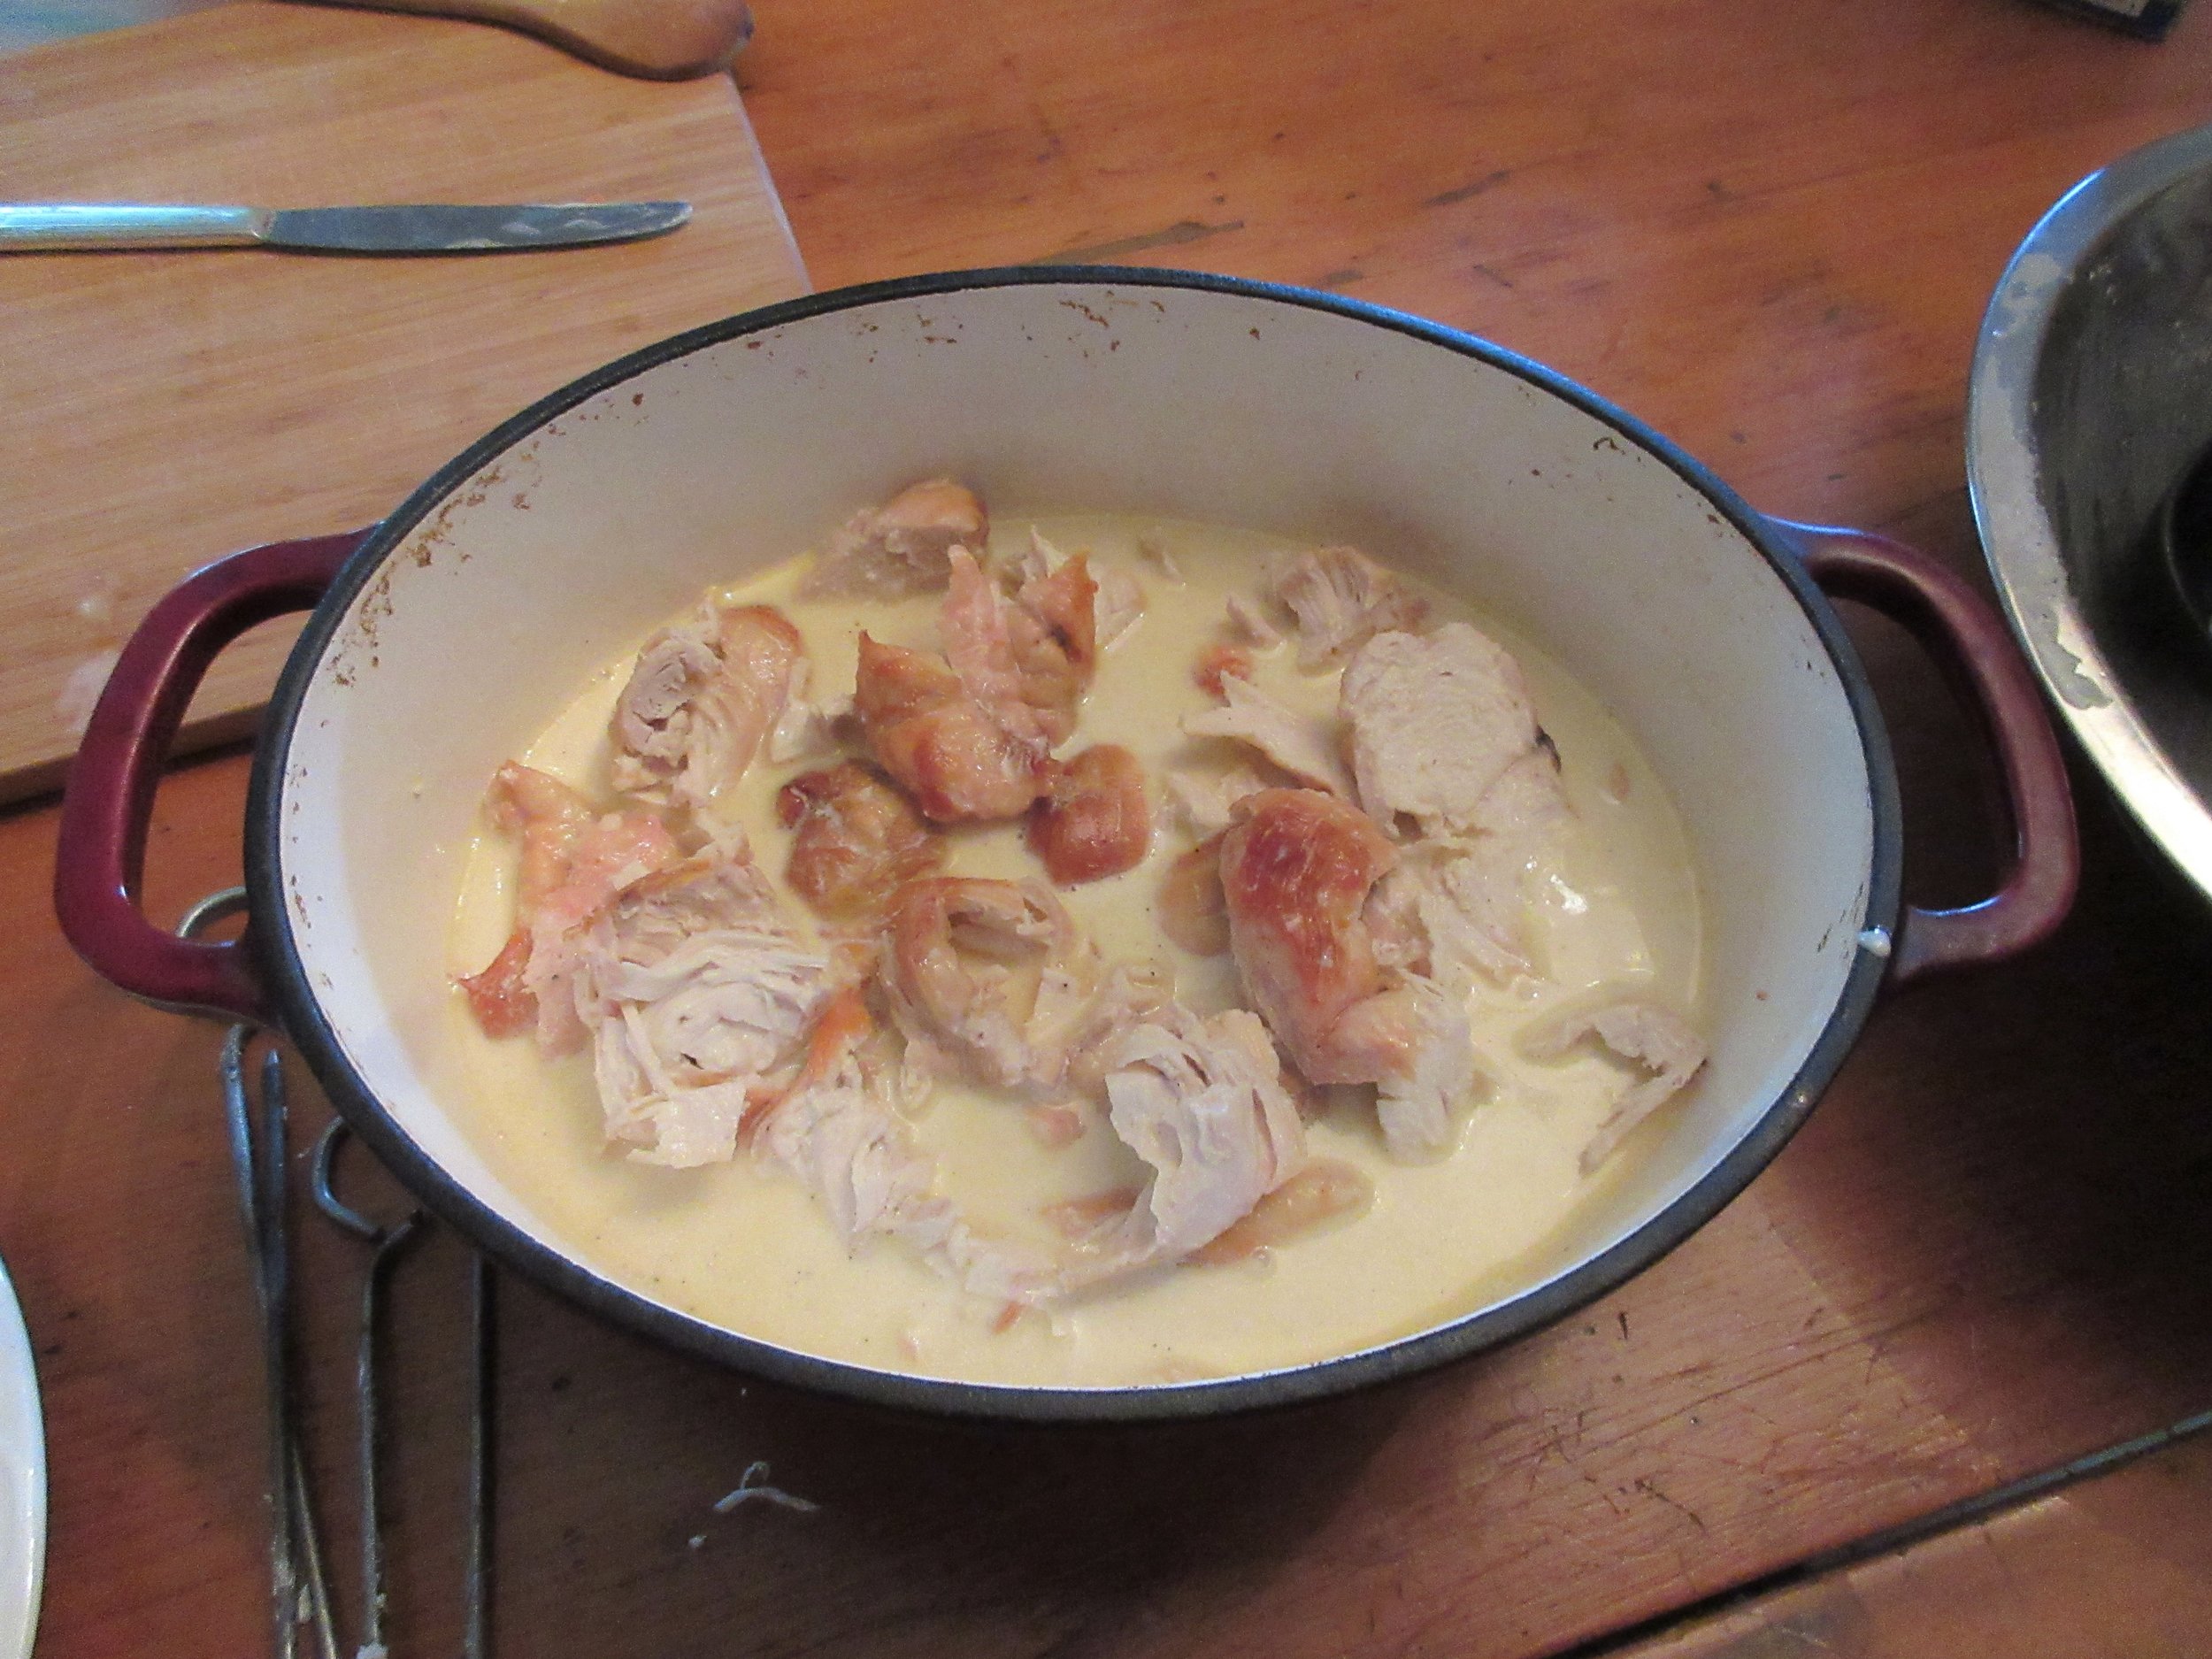
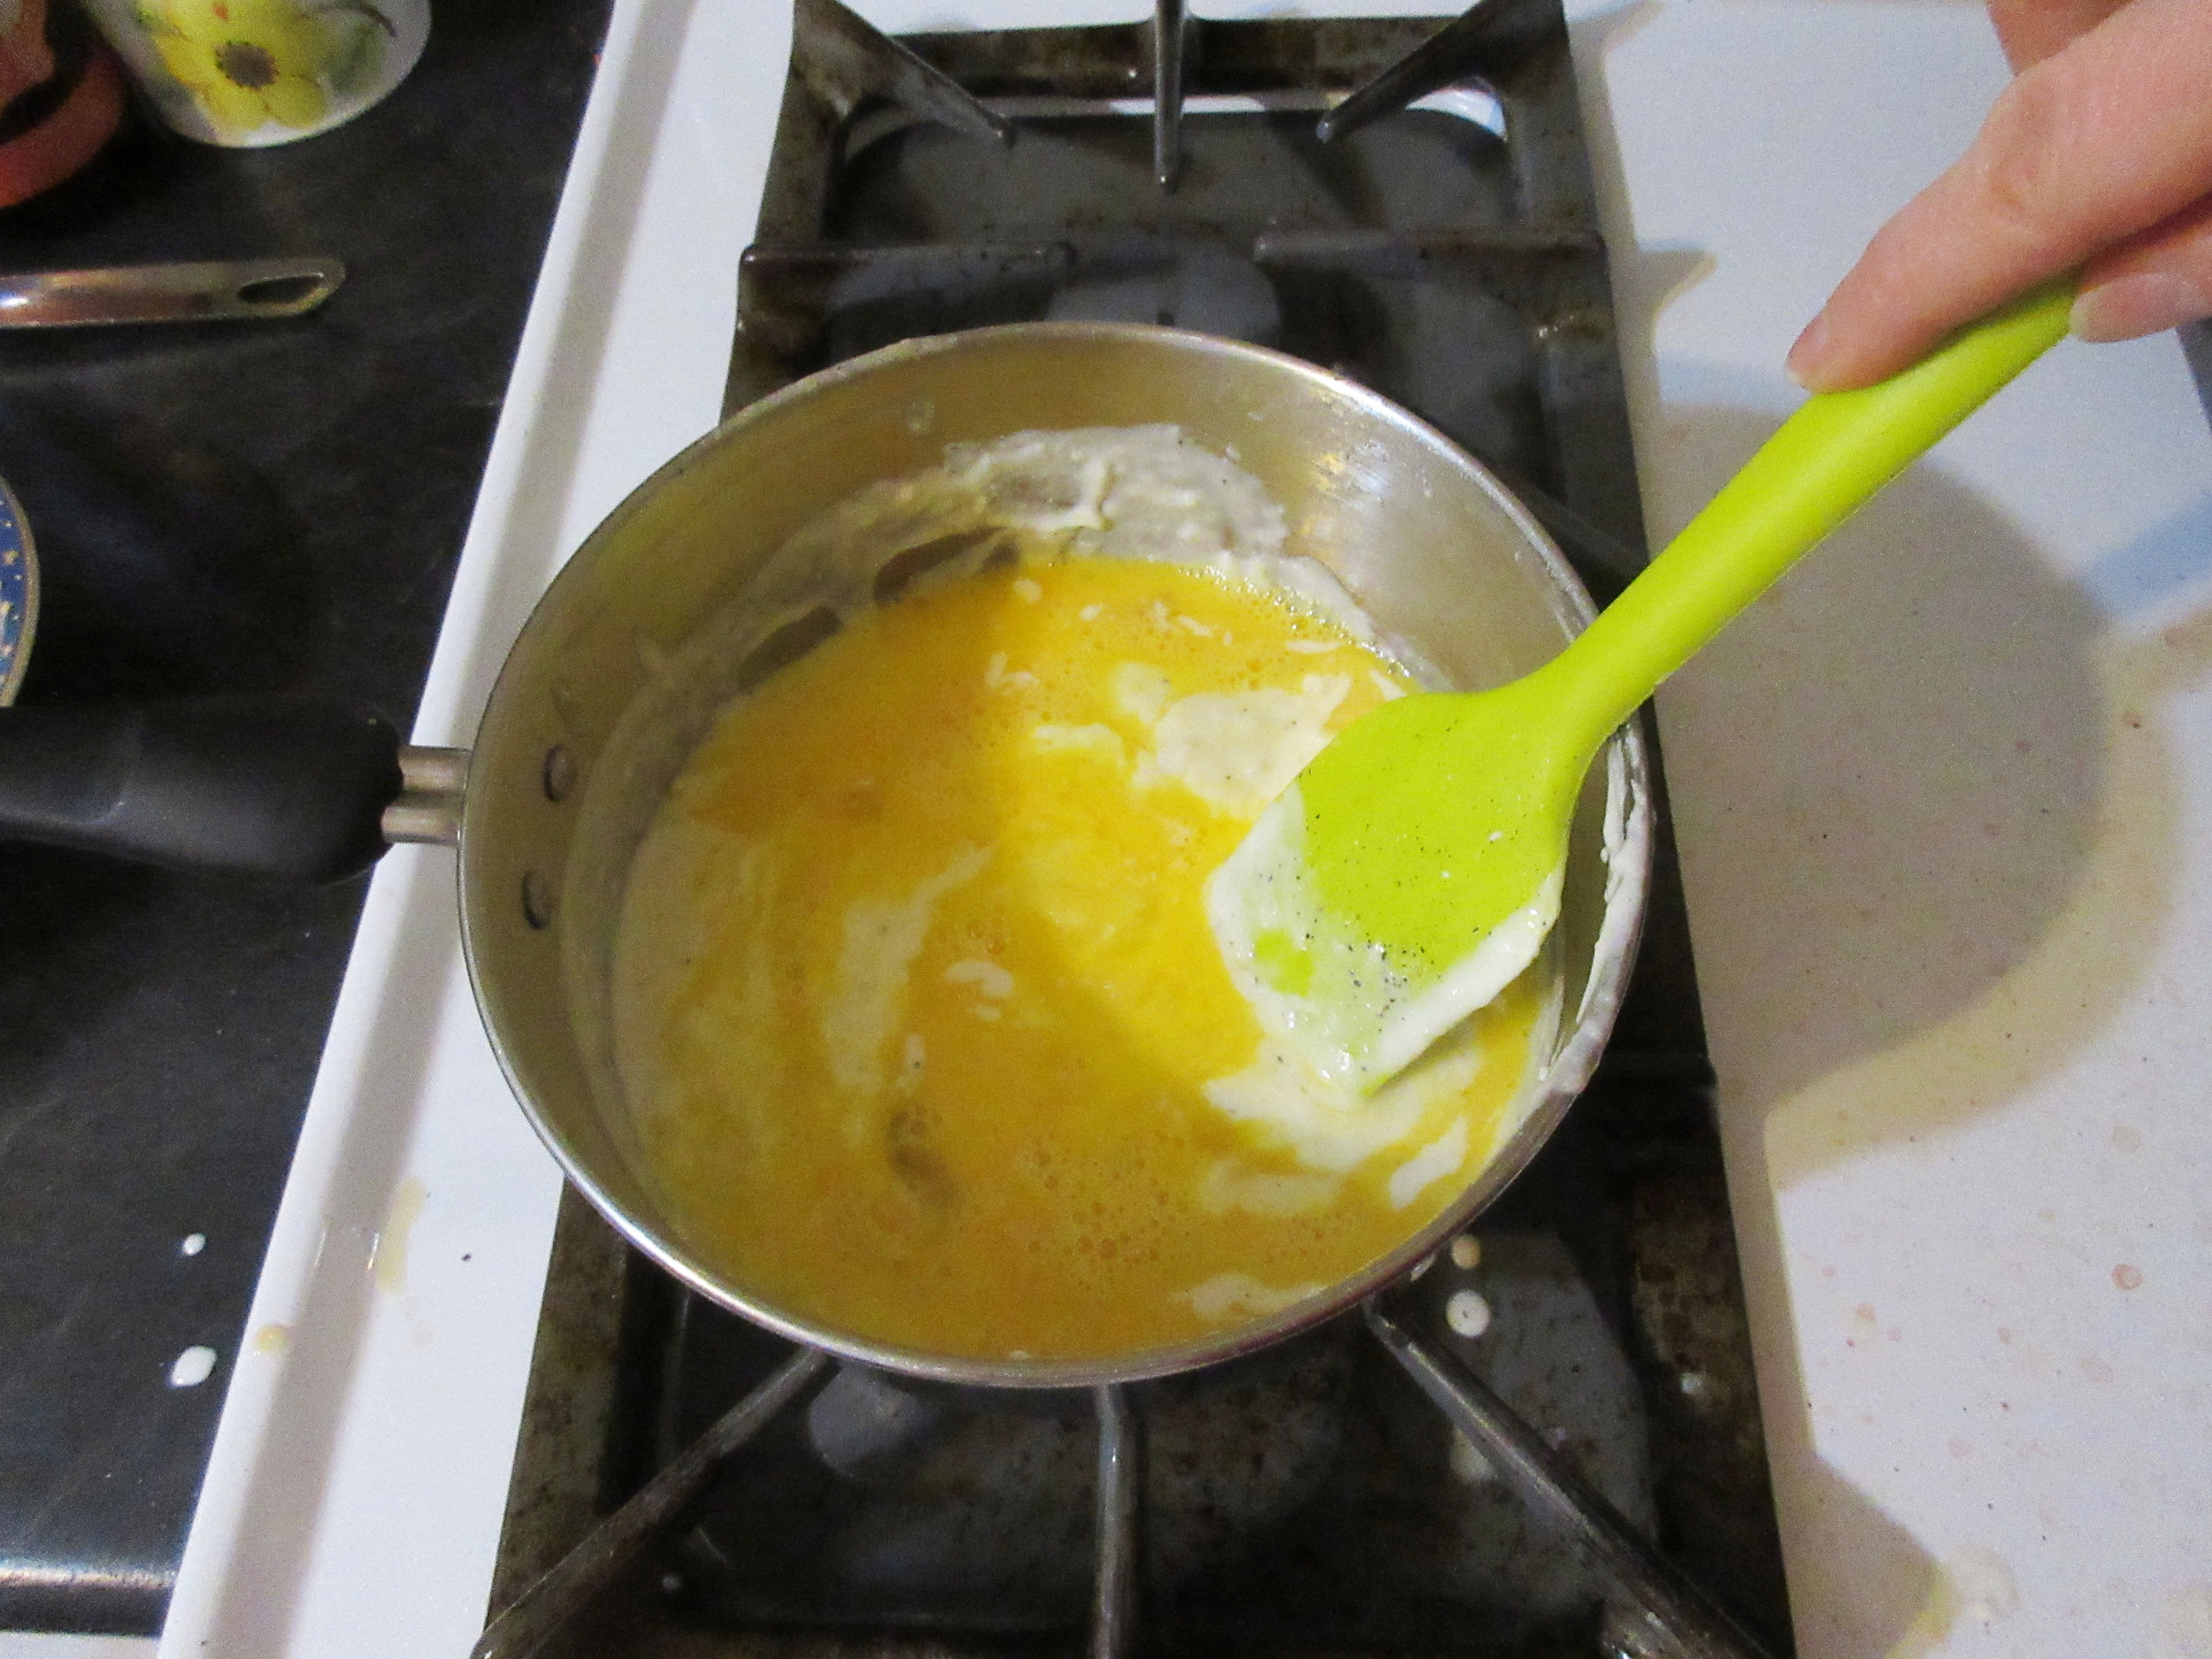
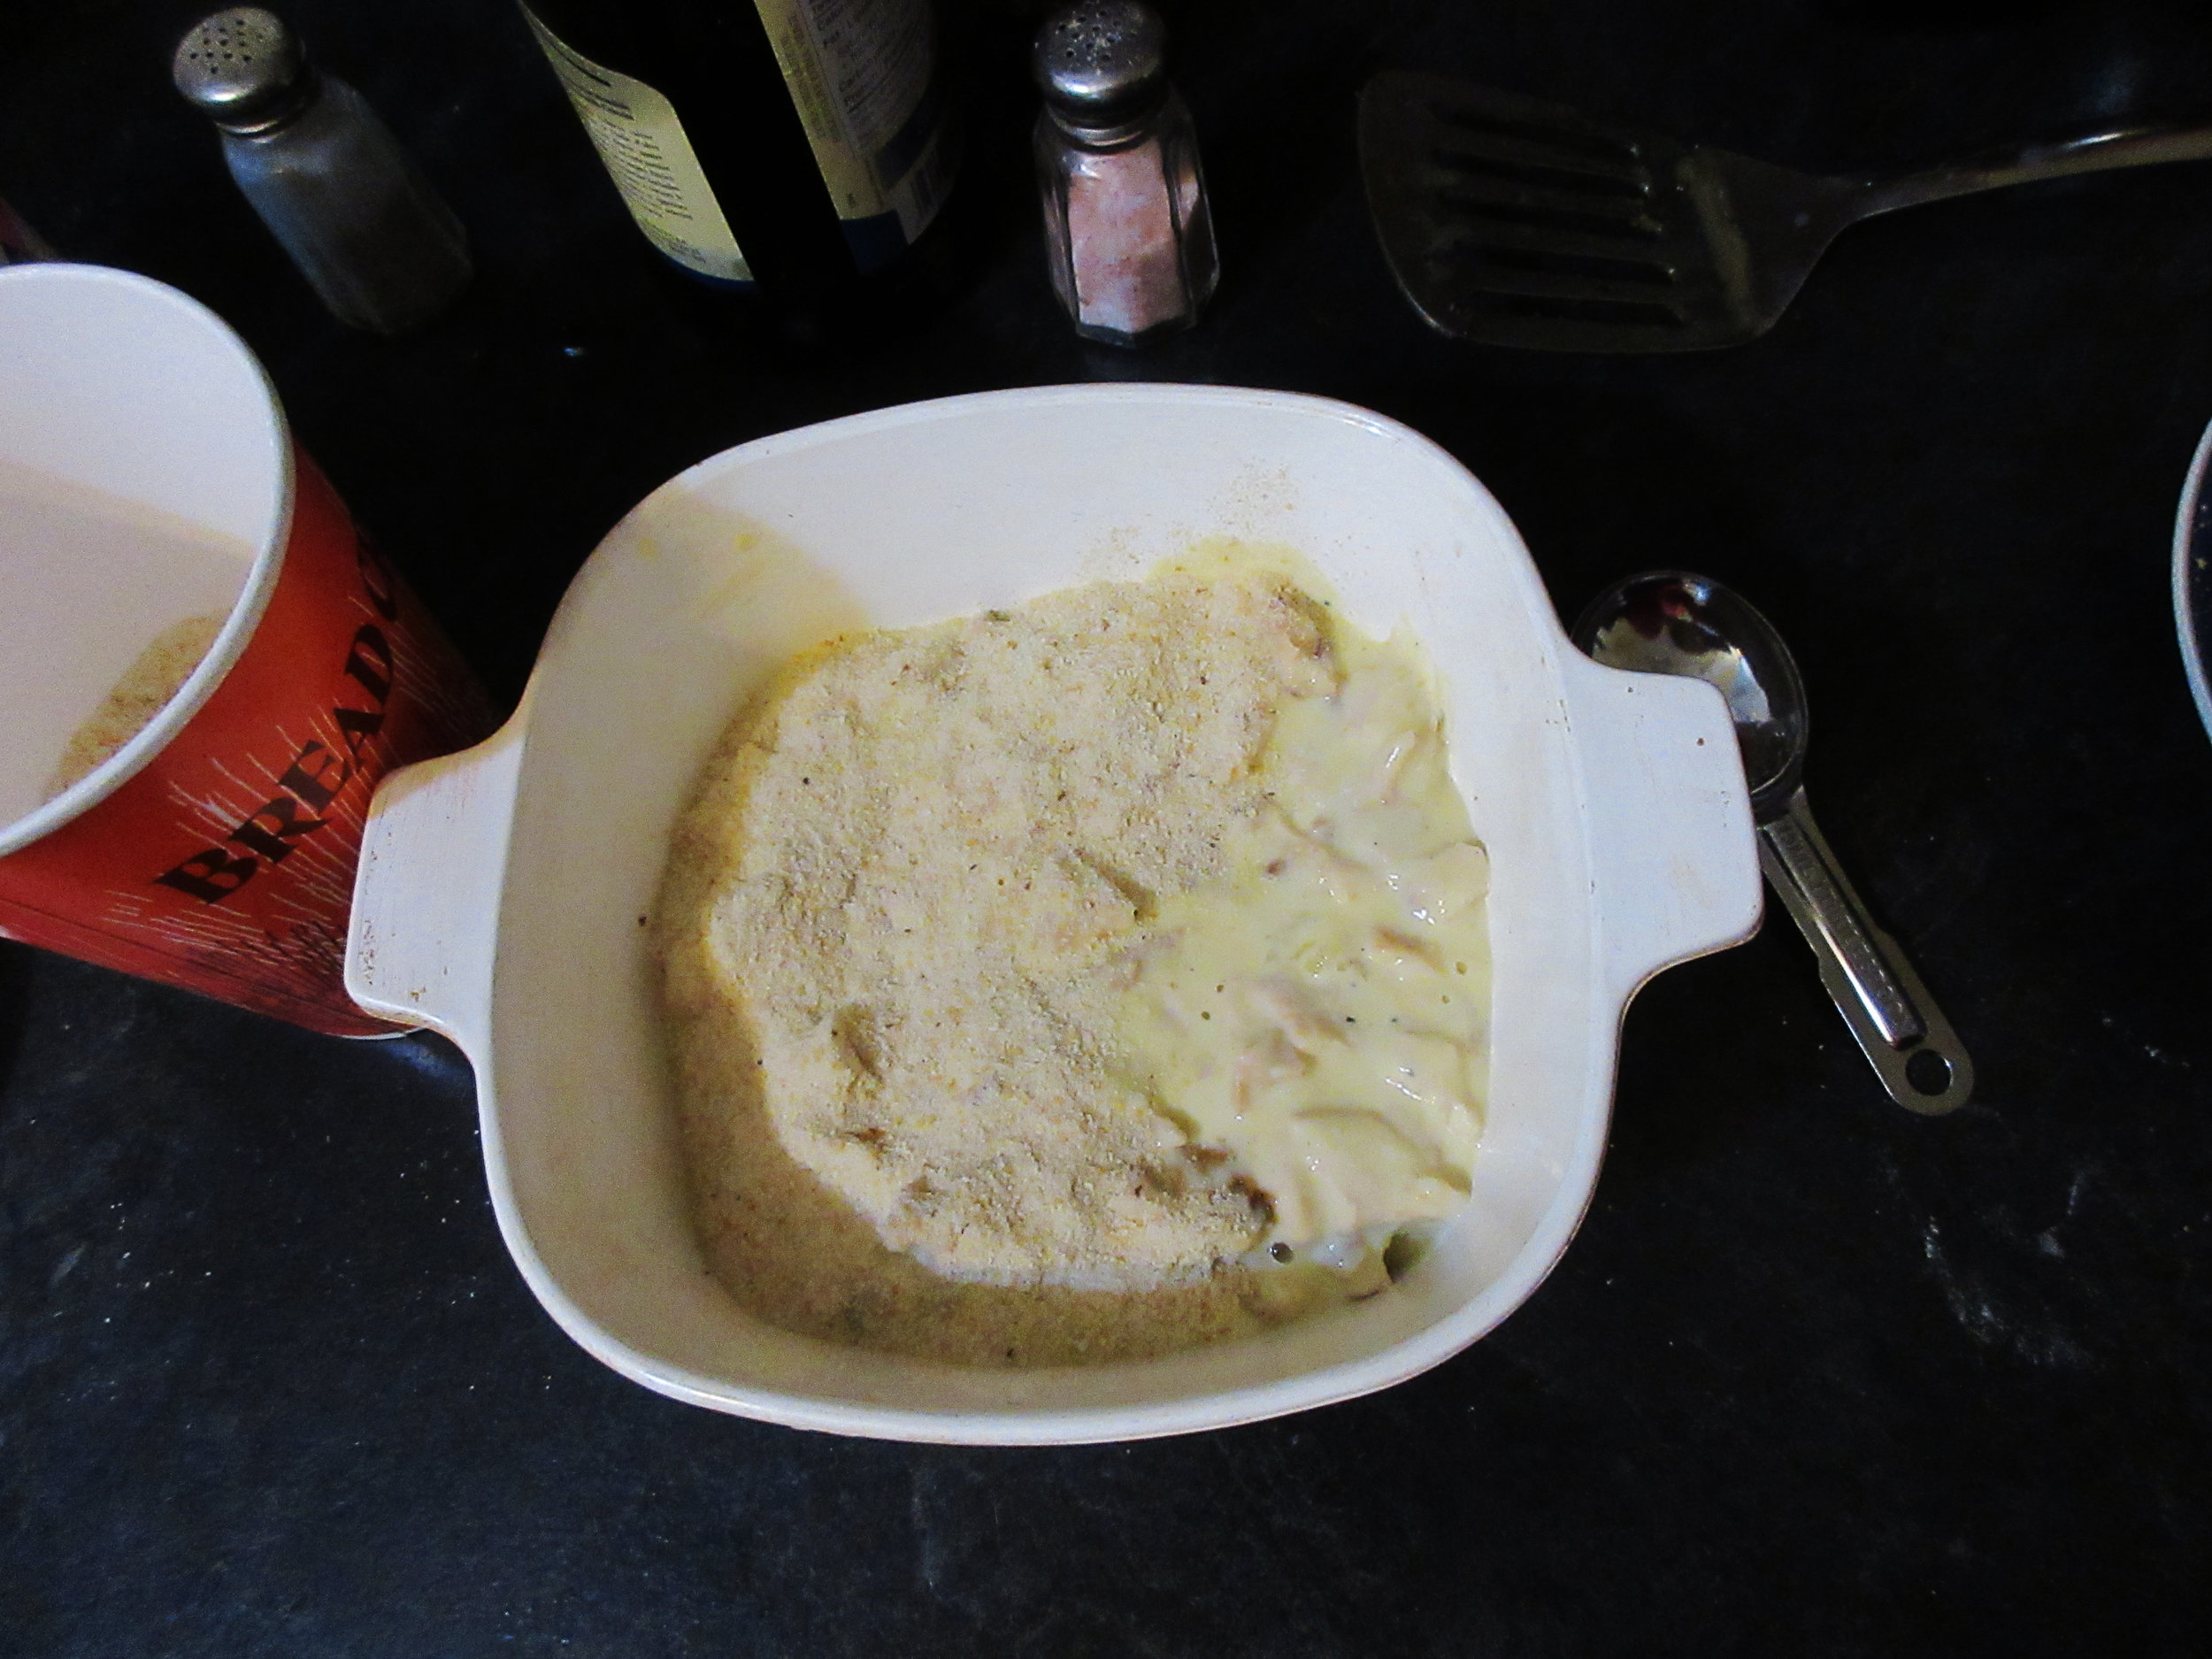
4) Strain the sauce through a sieve into the serving dish with the meat, then add the chopped parsley. Mix the melted butter with the breadcrumbs and layer on top of the sauce and chicken.
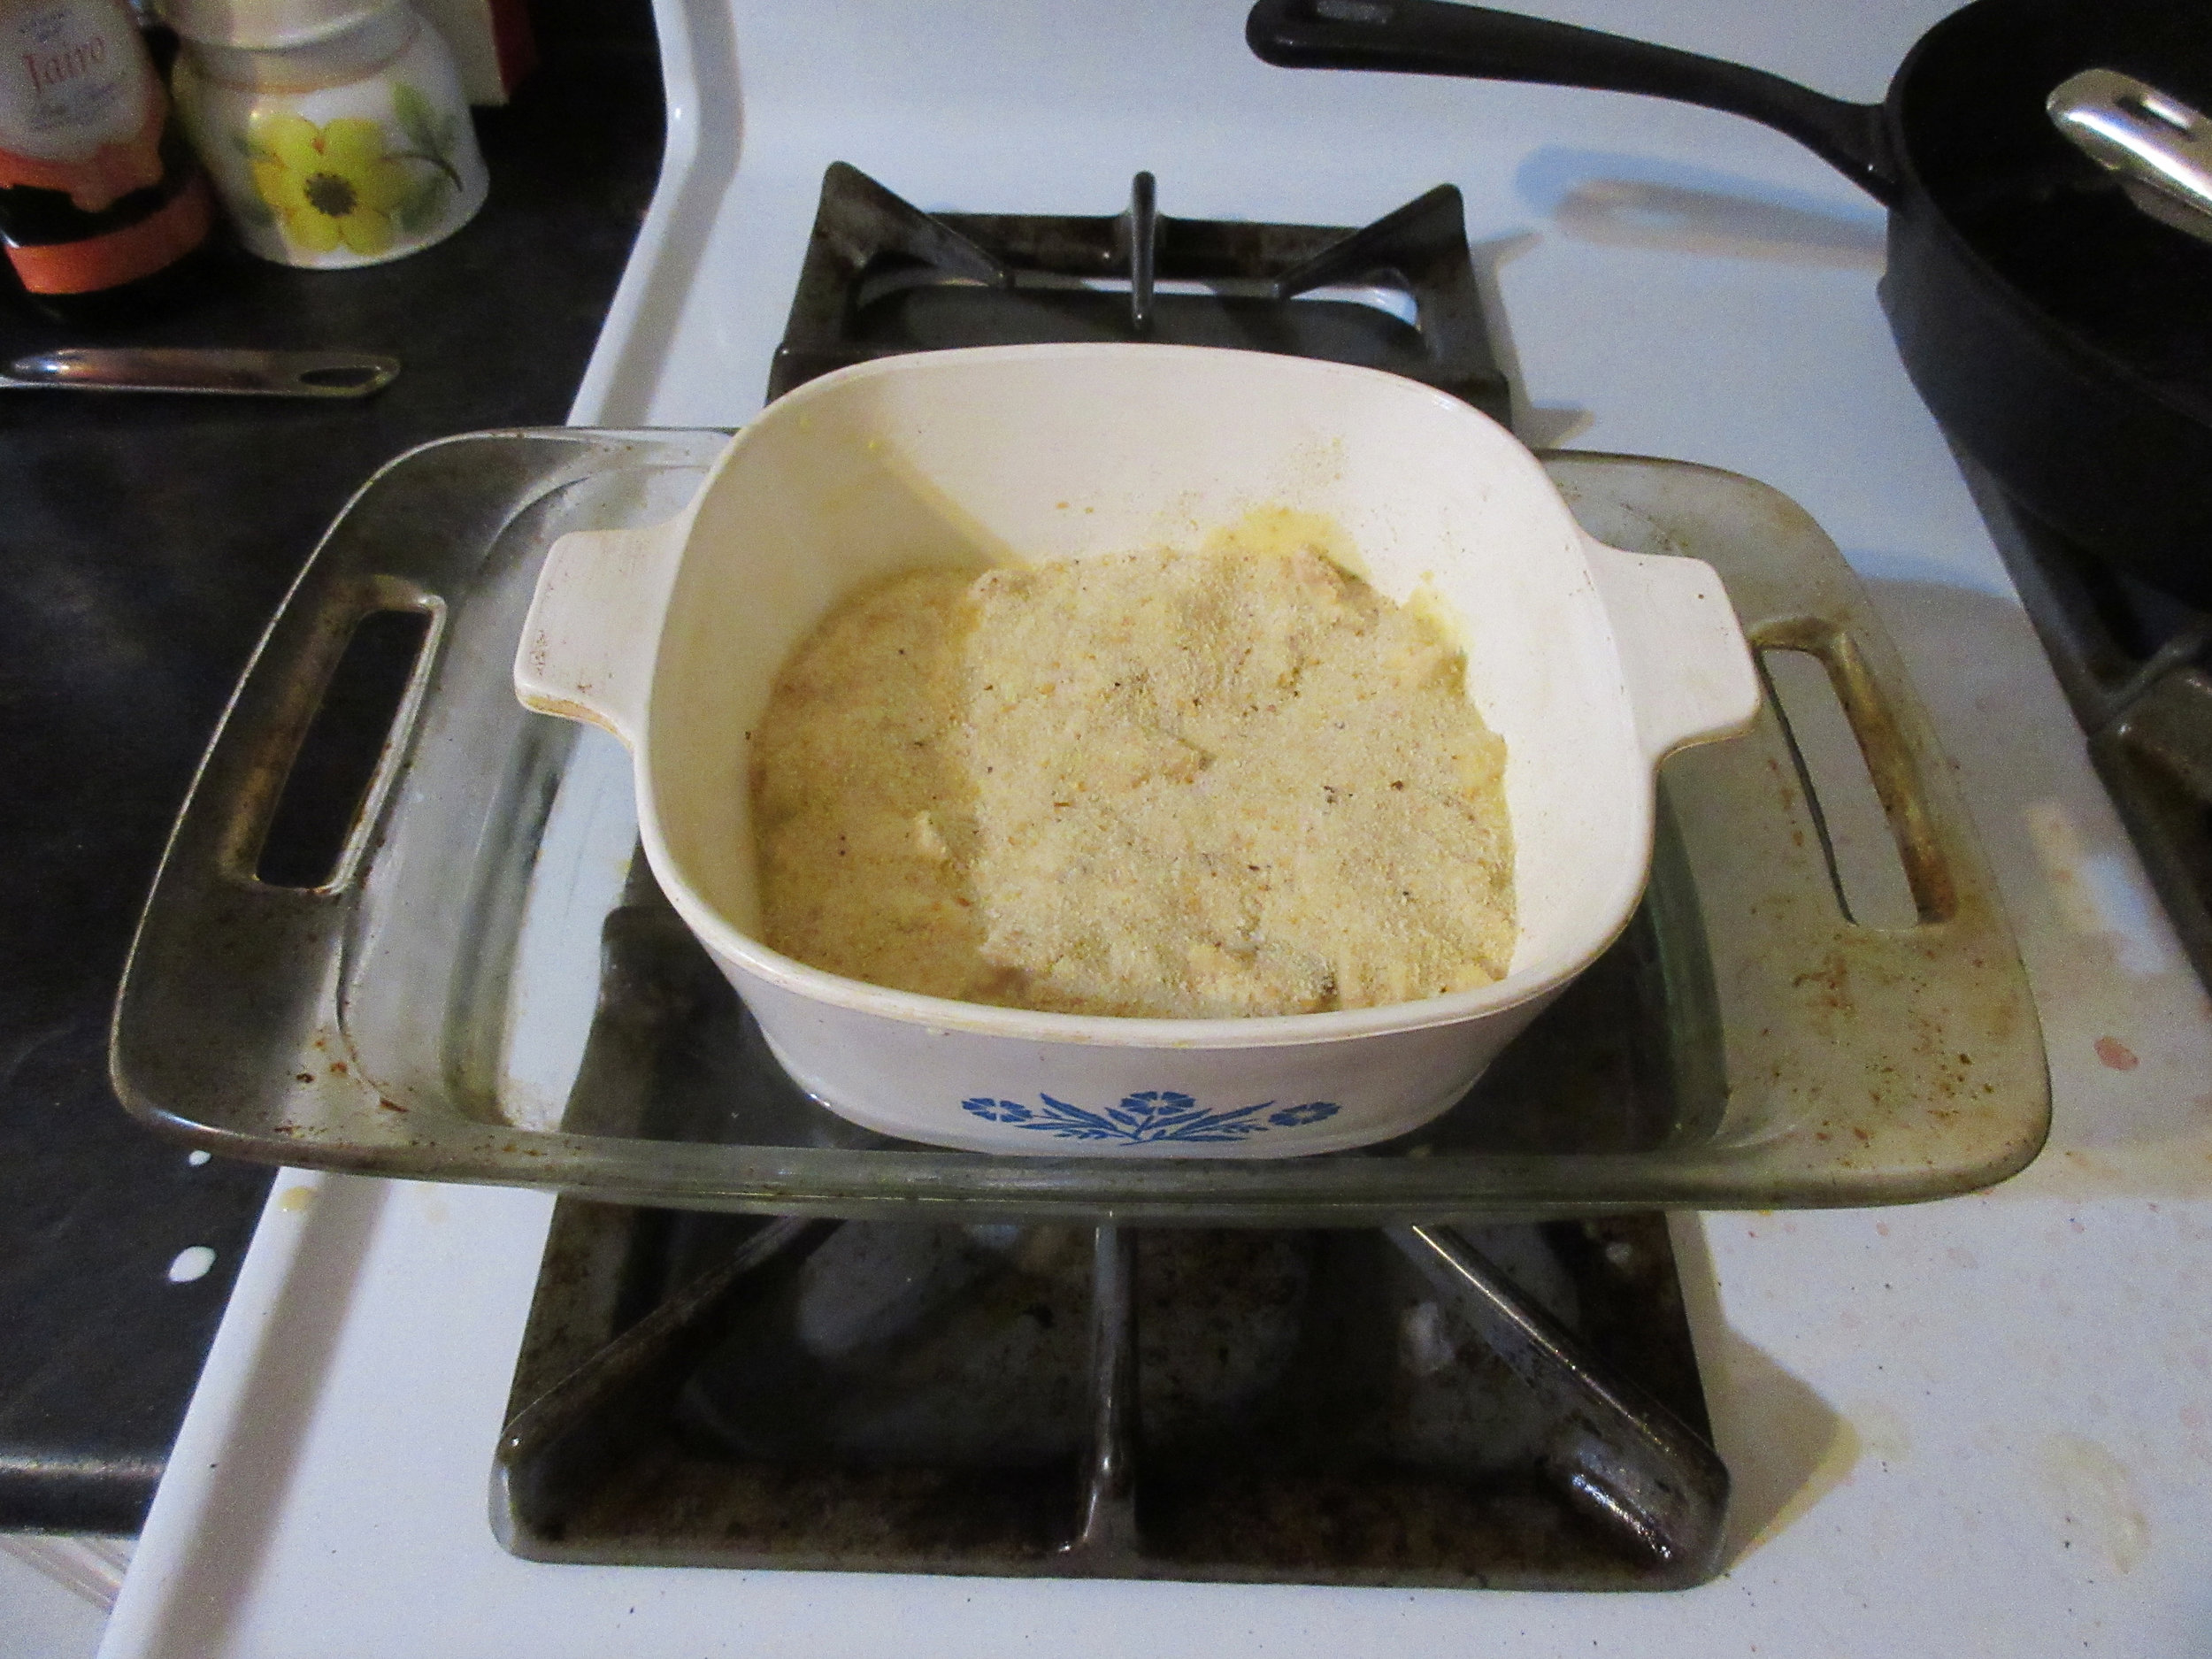
5) If your chicken is still warm from roasting, you may broil in the oven until the breadcrumbs are brown (or if you have a salamander, you can use that to brown the top). If your meat is cold, bake uncovered at 350F or 175C for 20-30 minutes. Switch to broil at the end to brown the breadcrumbs if needed.
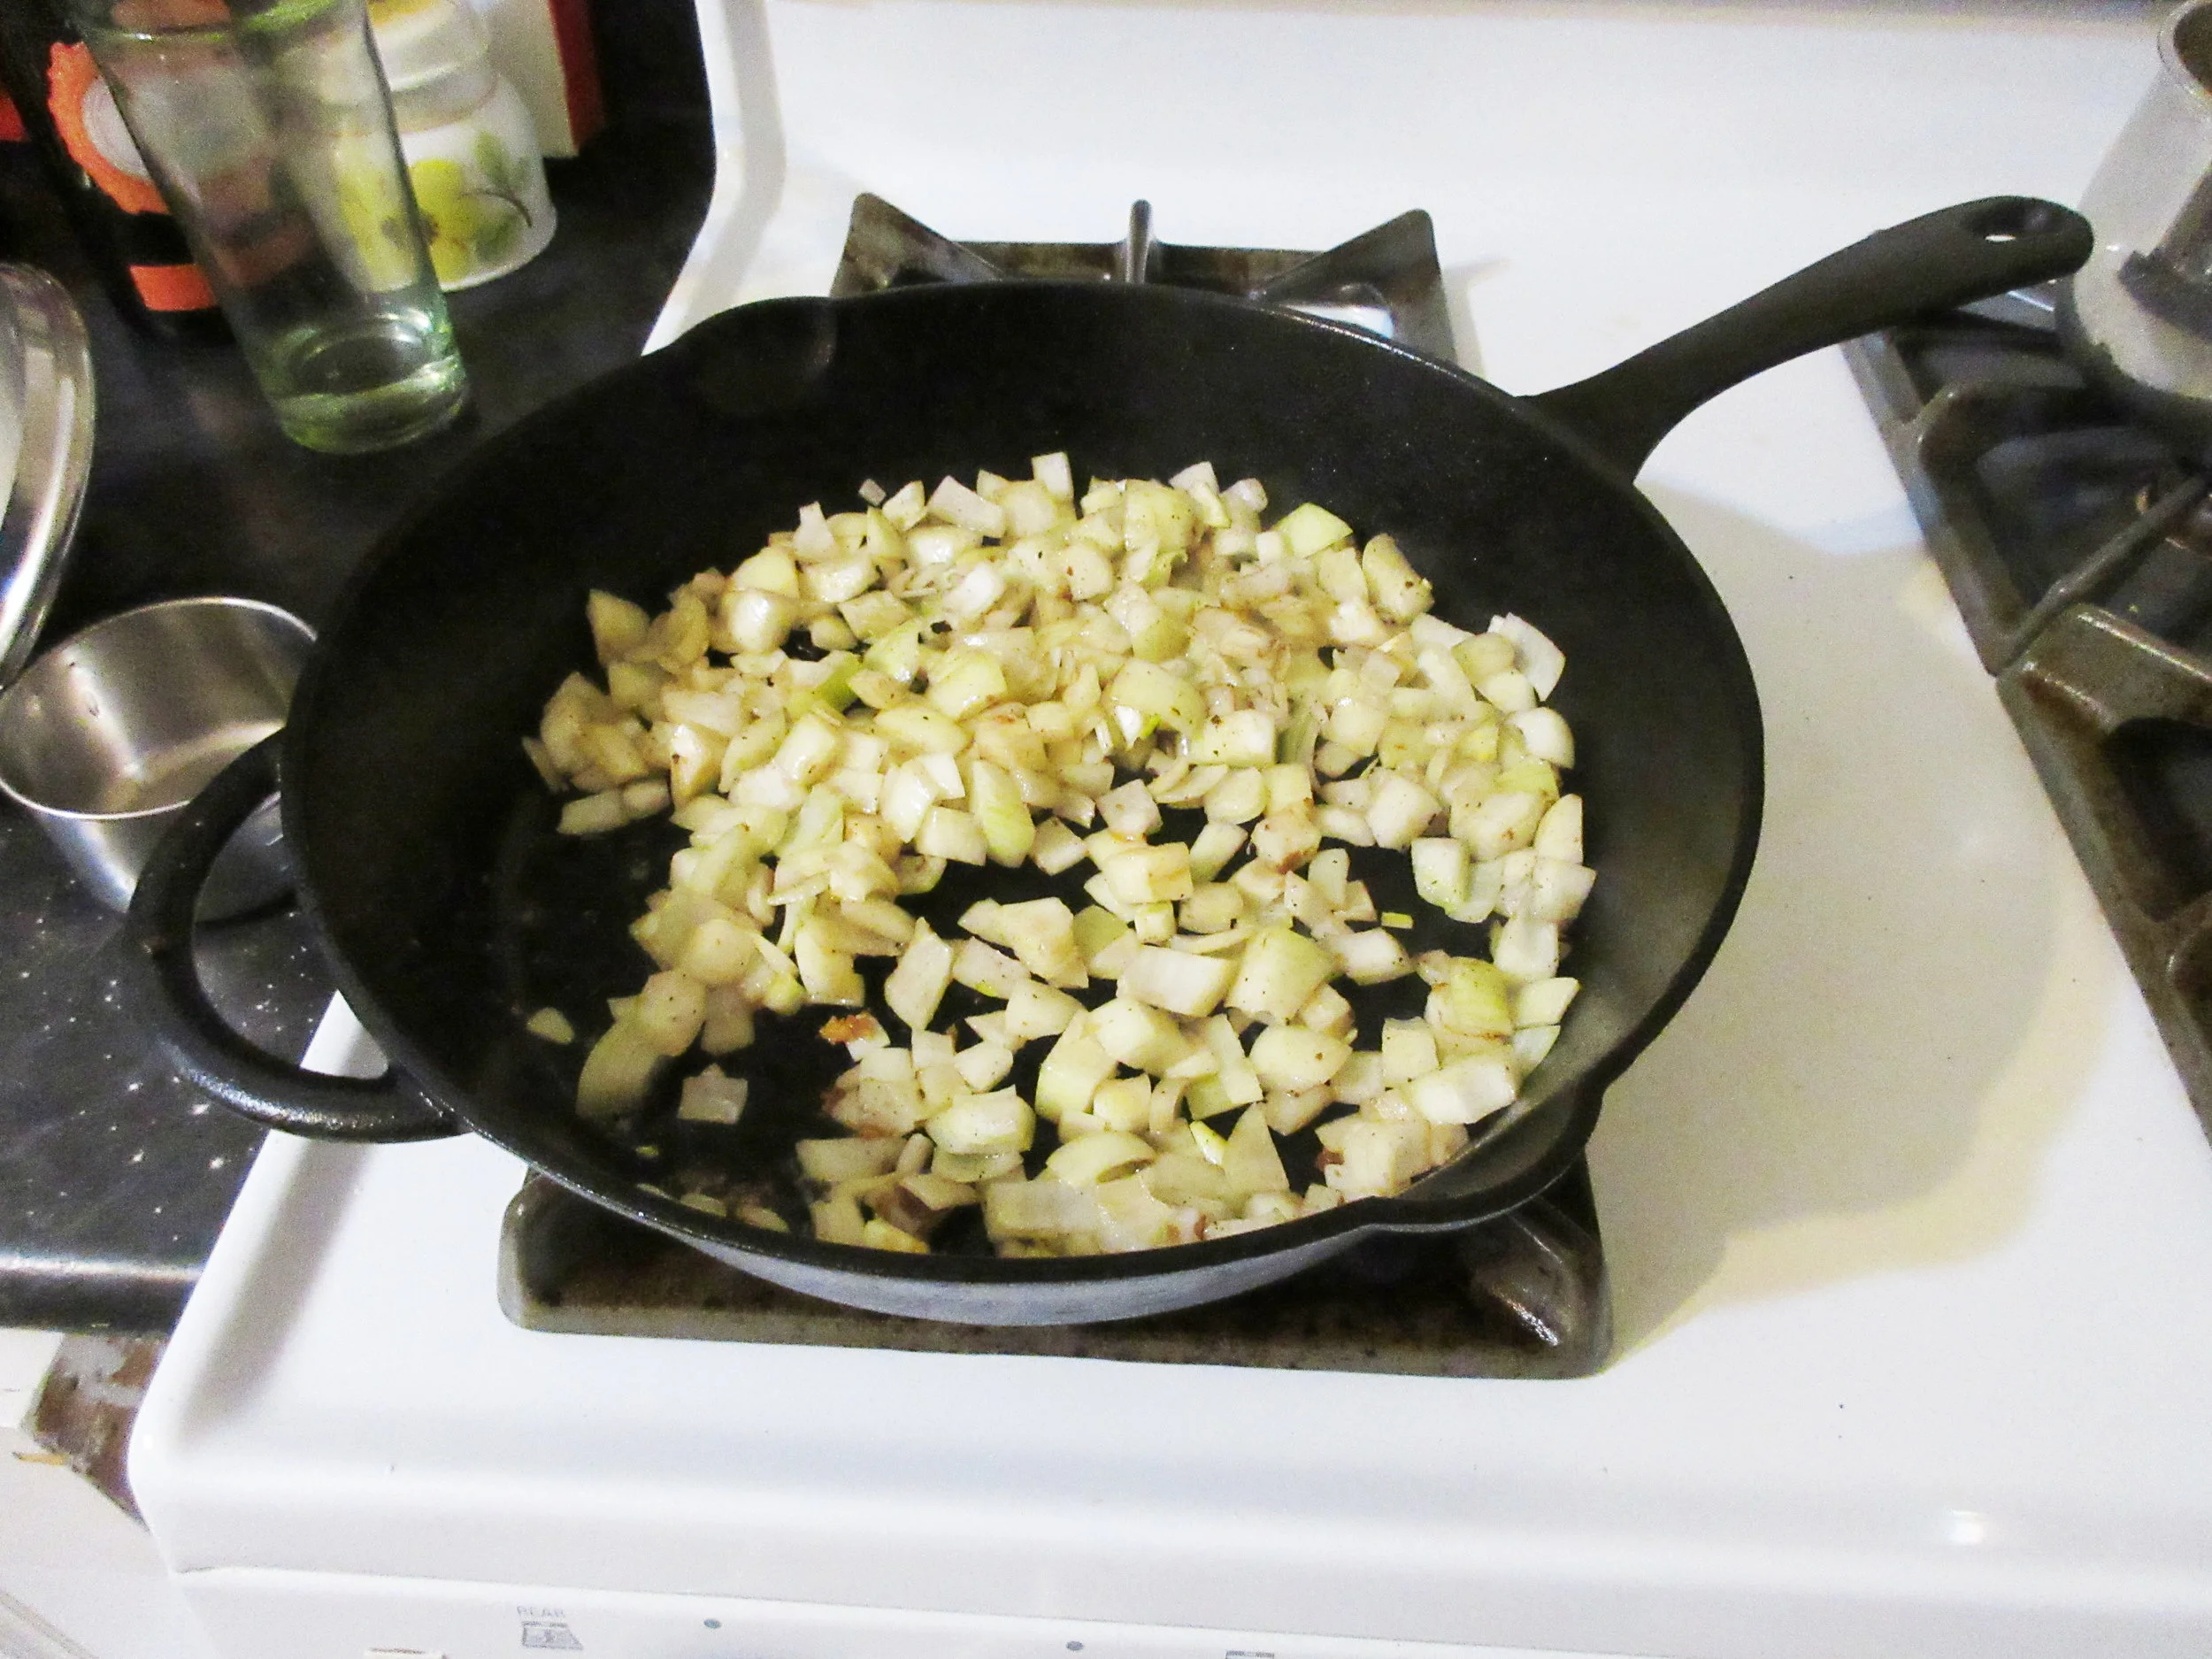
Optional, but delicious: Slice the ham or veal into small pieces and remove the cloves and bay leaf. The ham, veal, mushrooms and shallots are tasty as a side dish or as a garnish with this dish.


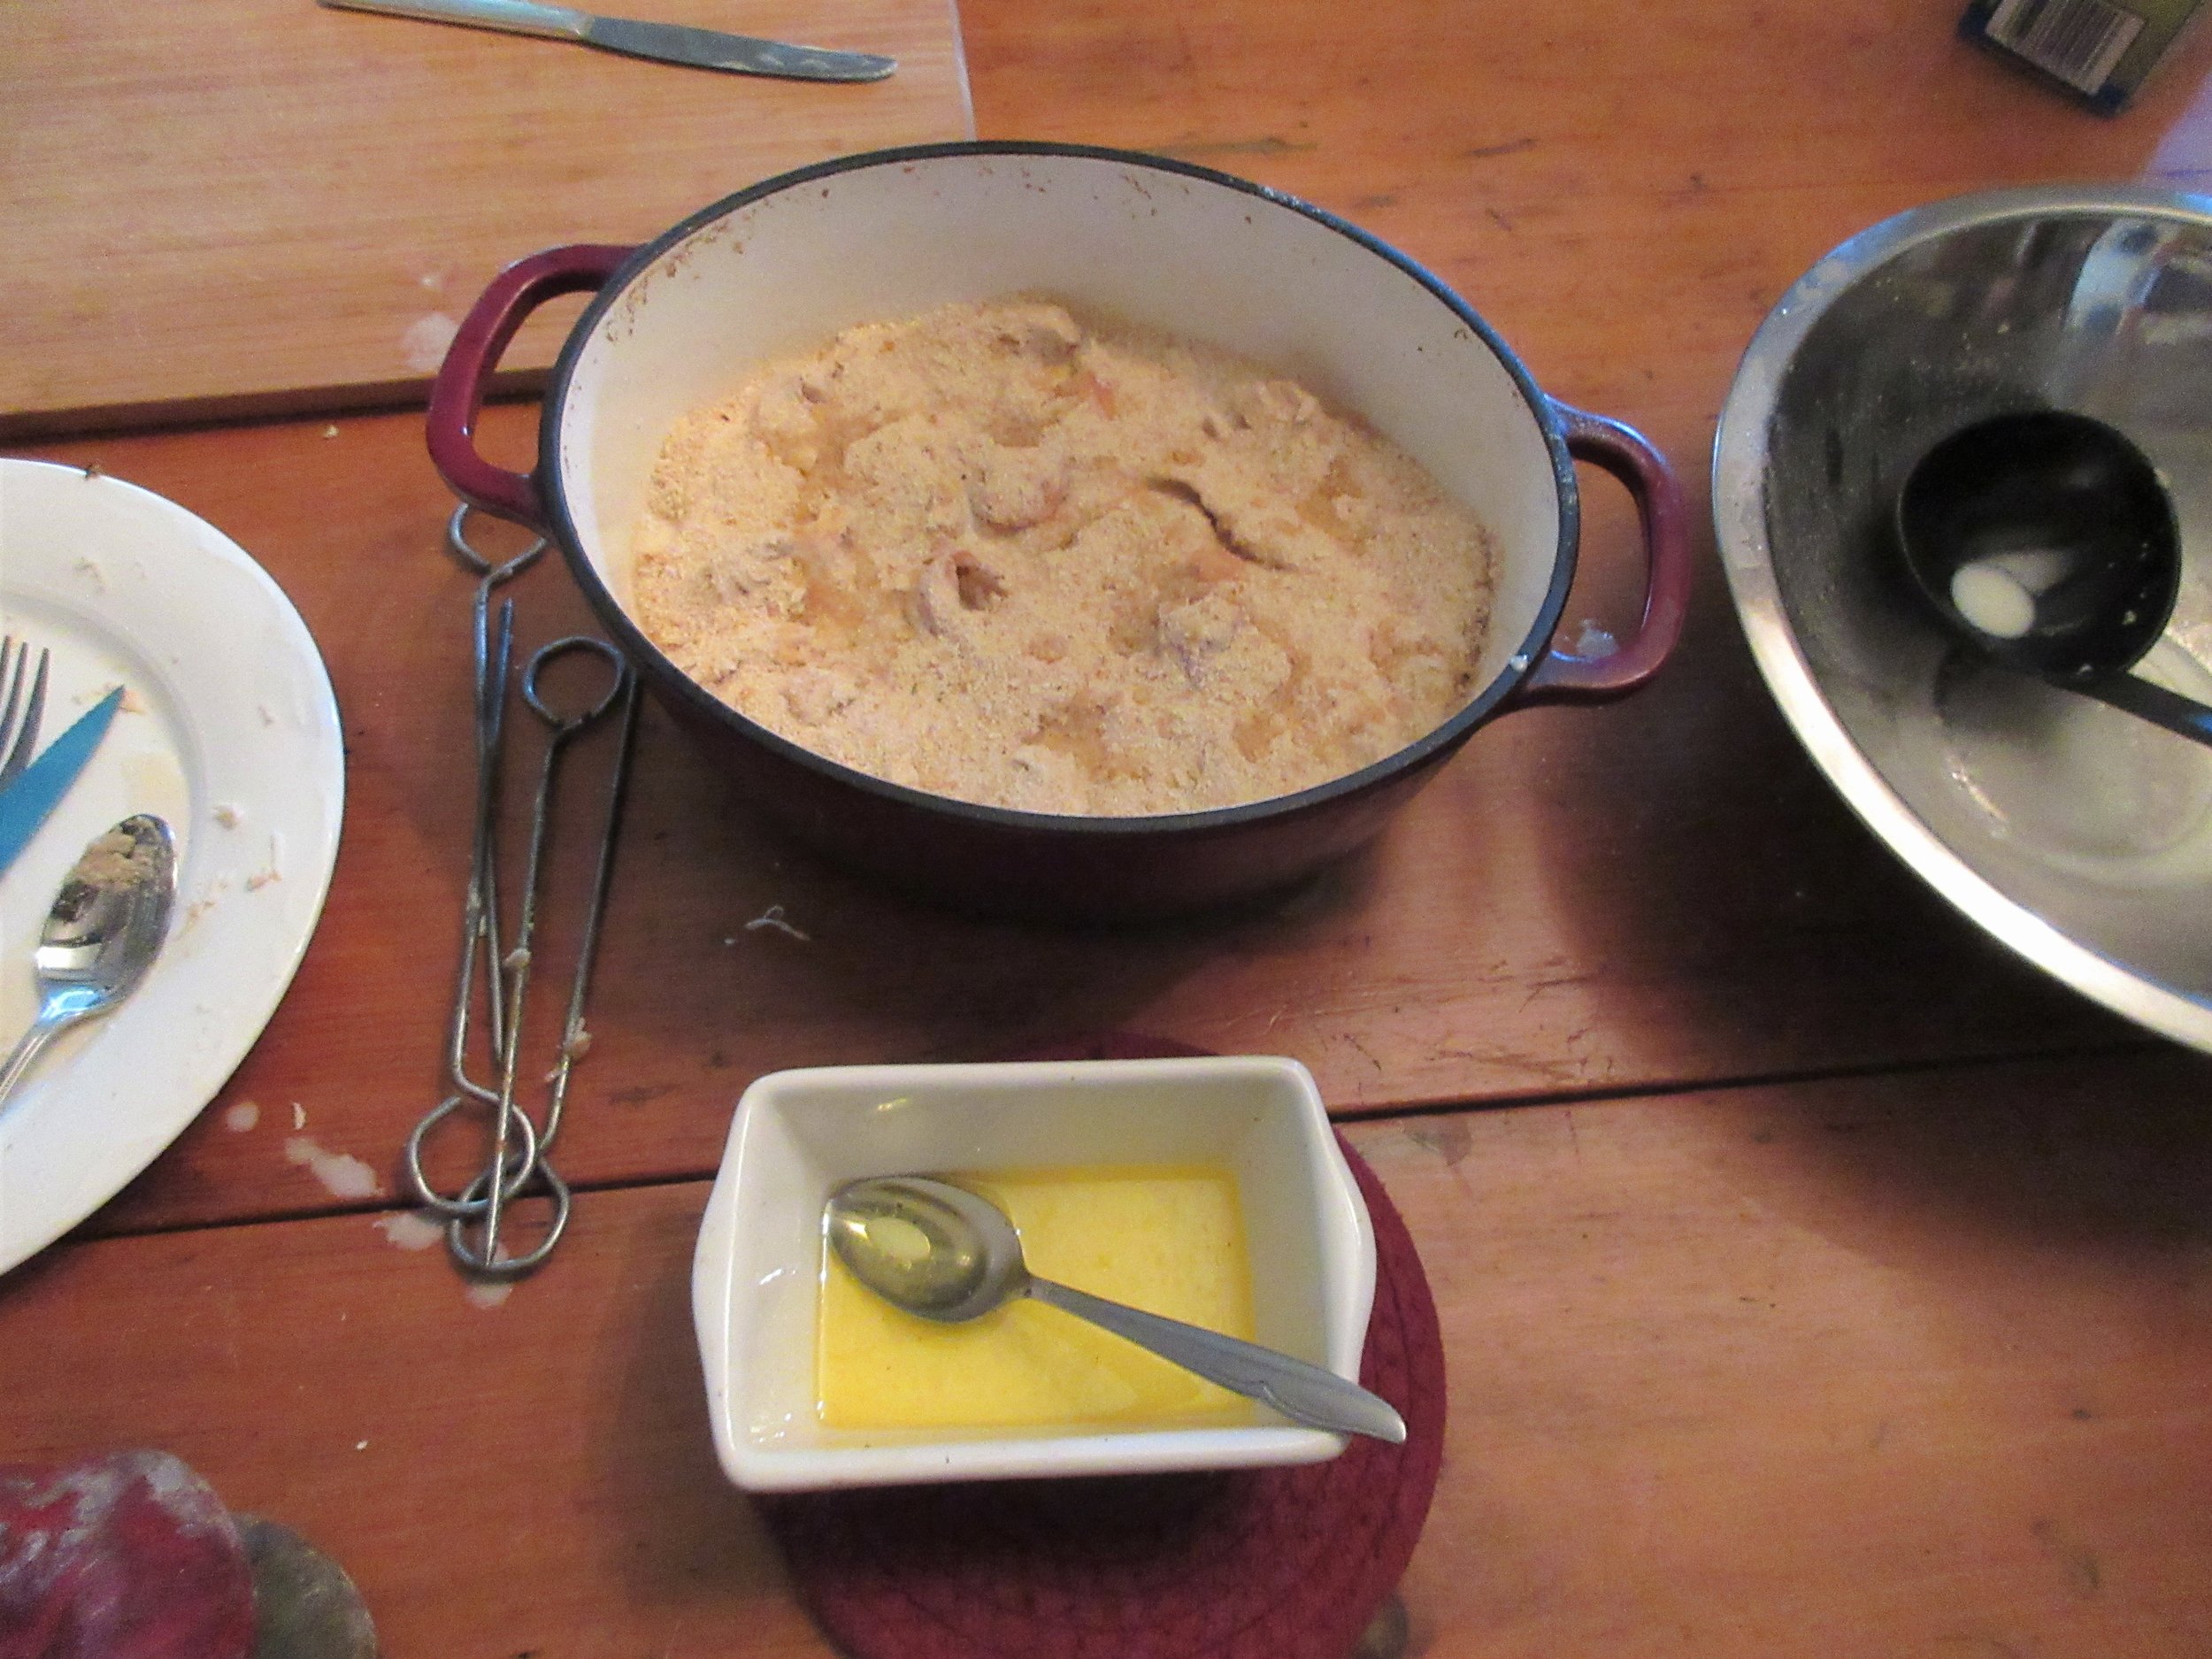
It’s been a while since I made Fillets of Chickens, with Bechamel-ſauce and Bread-crumbs at Nelles Manor Museum. I made it twice in the summer of 2019, which was the last time that I was able to teach an open hearth cooking class there. The recipe’s from the 1781 cookbook The Practice of Modern Cookery by George Dalrymple and at this class, we made recipes that would have been popular when the house was newly constructed using fresh garden produce and some newly purchased open hearth cooking implements.
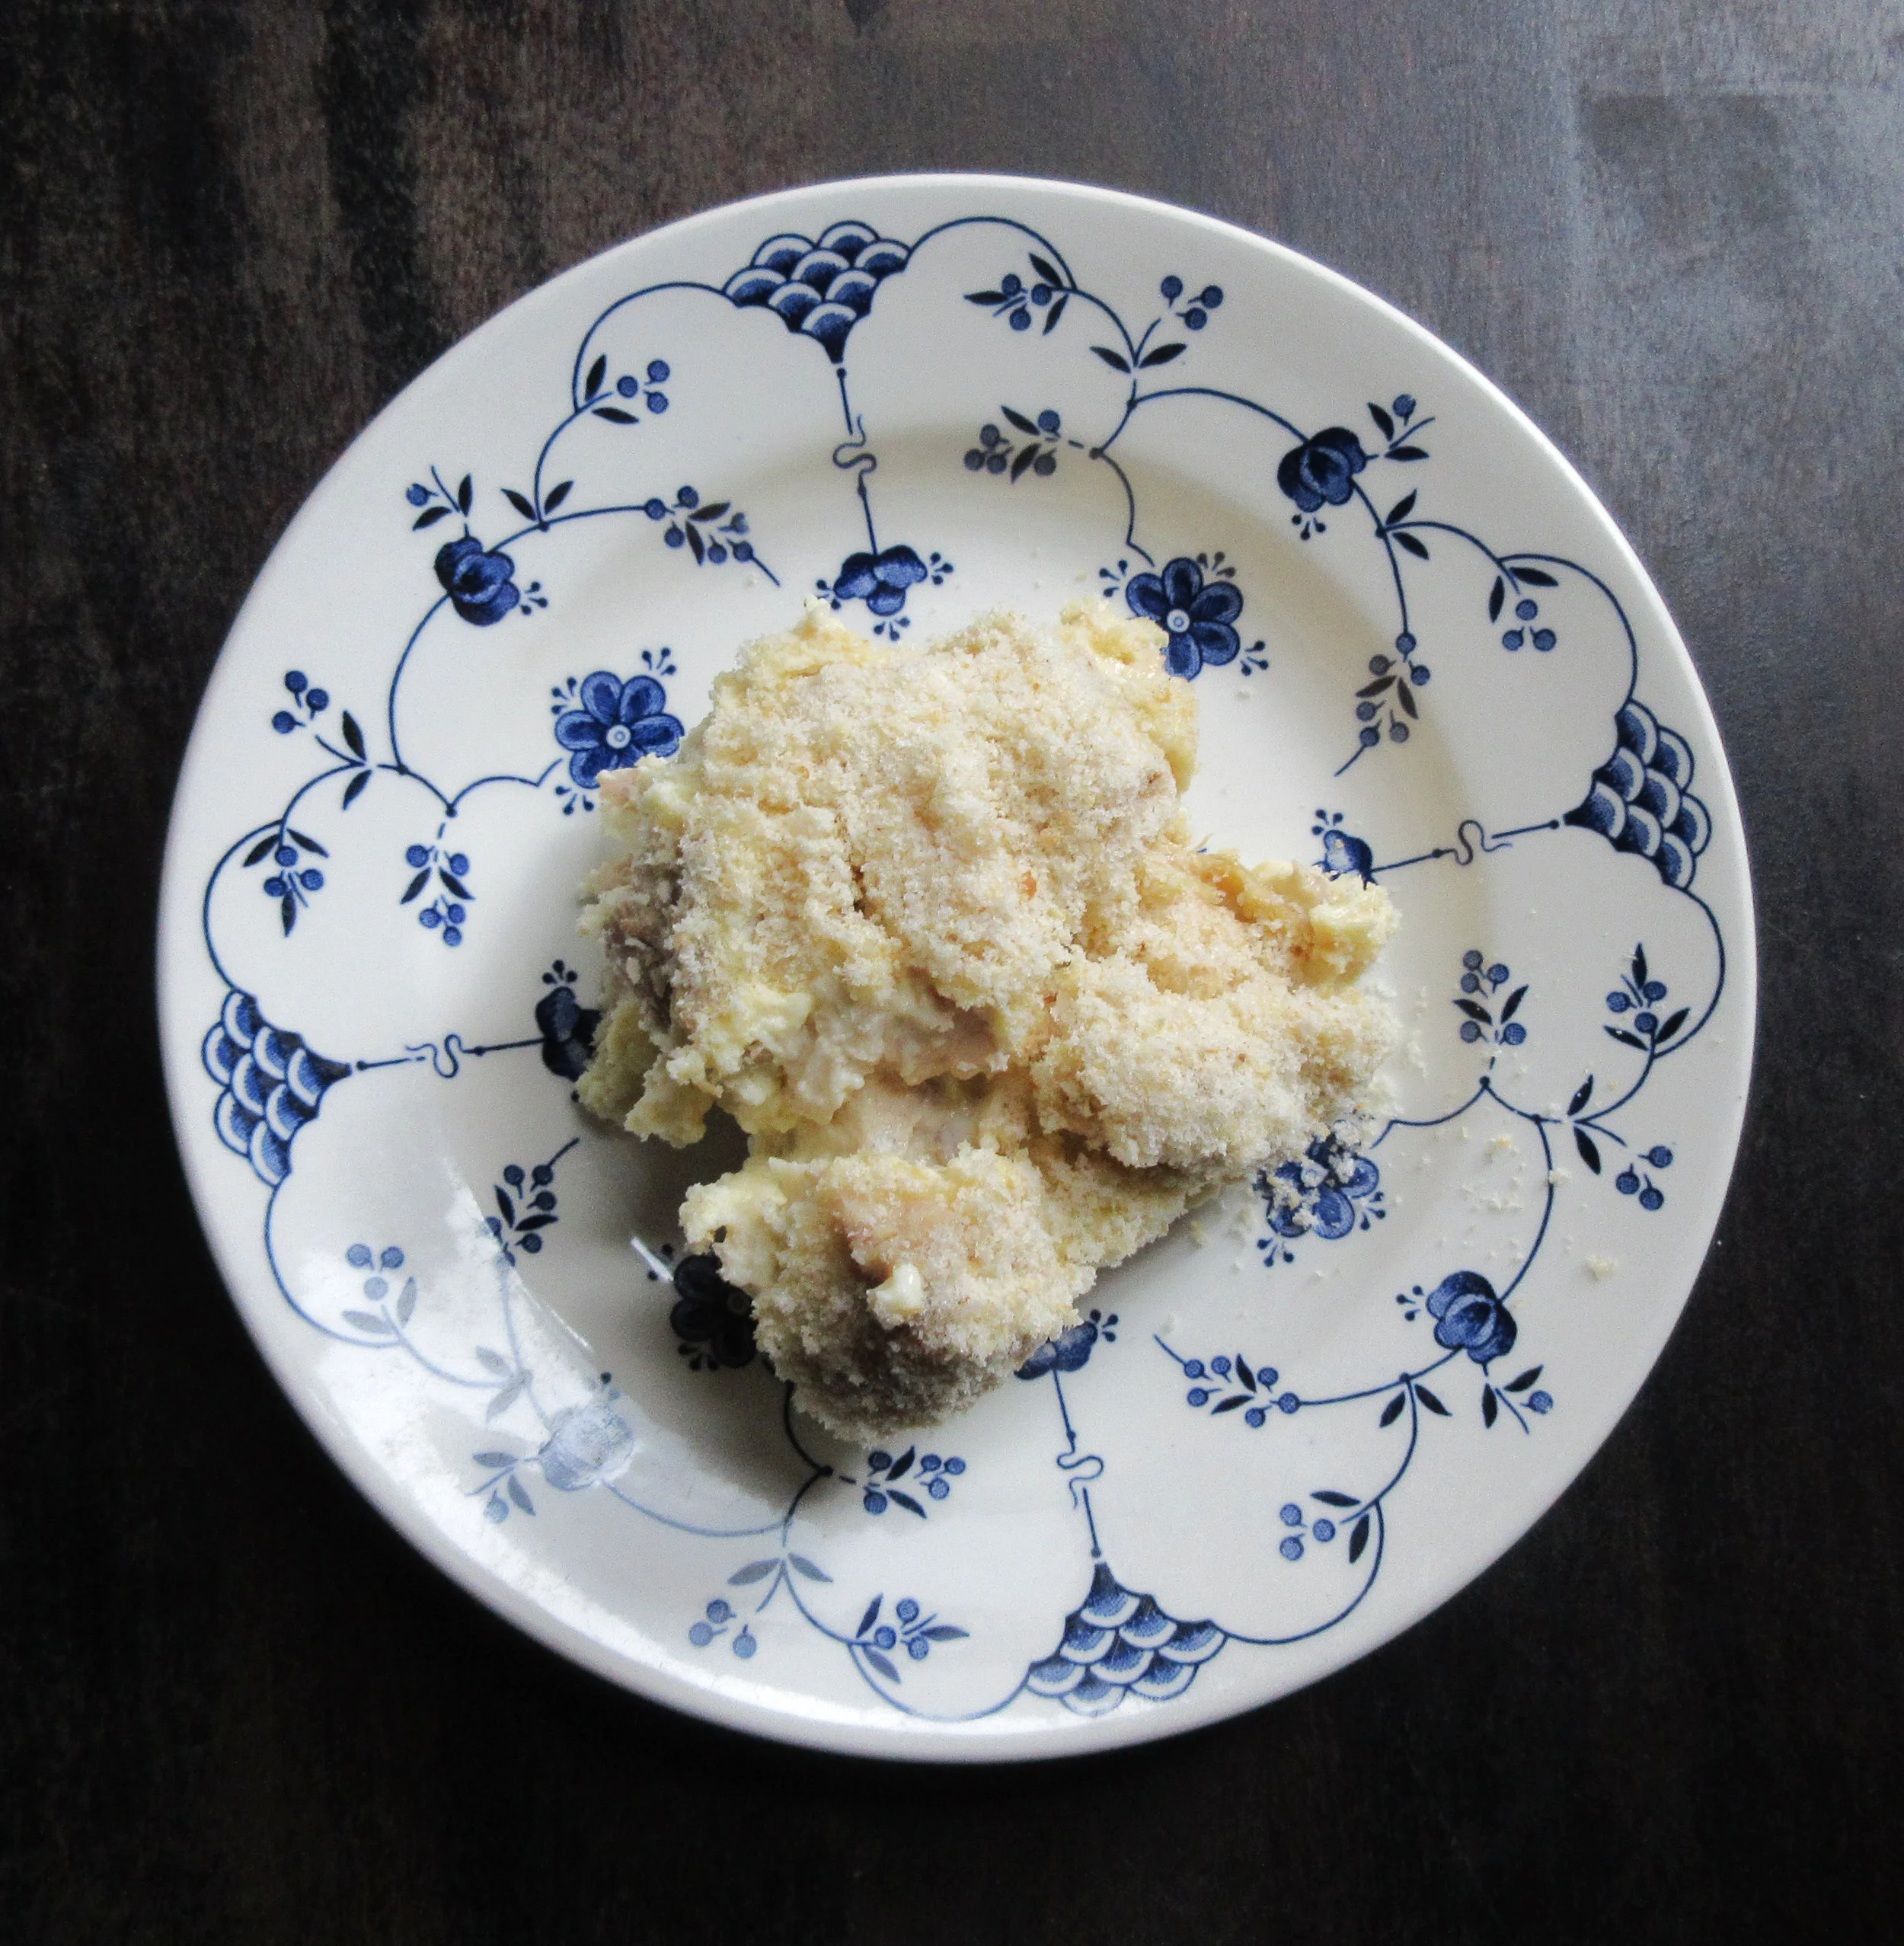
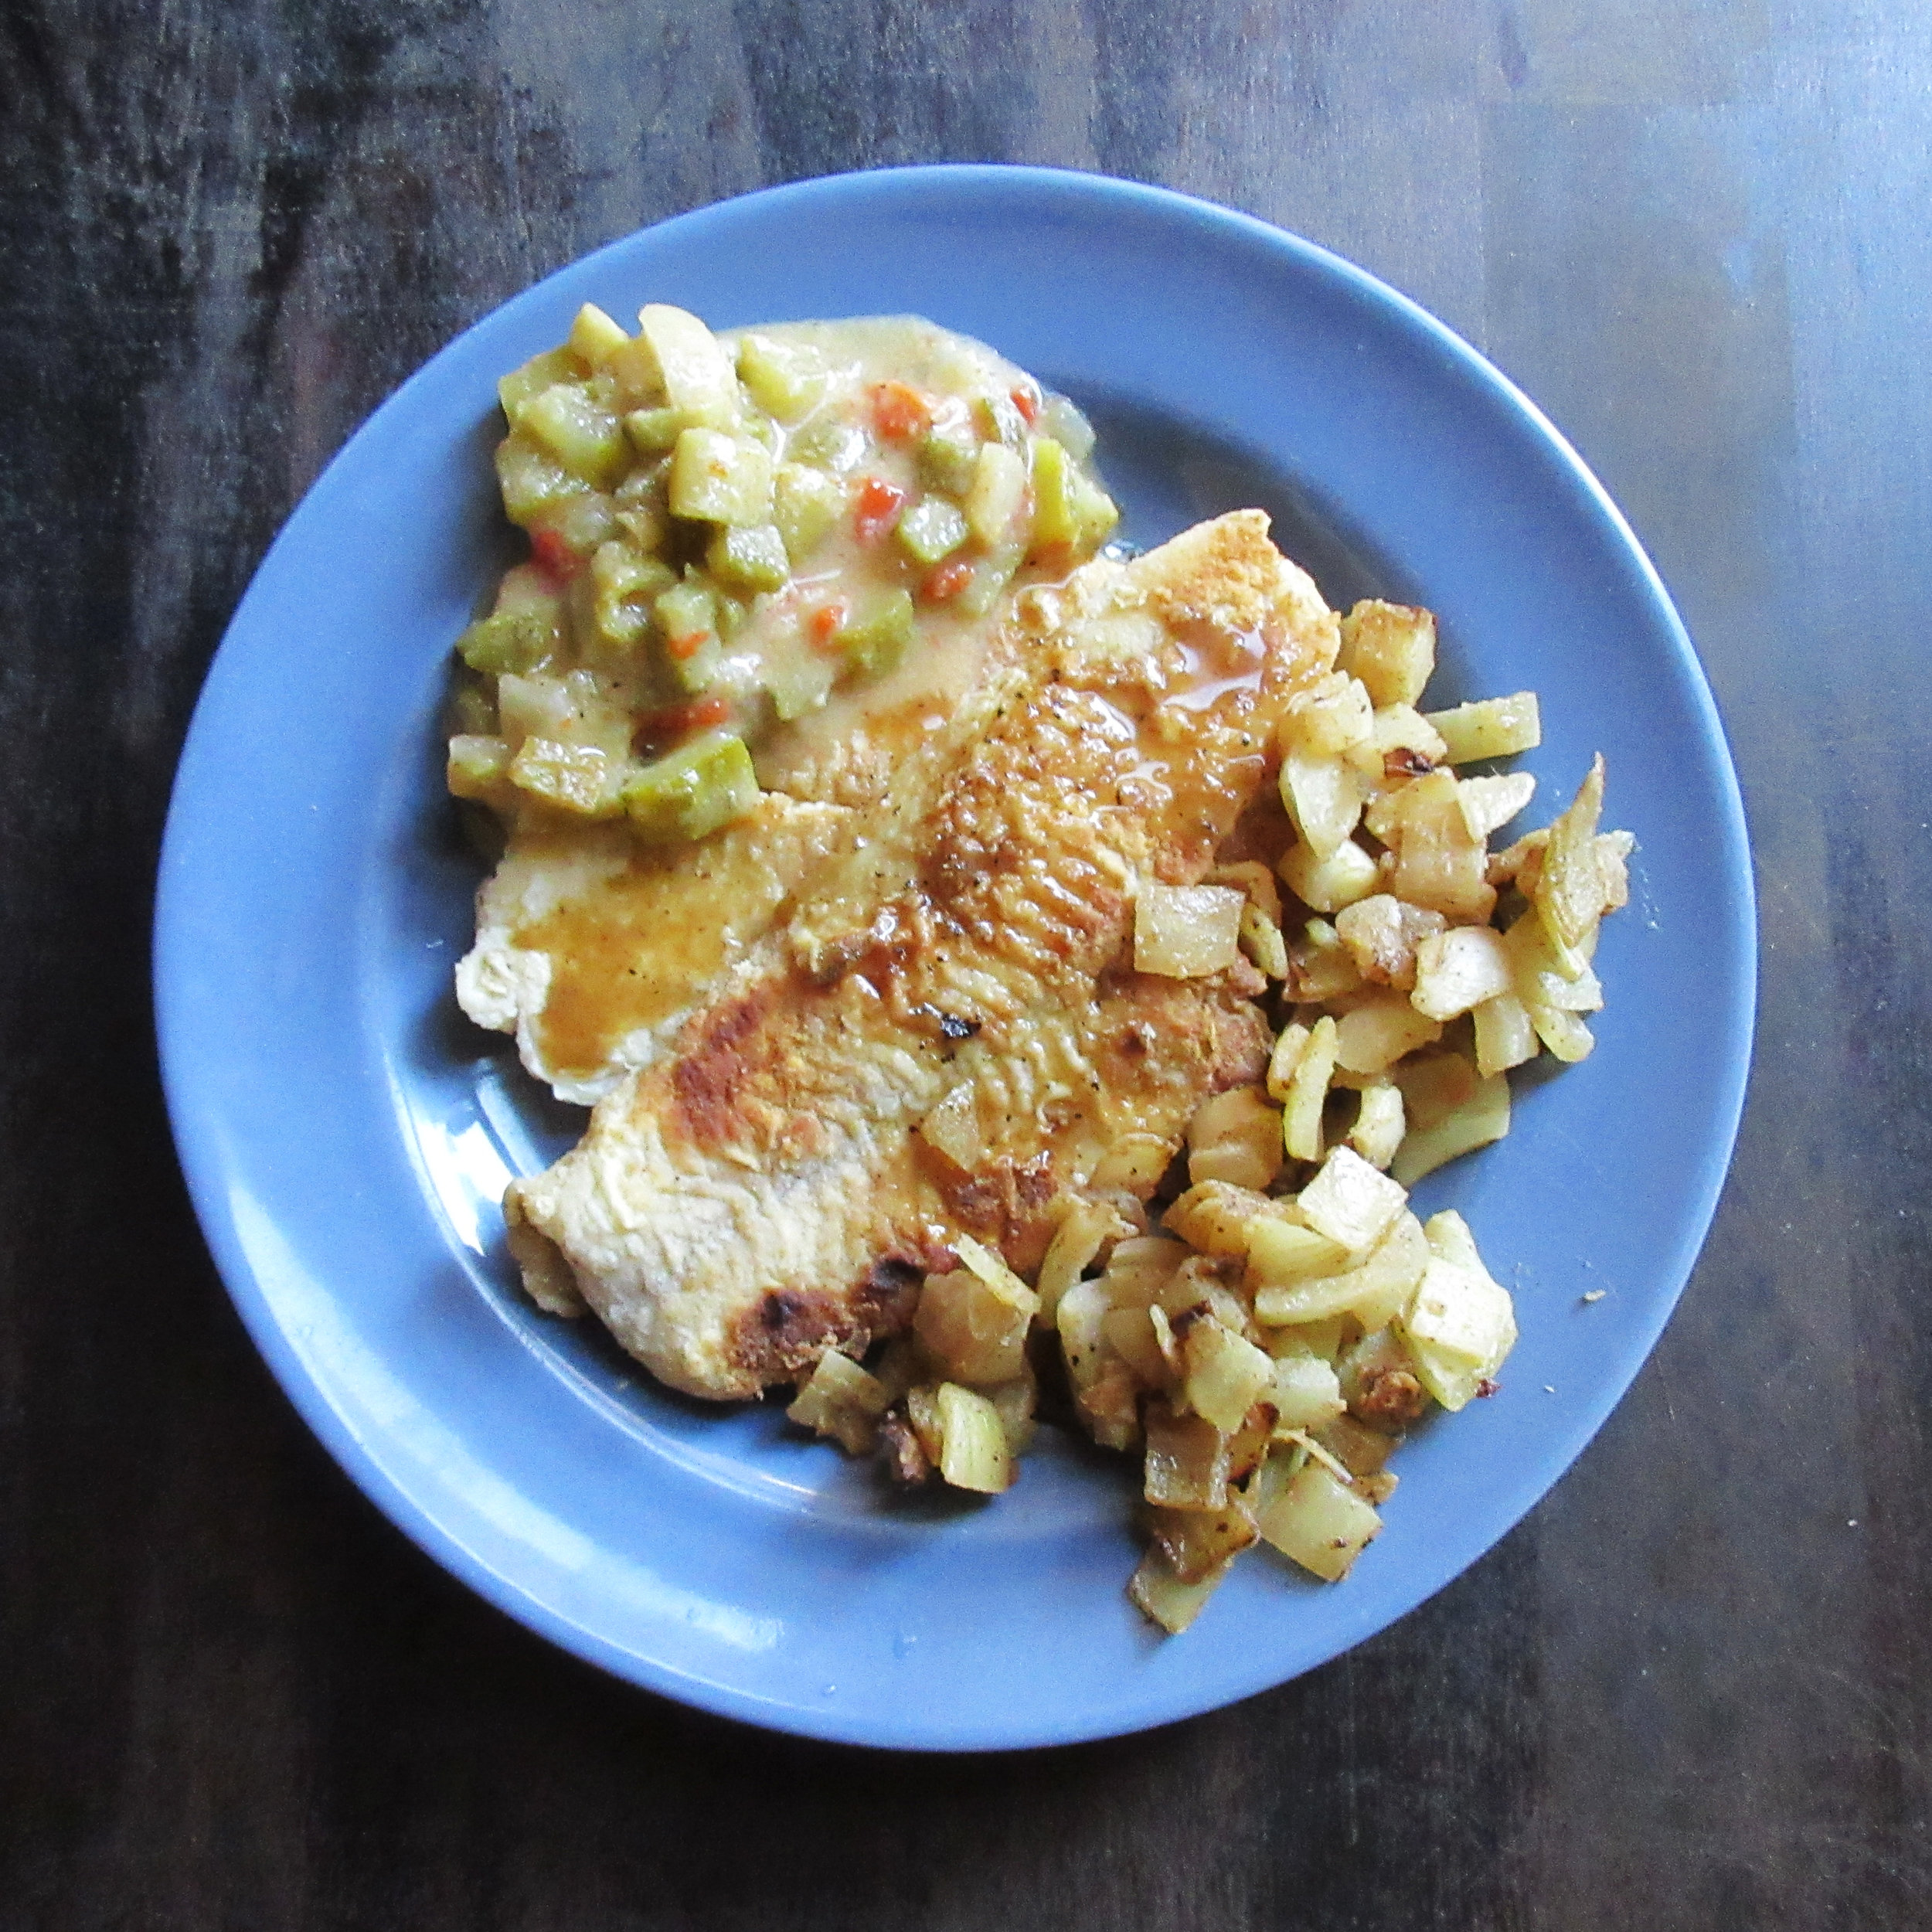
Above, the plate of Fillets of Chickens, with Bechamel-ſauce and Bread-crumbs on the left was cooked on recipe testing day, when I forgot both string and parsley. The picture of the plate on the right was snapped by a class attendee. You’ll also see To ragoo French Beans on the plate and you can just make out a glass of Freſh Raſpberry Water at the top. We finished off with some Strawberry-fritters for dessert.
If you’re curious about cooking with fire, keep reading to learn about some open hearth cookery techniques: using a salamander and a couple of different styles of reflector ovens. I also share some ideas for creating DIY reflector ovens using common items that you can use in front of a fireplace or campfire.
Salamanders
One of the final steps in our recipe is to “give it a colour in a oven or with a ſalamander”. Keep reading to find out how to brown a breadcrumb top in an oven in open hearth cookery, but our other option is to use a salamander. This recipe isn’t instructing us to brown the breadcrumbs by using a small lizard, though. A salamander is a metal tool used used to brown or caramelize the tops of dishes before being served. Today, a salamander is a small broiling oven that’s used for the same purpose.
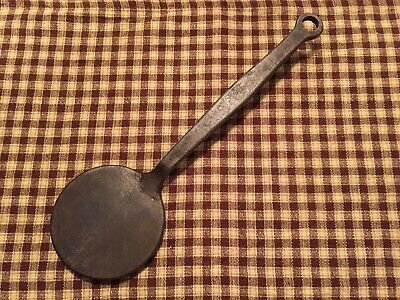
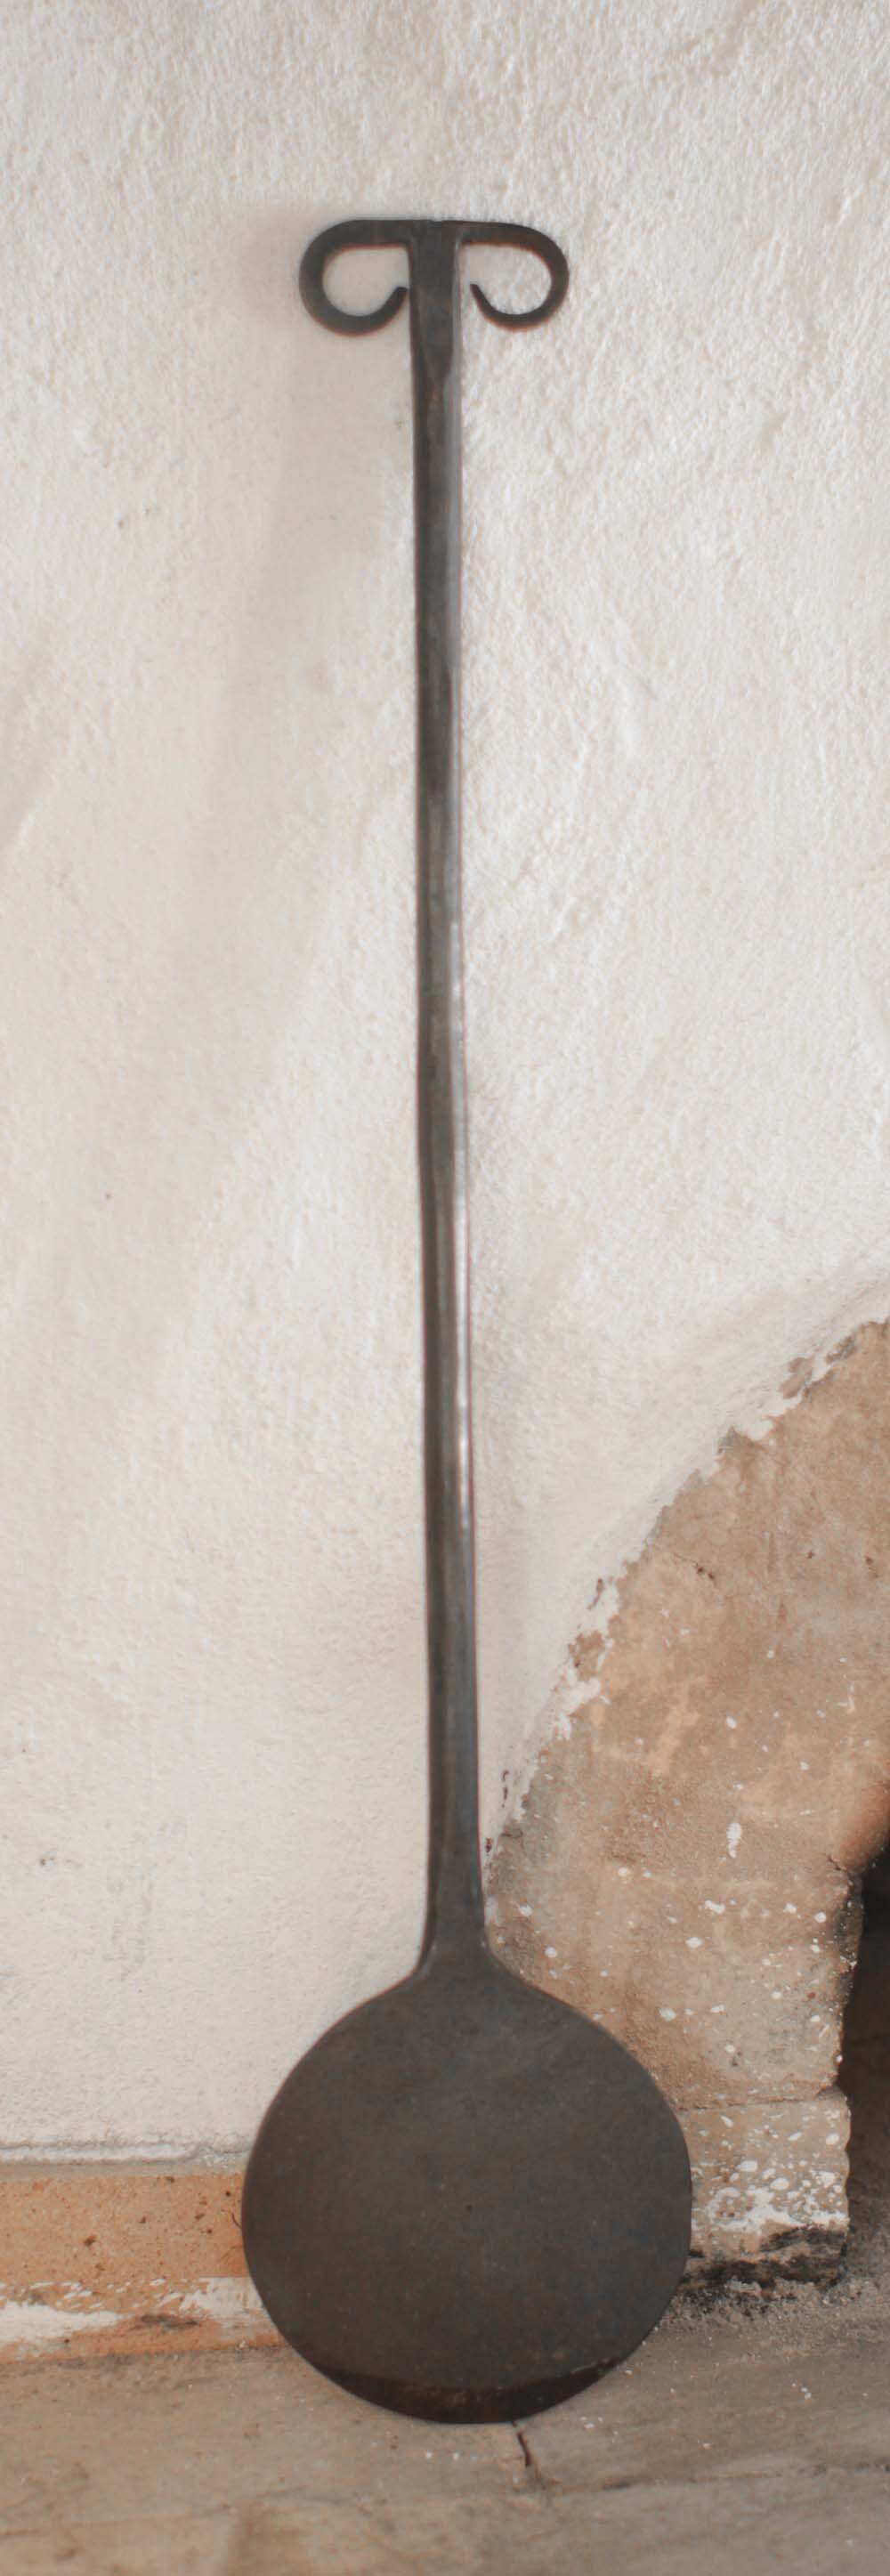

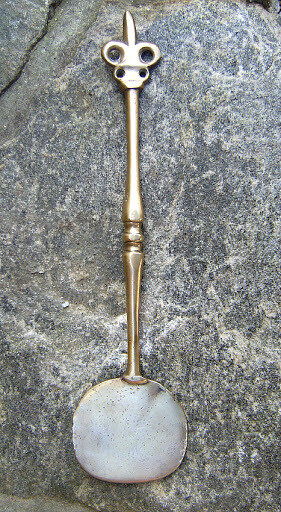
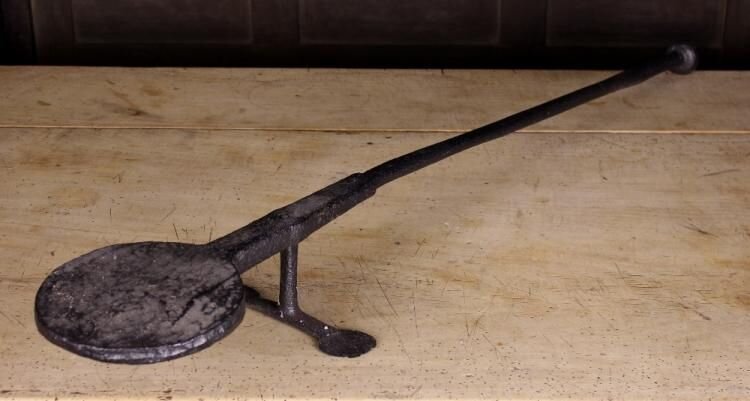
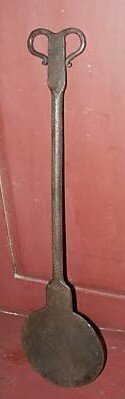
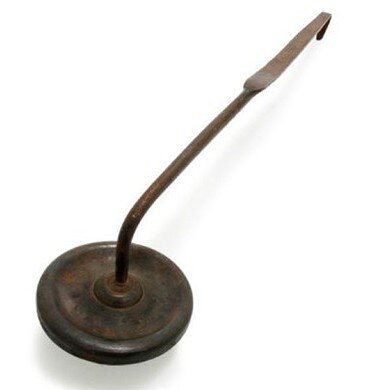
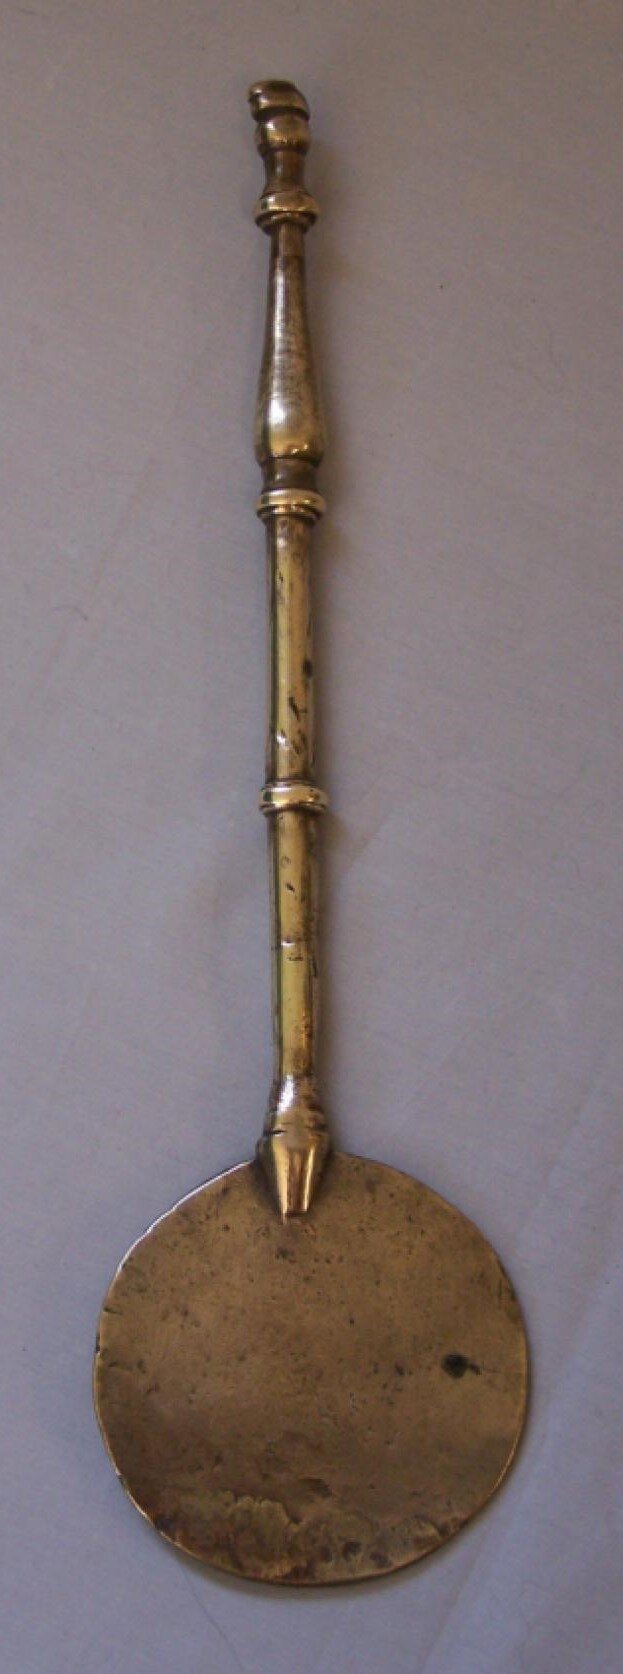
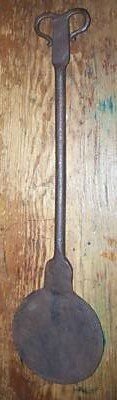
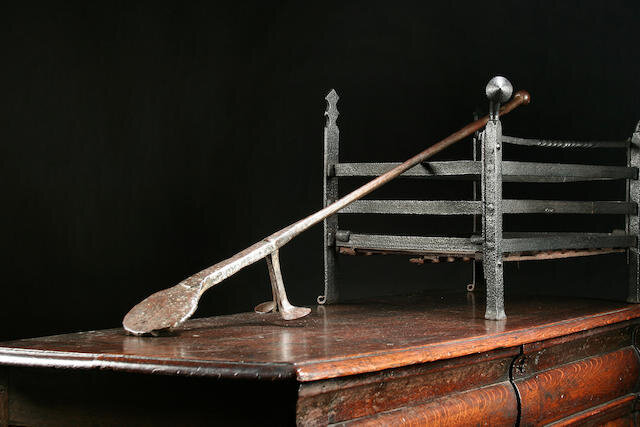
Traditional salamanders have a round metal piece at the end of a long handle. Sometimes salamanders also have little feet to help keep it in place when it’s being heated. If you didn’t have a salamander, you’d also have the option to use a small metal shovel.
Salamanders (or shovels) would be heated until they’re red hot by either burying the round end in hot coals or sticking its end in the fire. The salamander would be waved overtop or pressed on the area to brown, blacken and caramelize. To see these principals in action, have a look at the videos below from the Townsends youtube channel. Close to the end, he utilizes a salamander to caramelize the top of a bread pudding and in the other video, he uses a hot shovel to blacken the tops of baked apples.
Reflector Ovens
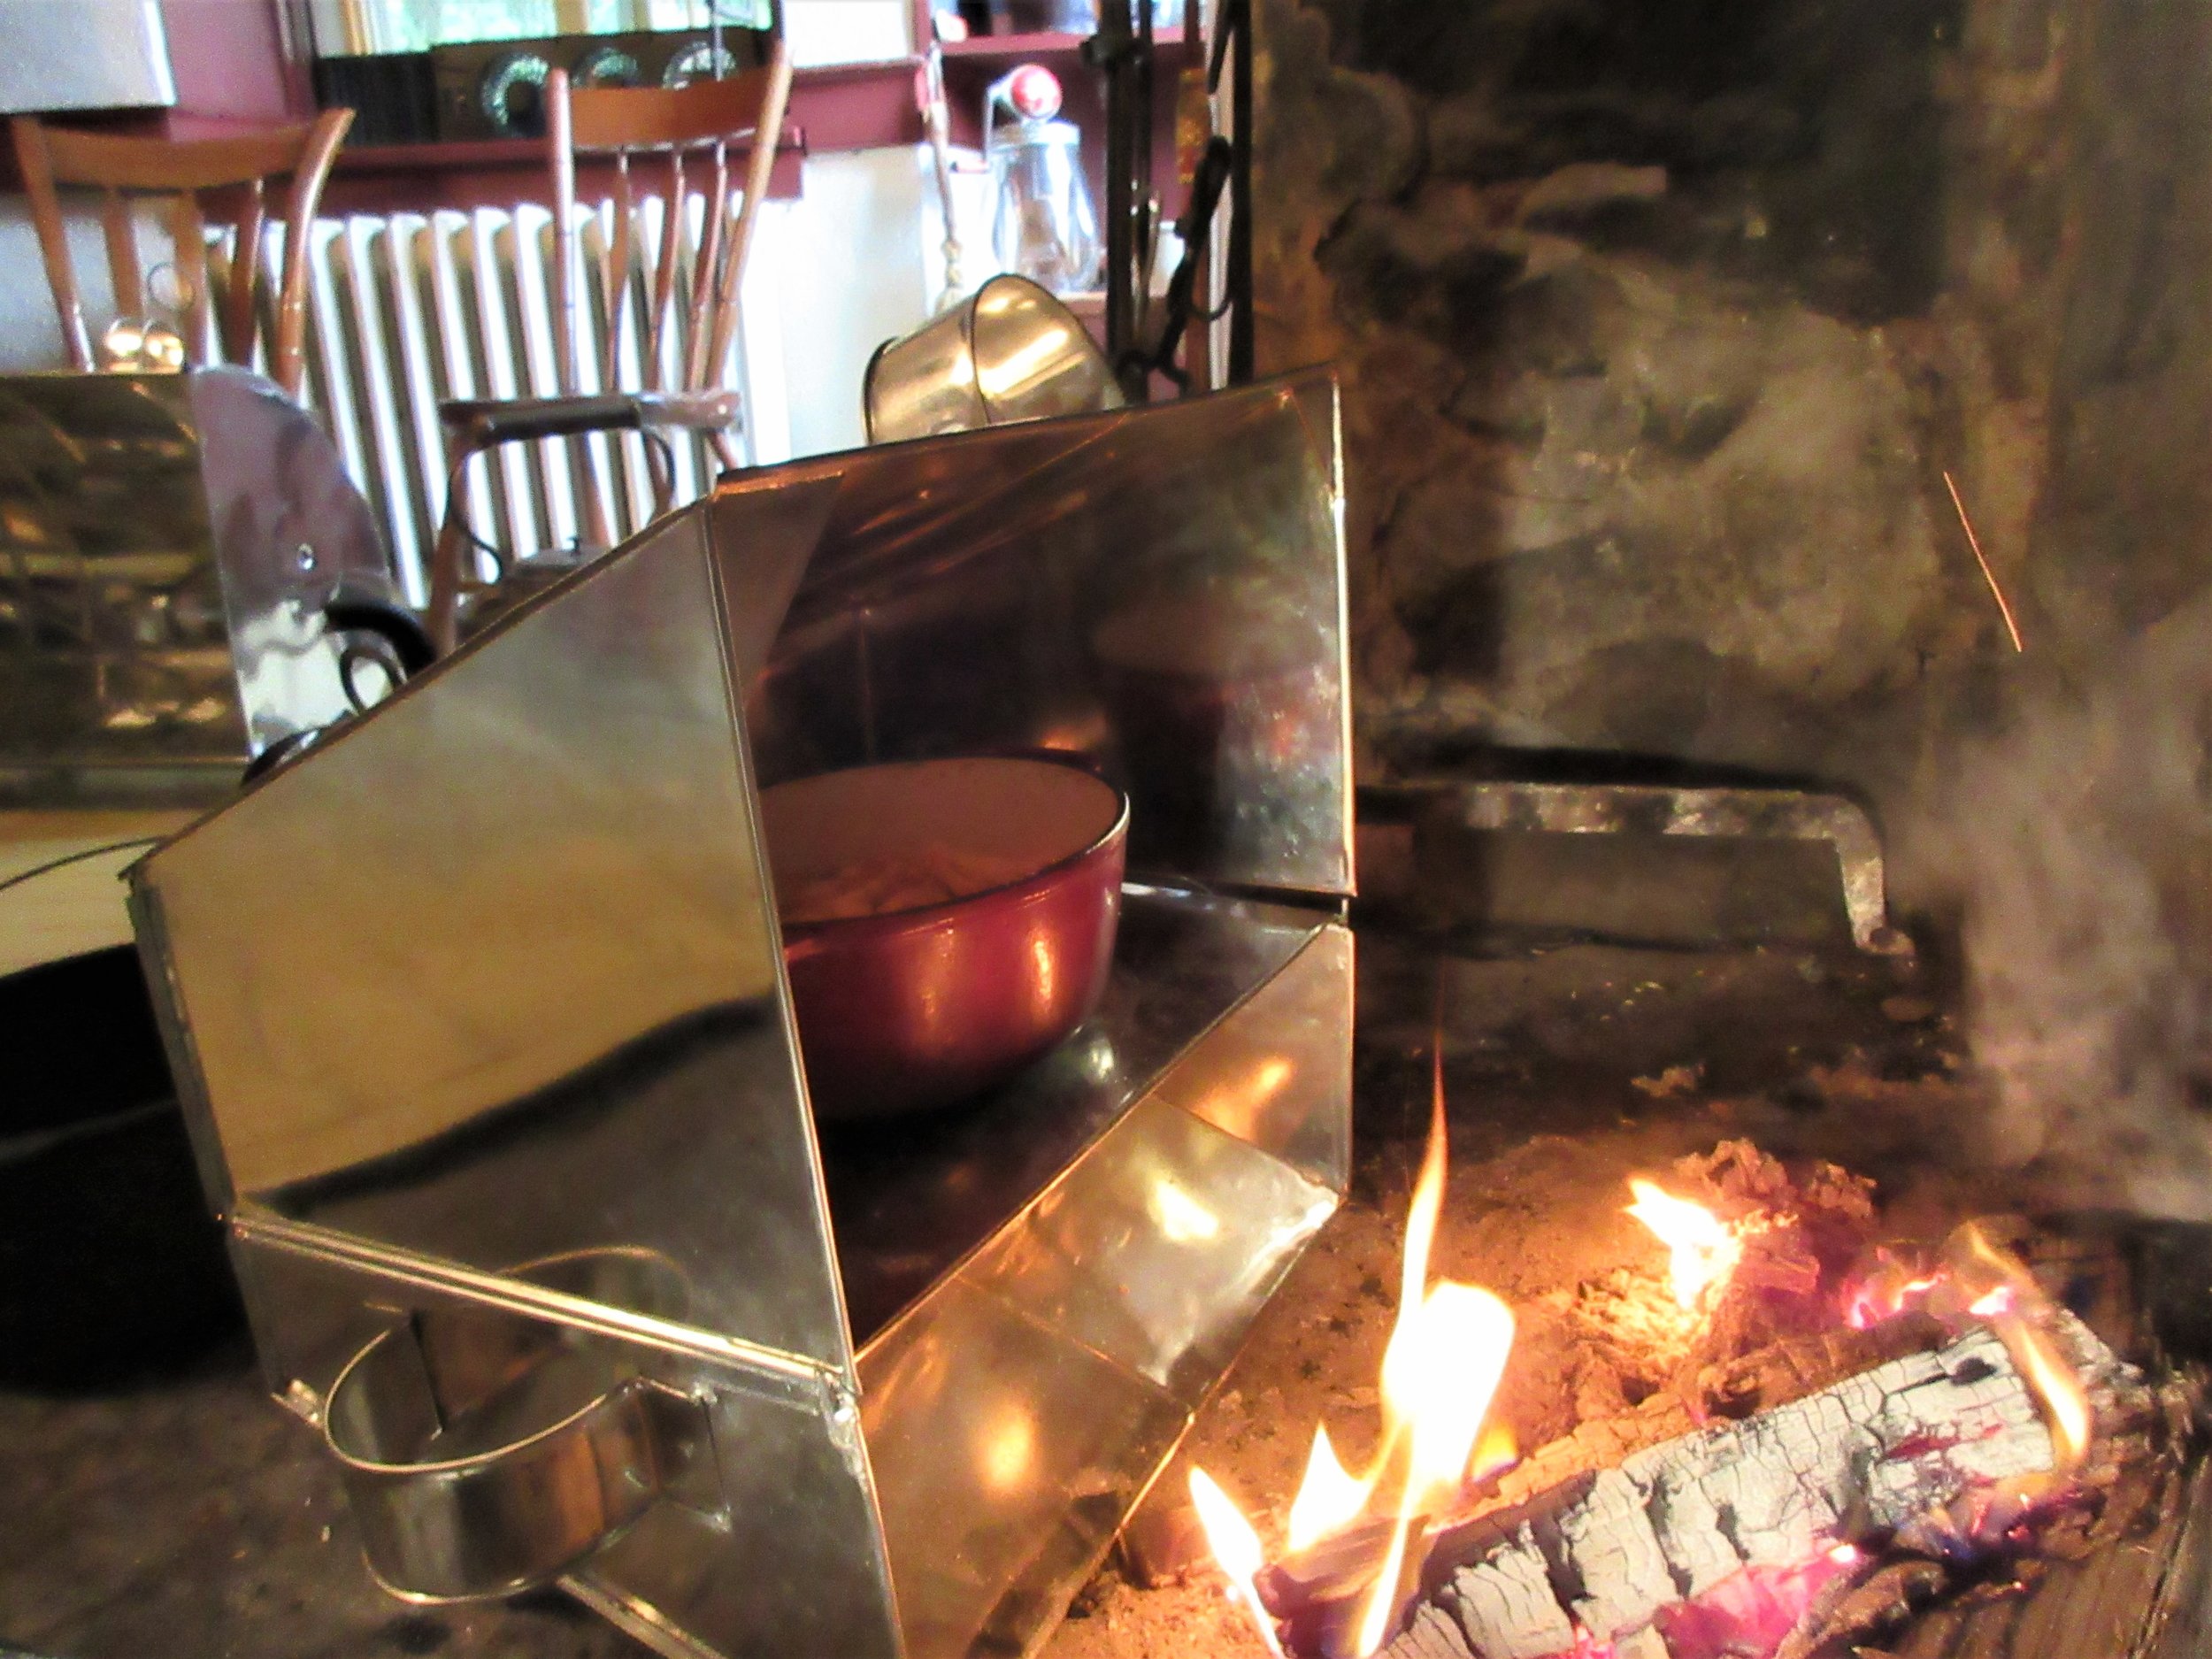
Reflector ovens are sometimes also called hastening ovens or tin kitchens and they are metal containers, traditionally made out of tin, meant for roasting and baking. Tin kitchens amplify, focus and reflect the heat from the fire. I used two types of reflectors to prepare Fillets of Chickens.
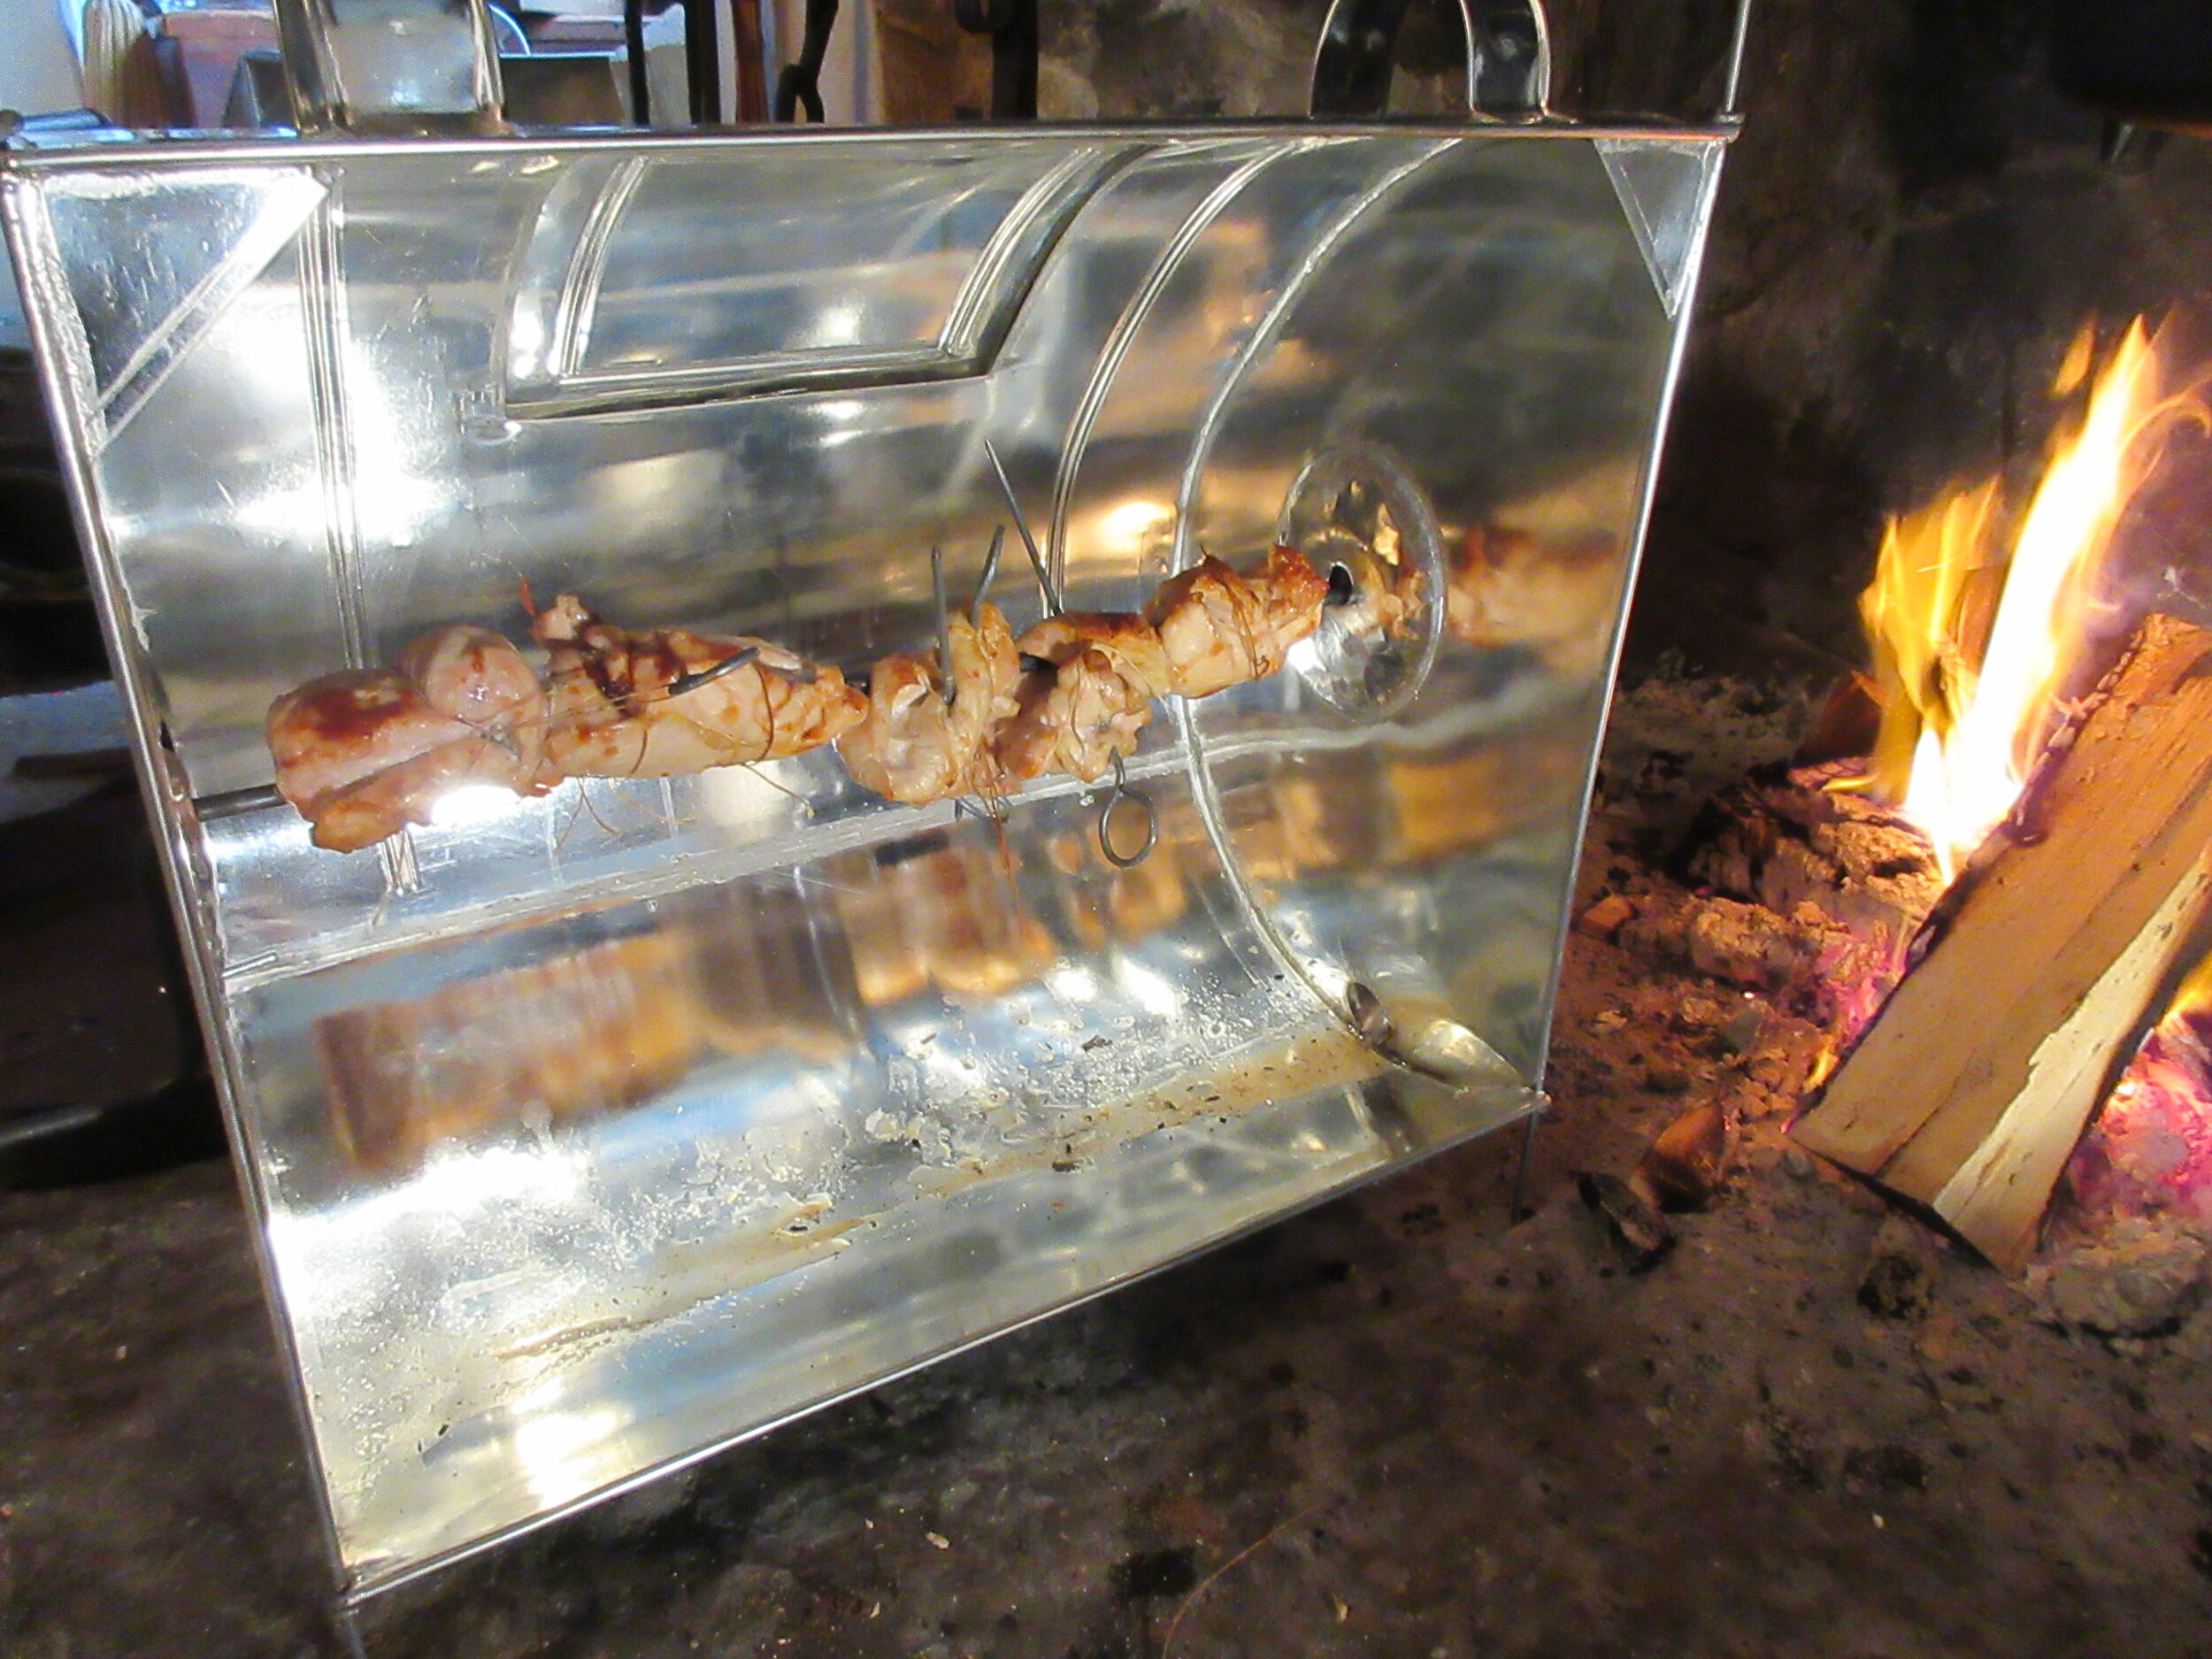
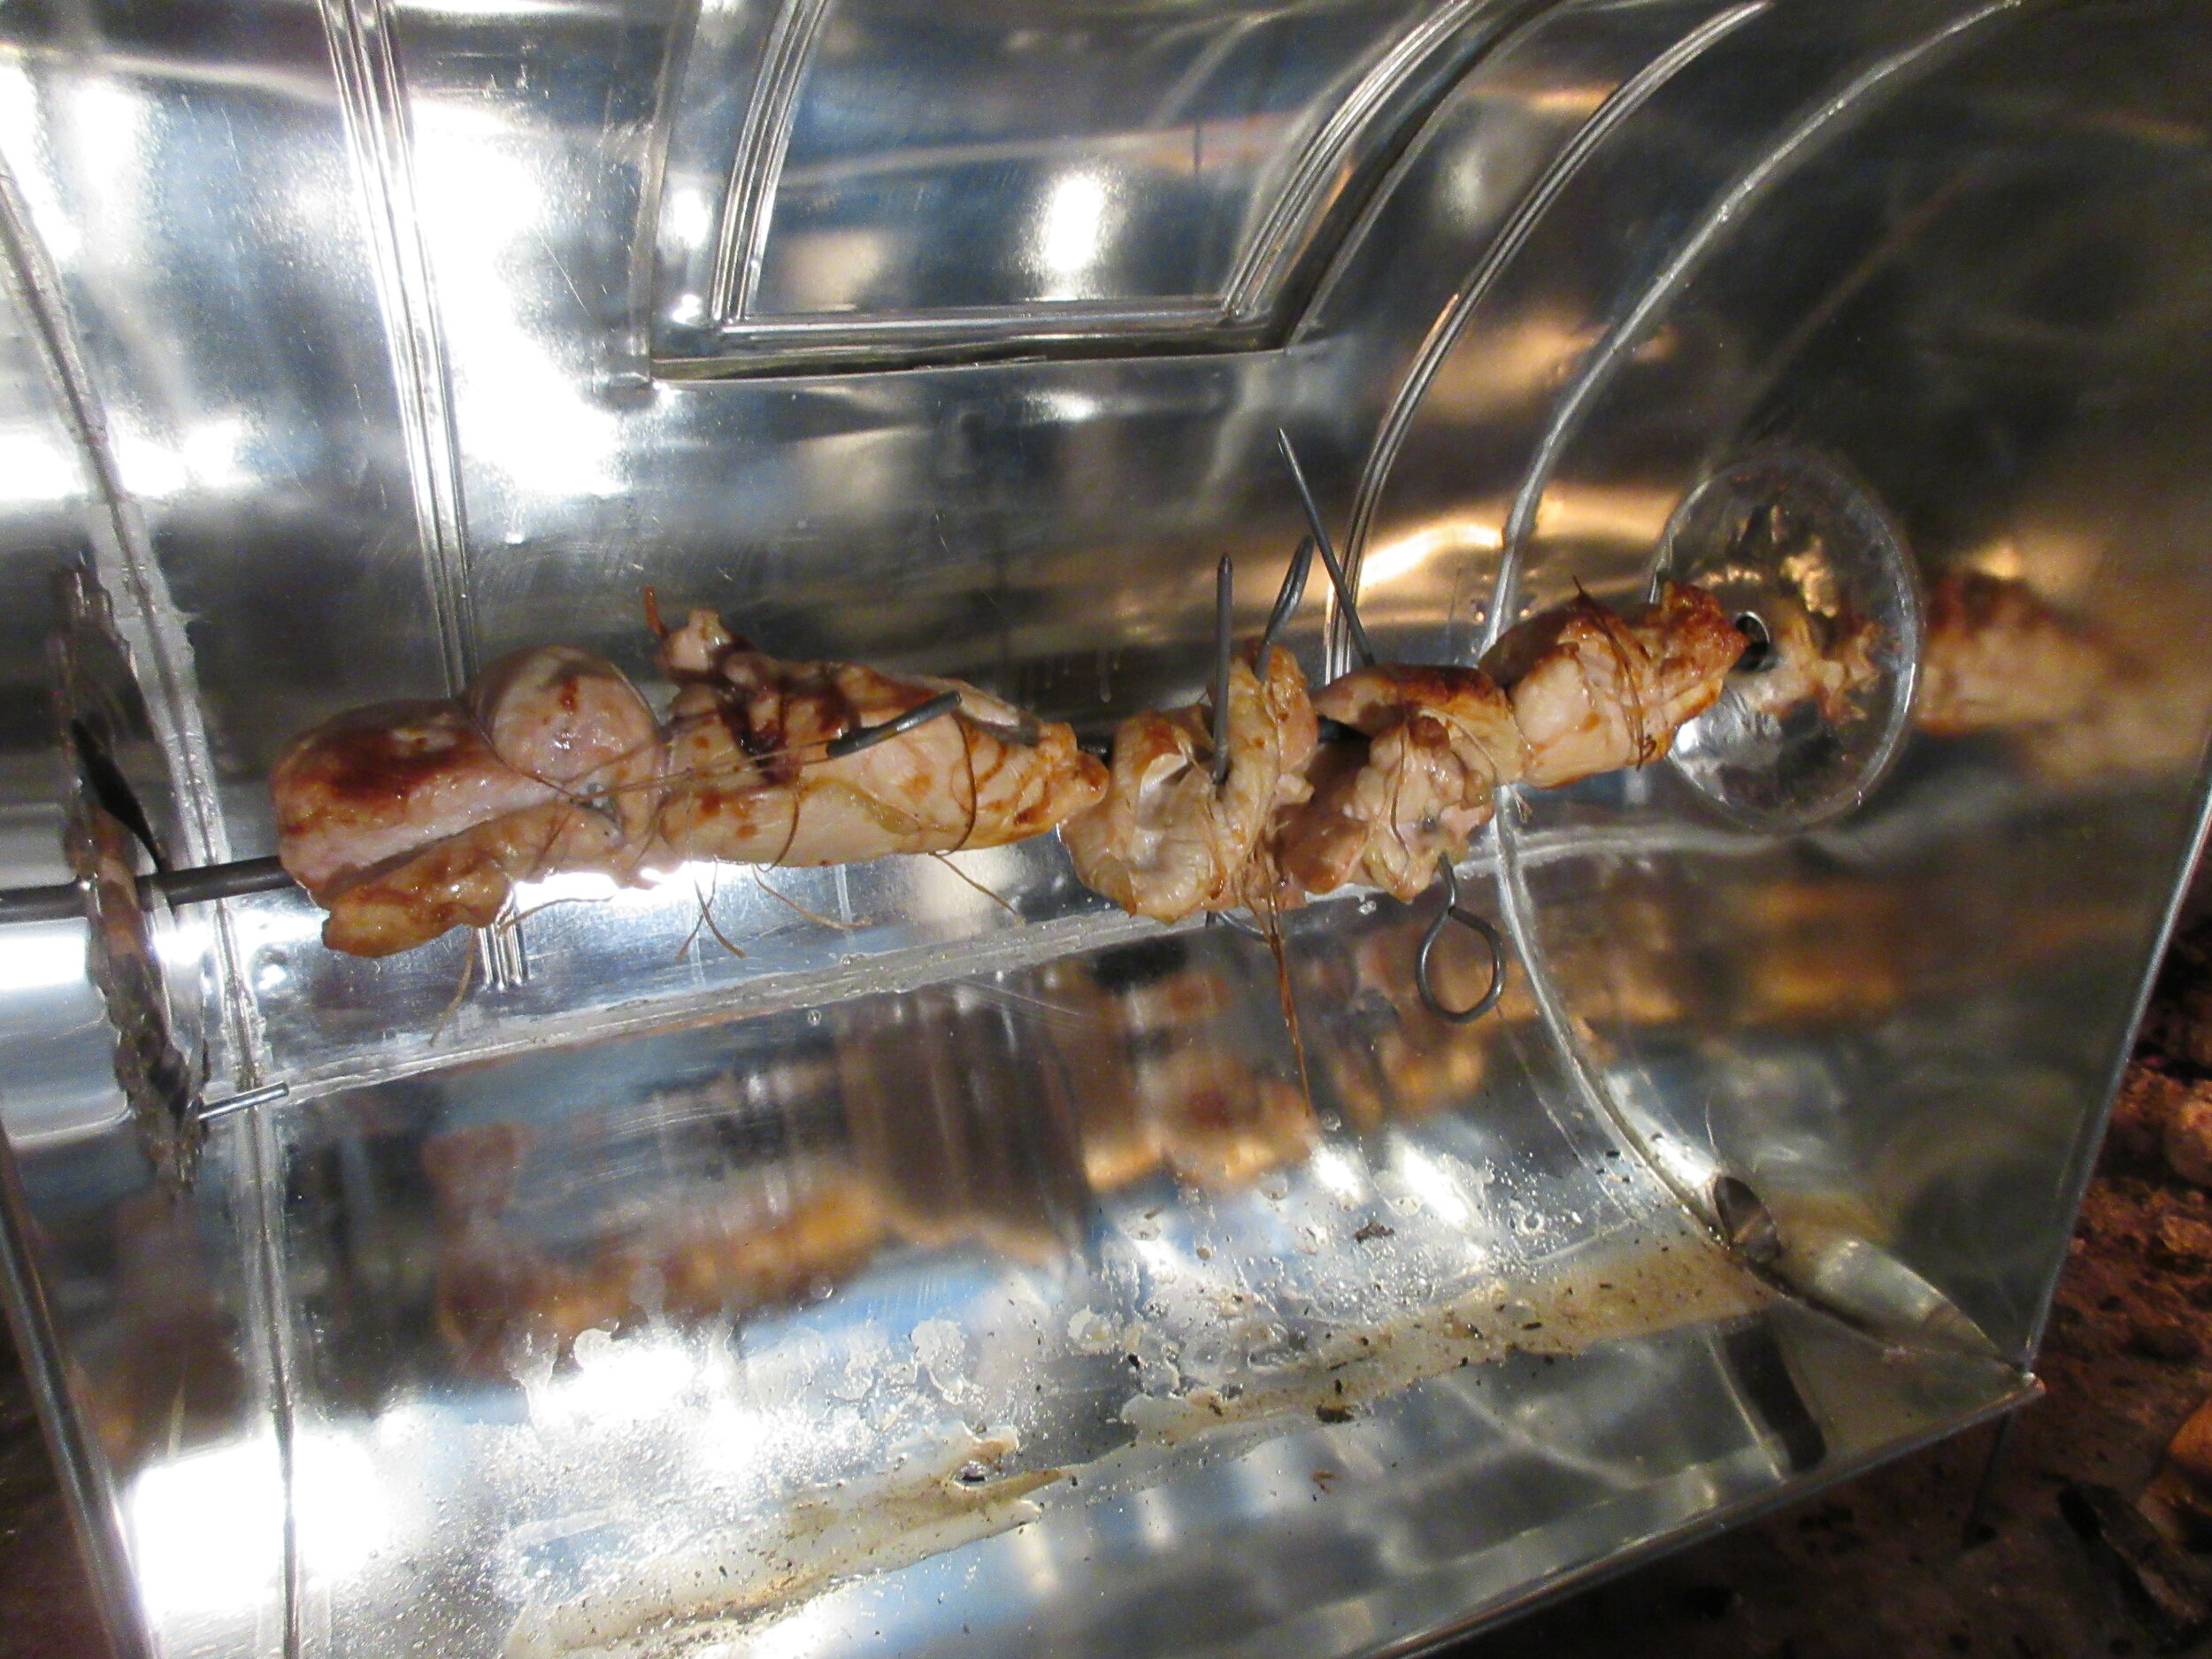
To roast my chicken breasts, I trussed them up to a reflector oven with a spit and at the end of the recipe, I used the more box-like hastening oven to brown the breadcrumb topping. If I didn’t have a rotisserie reflector oven, I would have still been able to roast my chicken breast in a dish or pan in the box reflector oven.


The key to trussing up your meat, vegetable or whatever you’re roasting is to securely attach it to the spit with string. It’s important that when you’re turning the spit, the meat turns with the spit. For even roasting, it’s not great if the spit turns inside the meat and the meat stays in the same position. It’s helpful to have an extra set of hands, tight knots and some good sturdy string to get the job done.
I’ve already mentioned that I forgot string on my recipe testing day, which wasn’t ideal. We found some white embroidery floss in the museum office and some skewers in the prep kitchen and I gave it a go. You’ll see my results on the left. What I ended up with worked, but it definitely wasn’t perfect and tidy.
The picture on the right of me holding the reflector oven was taken on the day of our open hearth cooking class. I wanted to show off what a wonderful job the class participants did of tying those chicken breasts to the spit! If you ever try this out for yourself, aim for what you see in the picture on the right.
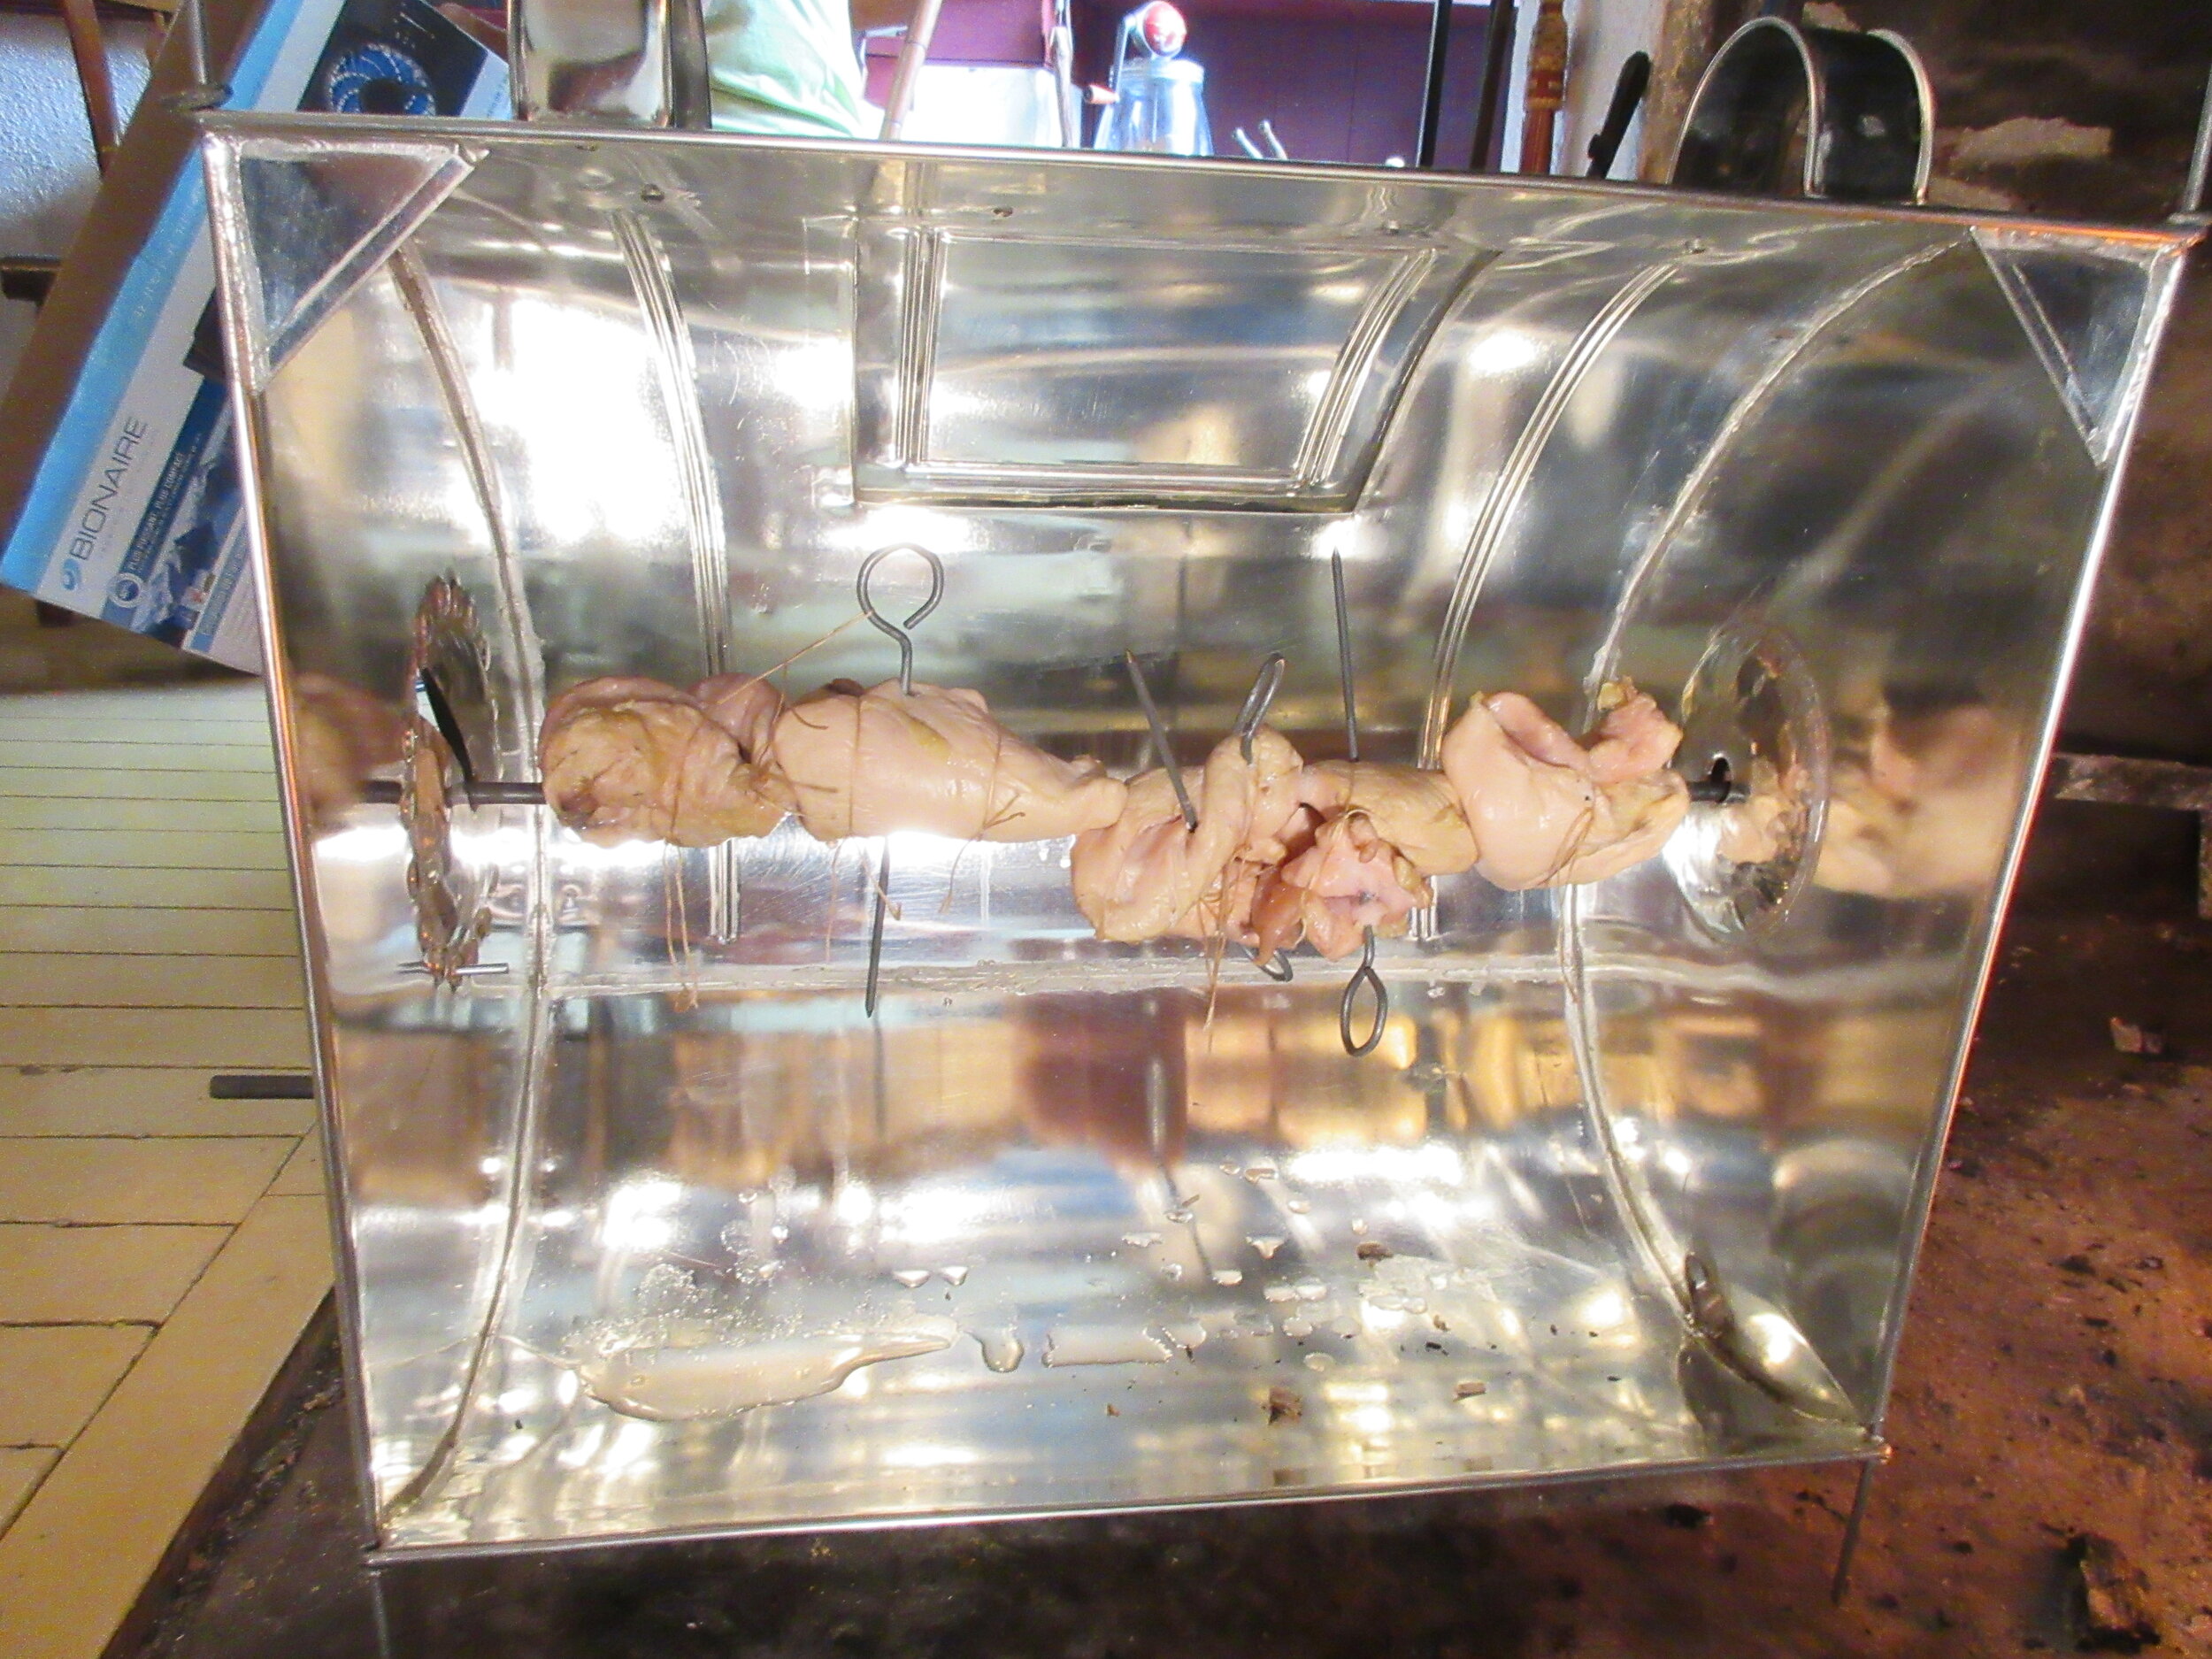
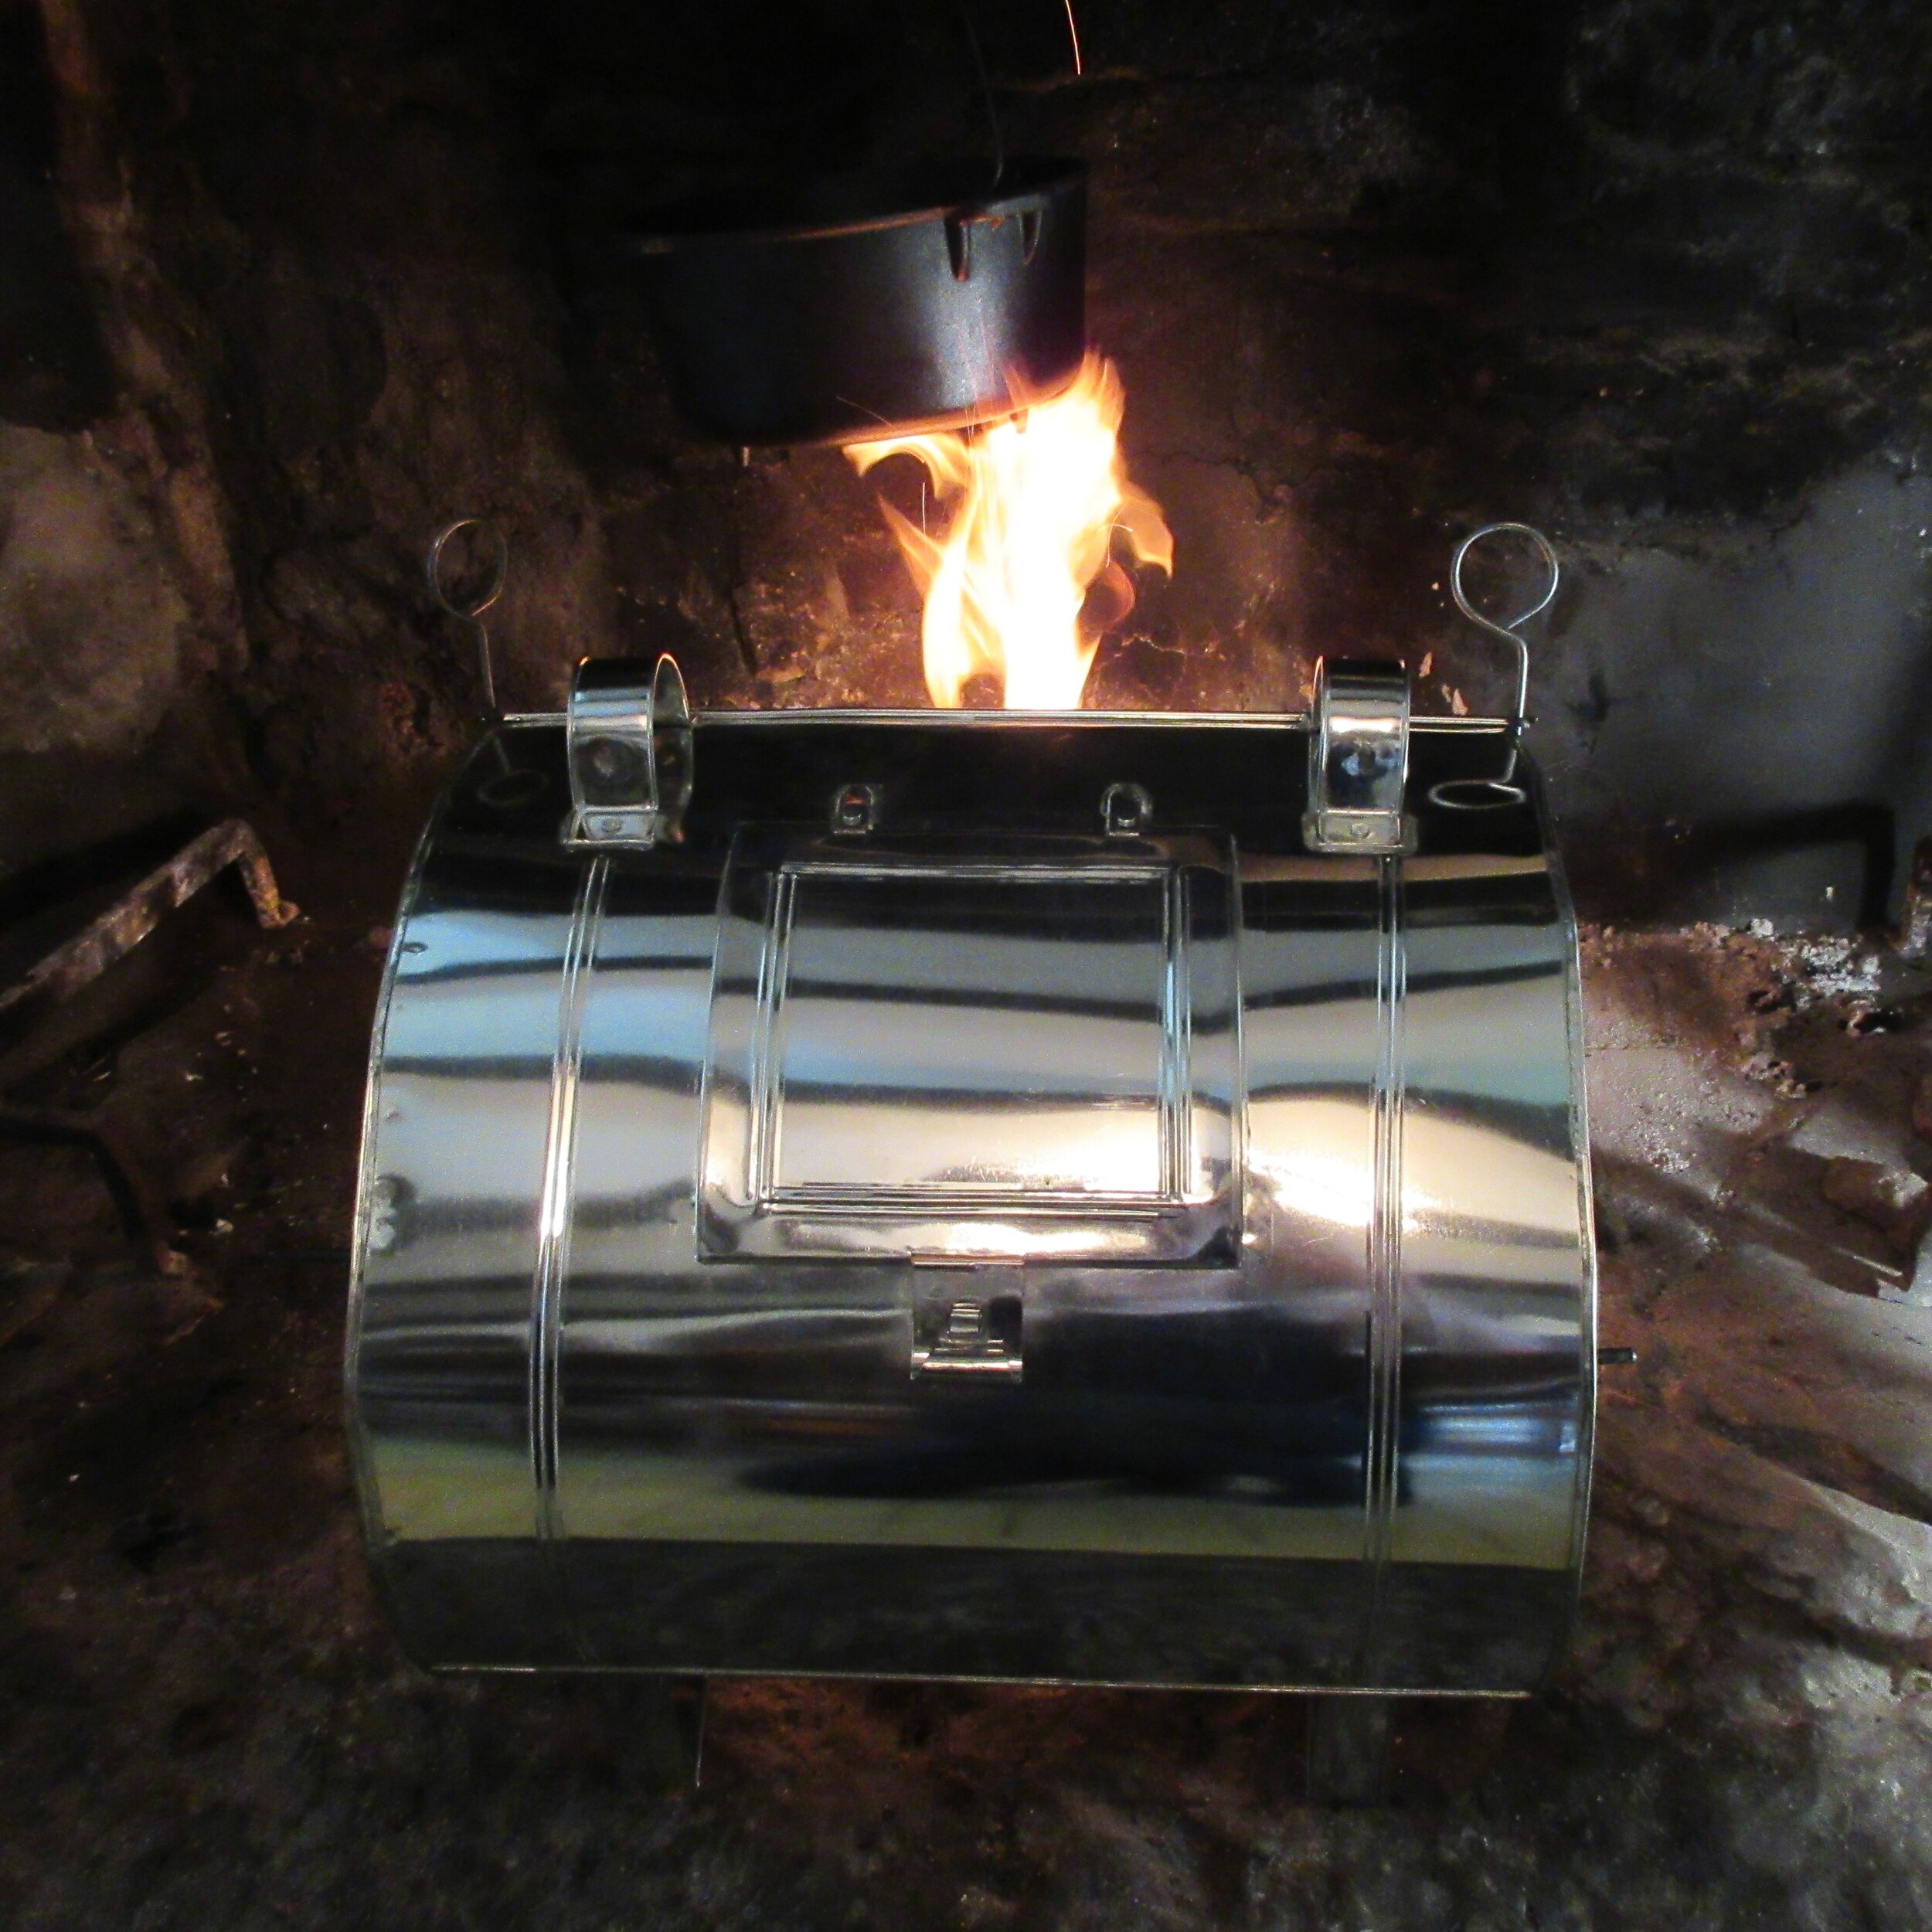
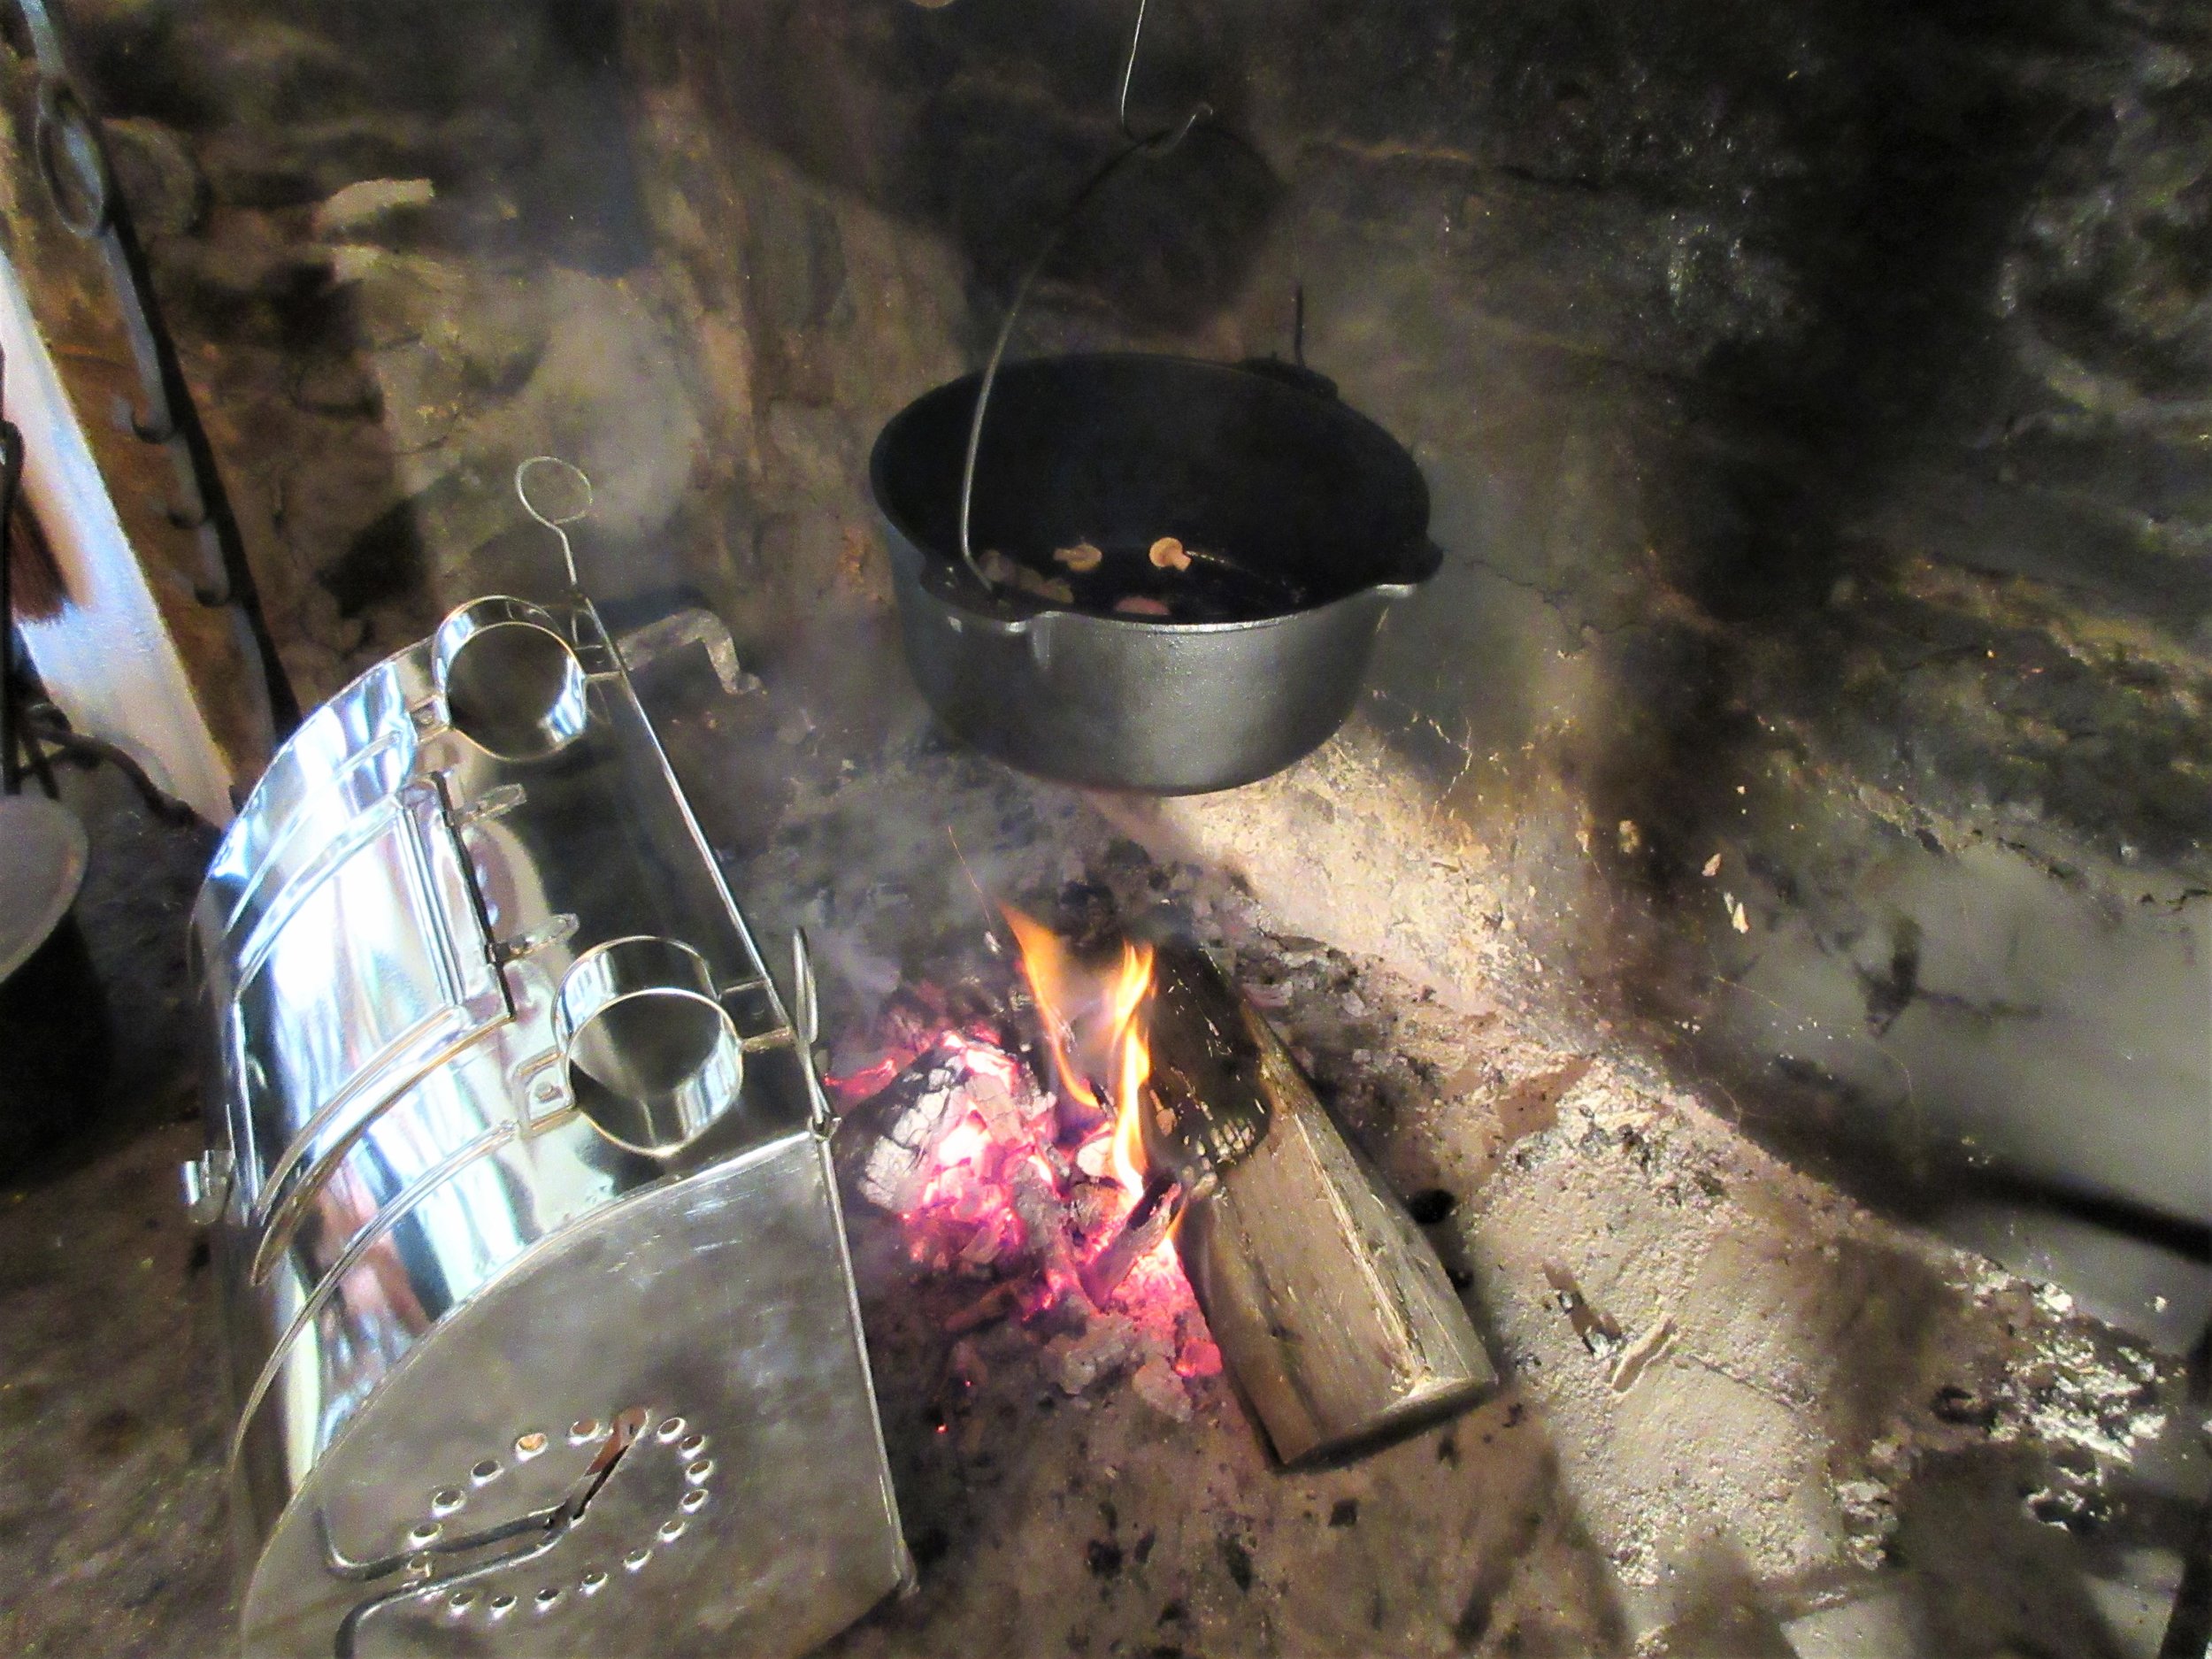
Scroll through the pictures above and see if you can pick out the features of the rotisserie reflector oven. There are handles on top to help you to move it around, which is one of the ways to control the temperature. You’re able to adjust the temperature of a reflector oven by either making adjustments to the fire (adding wood, redistributing the wood in the fire) and by changing how close it is to the fire.
The meat will actually brown the fastest on the side away from the fire because the metal is reflecting the heat, so you’ll see that there often is a little door on the back of the reflector. This allows you to check your food’s progress and helps you to decide when you’d like to change the position of the spit.
You don’t need to continuously turn the spit. On the side, there’s many holes in a clock-like formation where you can slip in a little notch on the end of the rotisserie. Depending on the temperature, you may choose to leave the meat in one position for 5 to 10 minutes before rotating the notch to the next slot.
These rotisserie reflector ovens are roughly half cylinders in shape, which helps to collect the juices that drip from the meat. If you look closely, you’ll see that there is a little hole that lines up perfectly with the bottom of the cylinder. That hole leads to a little spout that can be used to pour the juices out of the reflector oven so they can be used to make gravies and sauces.


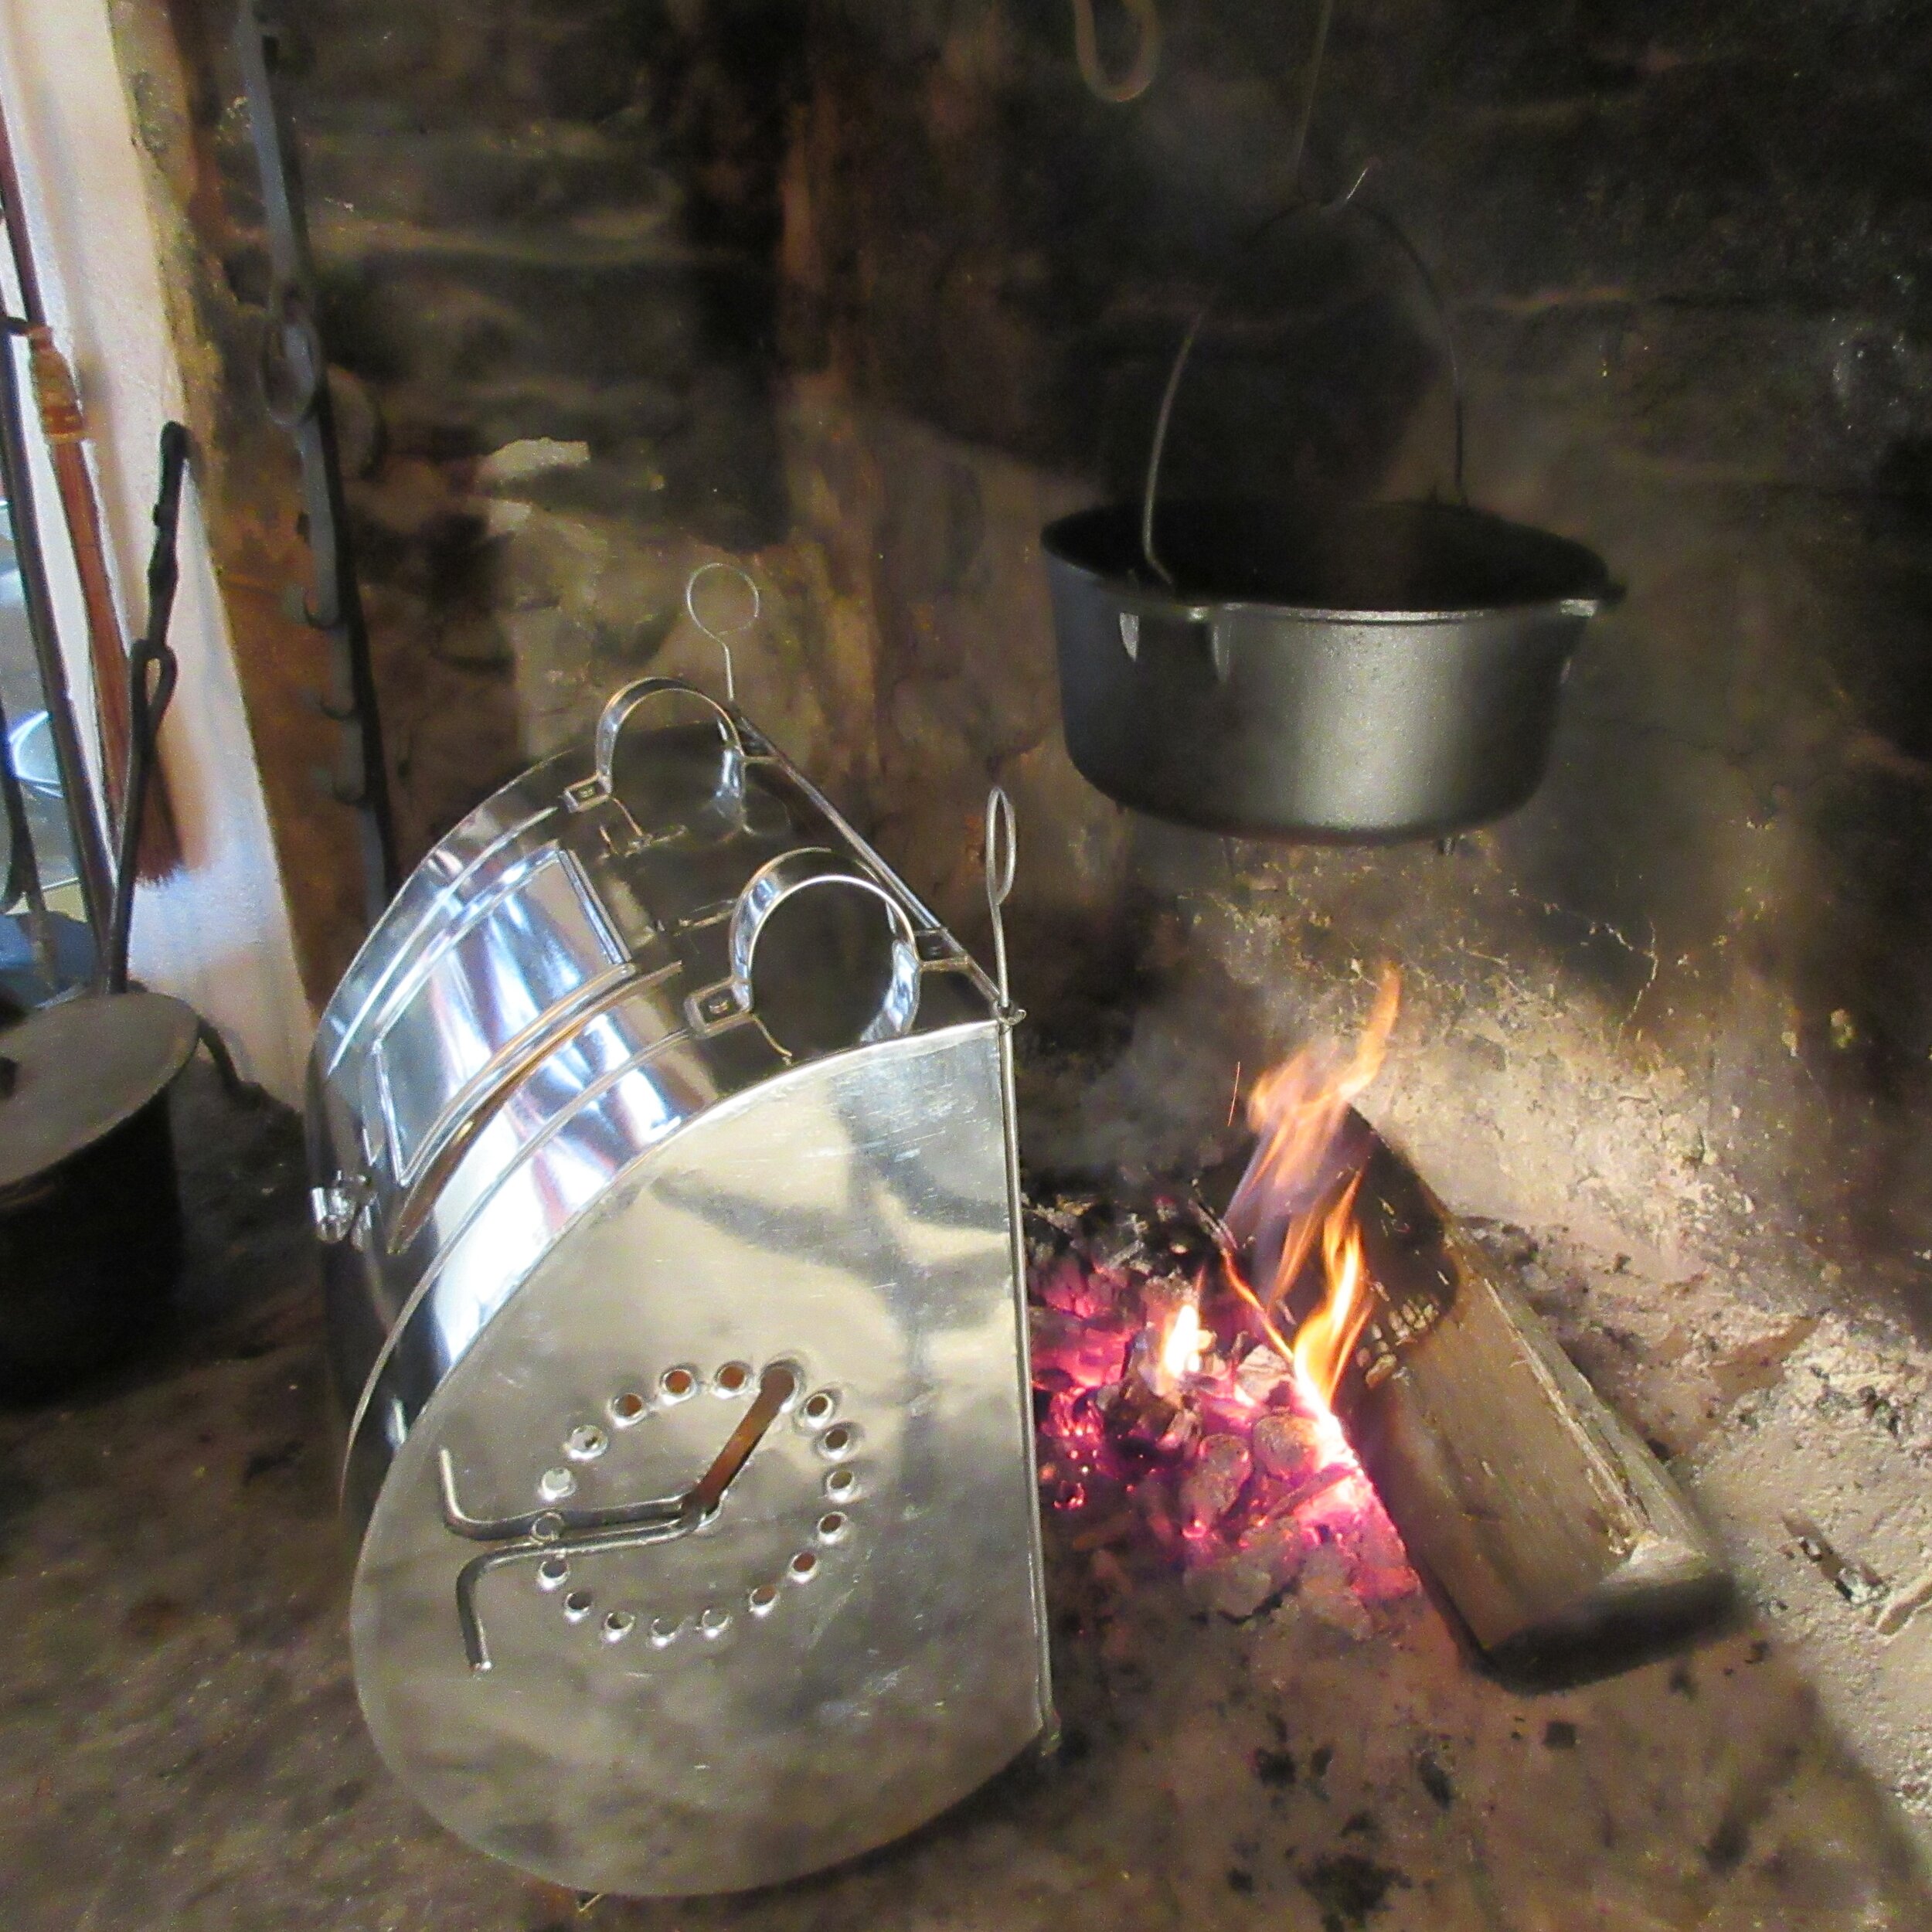
Instead of using a salamander, I used the other reflector oven to brown the breadcrumbs on top of Fillets of Chickens. This reflector is box-like in shape and can be used more like a traditional oven. You may use baking dishes or place food directly on the tin surface (but grease the surface first). I’ve also included a picture that I took when I baked some coconut macaroons on another recipe testing day at Nelles Manor Museum.
This reflector oven also features handles on the top and the side so you can move it closer to or further from the fire to adjust the temperature. Be careful about using the handle on the top, though! As you can see from the picture, the entire top of this oven flips back so that you can easily monitor, rearrange and flip your food.
Don’t worry, you don’t need to buy a reflector oven to try out these techniques. Have a look at these videos to glean some ideas about how you could build a DIY reflector oven using common items that you can use in front of a fireplace or campfire.
If you’d like to learn more about open hearth cooking techniques, check out what I wrote about Carrot Fritters. I recommend these fritters for breakfast or brunch and I also explain two different options for frying food over and around an open hearth.

Read The Practice of Modern Cookery :

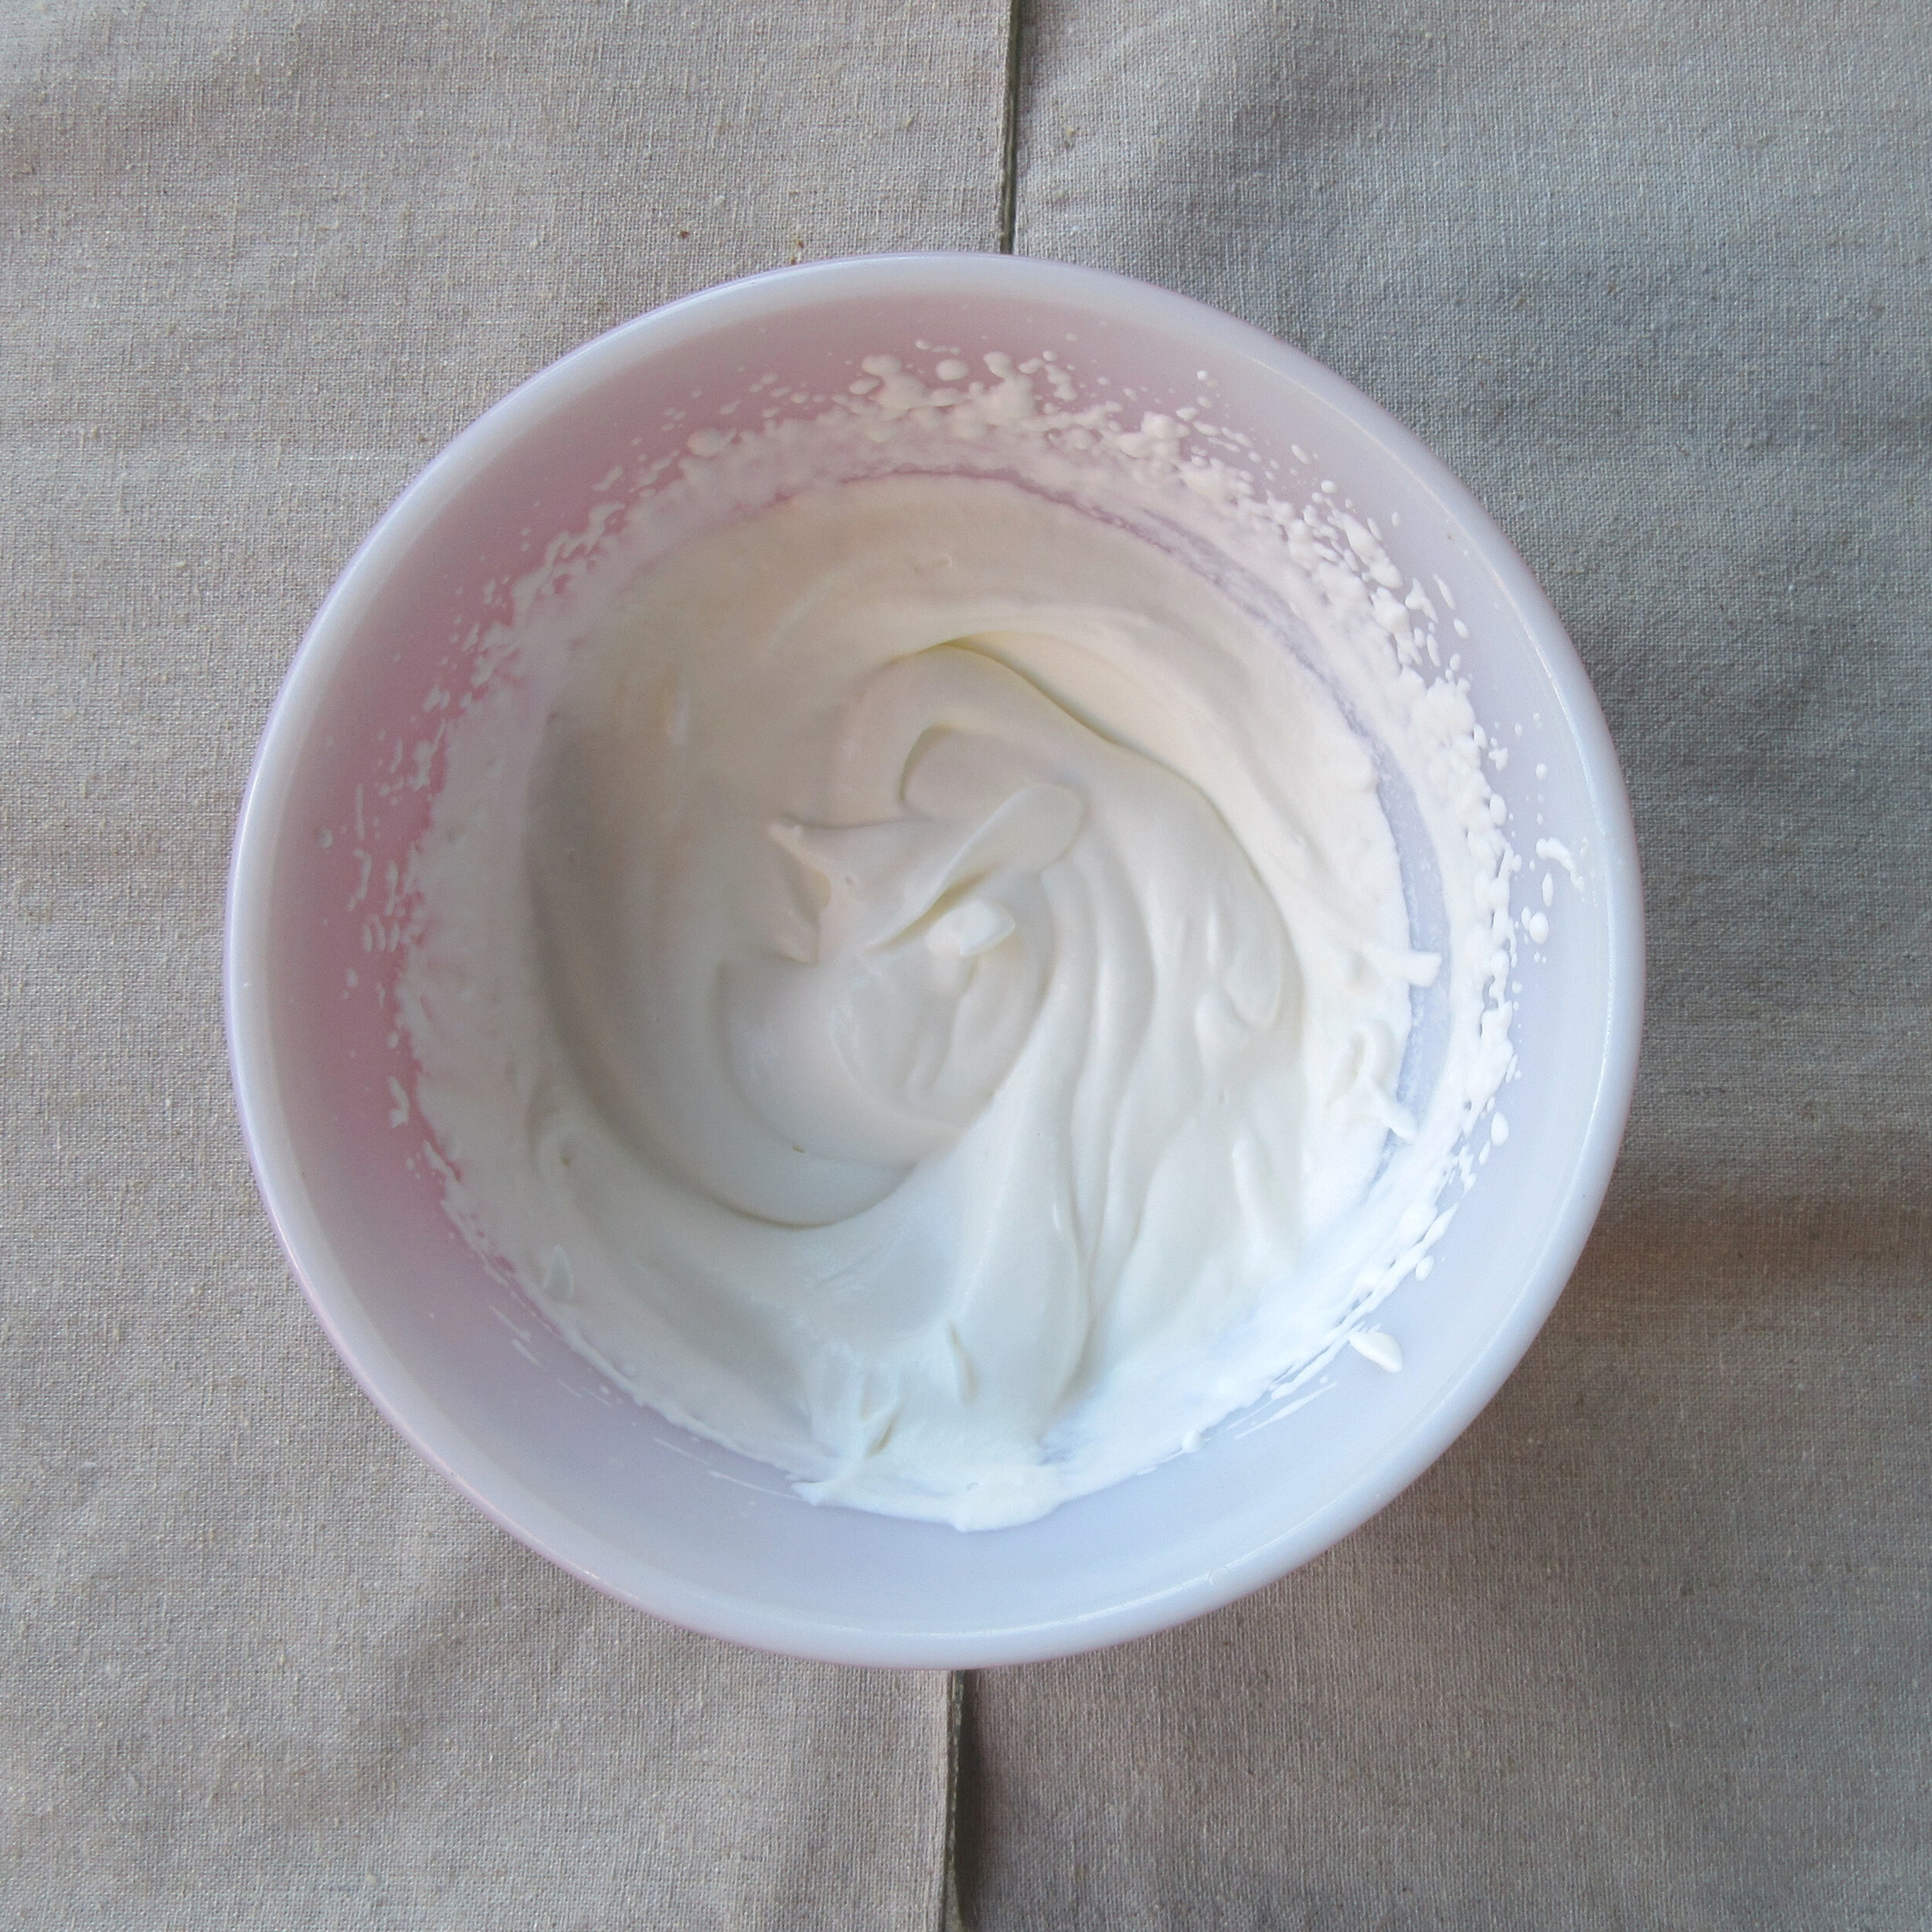
Peppermint Whipped Cream
Along with Marshmallow Mint Sauce, Peppermint Whipped Cream is one of the suggested toppings for the Chocolate Mousse recipe from the 1927 cookbook Electric Refrigerator Recipes and Menus. With only two ingredients, Peppermint Whipped Cream is tasty and easy to make and is a delightful topping for the frozen mousse.
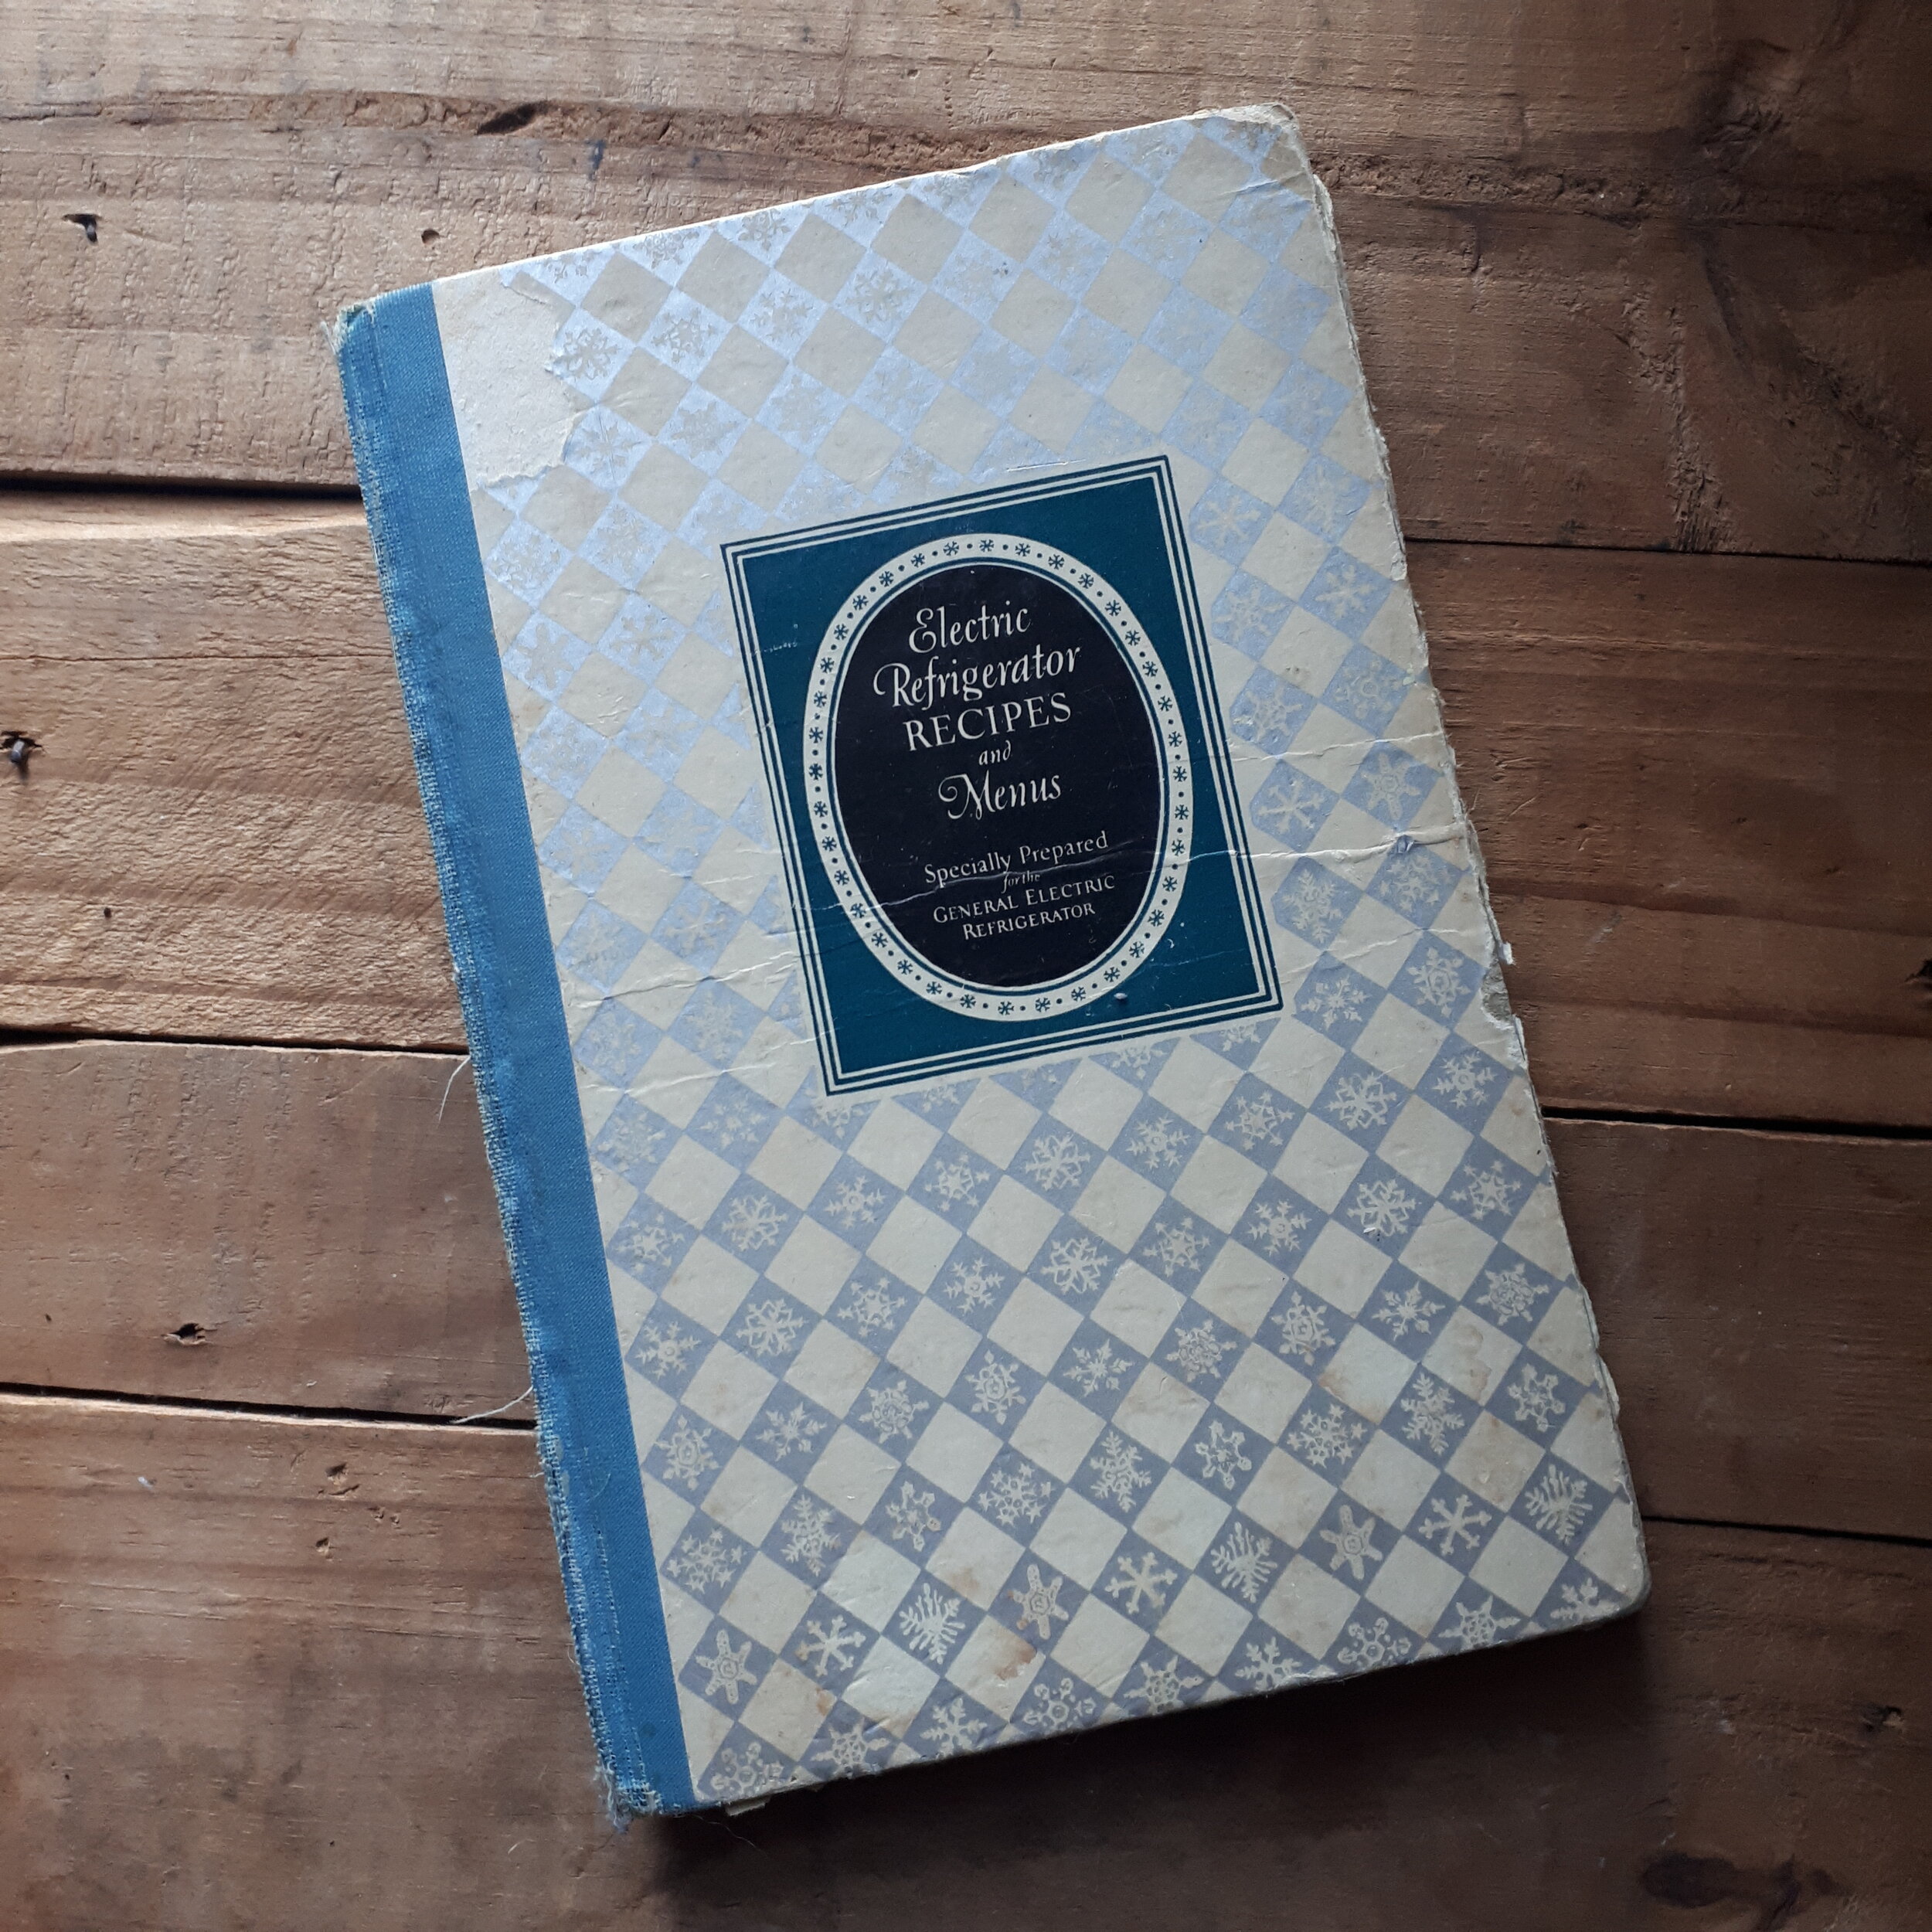
Written by Alice Bradley of the Boston Cooking School, Electric Refrigerator Recipes and Menus was a helpful resource for housewives who welcomed a General Electric Monitor Top Refrigerator into their kitchen. The Monitor Top was the first household electric refrigerator that was affordable for the middle class and it was advertised as a healthier, time-saving and money-saving option over ice refrigerators.

You’ll find this recipe in:
Electric Refrigerator Recipes and Menus:
Recipes prepared especially for the General Electric Refrigerator
By: Miss Alice Bradley
Cleveland, 1927
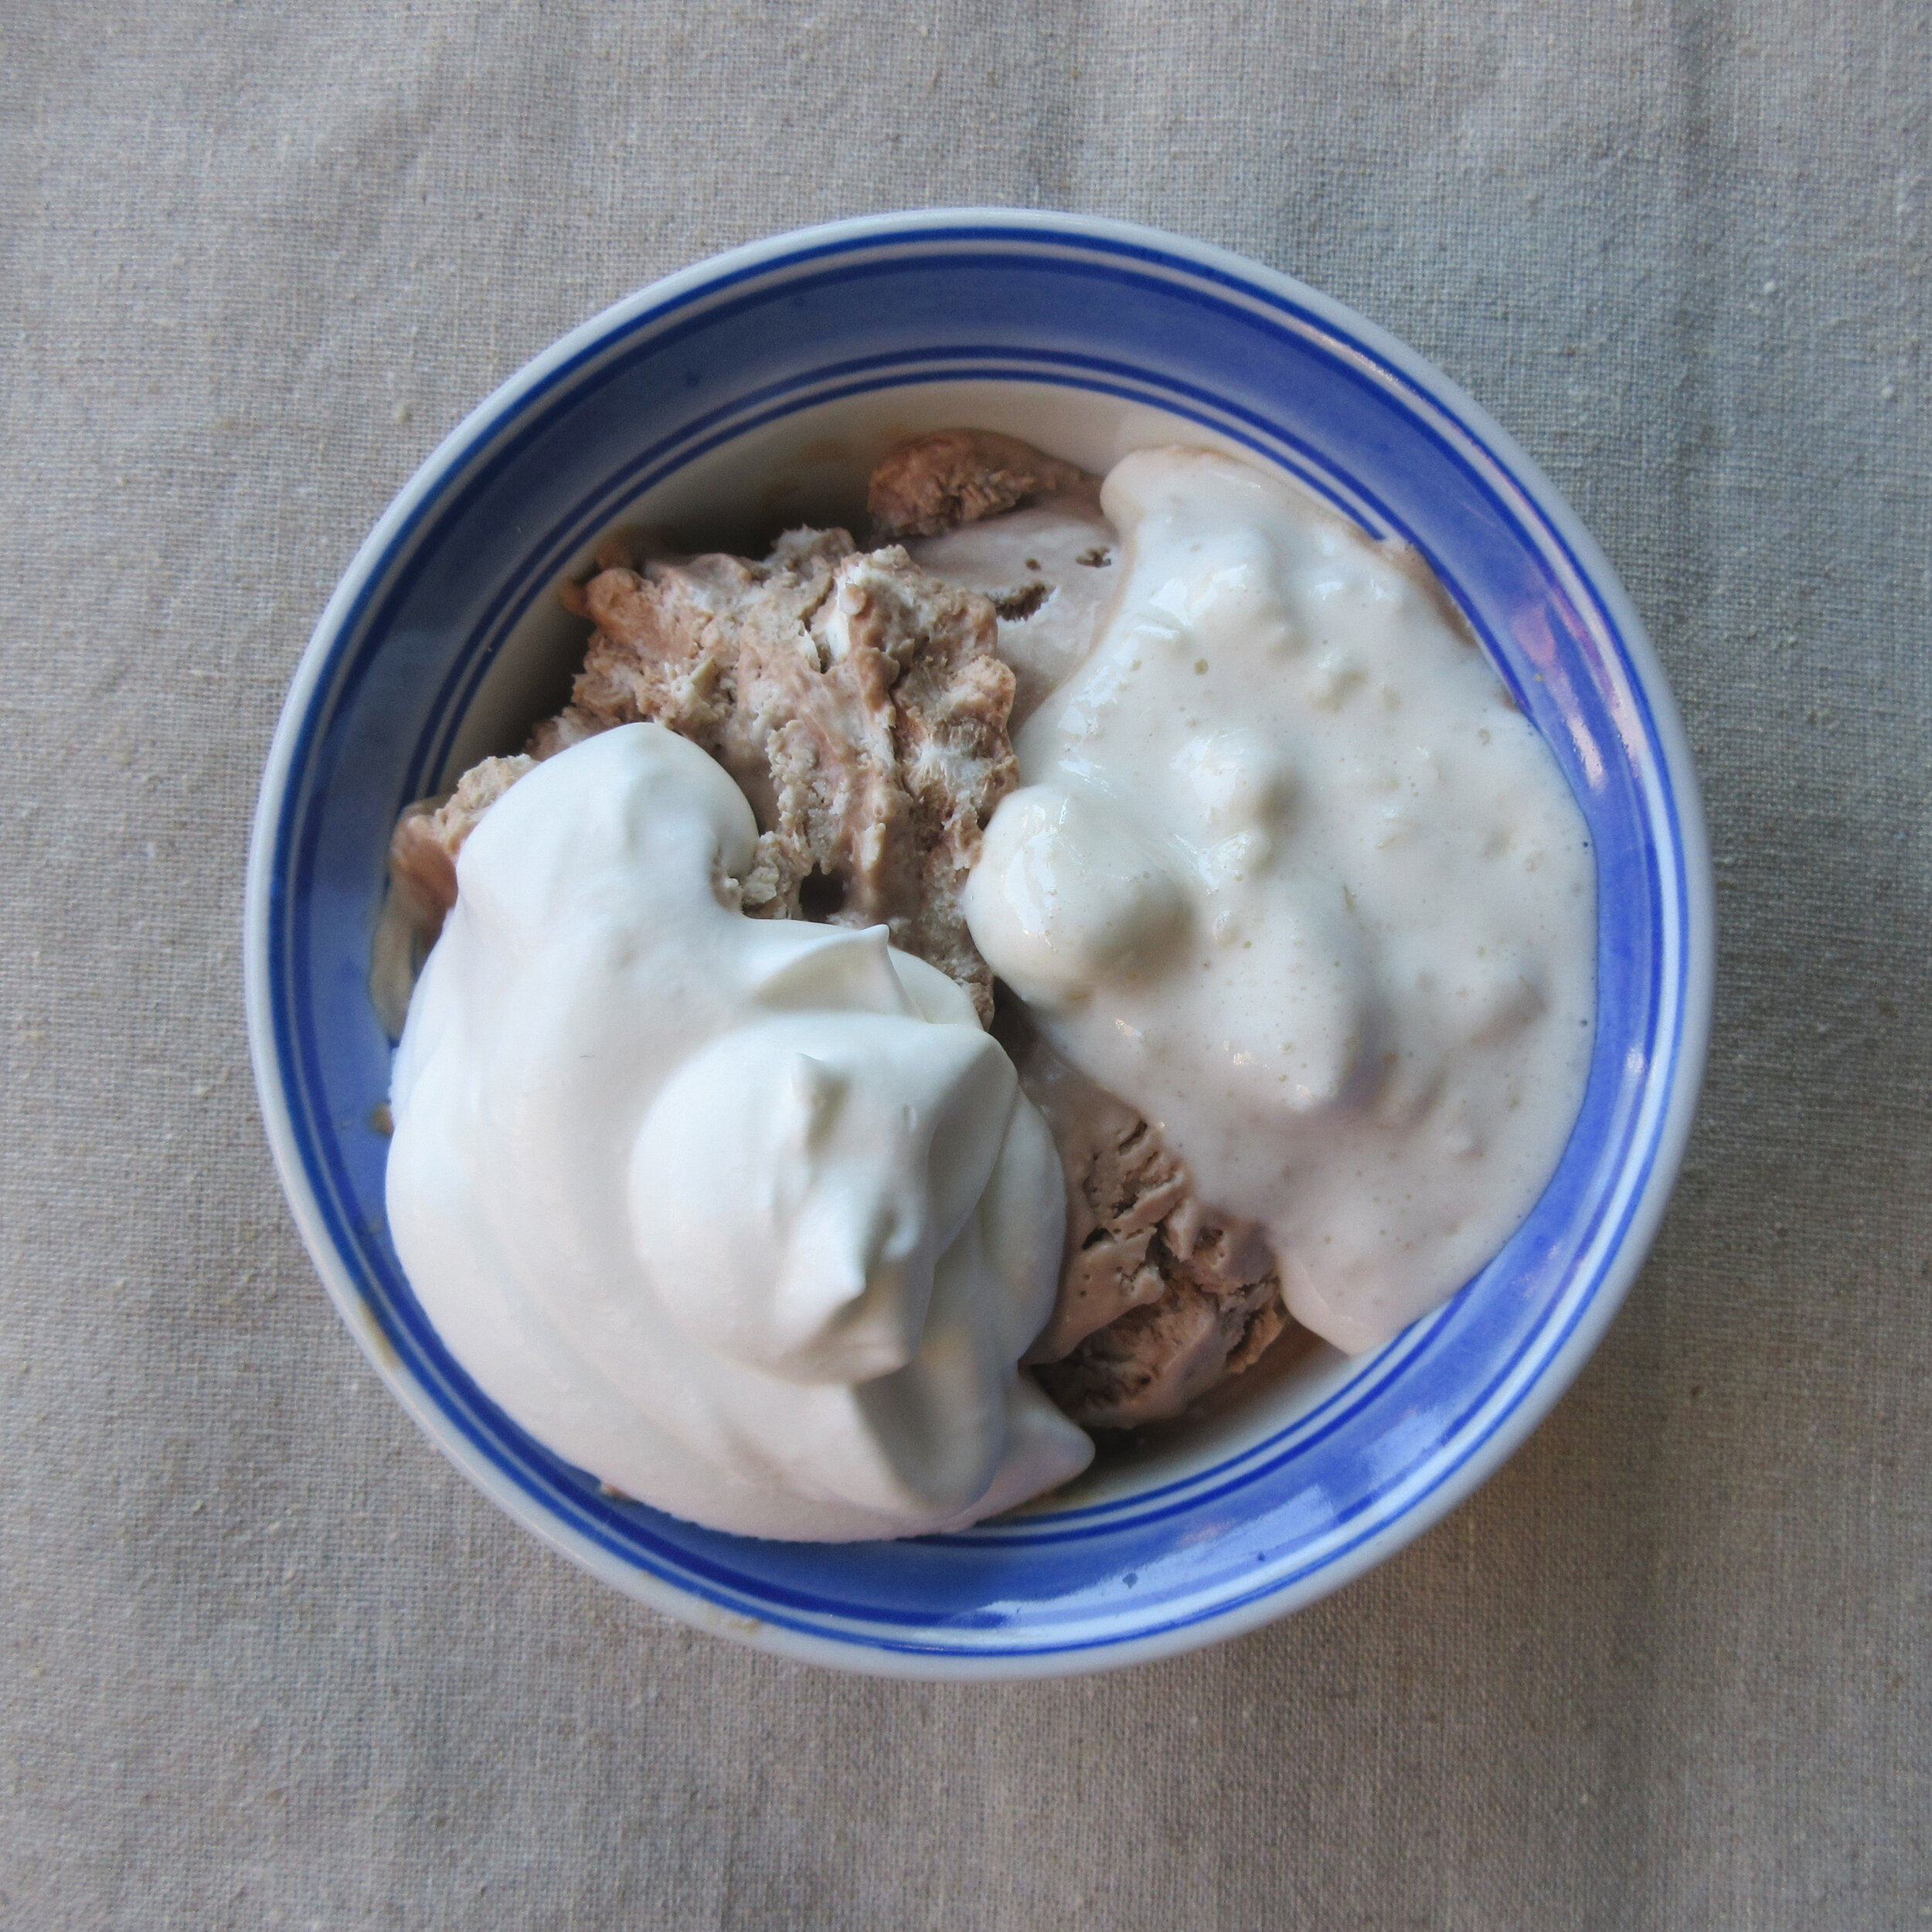
Peppermint Whipped Cream is delicious served on top of Chocolate Mousse
Historic Recipe:
Chocolate Mousse – No. 40
Put in top of double boiler
¼ cup milk and
1 teaspoon gelatine. When milk is hot and gelatine is dissolved, add
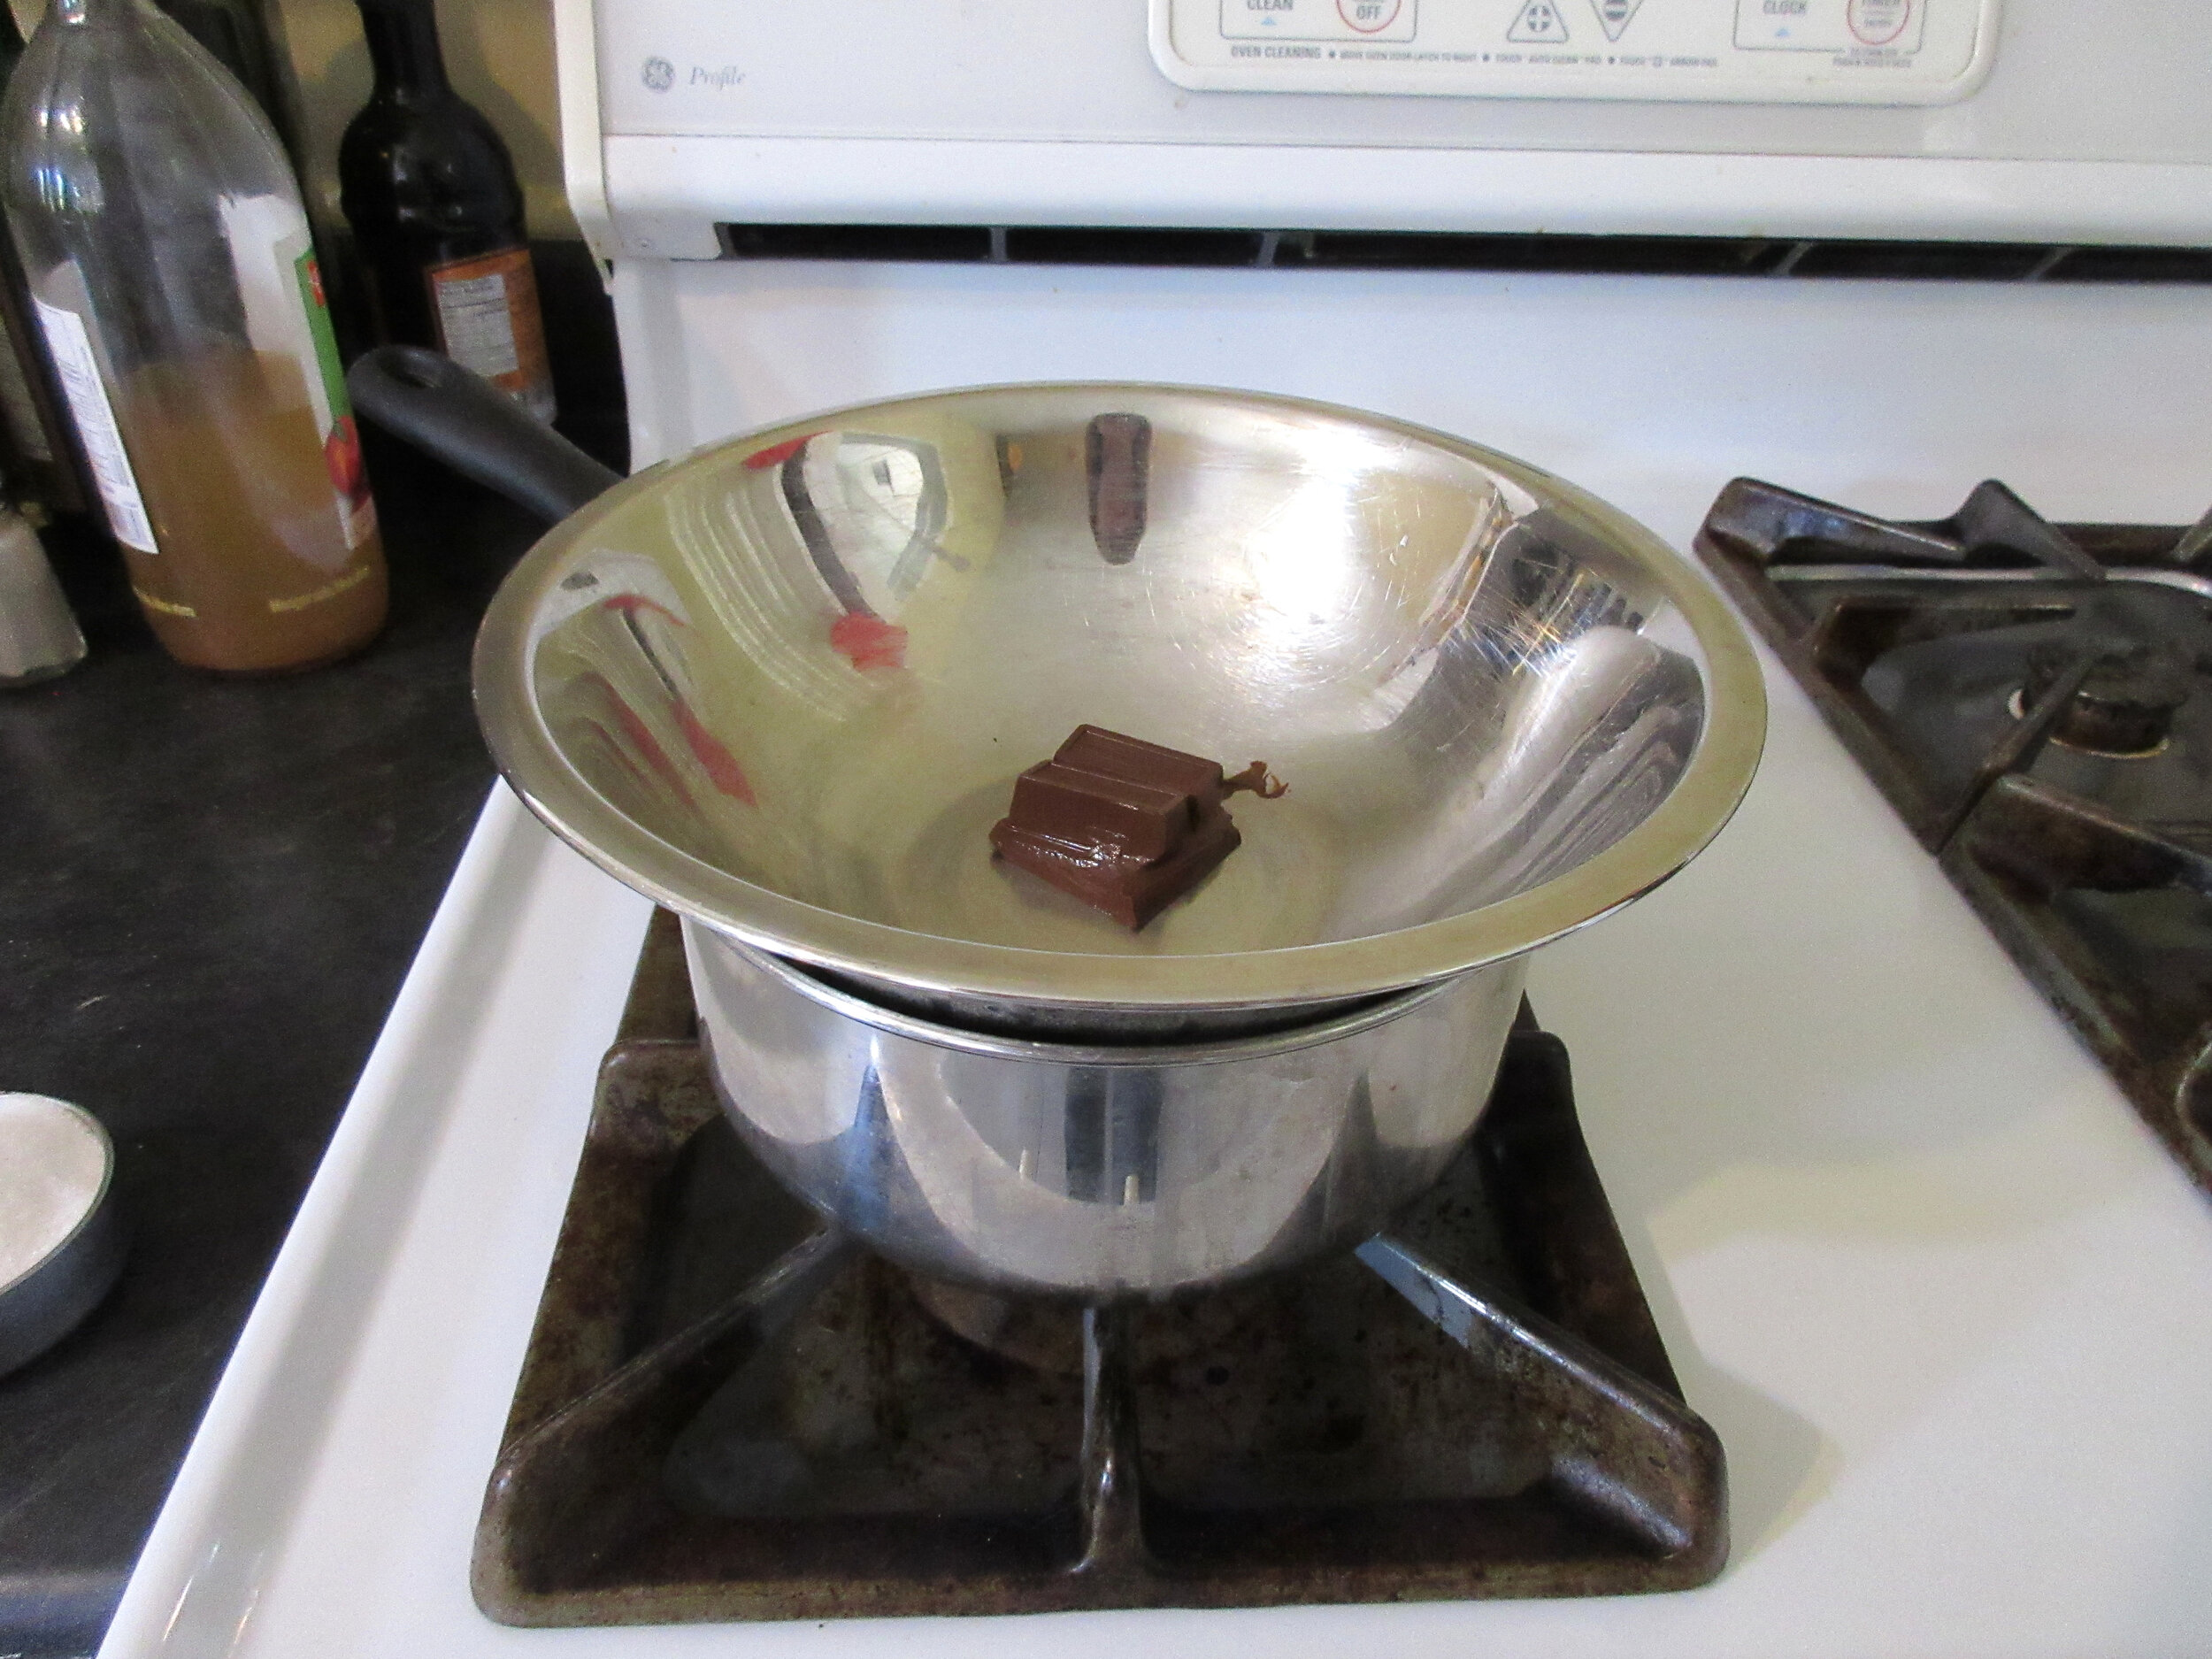
½ cup cold milk, strain into refrigerator pan and put in freezing chamber of refrigerator. When cool beat until light. Meanwhile, melt over hot water
1 square chocolate, add
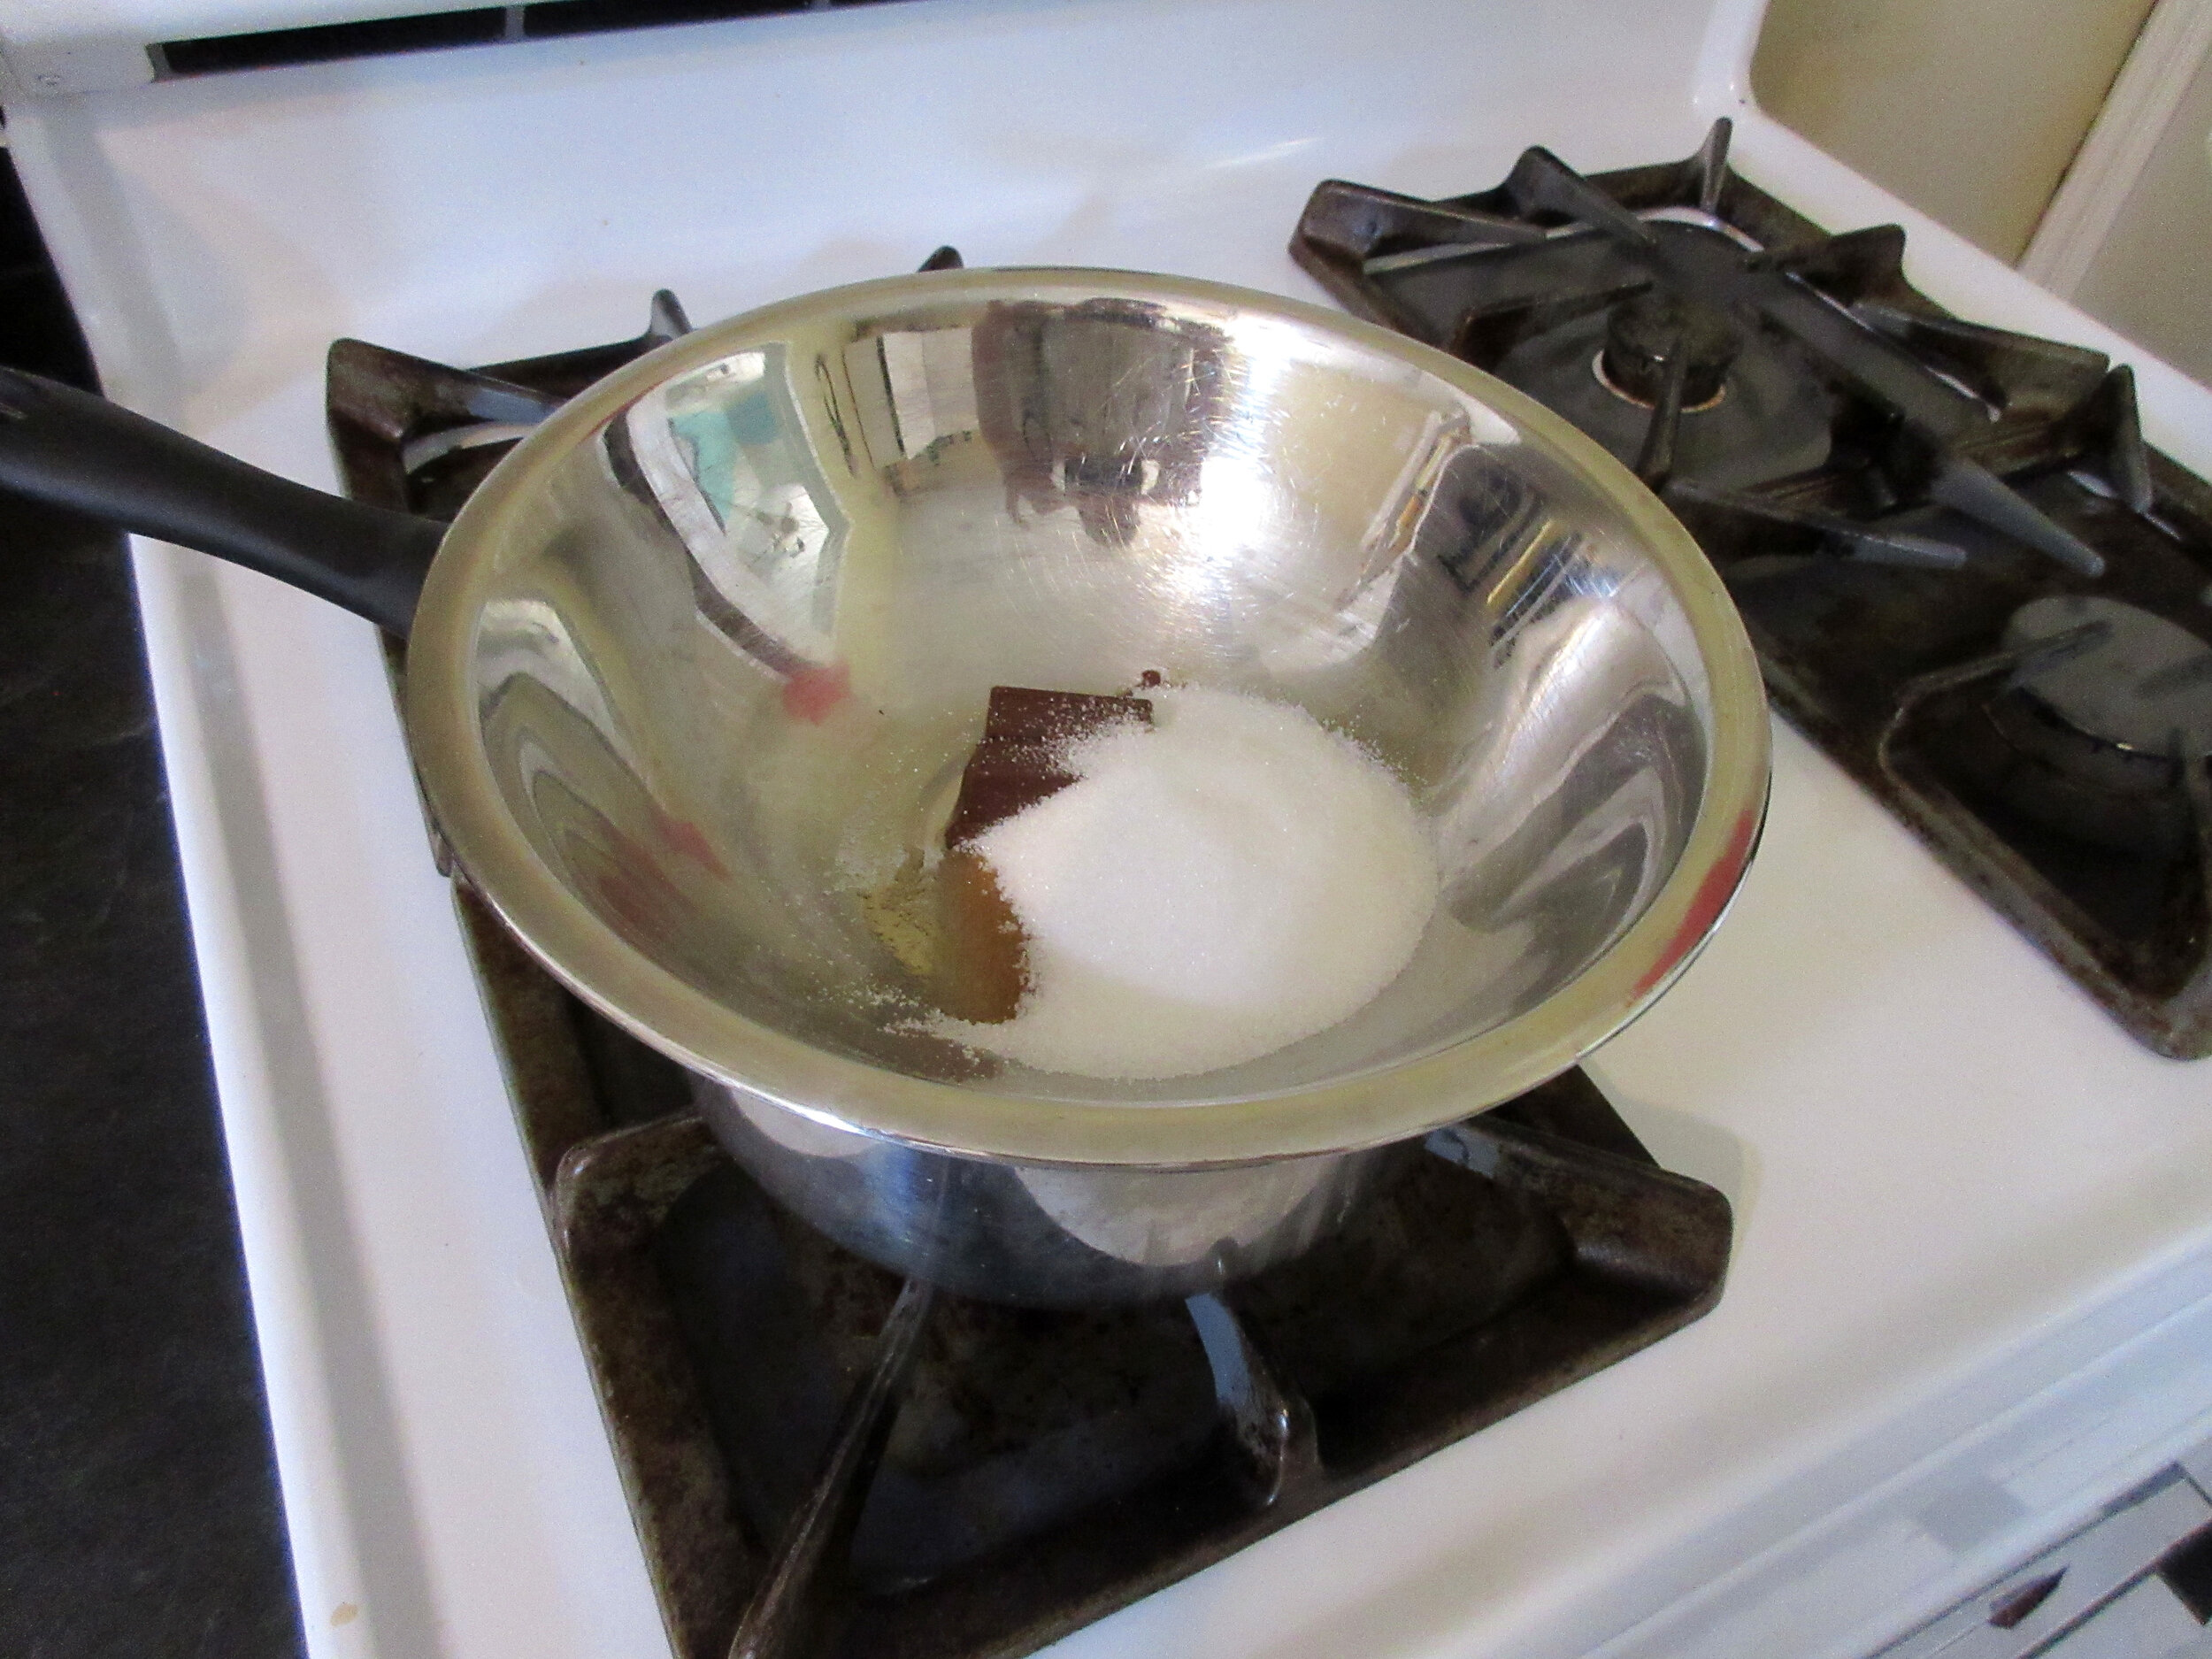
½ cup sugar
Few grains salt and
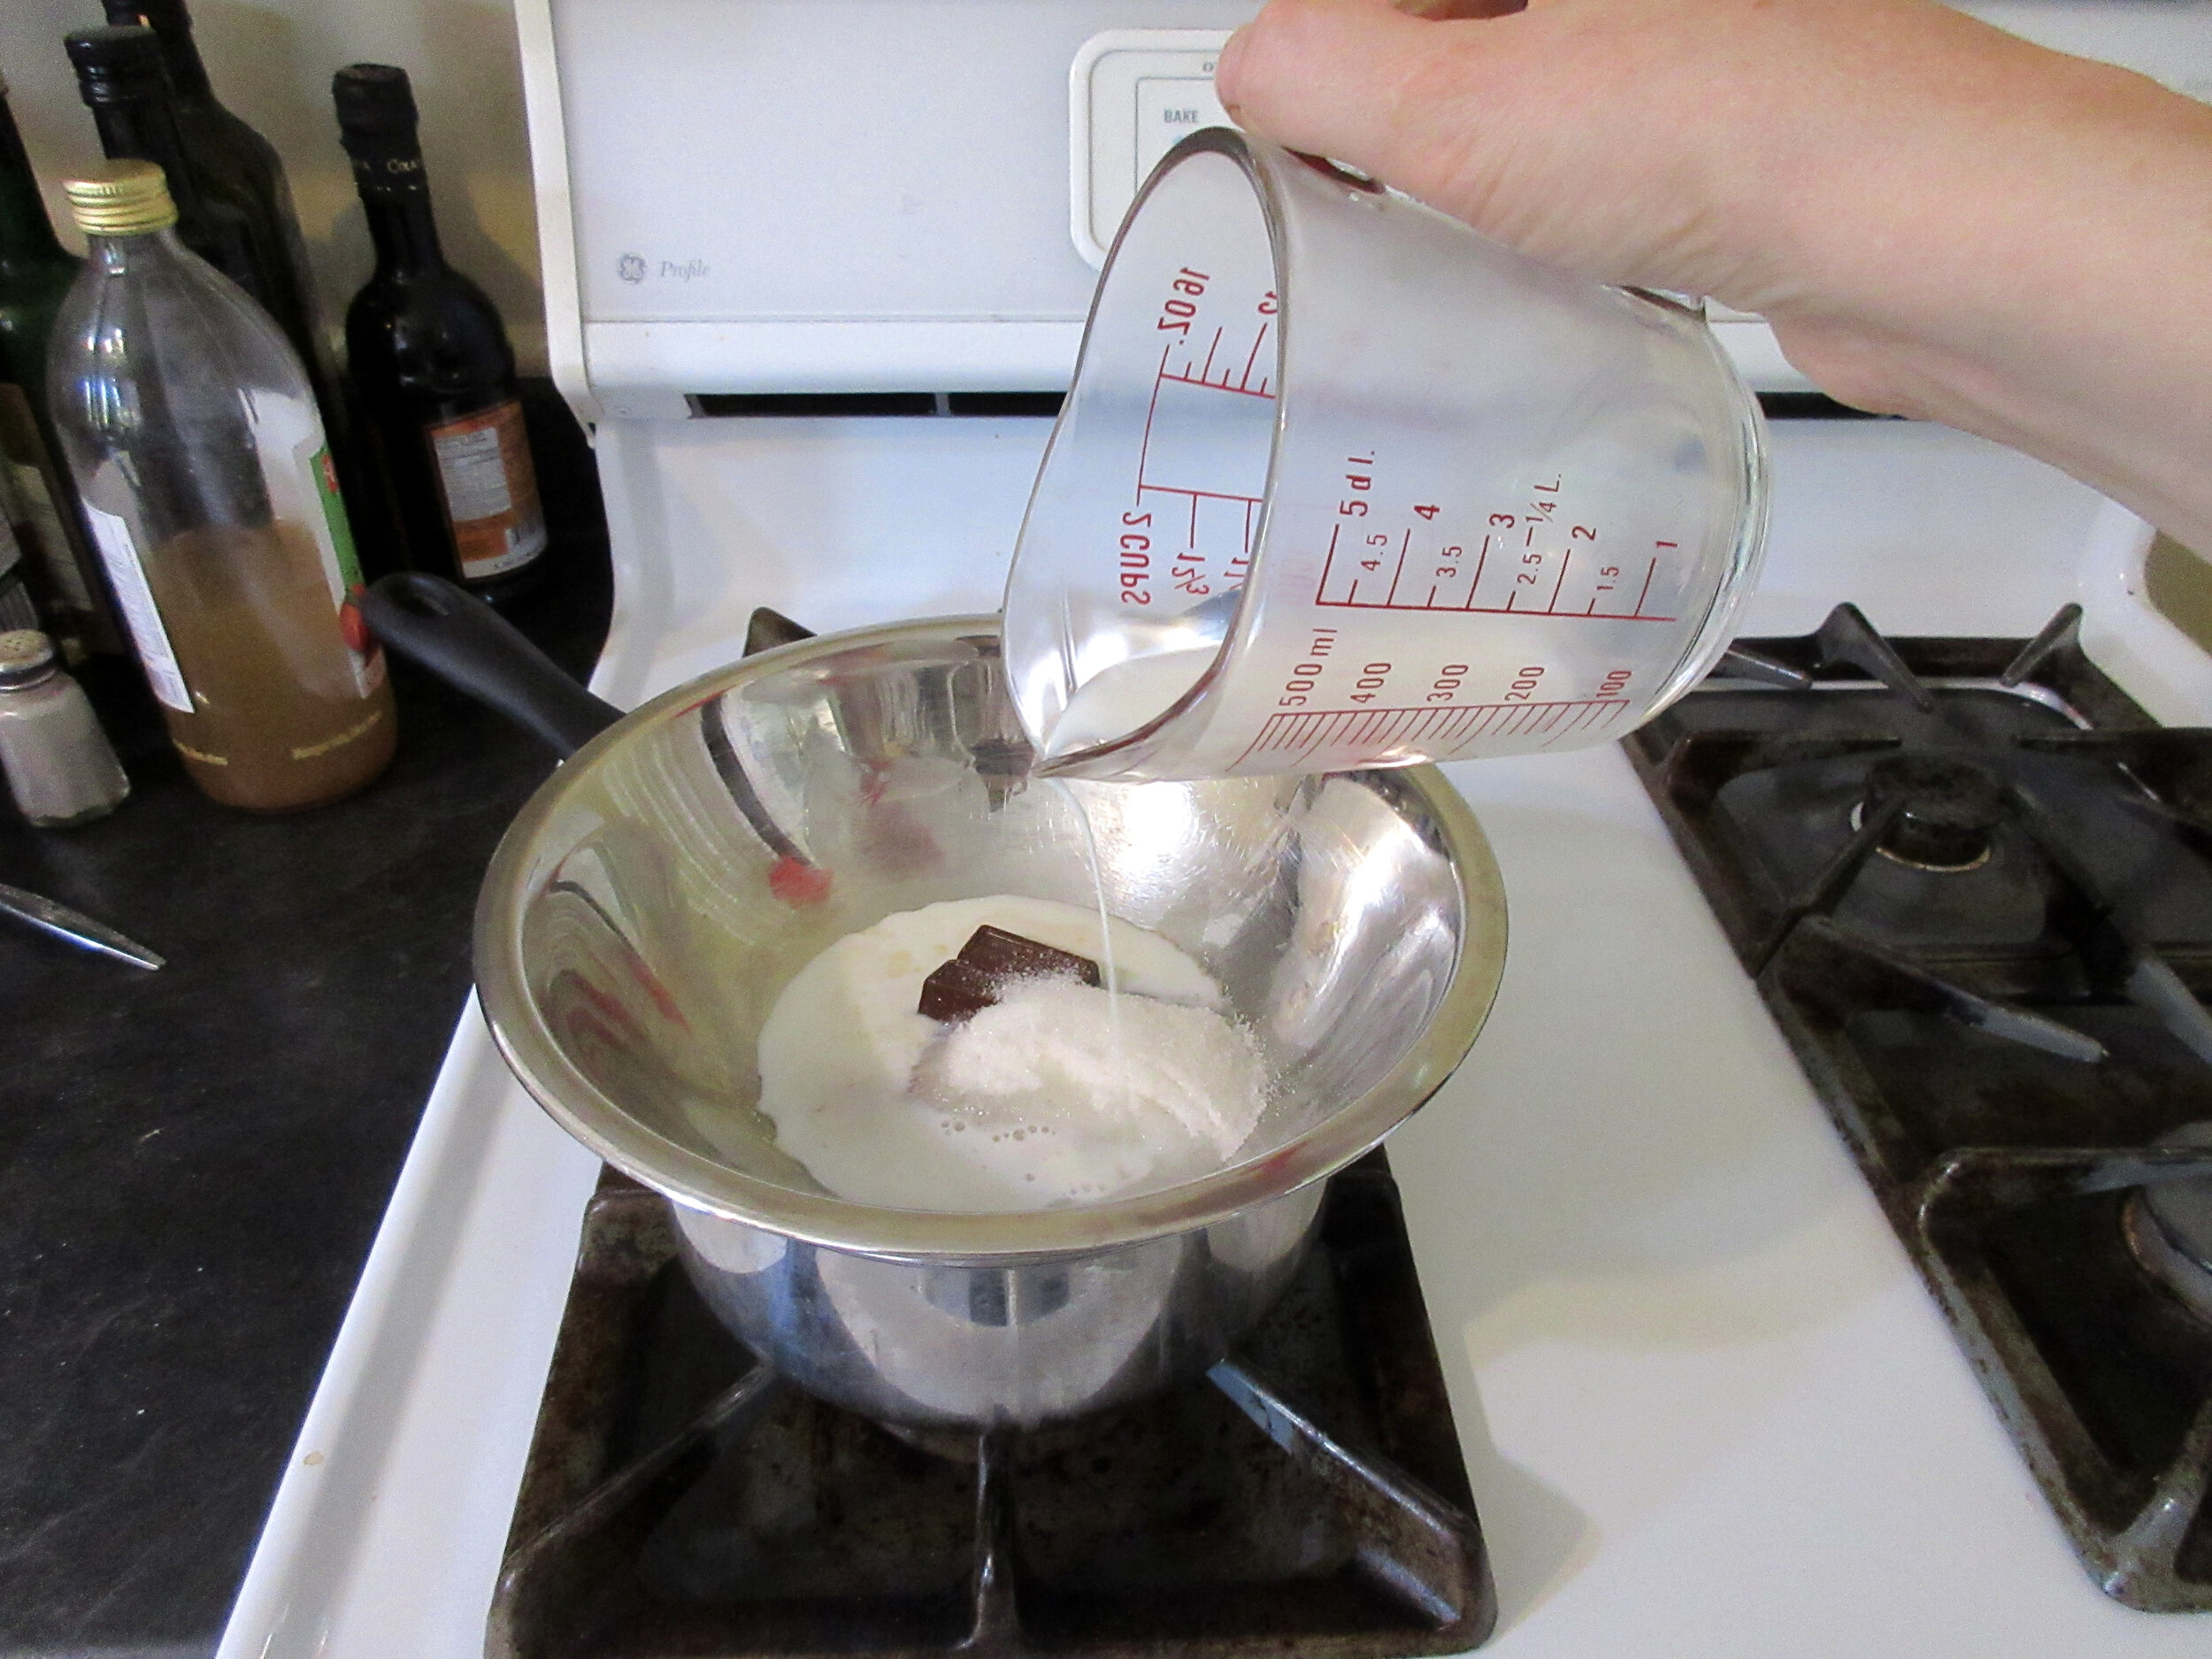
1 teaspoon vanilla and very slowly add
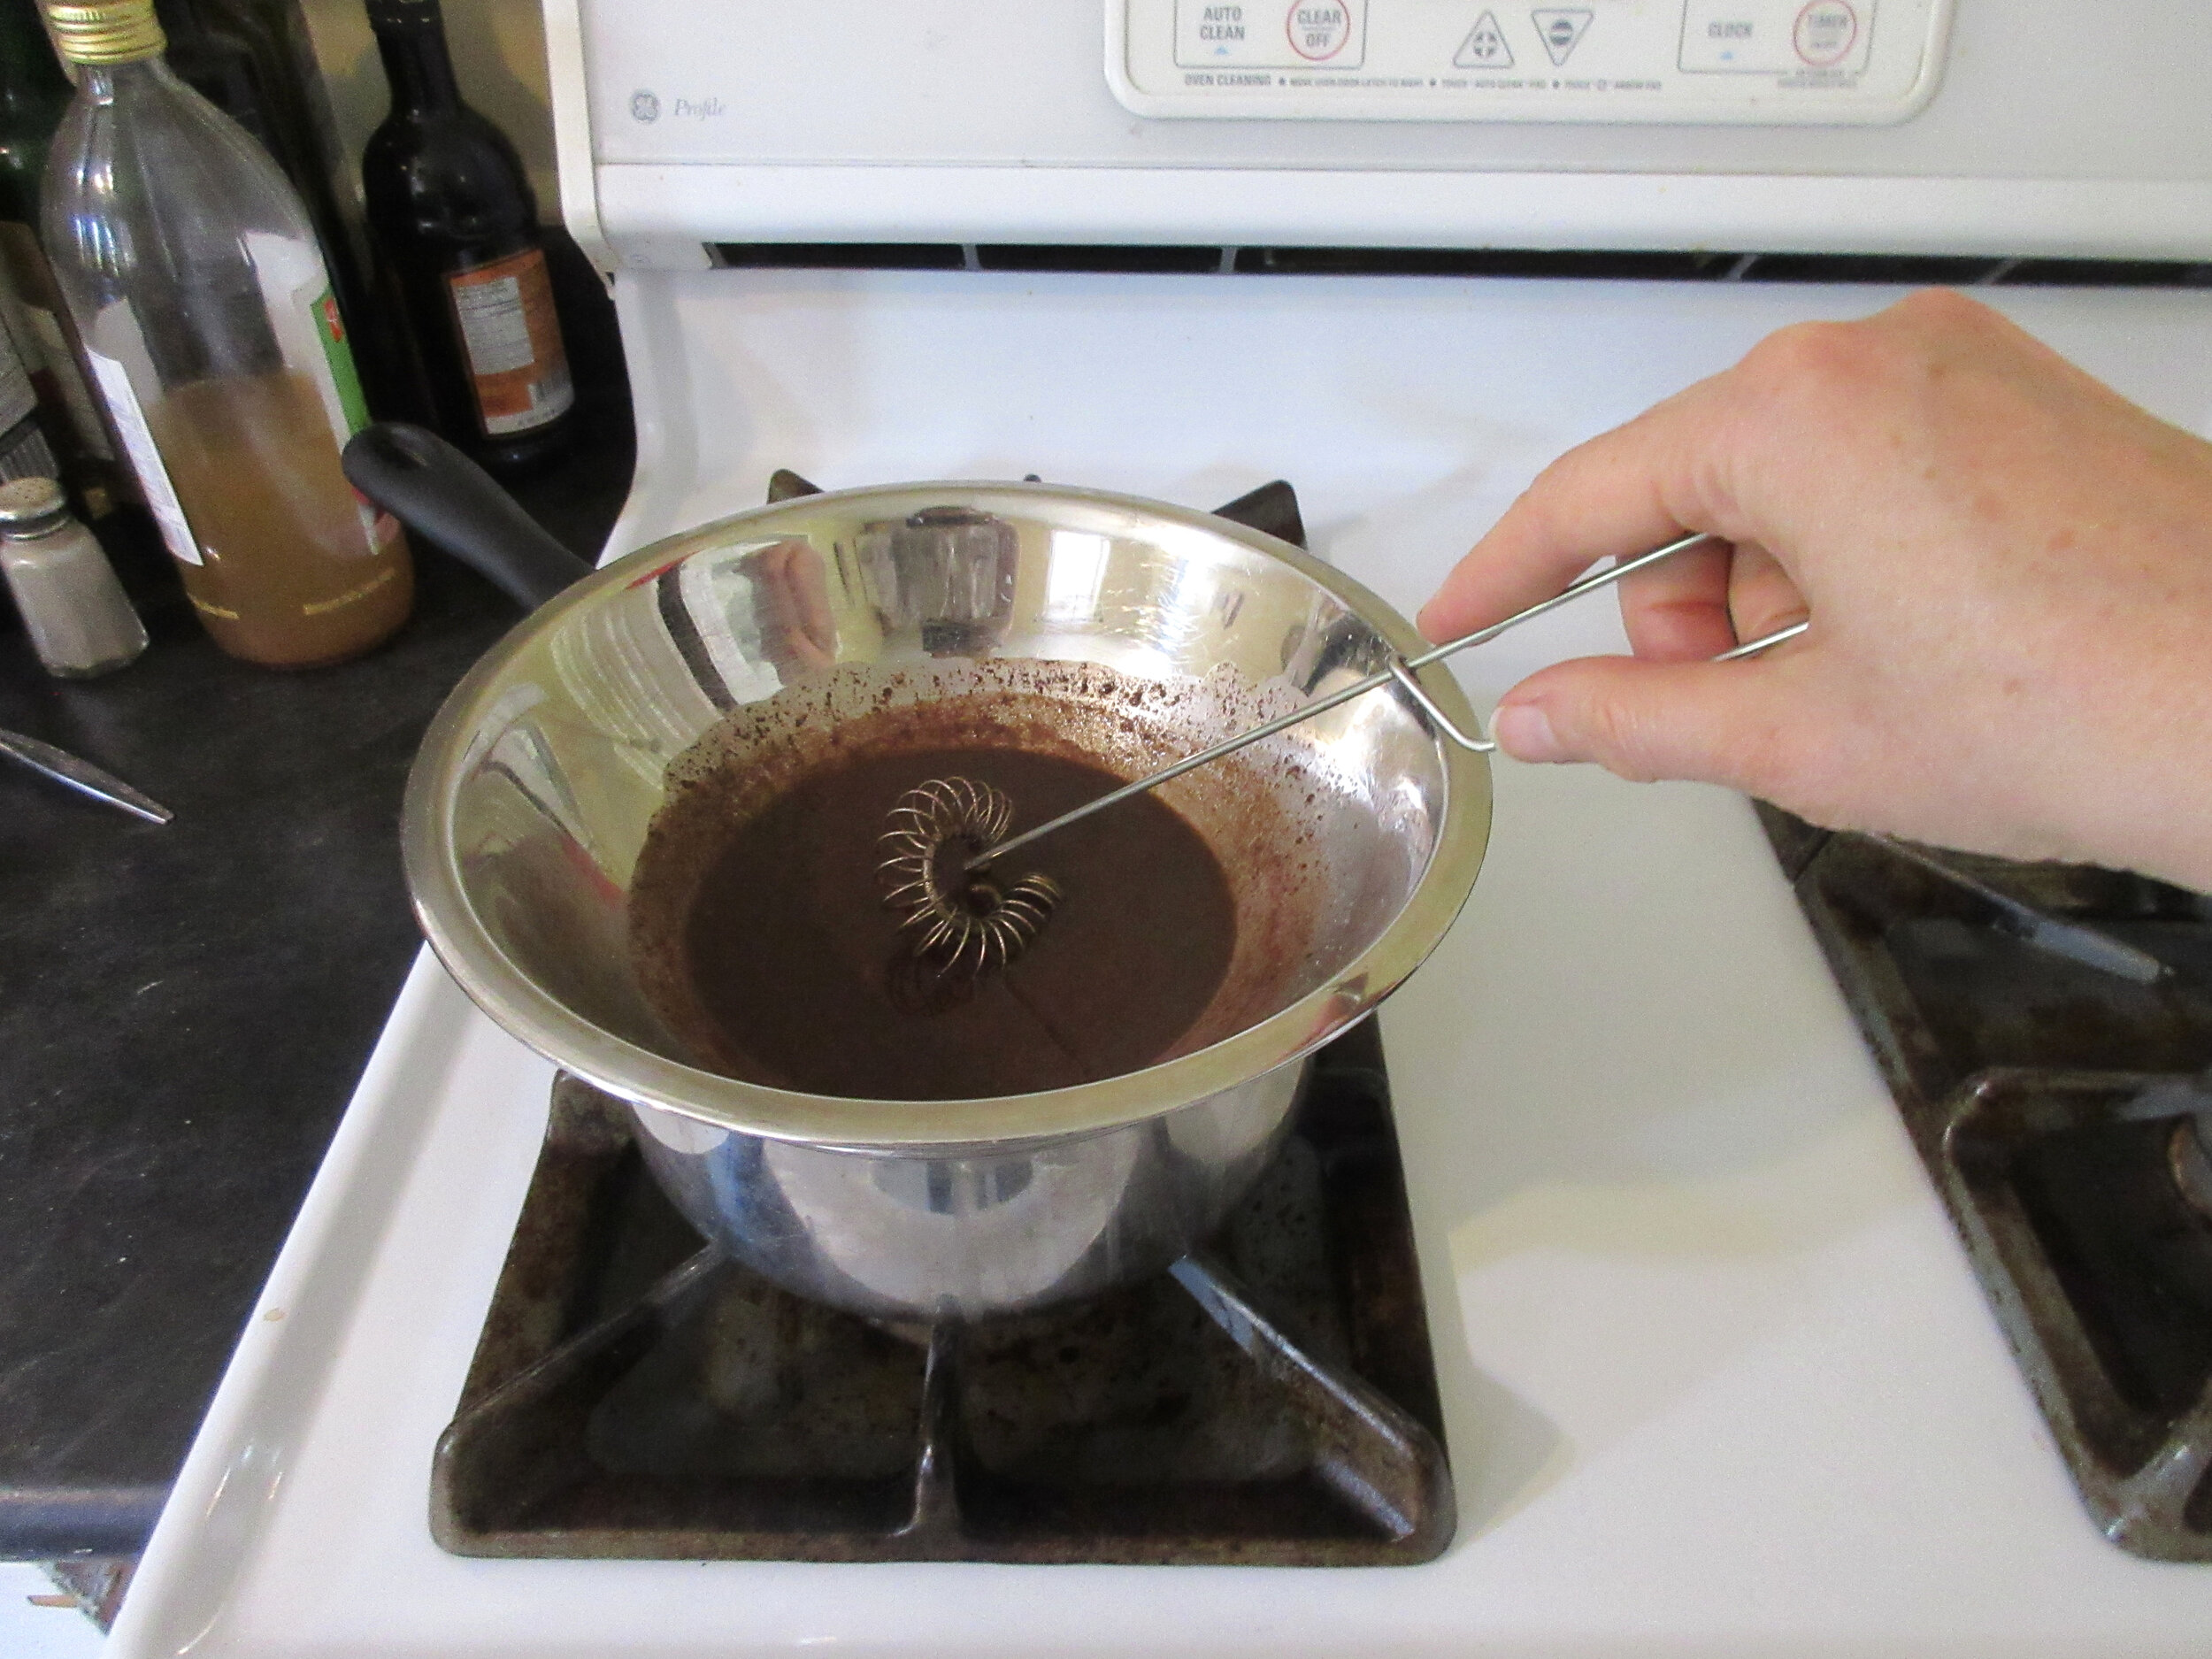
¼ cup milk. Stir until mixture boils. Strain and cool. Beat
½ pint cream until thick. Add beaten milk slowly and fold into chocolate mixture. Pour into refrigerator pan and freeze like Desserts and Salads That Need No Stirring, page 45. Serve if desired with
Whipped cream beaten stiff and flavored with vanilla or with oil of peppermint, or serve with Chocolate Sauce – No. 60.


My Peppermint Whipped Cream recipe:
1 cup 35% whipping cream – 237 mL
Start with 1 drop Peppermint essential oil or ½ tsp peppermint or vanilla extract and add more to taste
(I used 3 drops doTERRA Peppermint essential oil)
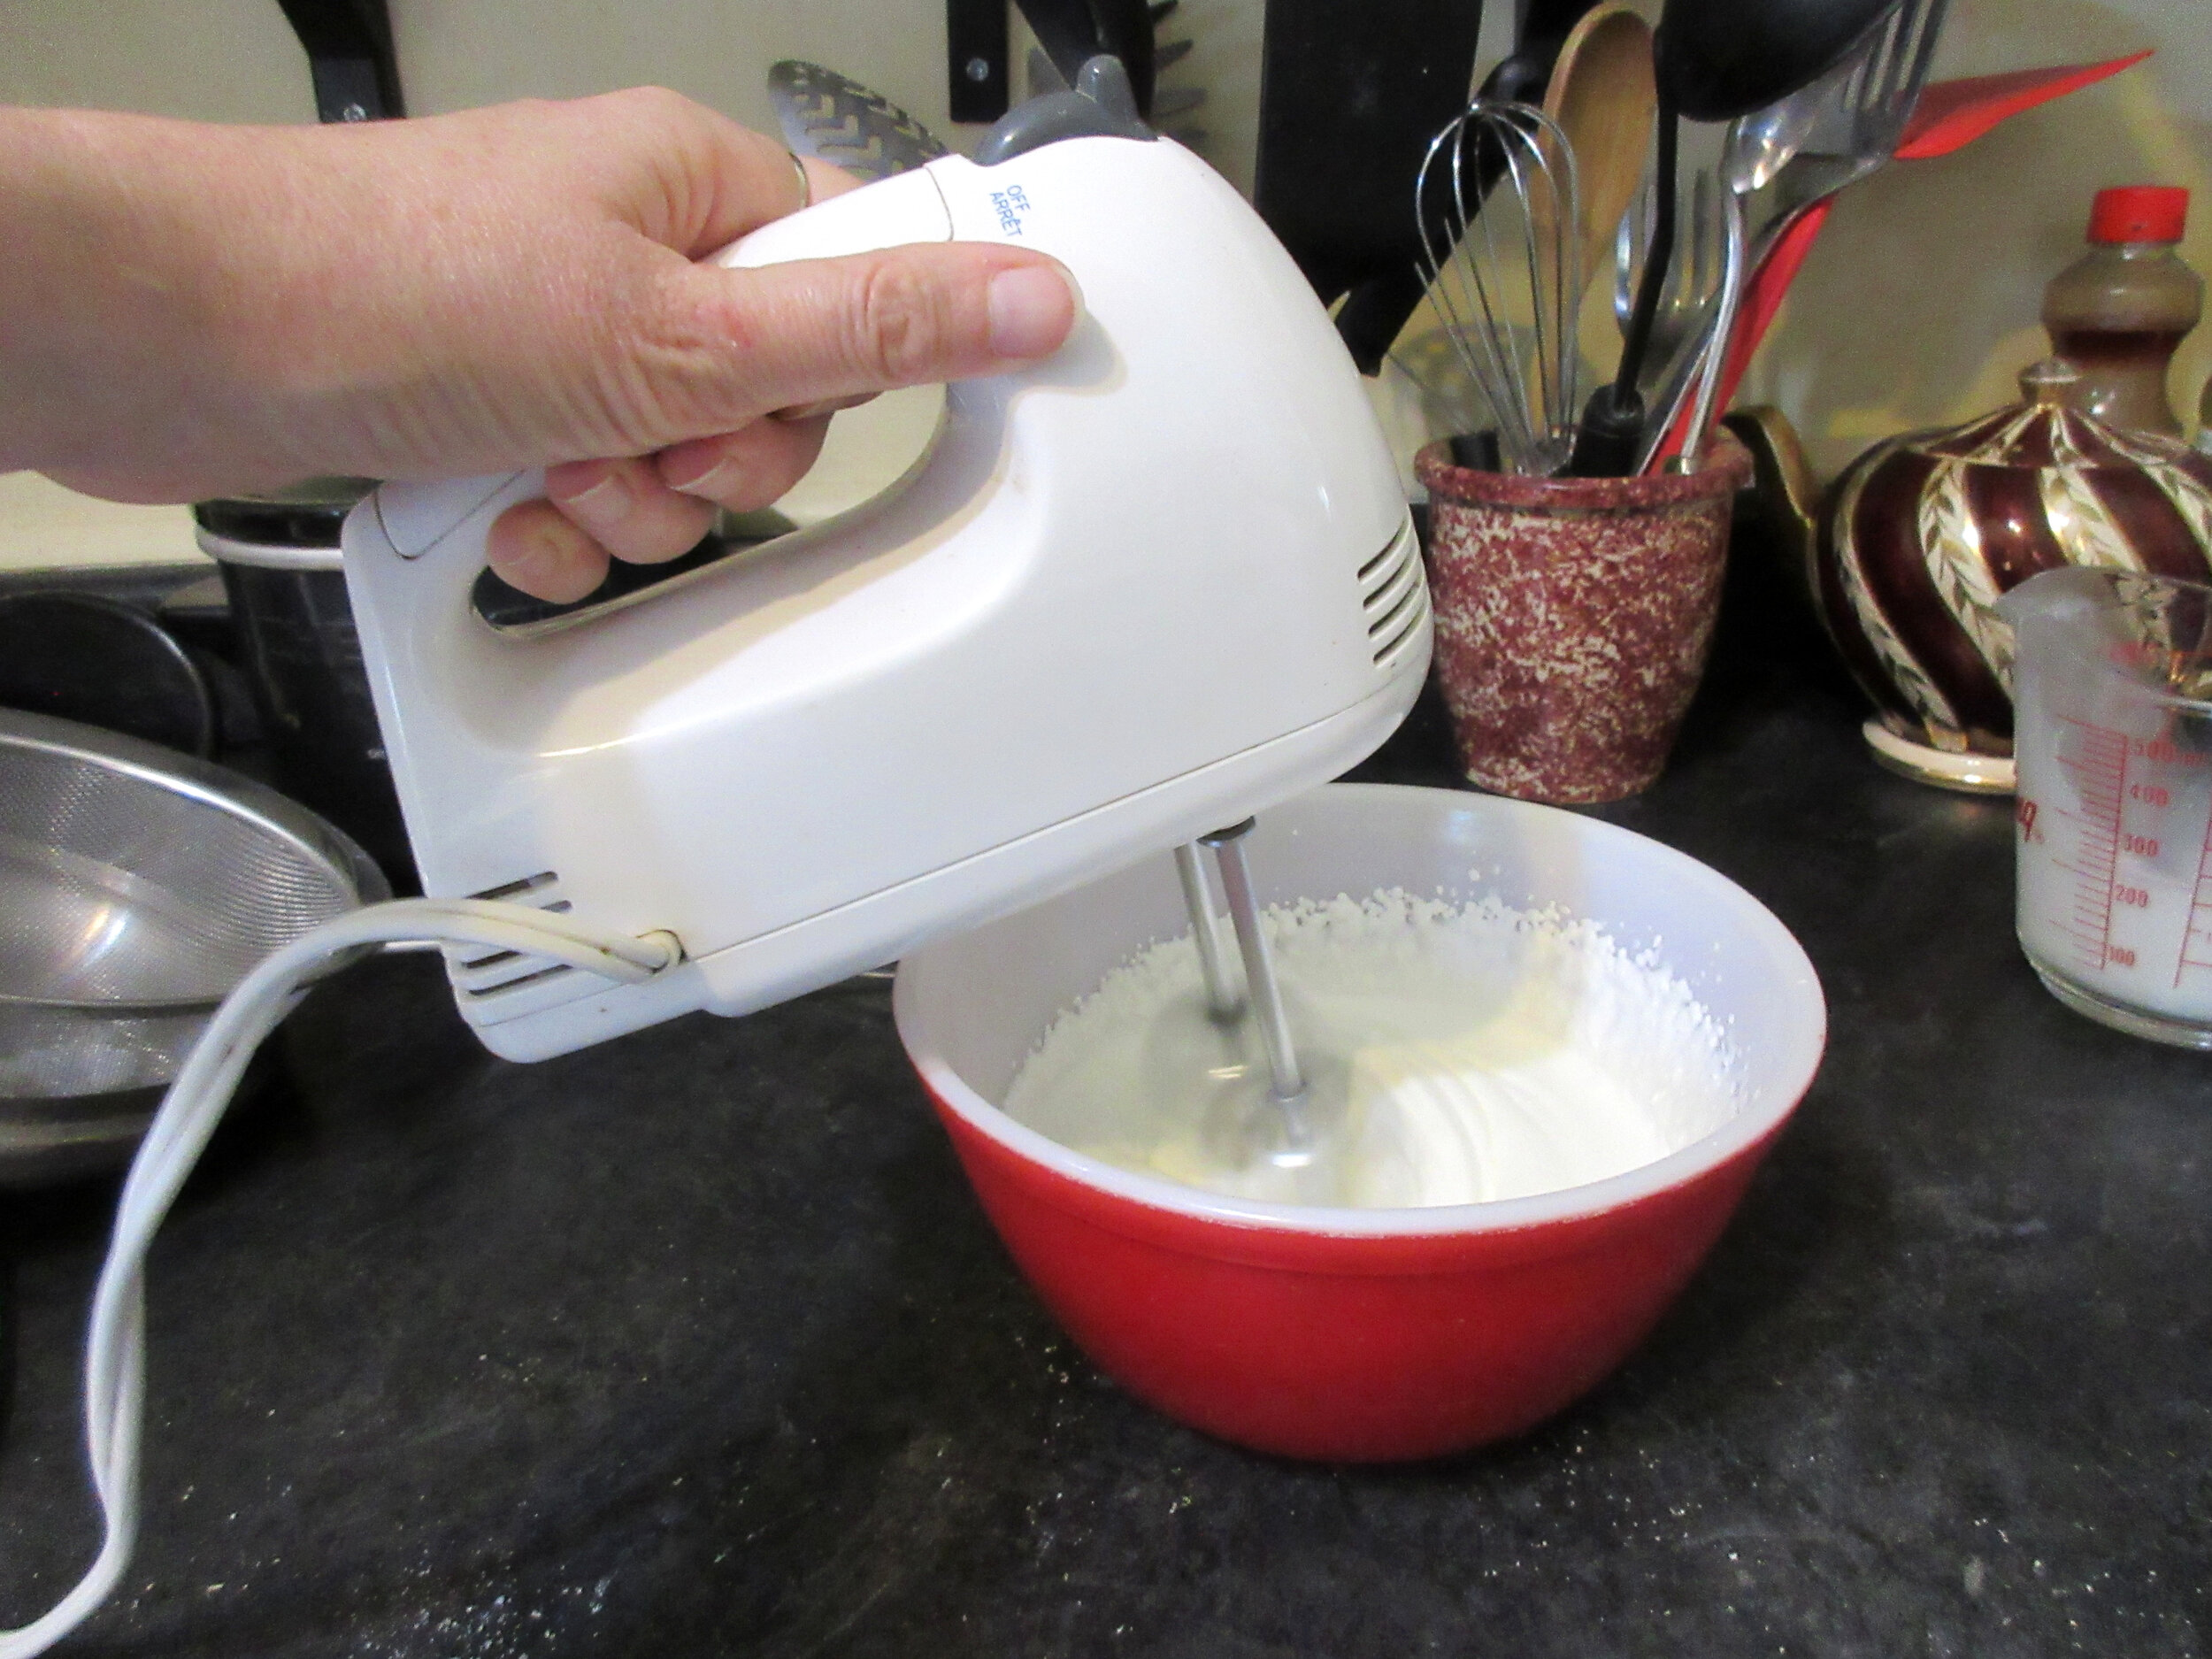
Beat the whipping cream until it is stiff and will remain peaked when you pull out the beaters. Customize your peppermint flavour (or vanilla flavour if that’s what you prefer) by adding your flavouring gradually to taste.
Peppermint Whipped Cream is very delicious served on Chocolate Mousse
***It’s important to stress that most essential oils on the market today are not safe to put in food because of the adulteration and contamination that are prevalent in this industry. For this reason, I’ll always suggest a food-safe substitute ingredient for the essential oil, like extract. Please look out for your safety and don’t use any old bottle of essential oil in the recipes on this blog! The brand that I use is doTERRA essential oils, which has extremely high standards for testing and purity, meaning that doTERRA essential oils can be safely used to flavour food.
Pop over here for more information about doTERRA & adulteration in the essential oil industry and if in doubt, use Peppermint extract in this recipe.


Along with Marshmallow Mint Sauce, Peppermint Whipped Cream is one of the suggested toppings for the Chocolate Mousse recipe from the 1927 cookbook Electric Refrigerator Recipes and Menus. With only two ingredients, Peppermint Whipped Cream is tasty and easy to make and is a delightful topping for the frozen mousse.
Written by Alice Bradley of the Boston Cooking School, Electric Refrigerator Recipes and Menus was a helpful resource for housewives who welcomed a General Electric Monitor Top Refrigerator into their kitchen. The Monitor Top was the first household electric refrigerator that was affordable for the middle class and it was advertised as a healthier, time-saving and money-saving option over ice refrigerators.
Early in the days of household refrigeration, companies supplied cookbooks to help women figure out how to effectively use their new appliance. Electric Refrigerator Recipes and Menus; Recipes prepared especially for the General Electric Refrigerator is part owner’s manual, part propaganda and part cookbook. Most of the book’s recipes focus on how to use the chilling unit (we’d call this compartment the freezer today), with chapters on Methods of Freezing; Ice Blocks – Plain and Fancy; Fruit Cocktails and Frozen Salads; Ices, Sherberts and Frozen Fruits; and Mousses, Parfaits and Ice Cream.
Early Days of Electric Refrigeration
The story goes back to 1748, when William Cullen demonstrated at the University of Glasgow that rapid heating of a liquid to a gas can result in cooling. The potential for developing technology with real-world applications from this idea ended up sitting on ice (hardy har) for almost a century.
In 1802, American Thomas Moore received a patent for the “refrigerator”, which was close to what we’d call an ice box. It was an oval wooden chamber with a hinged lid surrounding a tin box, with ice blocks in the space between the wood & tin and wool & rabbit fur insulation on the outside. Moore used his refrigerator to transport butter and the same year, he made an appointment to show his invention to Thomas Jefferson, who later purchased a refrigerator from Moore. Below, you’ll see Moore’s original letter to Jefferson, where Thomas Jefferson drew a sketch of the refrigerator in the margins. The use of ice boxes for household food storage didn’t become widespread until technological innovations in the ice harvesting industry happened in the 1820s and 1830s.
In 1835, a patent for “Apparatus and means for producing ice, and in cooling fluids” was granted to Jacob Perkins. It was the first functional vapour-compression refrigeration system, but it wasn’t a commercial success. Perkins built upon the designs of Oliver Evans, who was the first to conceive of the idea and propose a design for vapour-compression refrigeration in 1805, but never constructed a working example. From here, refrigeration gradually became perfected through inventors improving upon the patents of their predecessors and refrigeration transformed the commercial world in the last half of the nineteenth-century. Head over to my Rhubarb and Banana Fool recipe post to find out the part that refrigeration played in bringing bananas to the tables of the world.

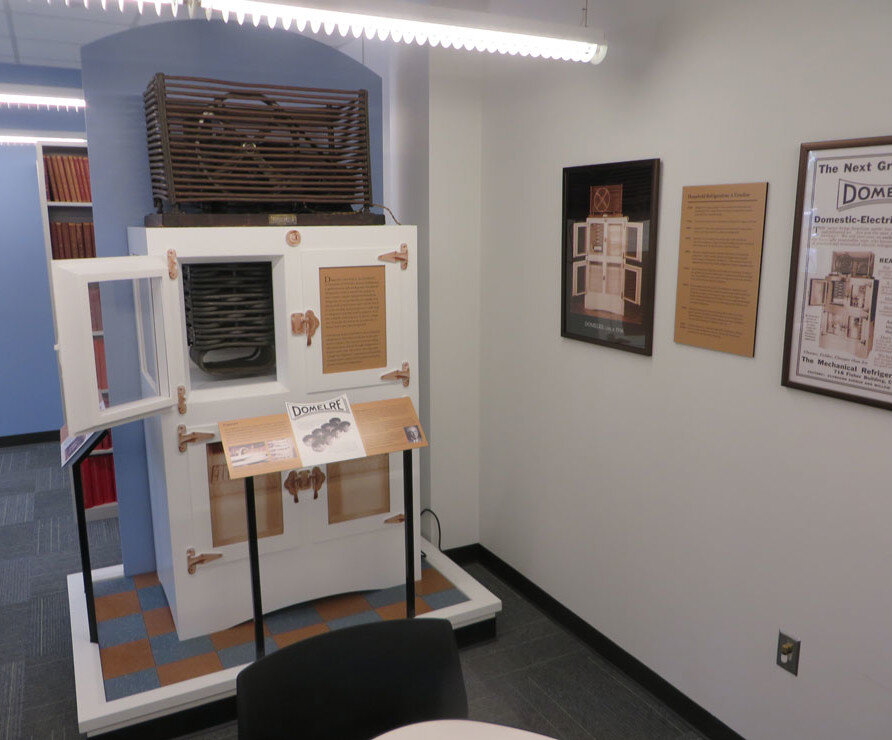

Letter from Thomas Moore to Thomas Jefferson, with Jefferson’s sketch of the refrigerator in the margins, courtesy of the Library of Congress; potentially the only surviving DOMELRE refrigerator on display at the American Society of Heating, Refrigerating and Air-Conditioning Engineers; DOMLERE ice cube tray
Bringing Electric Refrigerators Home
The first refrigerator designed for household use was invented by Fred W. Wolf Jr. in 1913. The DOMELRE (DOMestic ELectric REfrigerator) didn’t feature a cabinet, but was a cooling unit that could convert the ice box you already own into a refrigerator. Besides bringing refrigeration into household kitchens, another innovation of the DOMELRE was that it was the first to include an ice cube tray. It wasn’t affordable for most people, since purchasing a DOMELRE was about $900, which was the average annual income at the time. In 1916, Wolf sold his rights to Packard Motor Car Company, which created refrigerators under the name of ISKO, which was purchased by Frigidaire in 1922.
Other early domestic refrigerators would include a cabinet made of wood similar to an ice box and the compressors were mainly driven by belt motors, some of which needed to be installed in the basement under the refrigerator. They were often loud and financially unattainable for most families. Purchasing a refrigerator could cost up to twice as much as buying a car.

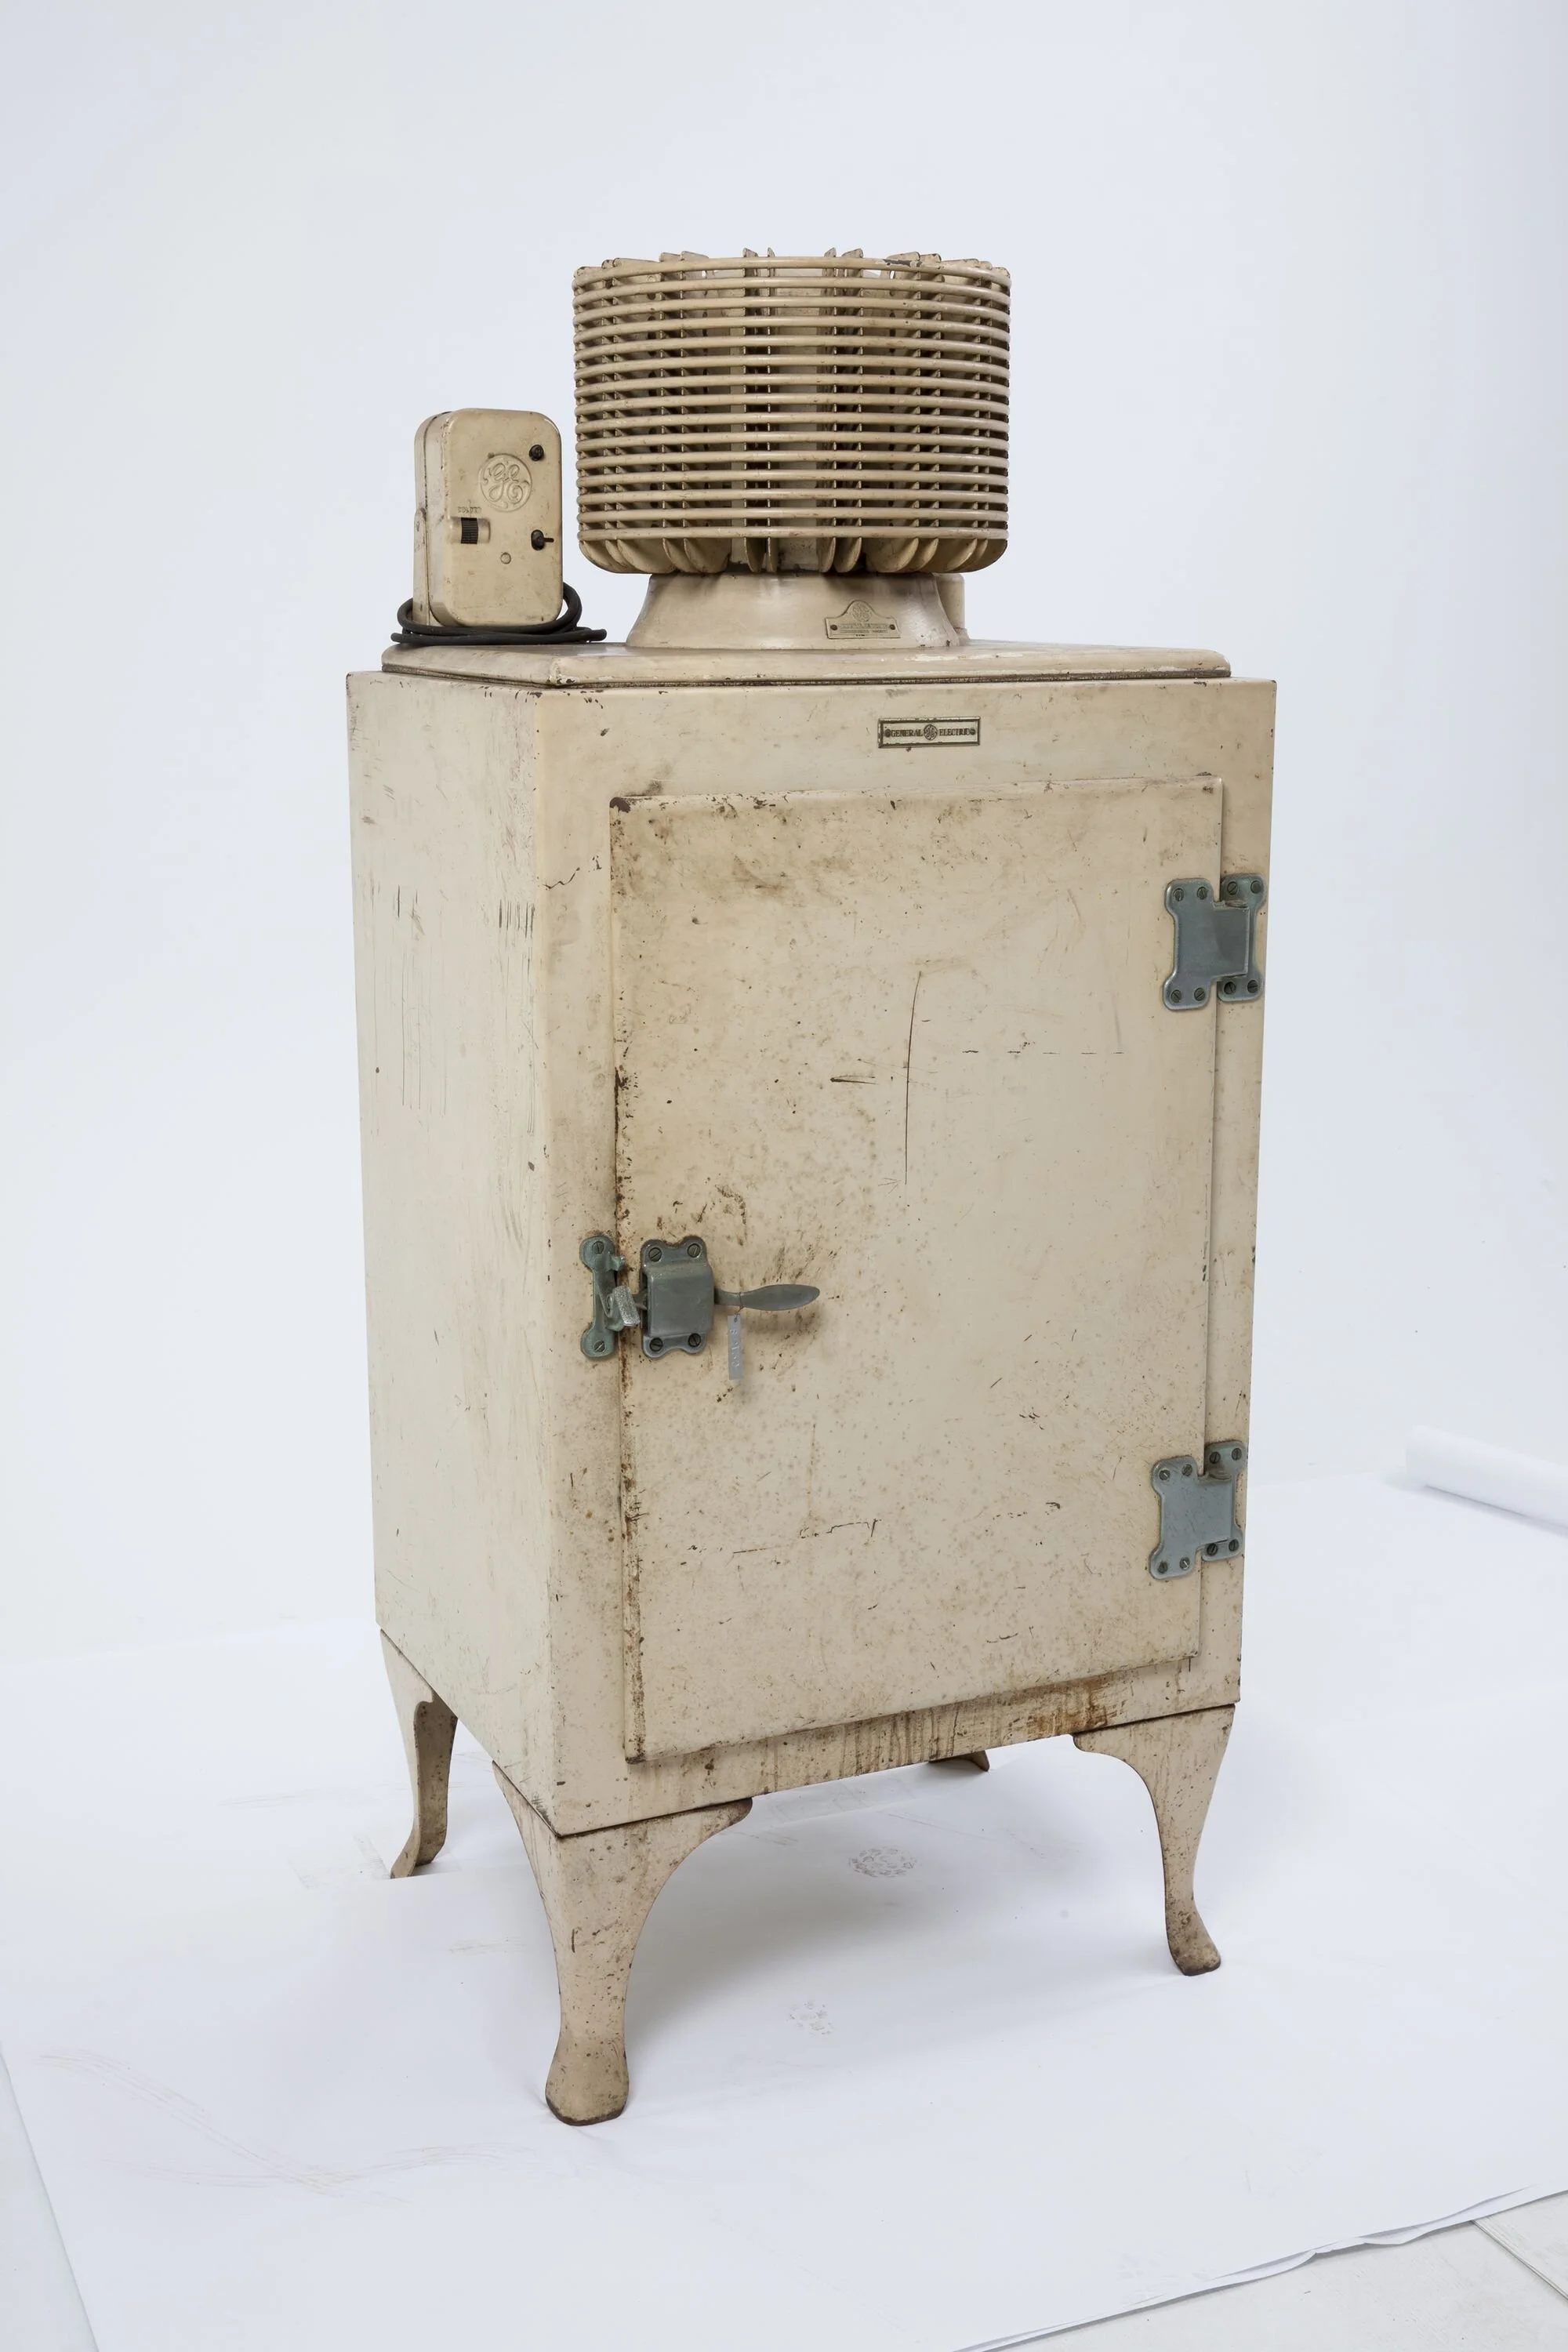

Photograph of a Monitor Top Refrigerator from the collection at the Museum of Applied Arts & Sciences; advertisements courtesy of random people selling things on the internet
Enter the Monitor Top
Starting in 1927, General Electric unveiled the Monitor Top Refrigerator onto the domestic market, building upon technology from the GE 1910 refrigerator called the Dumbbell, which was mainly used by the dairy industry. The Monitor Top was constructed of stainless steel and featured a hermetically sealed cylindrical condenser on its top next to a temperature control. What really set the Monitor Top apart was the price. It hit the market with a price tag of $525, but was available after a few years for the ballpark of $200 to $225, with the option of an installment payment plan. When General Electric stopped making the Monitor Top in 1936, a family could purchase a Monitor Top Refrigerator for as little as $77.50.
This refrigerator got its name from the compressor’s distinct shape and it was named after a ship that had a similarly shaped gun turret. The USS Monitor was an ironclad battleship during the American Civil War that was built in 1861 and sank in 1862 during a storm. Have a look at these images to compare the refrigerator and its namesake ship.
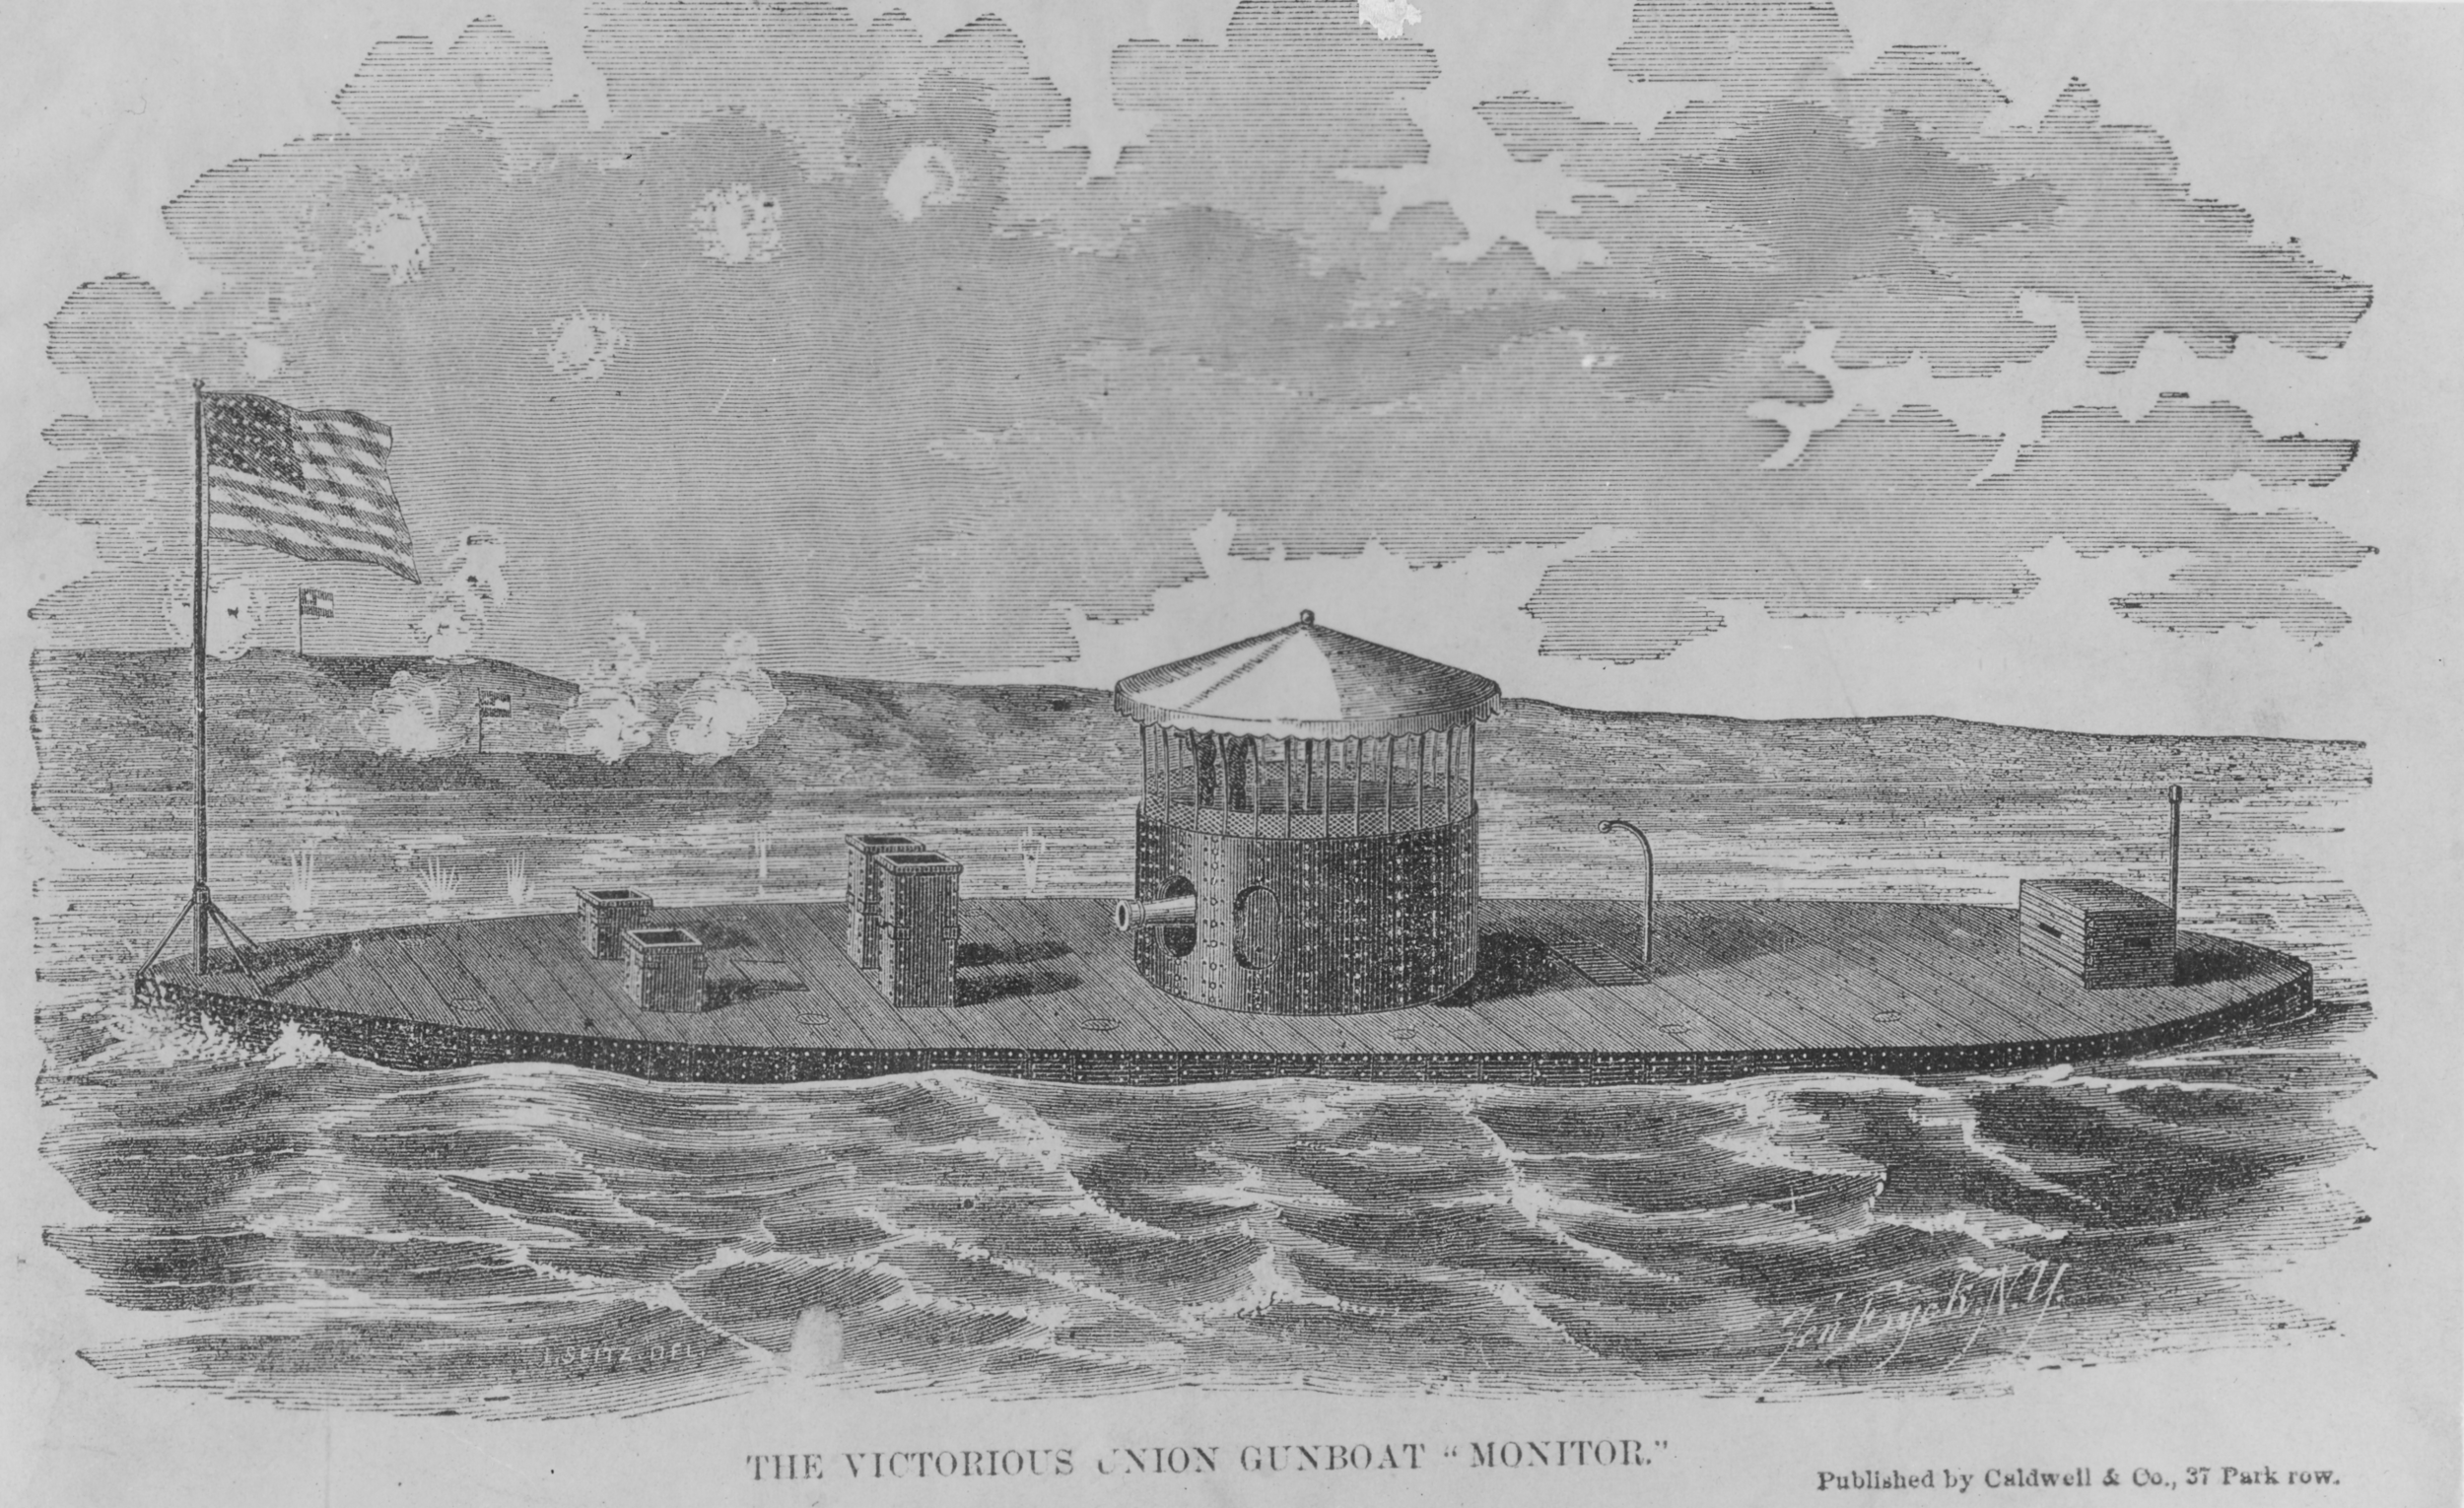


The Victorious Union Gunboat “Monitor” (Naval History and Heritage Command); Monitor Top Refrigerator Advertisement; USS Monitor crew cooking on deck, July 9, 1862, by James F. Gibson (USS Monitor Center)
In Electric Refrigerator Recipes and Menus, Alice Bradley promotes the General Electric Monitor Top Refrigerator as essential to the family’s health, efficiency, frugality and even happiness: “The owning of such a refrigerator is a form of health and happiness insurance which every homemaker in American should have the privilege of enjoying.”
The Monitor Top was entirely made of stainless steel, so it was easy to keep clean on top of reducing instances of food poisoning. Fear of bacteria and a mother’s desire to keep her children healthy were definitely exploited to sell the Monitor Top Refrigerator. One advertisement states: “It’s always summer-time in your kitchen. And the dangers of food contamination are always present.”
Time was saved by eliminating the need for organizing ice deliveries, replenishing the ice and emptying the drip pan in ice boxes. “In using an ice-cooled chest very careful daily watch must be kept of the chest and all contents. This worry disappears with the General Electric Refrigerator.” Time was also purported to be saved because perishable food needed to be purchased less frequently and money was saved over time because “not only fresh food supplies but left-overs are kept from spoiling.”
It was also noted that a Monitor Top Refrigerator didn’t require frequent oiling or maintenance and didn’t create radio interference. “Since it is kept cold electrically, it need not be near an outside door, nor placed for the convenience of the ice man. All that is necessary is a convenience outlet into which its long cord can be plugged. The most convenient place in the pantry or kitchen is the place for the General Electric Refrigerator.”
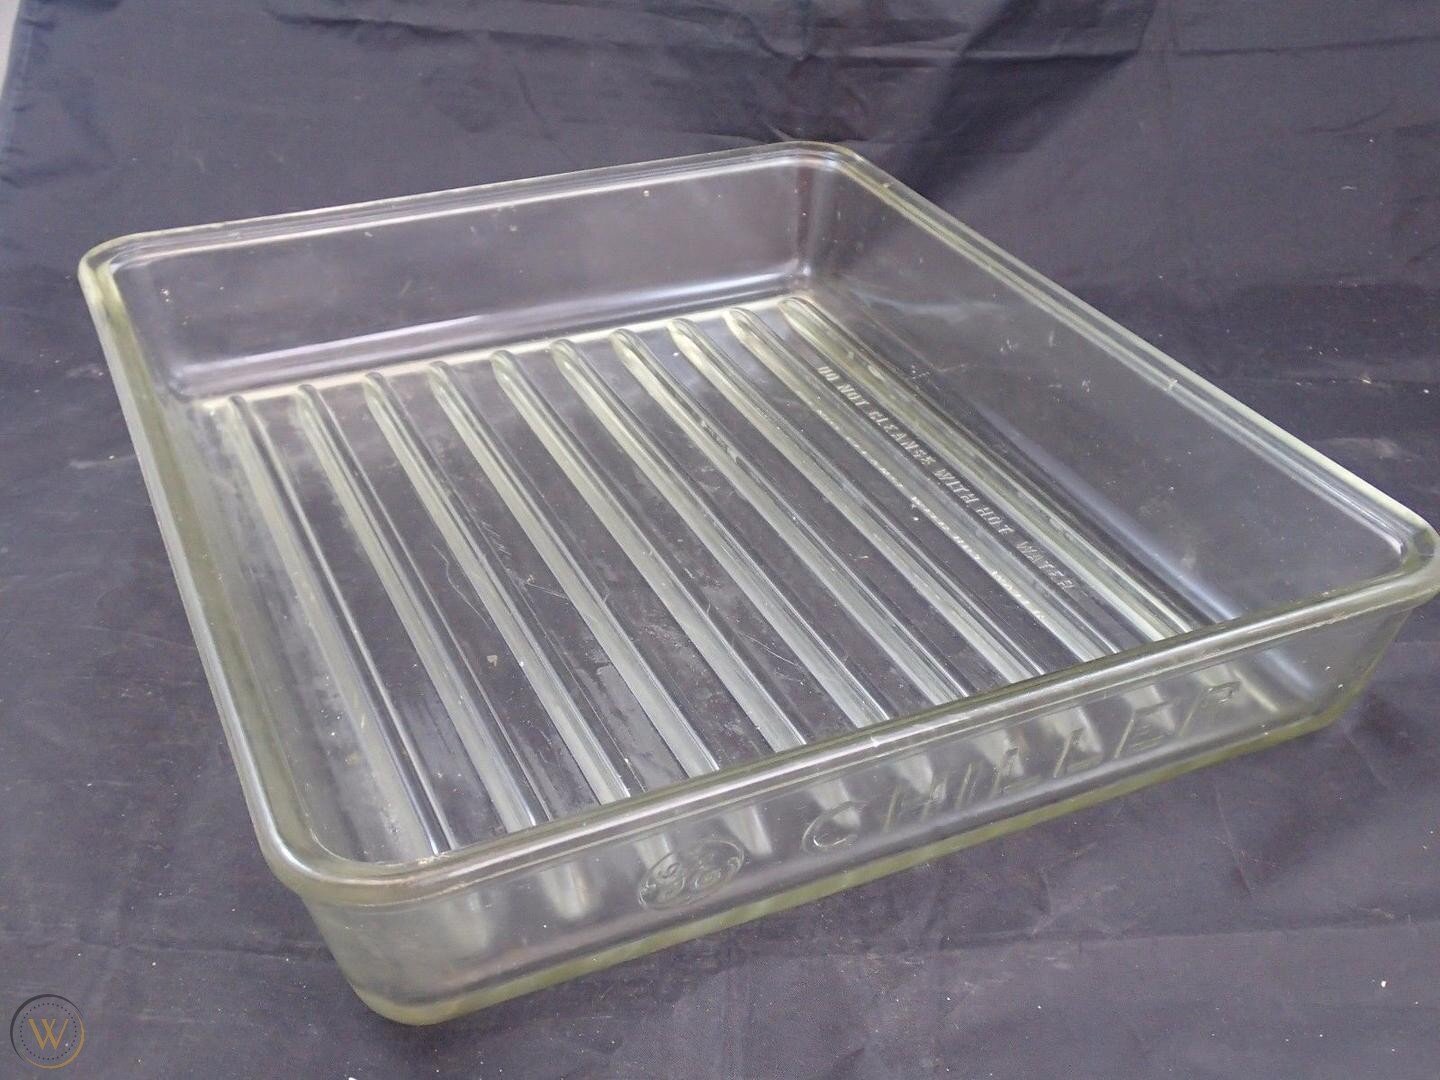
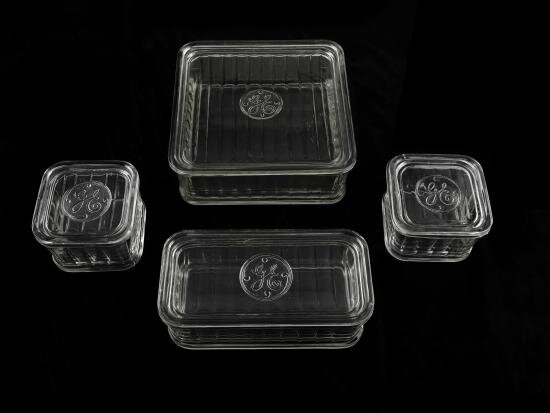
Illustration from Electric Refrigerator Recipes and Menus showing refrigerator dishes, refrigerator pans and chiller tray; Chiller Tray; GE Covered Refrigerator Dishes courtesy of the collection at the National Museum of American History
The Monitor Top was also accompanied by accessories. Skip over to Chocolate Mousse to find out all about the Refrigerator Pans that were used when freezing recipes or ice. Each refrigerator would also come with a Chiller Tray (which has ‘CHILLER’ written on the side) that would slide underneath the chilling unit or freezer. The Chiller Tray would catch drips, but since that location under the chilling unit was the coldest area of the refrigerator, it was the perfect spot to stash ice cubes or other perishables that needed to be the coldest.
As well, a variety of Refrigerator Dishes with the General Electric logo on the lid were available. These dishes were safe to put in the oven as well as the fridge and were likely the precursor to kitchen dishes made later on by brands like Pyrex and Fire King.

Read Electric Refrigerator Recipes and Menus online:

Chocolate Mousse
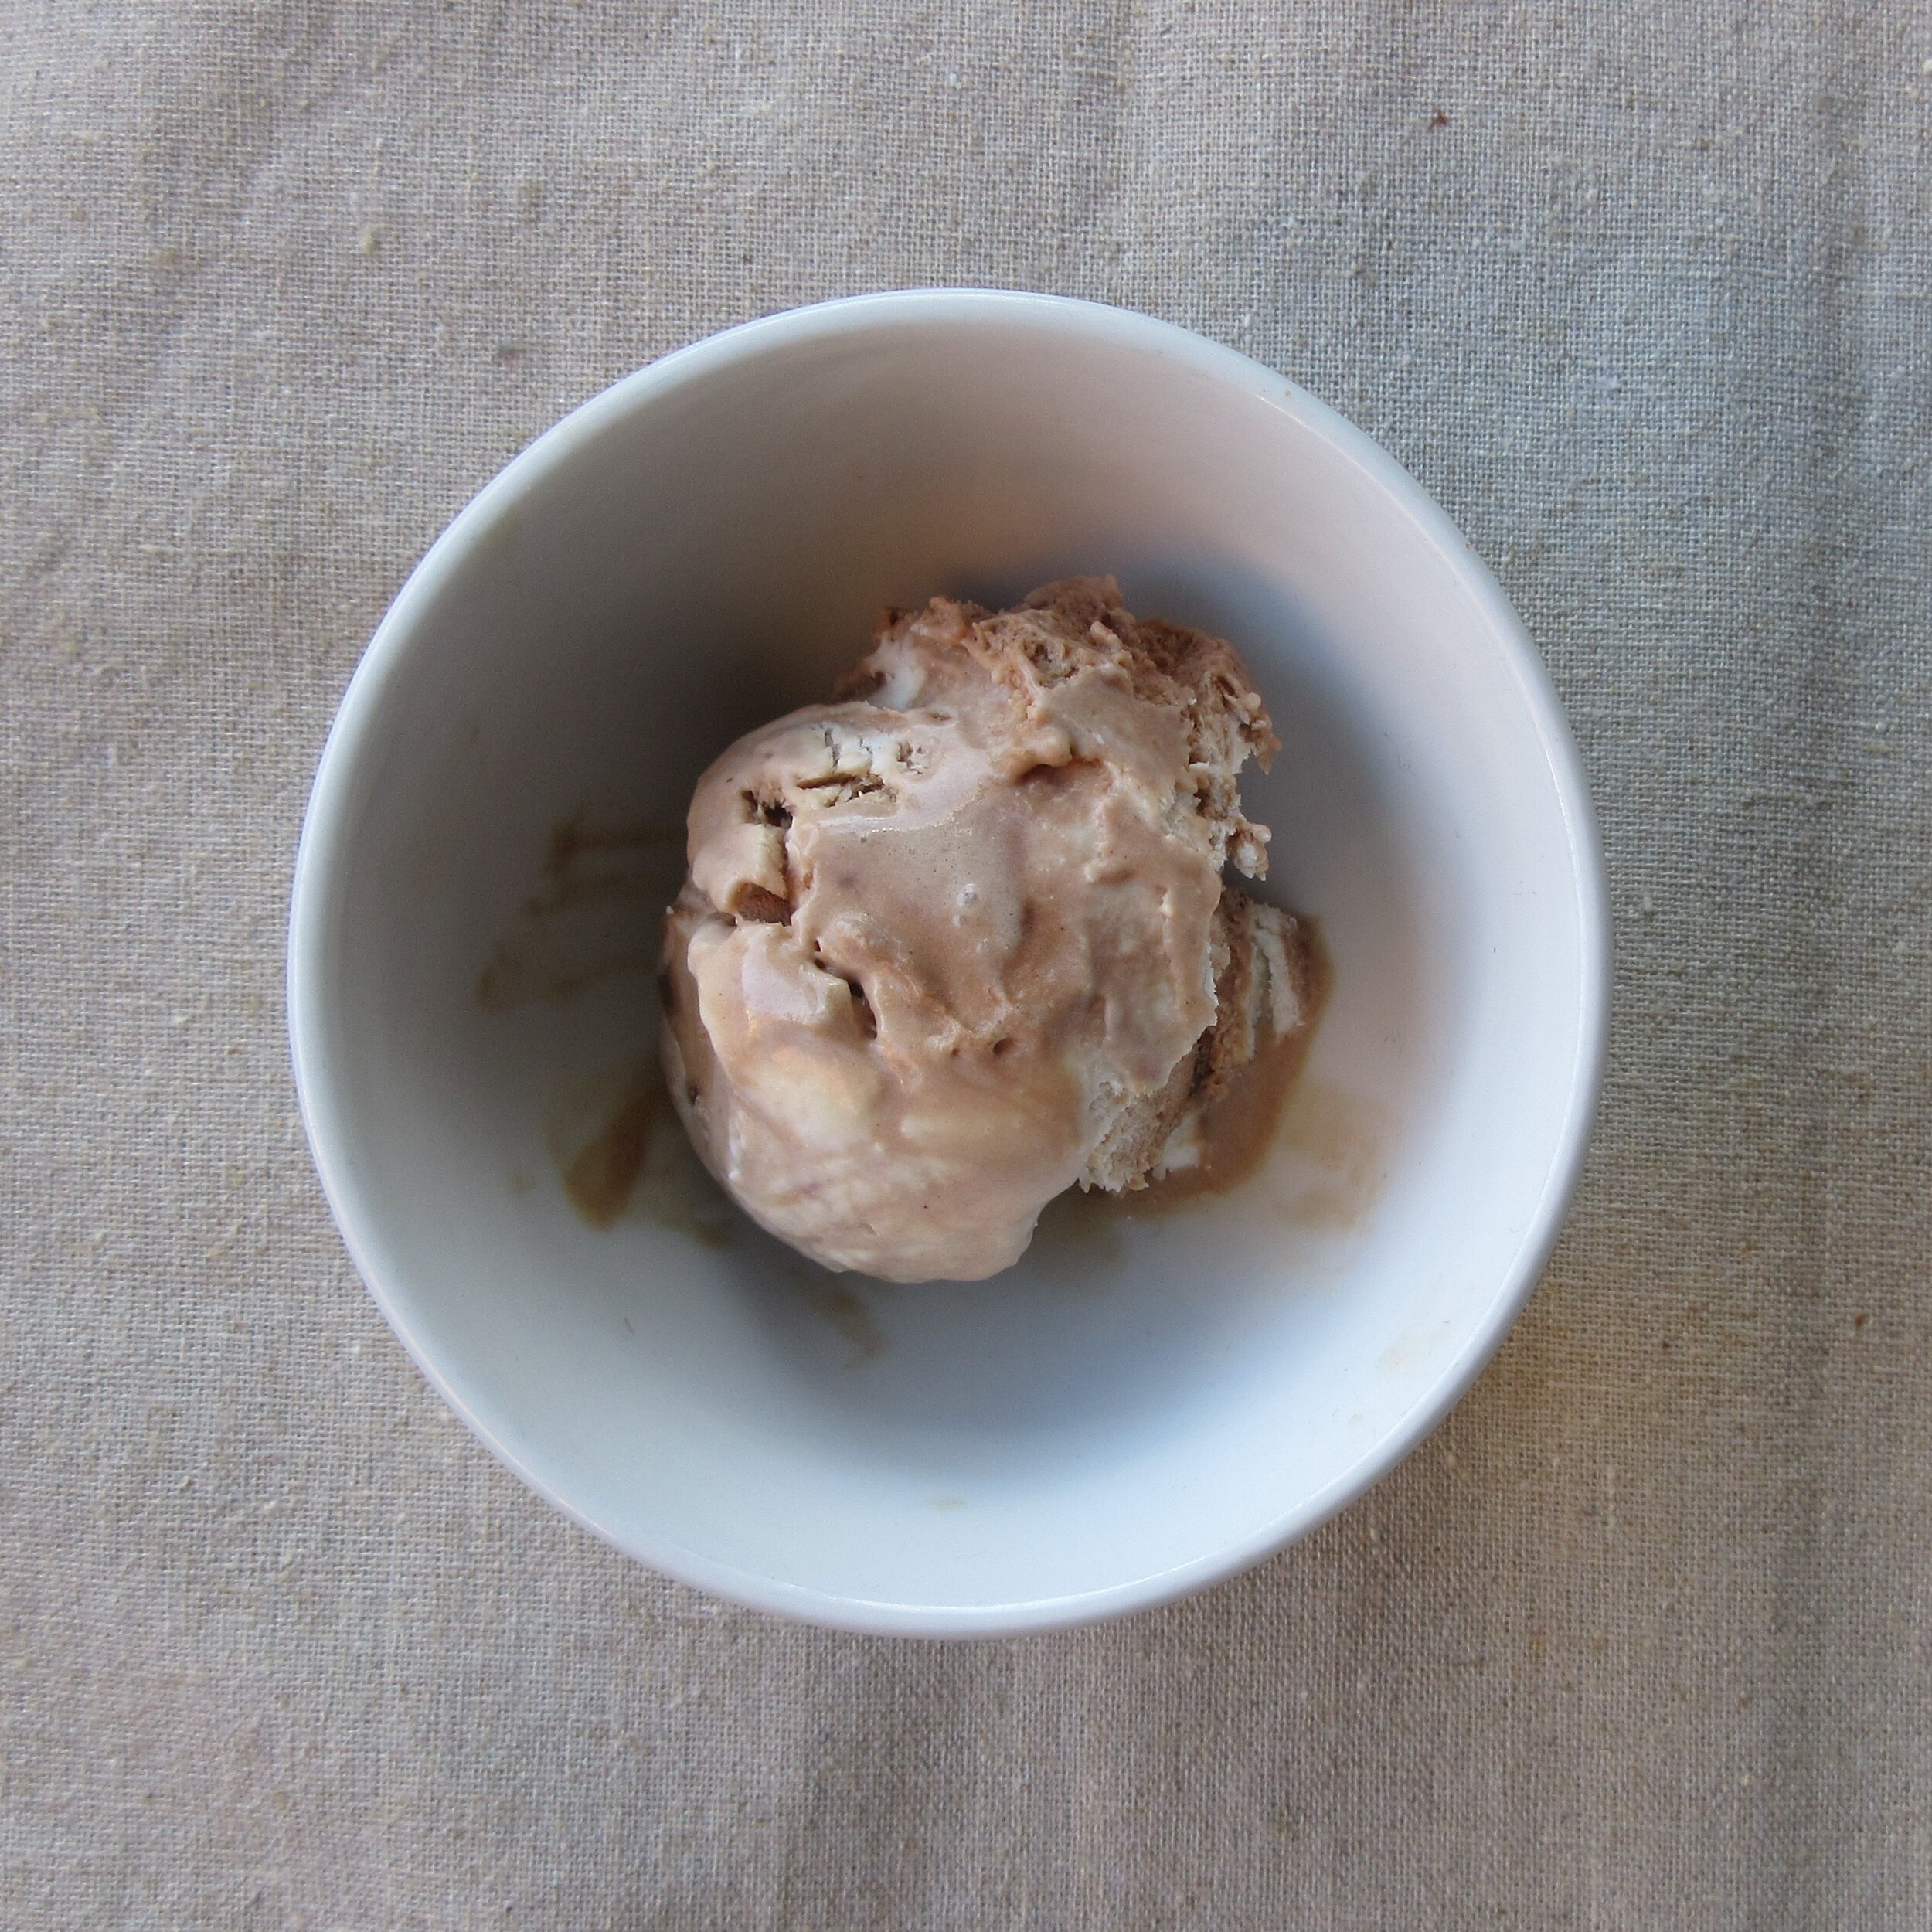
This Chocolate Mousse recipe comes from Electric Refrigerator Recipes and Menus, a 1927 cookbook written by Miss Alice Bradley that was put out by General Electric to help housewives learn how to use their newfangled kitchen appliance. It is mild and refreshing, but my batch ended up being more similar to an ice cream than a mousse (probably because my freezer is much more efficient than a 1927 “chilling unit”). Still delicious, anyhow. Top with Marshmallow Mint Sauce or Peppermint Whipped Cream from the same cookbook. Chocolate Mousse is frozen in a “refrigerator pan”, so you’ll find out what that is and I’ve also written a rant about the appalling baker’s chocolate square fiasco of 2013.
You’ll find this recipe in:
Electric Refrigerator Recipes and Menus:
Recipes prepared especially for the General Electric Refrigerator
By: Miss Alice Bradley
Cleveland, 1927
Historic Recipe:
Chocolate Mousse – No. 40
Put in top of double boiler
¼ cup milk and
1 teaspoon gelatine. When milk is hot and gelatine is dissolved, add
½ cup cold milk, strain into refrigerator pan and put in freezing chamber of refrigerator. When cool beat until light. Meanwhile, melt over hot water
1 square chocolate, add
½ cup sugar
Few grains salt and
1 teaspoon vanilla and very slowly add
¼ cup milk. Stir until mixture boils. Strain and cool. Beat
½ pint cream until thick. Add beaten milk slowly and fold into chocolate mixture. Pour into refrigerator pan and freeze like Desserts and Salads That Need No Stirring, page 45. Serve if desired with
Whipped cream beaten stiff and flavored with vanilla or with oil of peppermint, or serve with Chocolate Sauce – No. 60.
I’ve put “To Freeze Desserts and Salads That Need No Stirring” and some other helpful hints from this cookbook about removing & serving the mousse at the bottom of this post.
My Chocolate Mousse recipe:
1 cup milk – 237 mL
1 tsp unflavoured gelatin
1 ounce baker’s chocolate – 28 g
½ cup white sugar – 100 g
1 tsp vanilla
dash of salt
1 cup 35% whipping cream – 237 mL
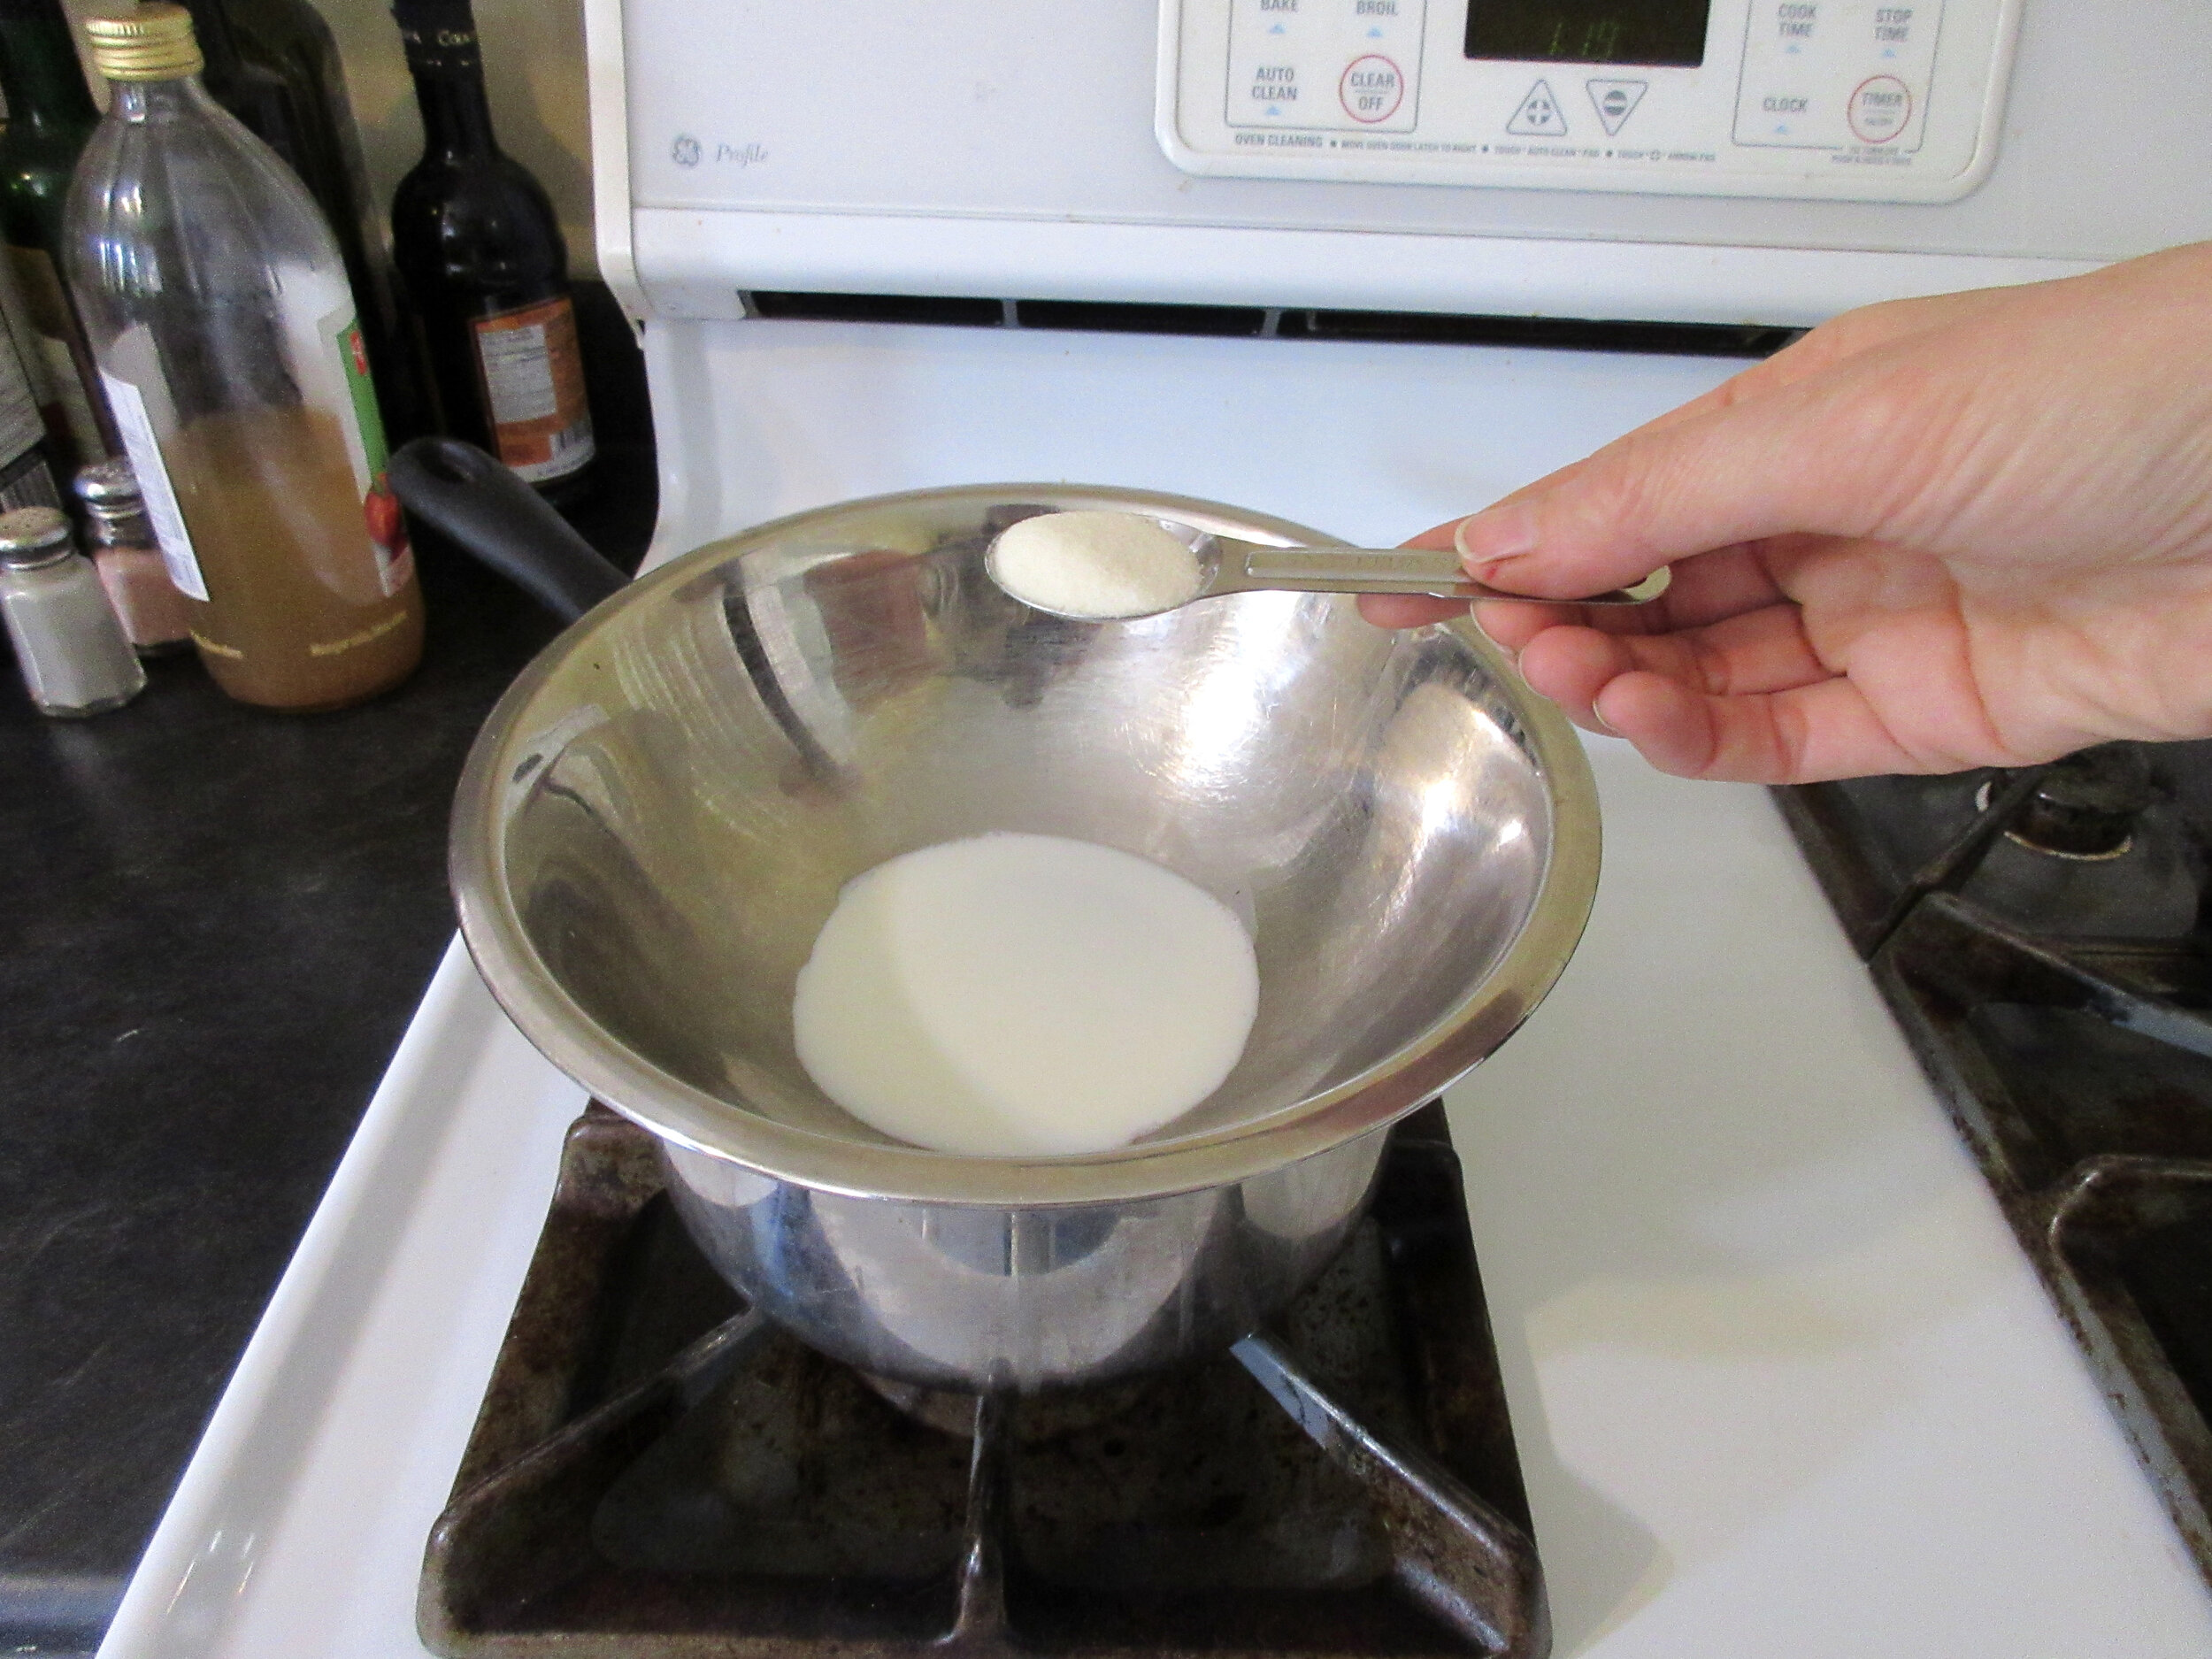
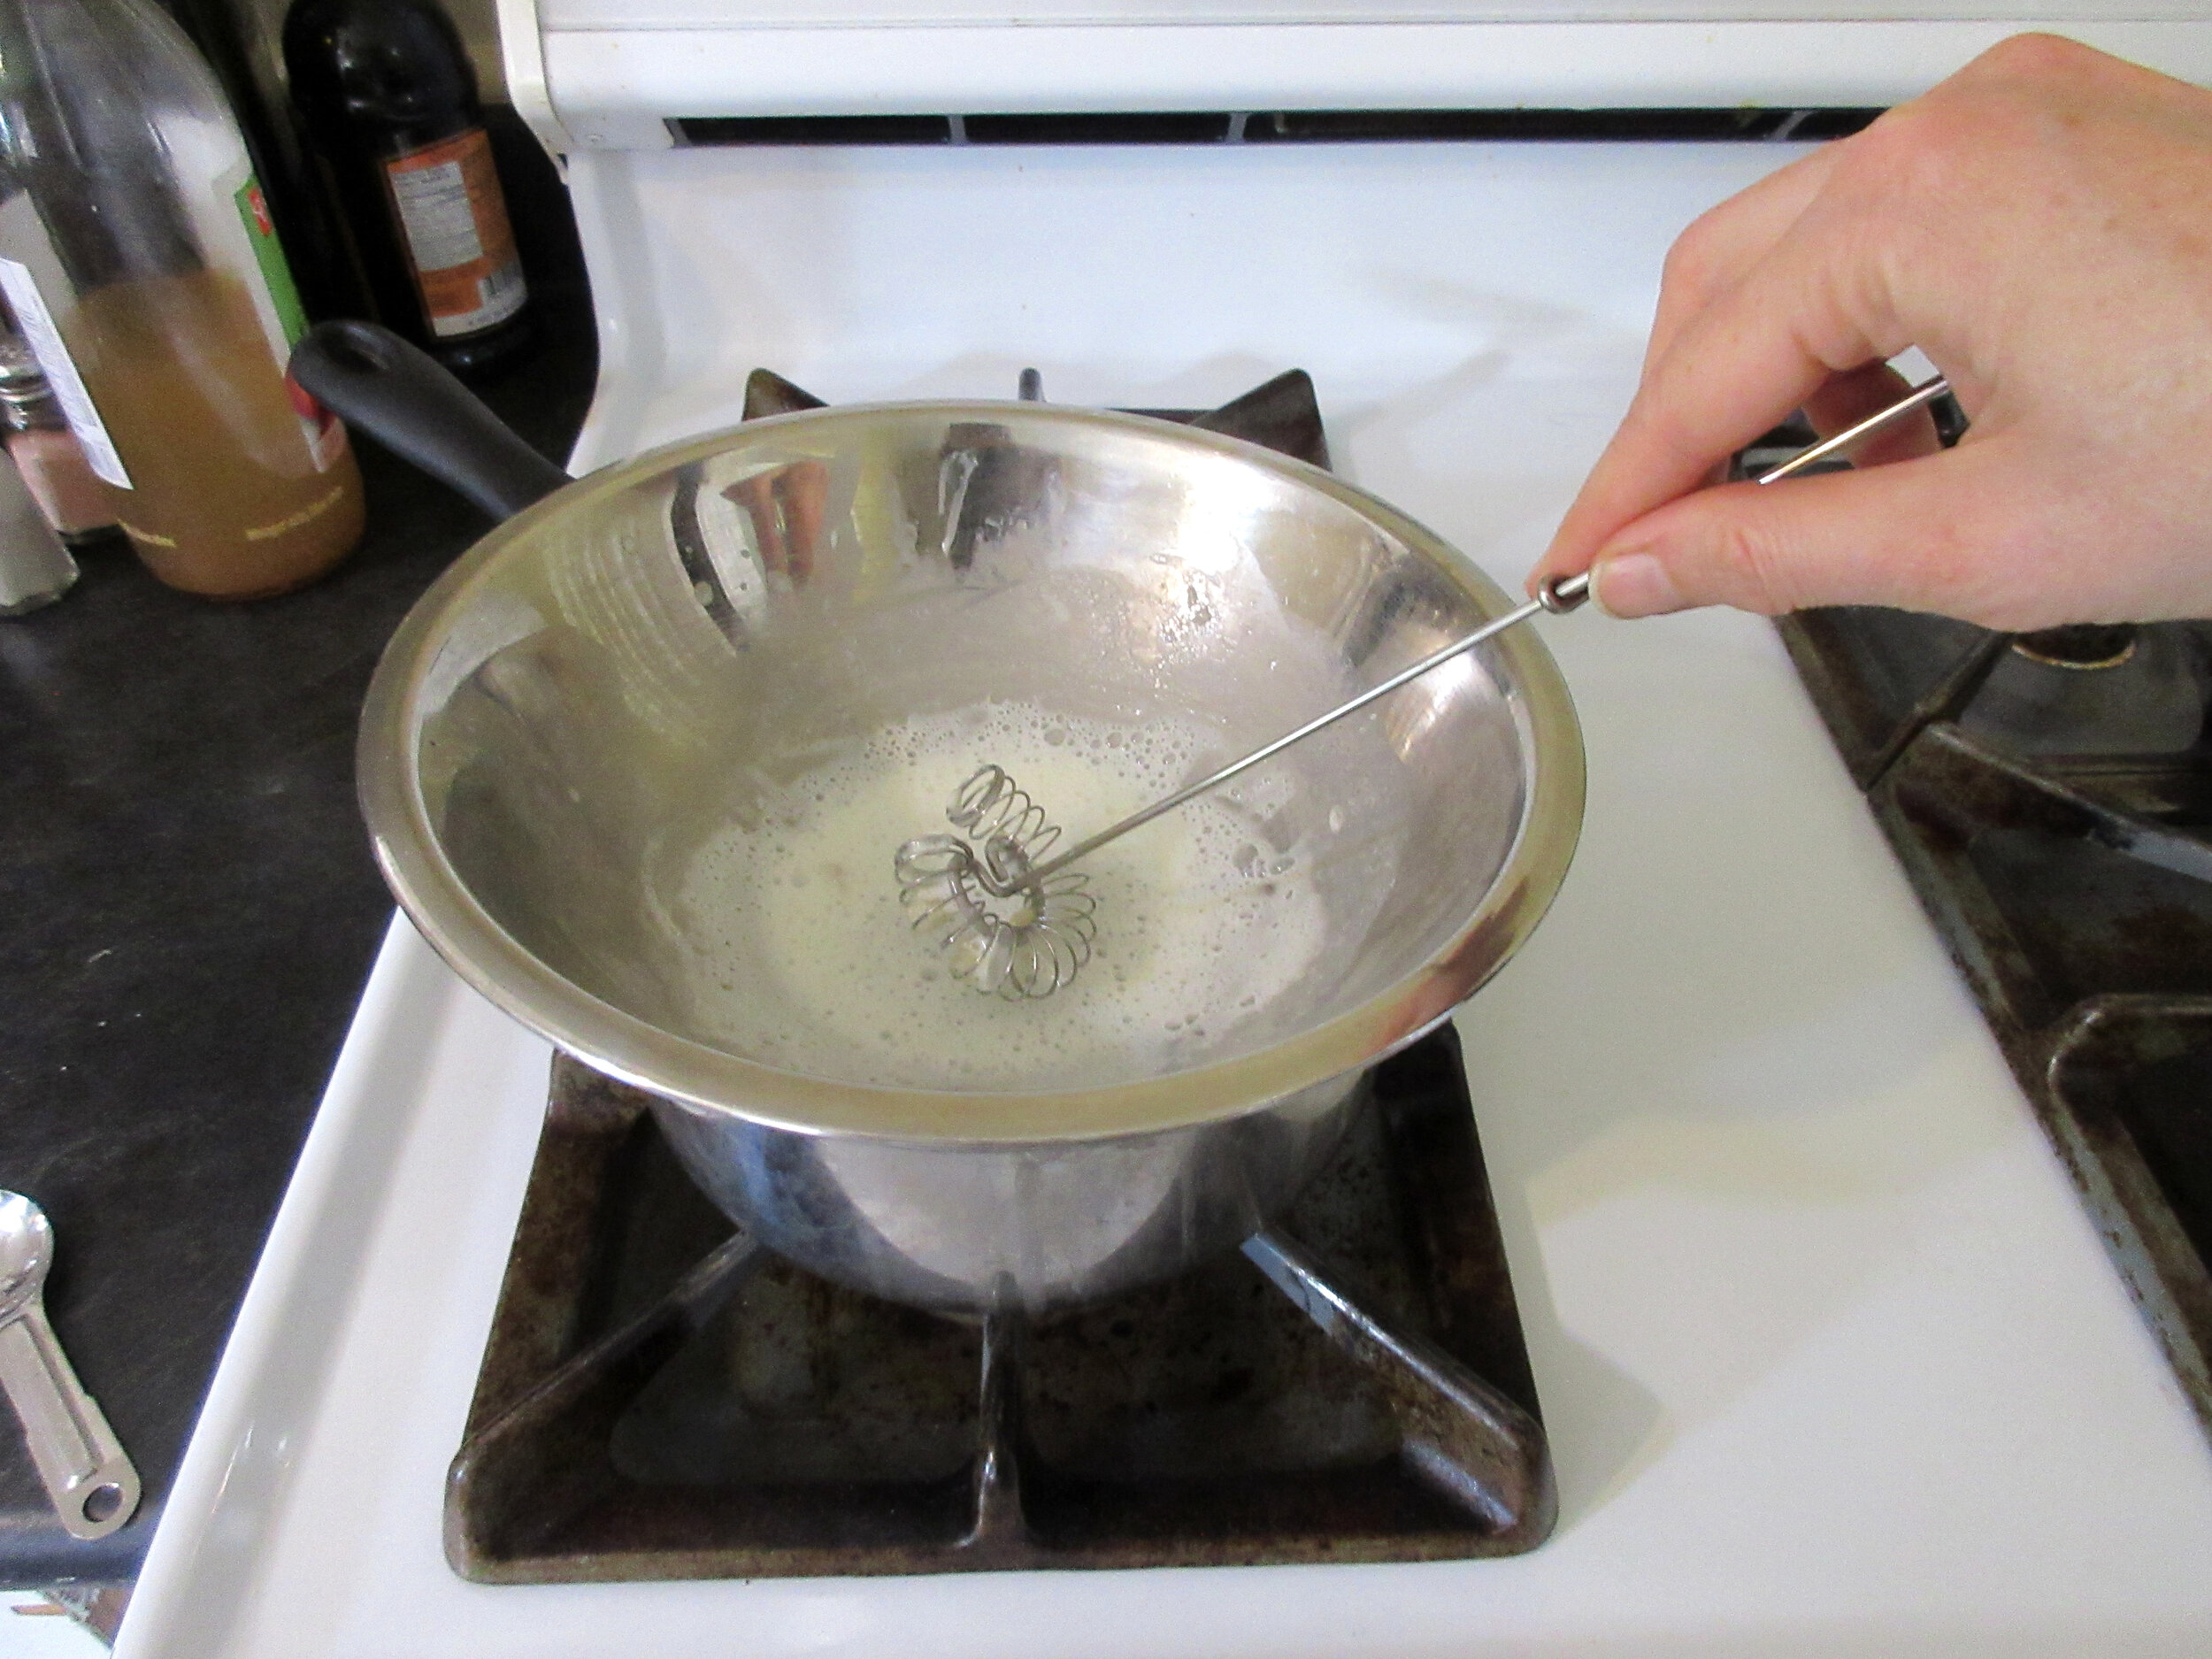
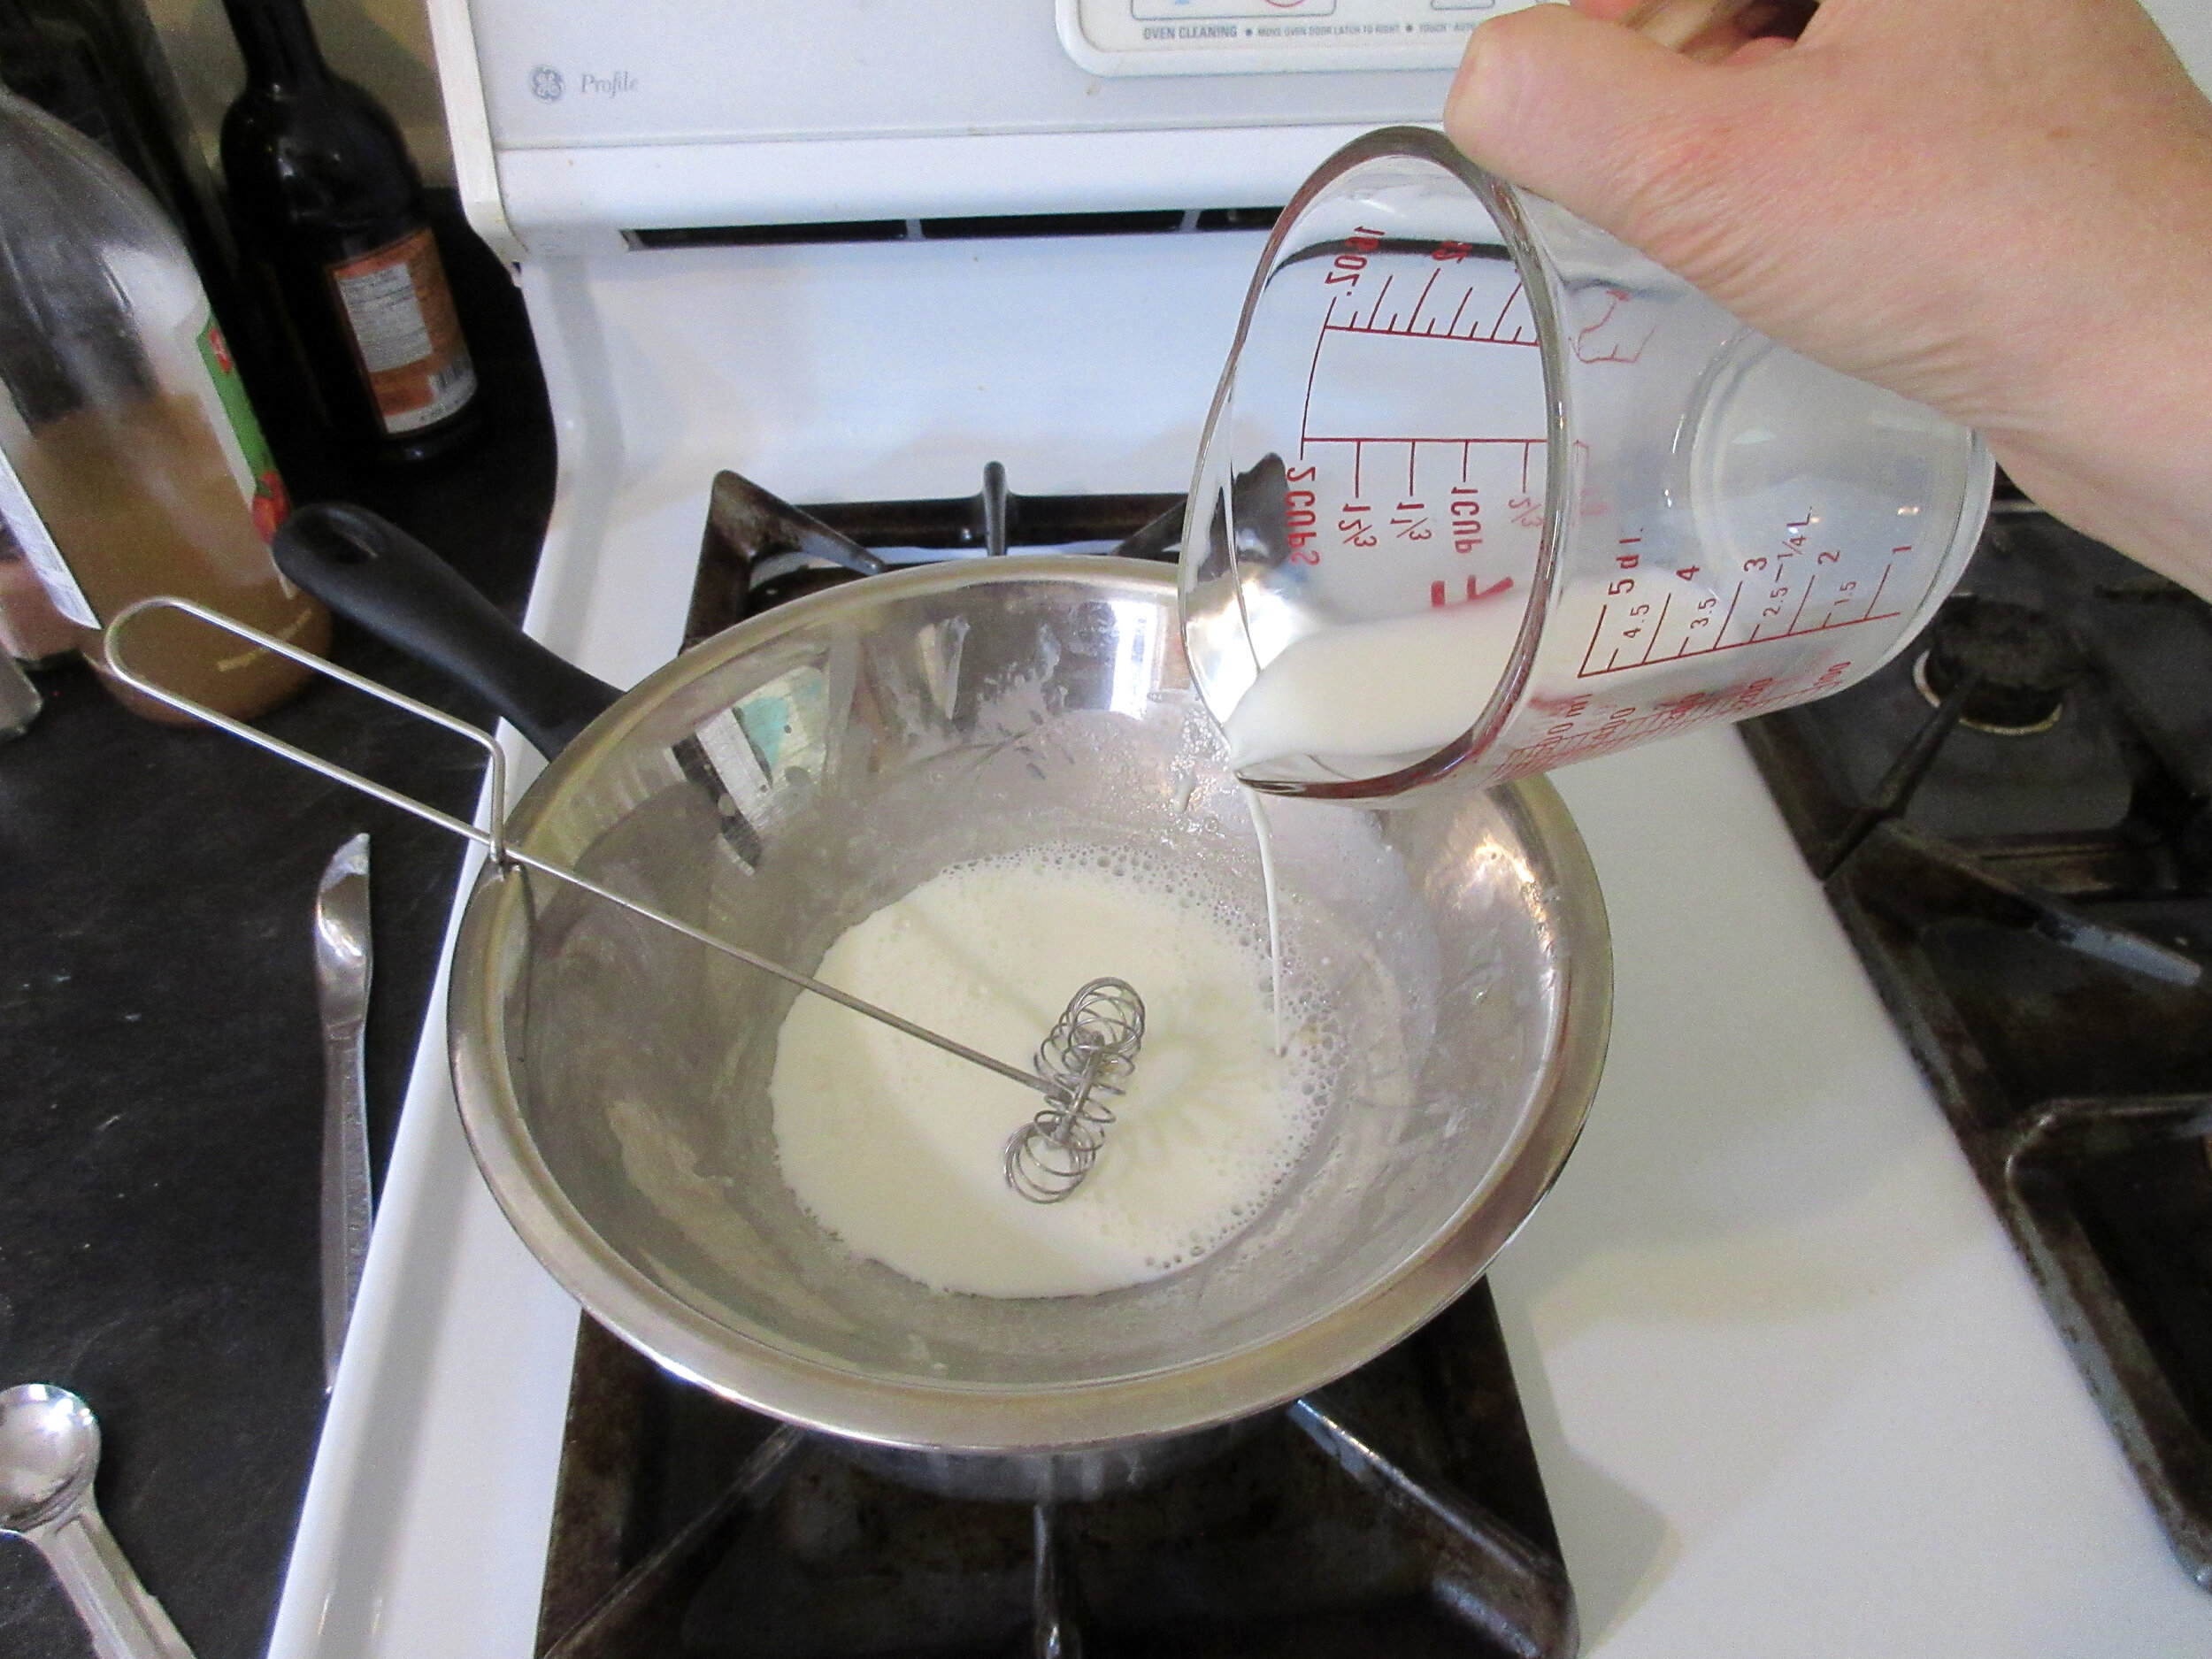
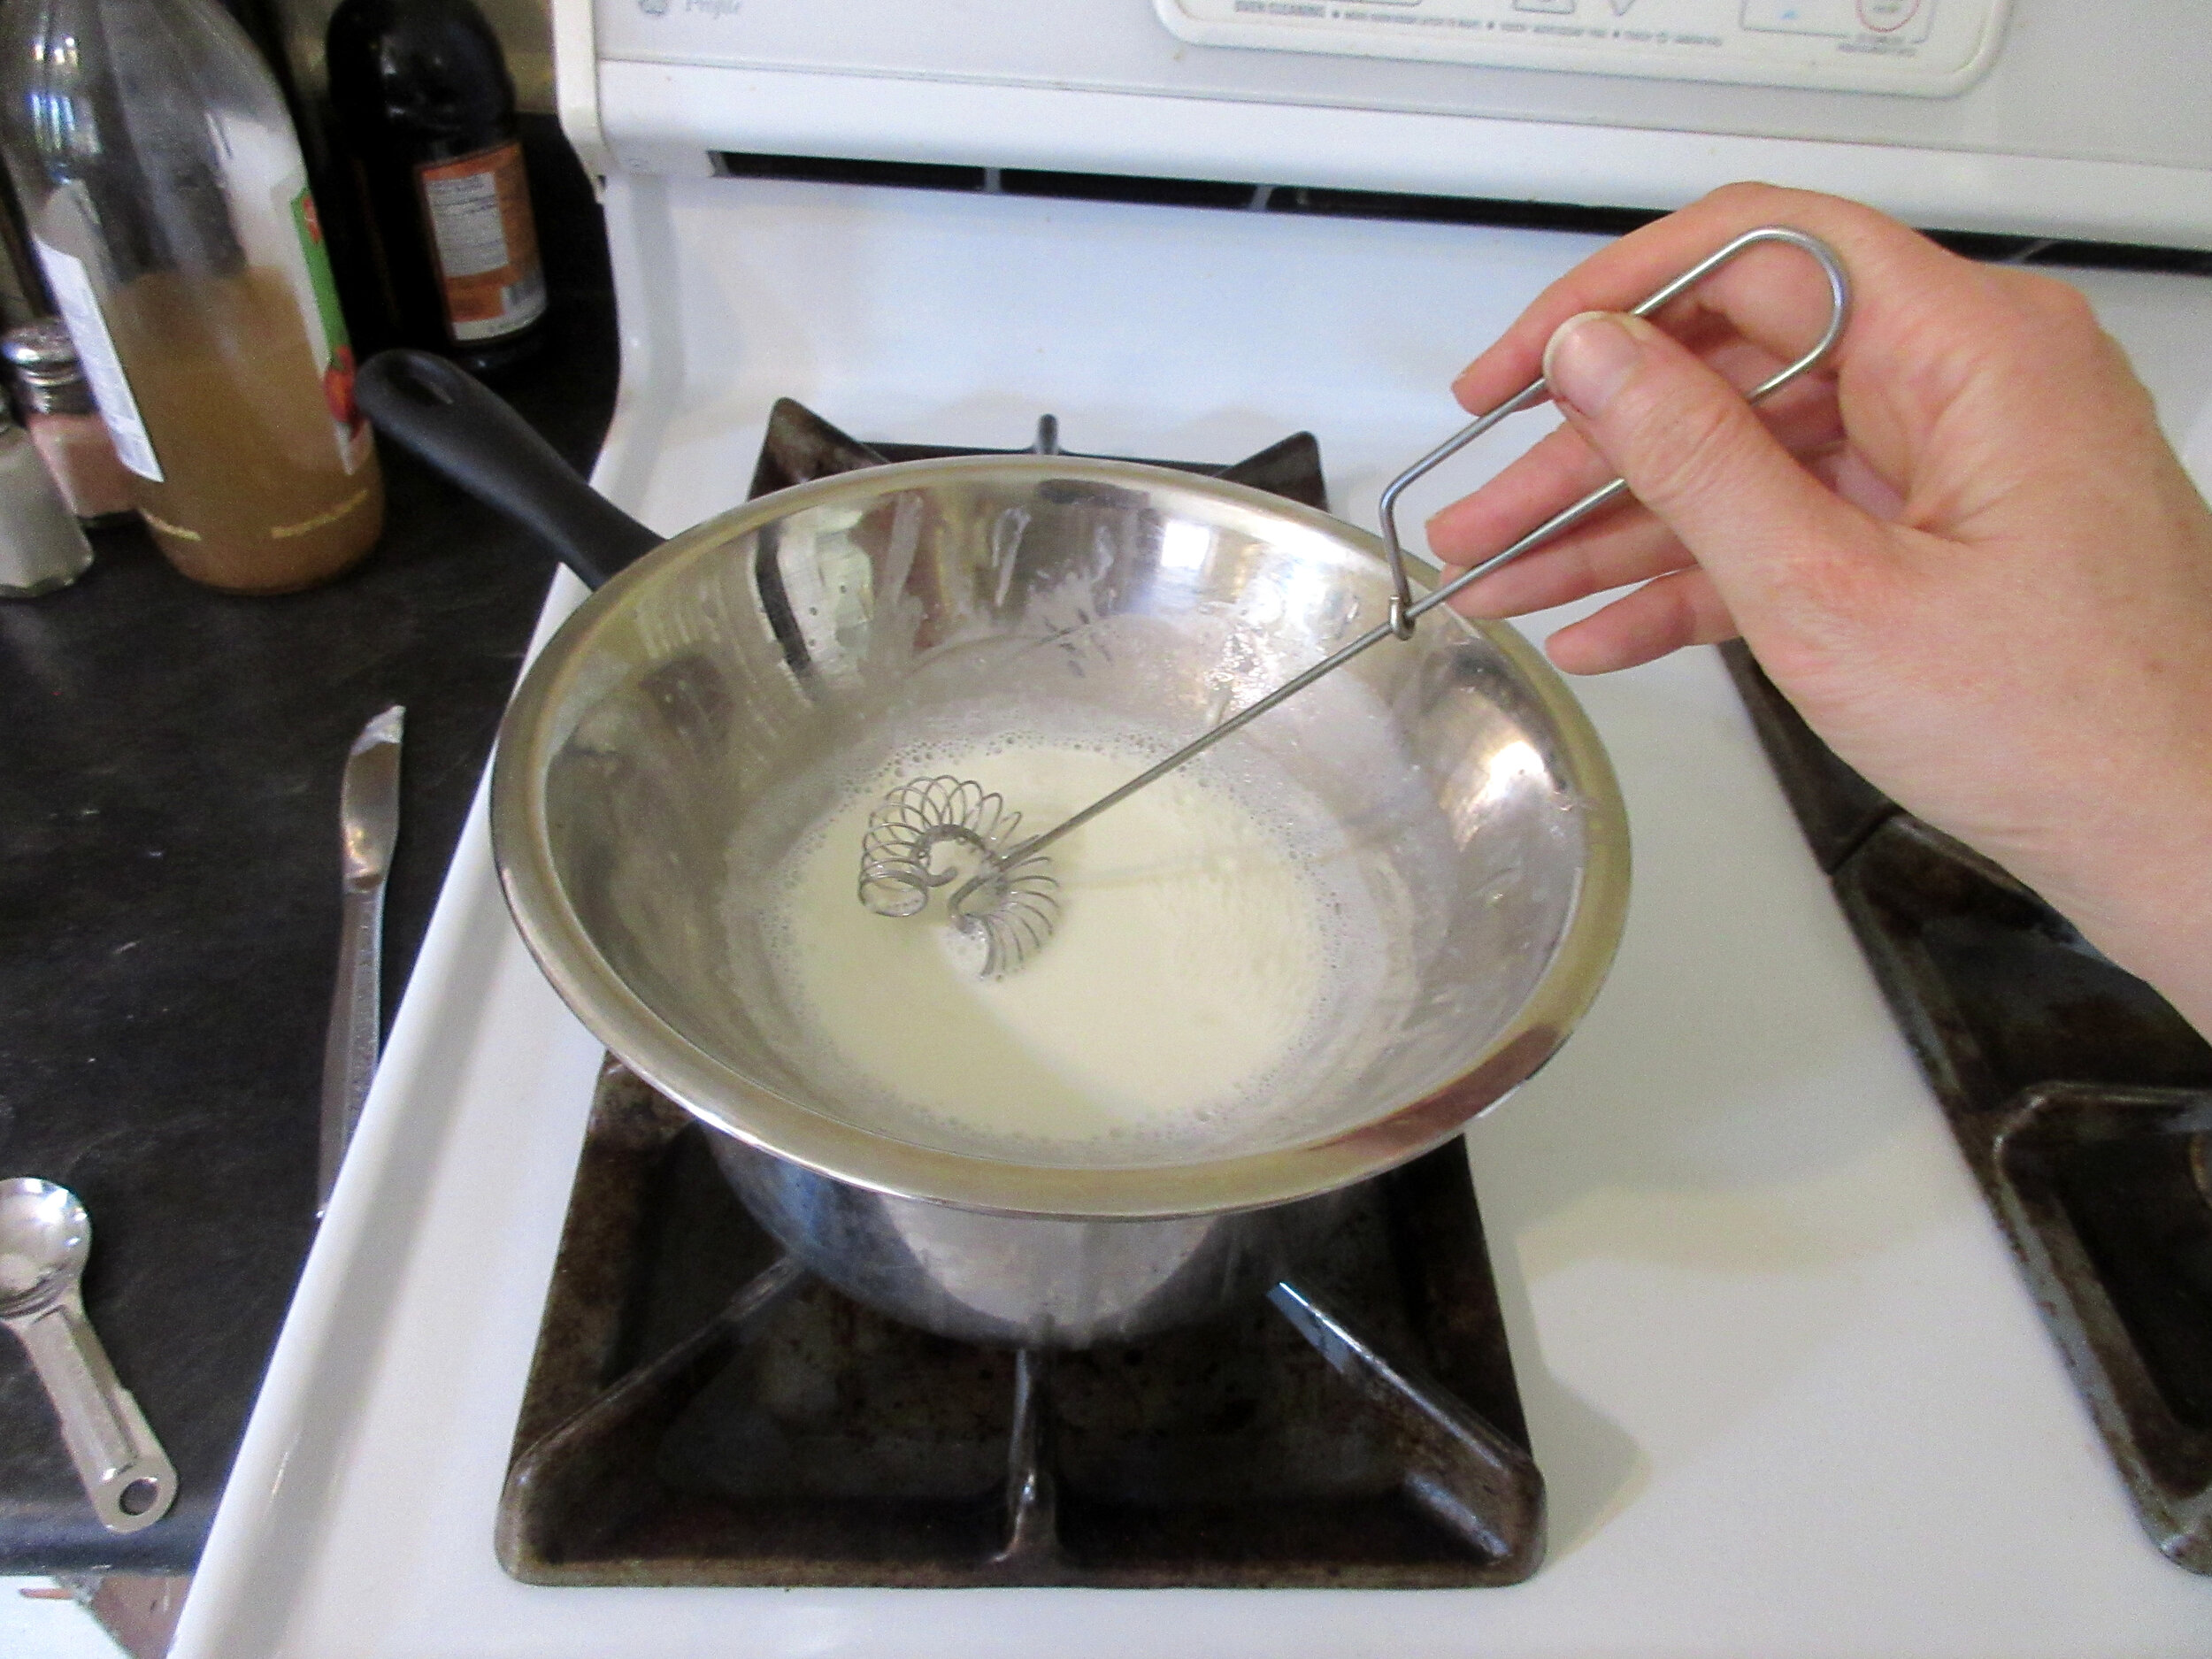
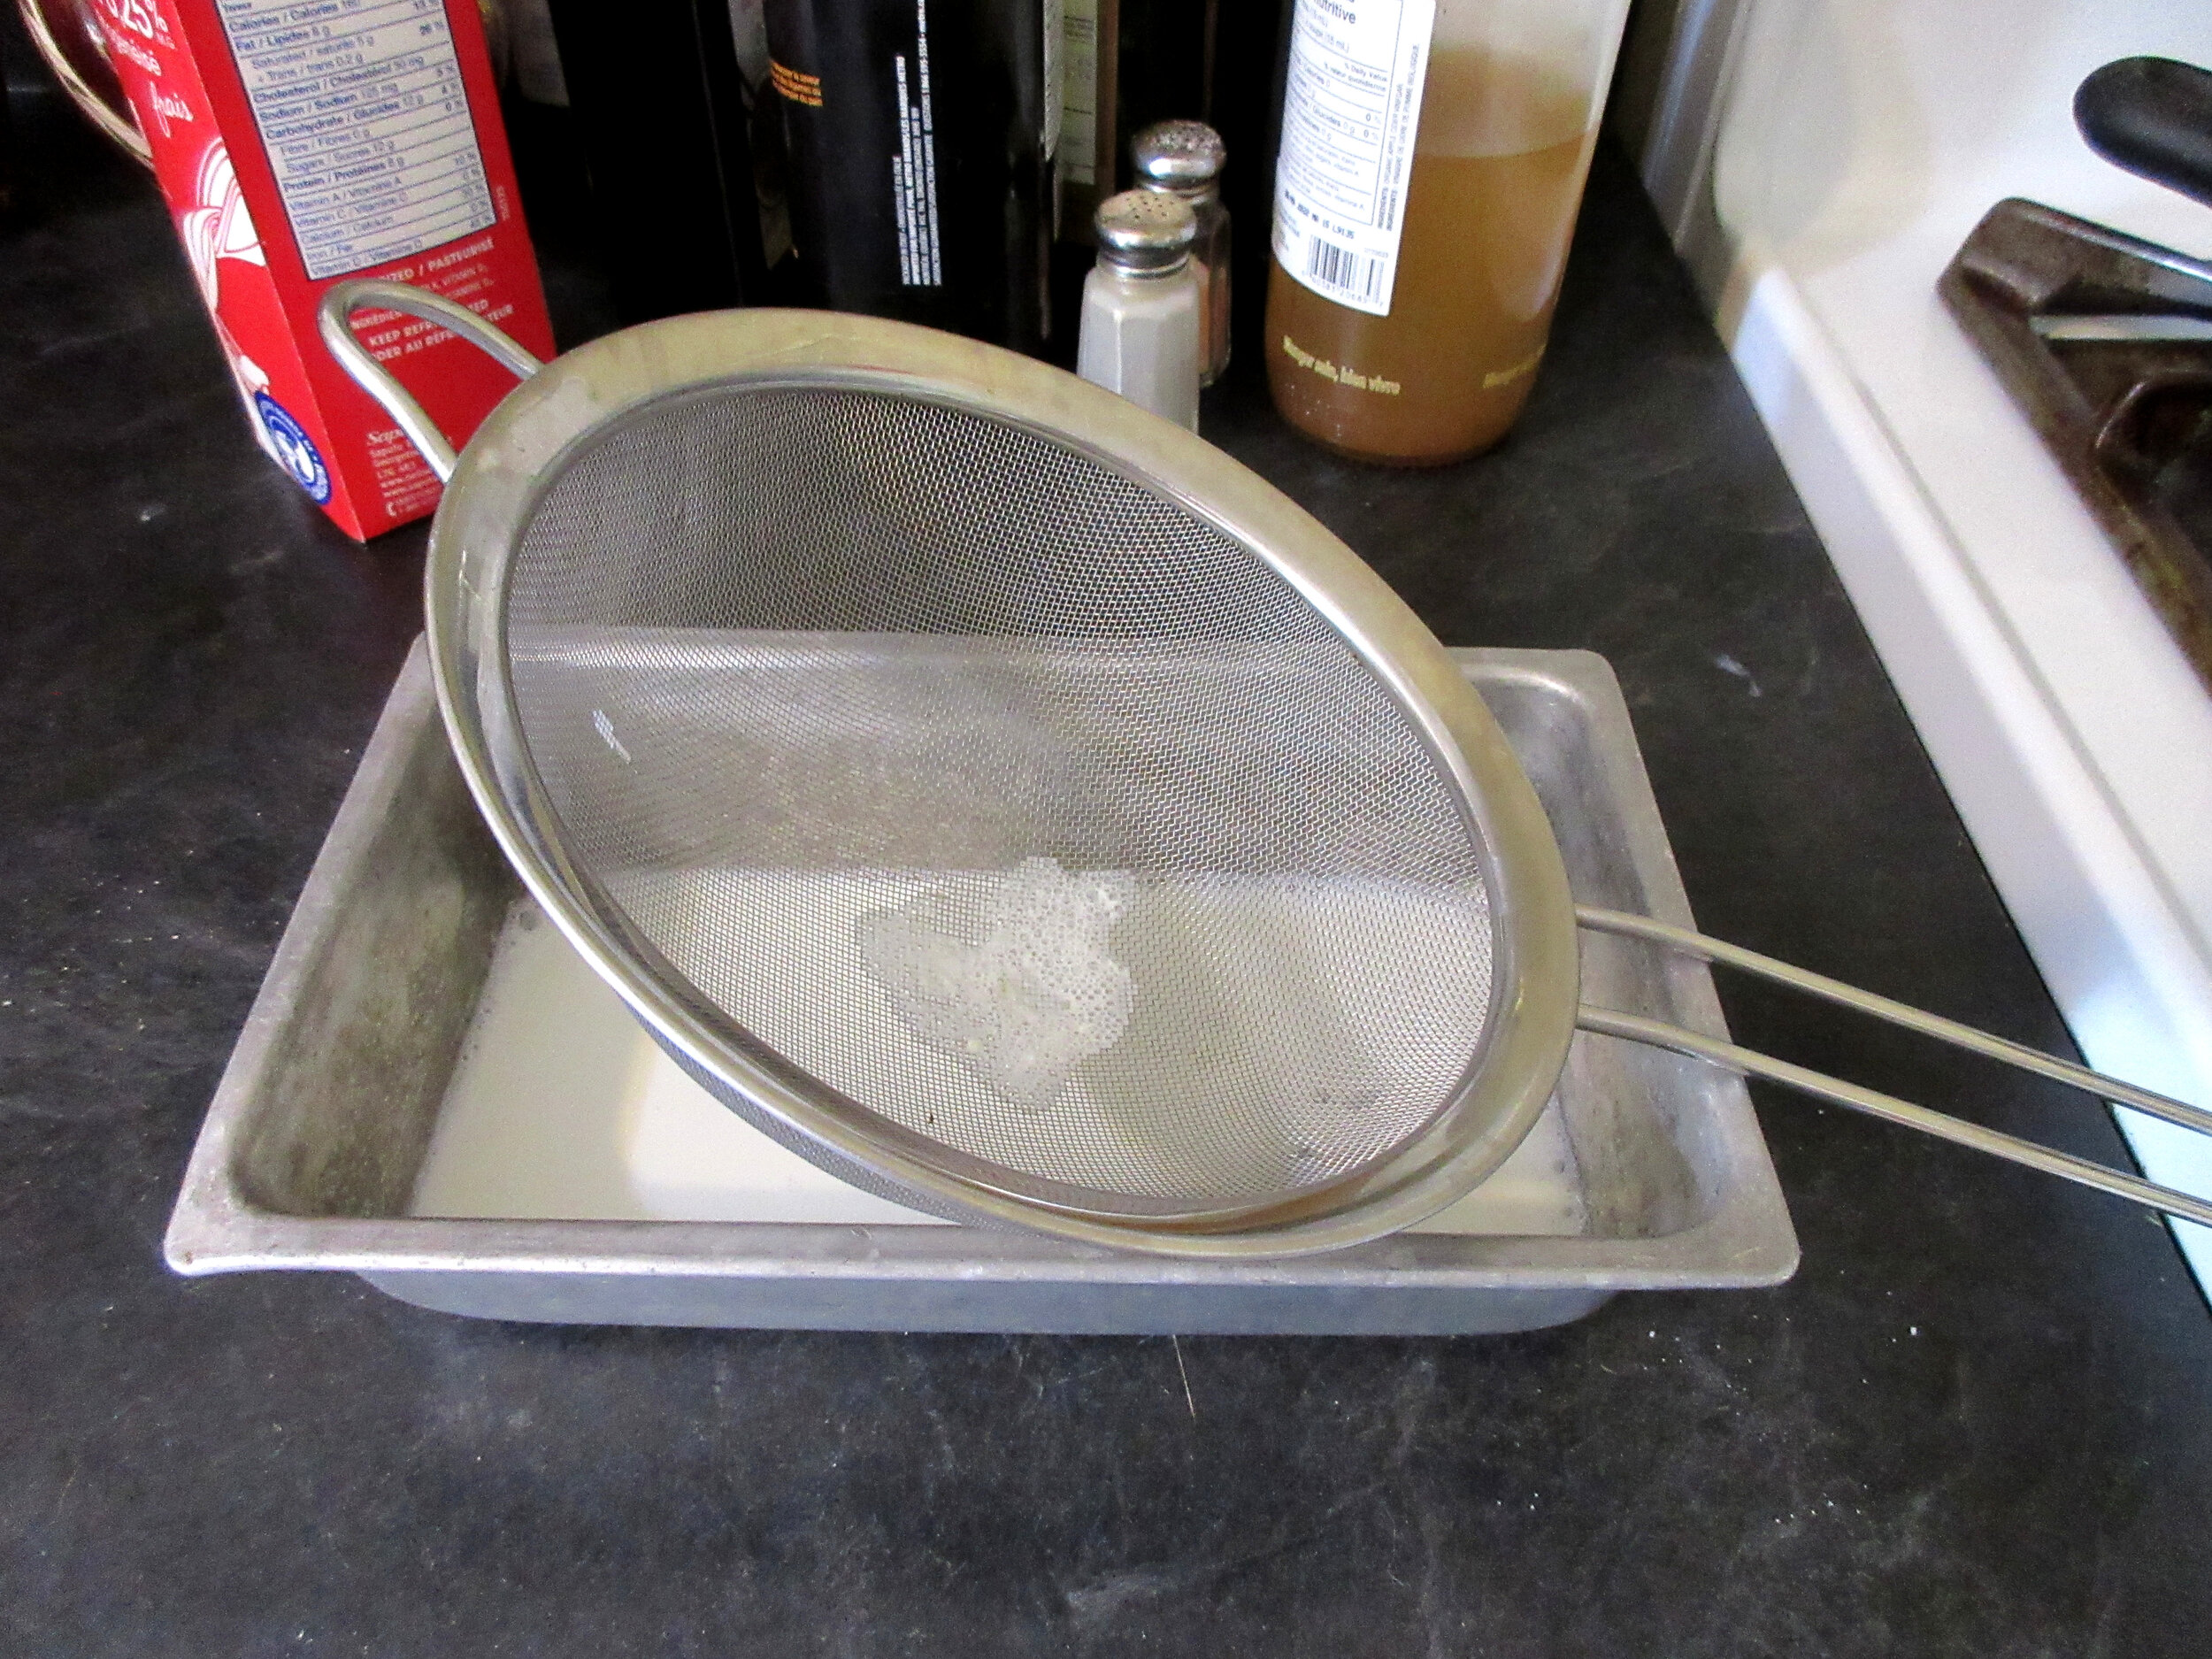
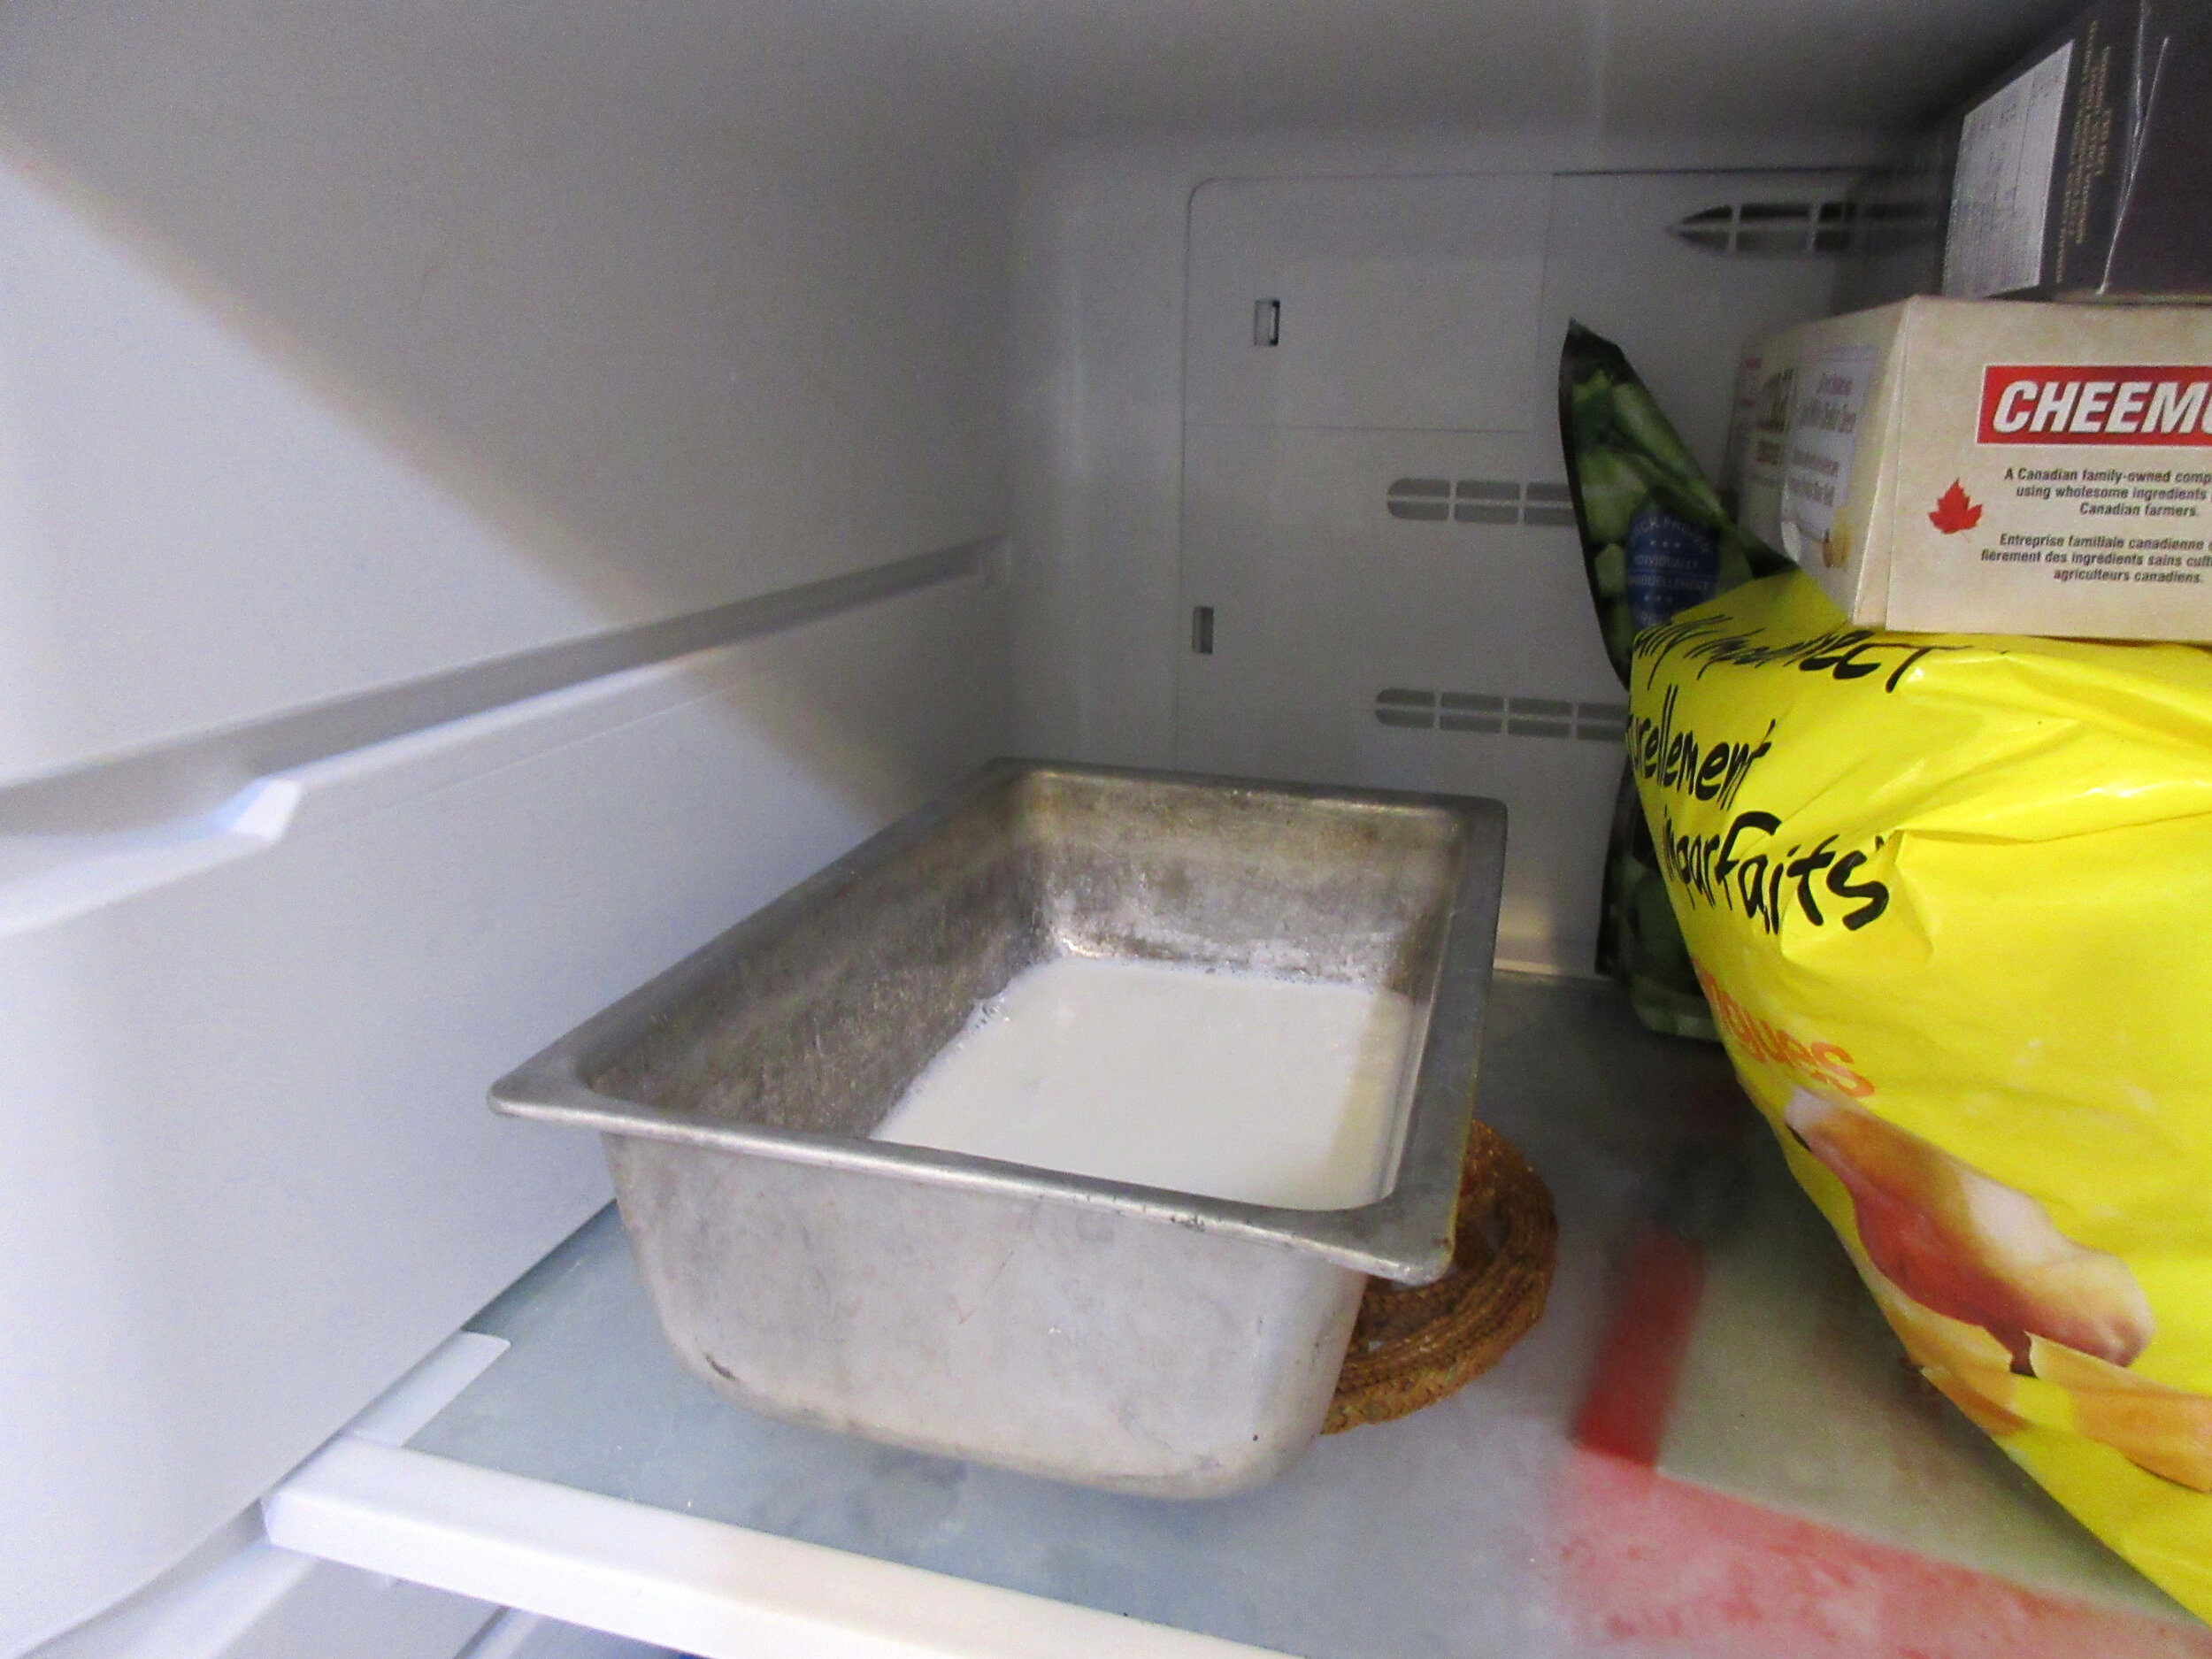
Warm ¼ cup (60 mL) milk in a double boiler, then add 1 tsp unflavoured gelatin. Whisk until dissolved, then add ½ cup (120 mL) cold milk. Strain the mixture through a sieve into a metal pan and place in the freezer until cool. When cool, beat until light.
While milk and gelatin mixture cools, melt baker’s chocolate in the double boiler, then stir in the sugar, vanilla and salt. Whisk in ¼ cup (60 mL) milk. Stir until it bubbles and remove from heat.
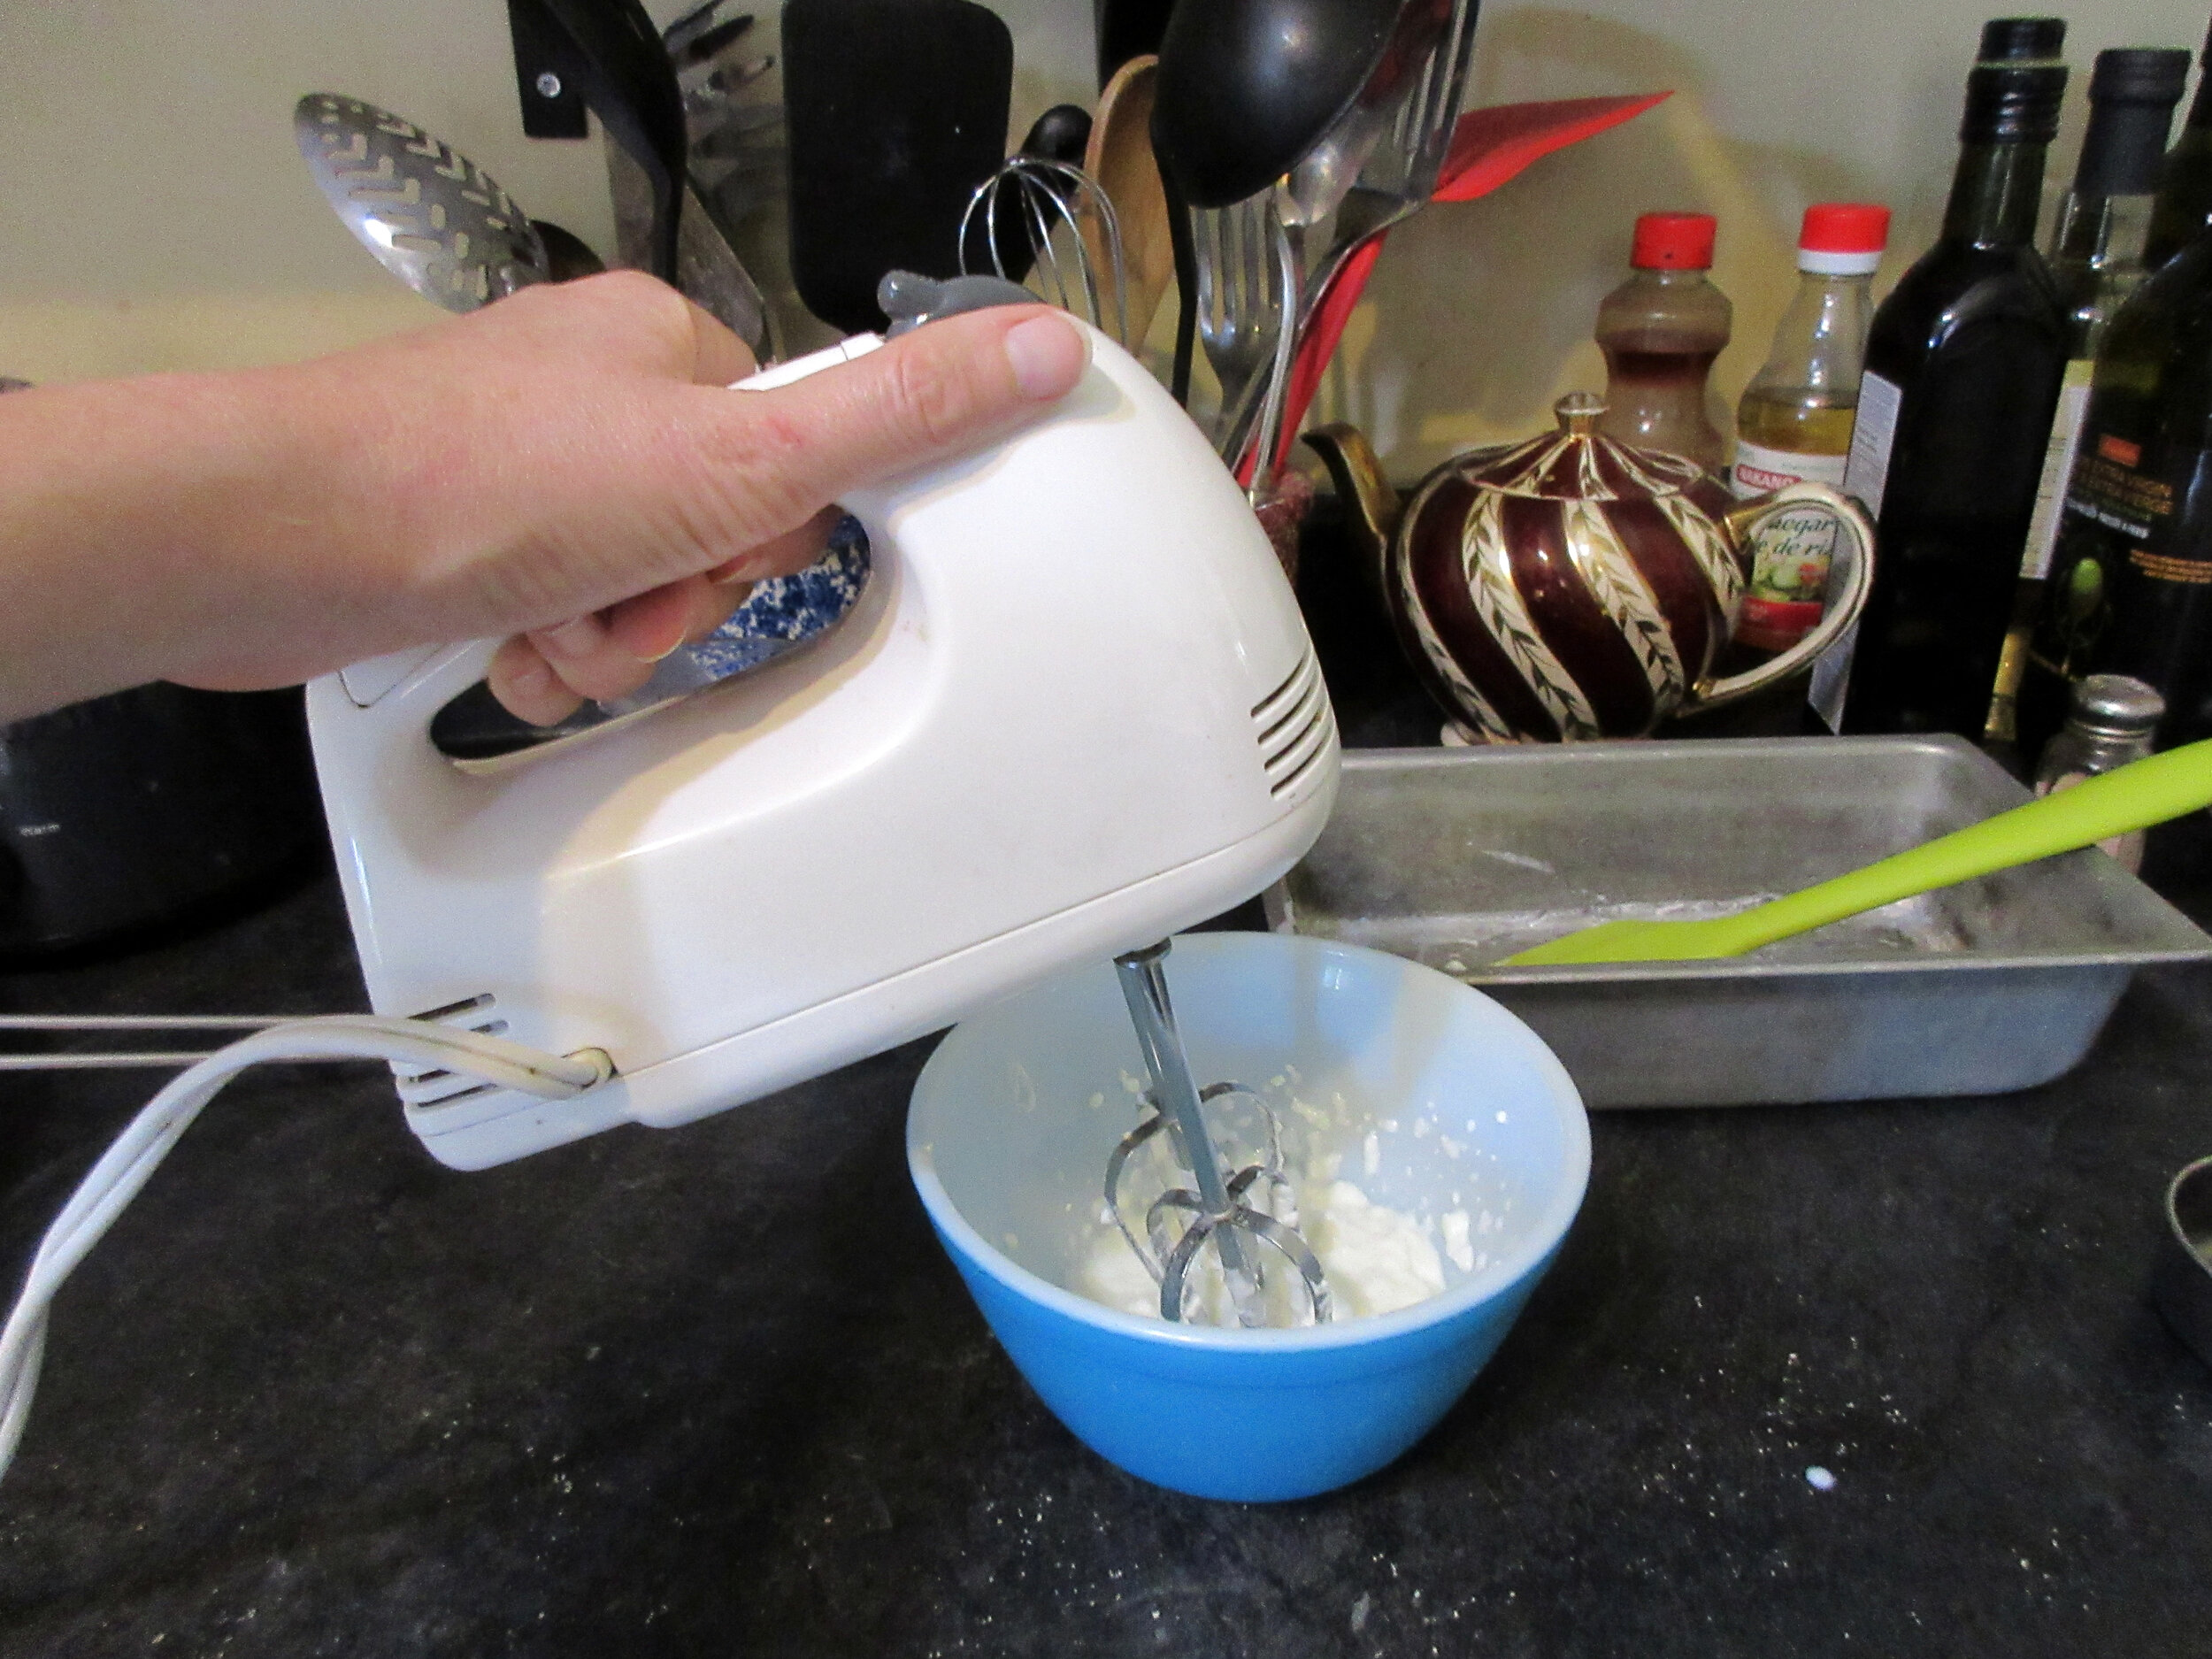
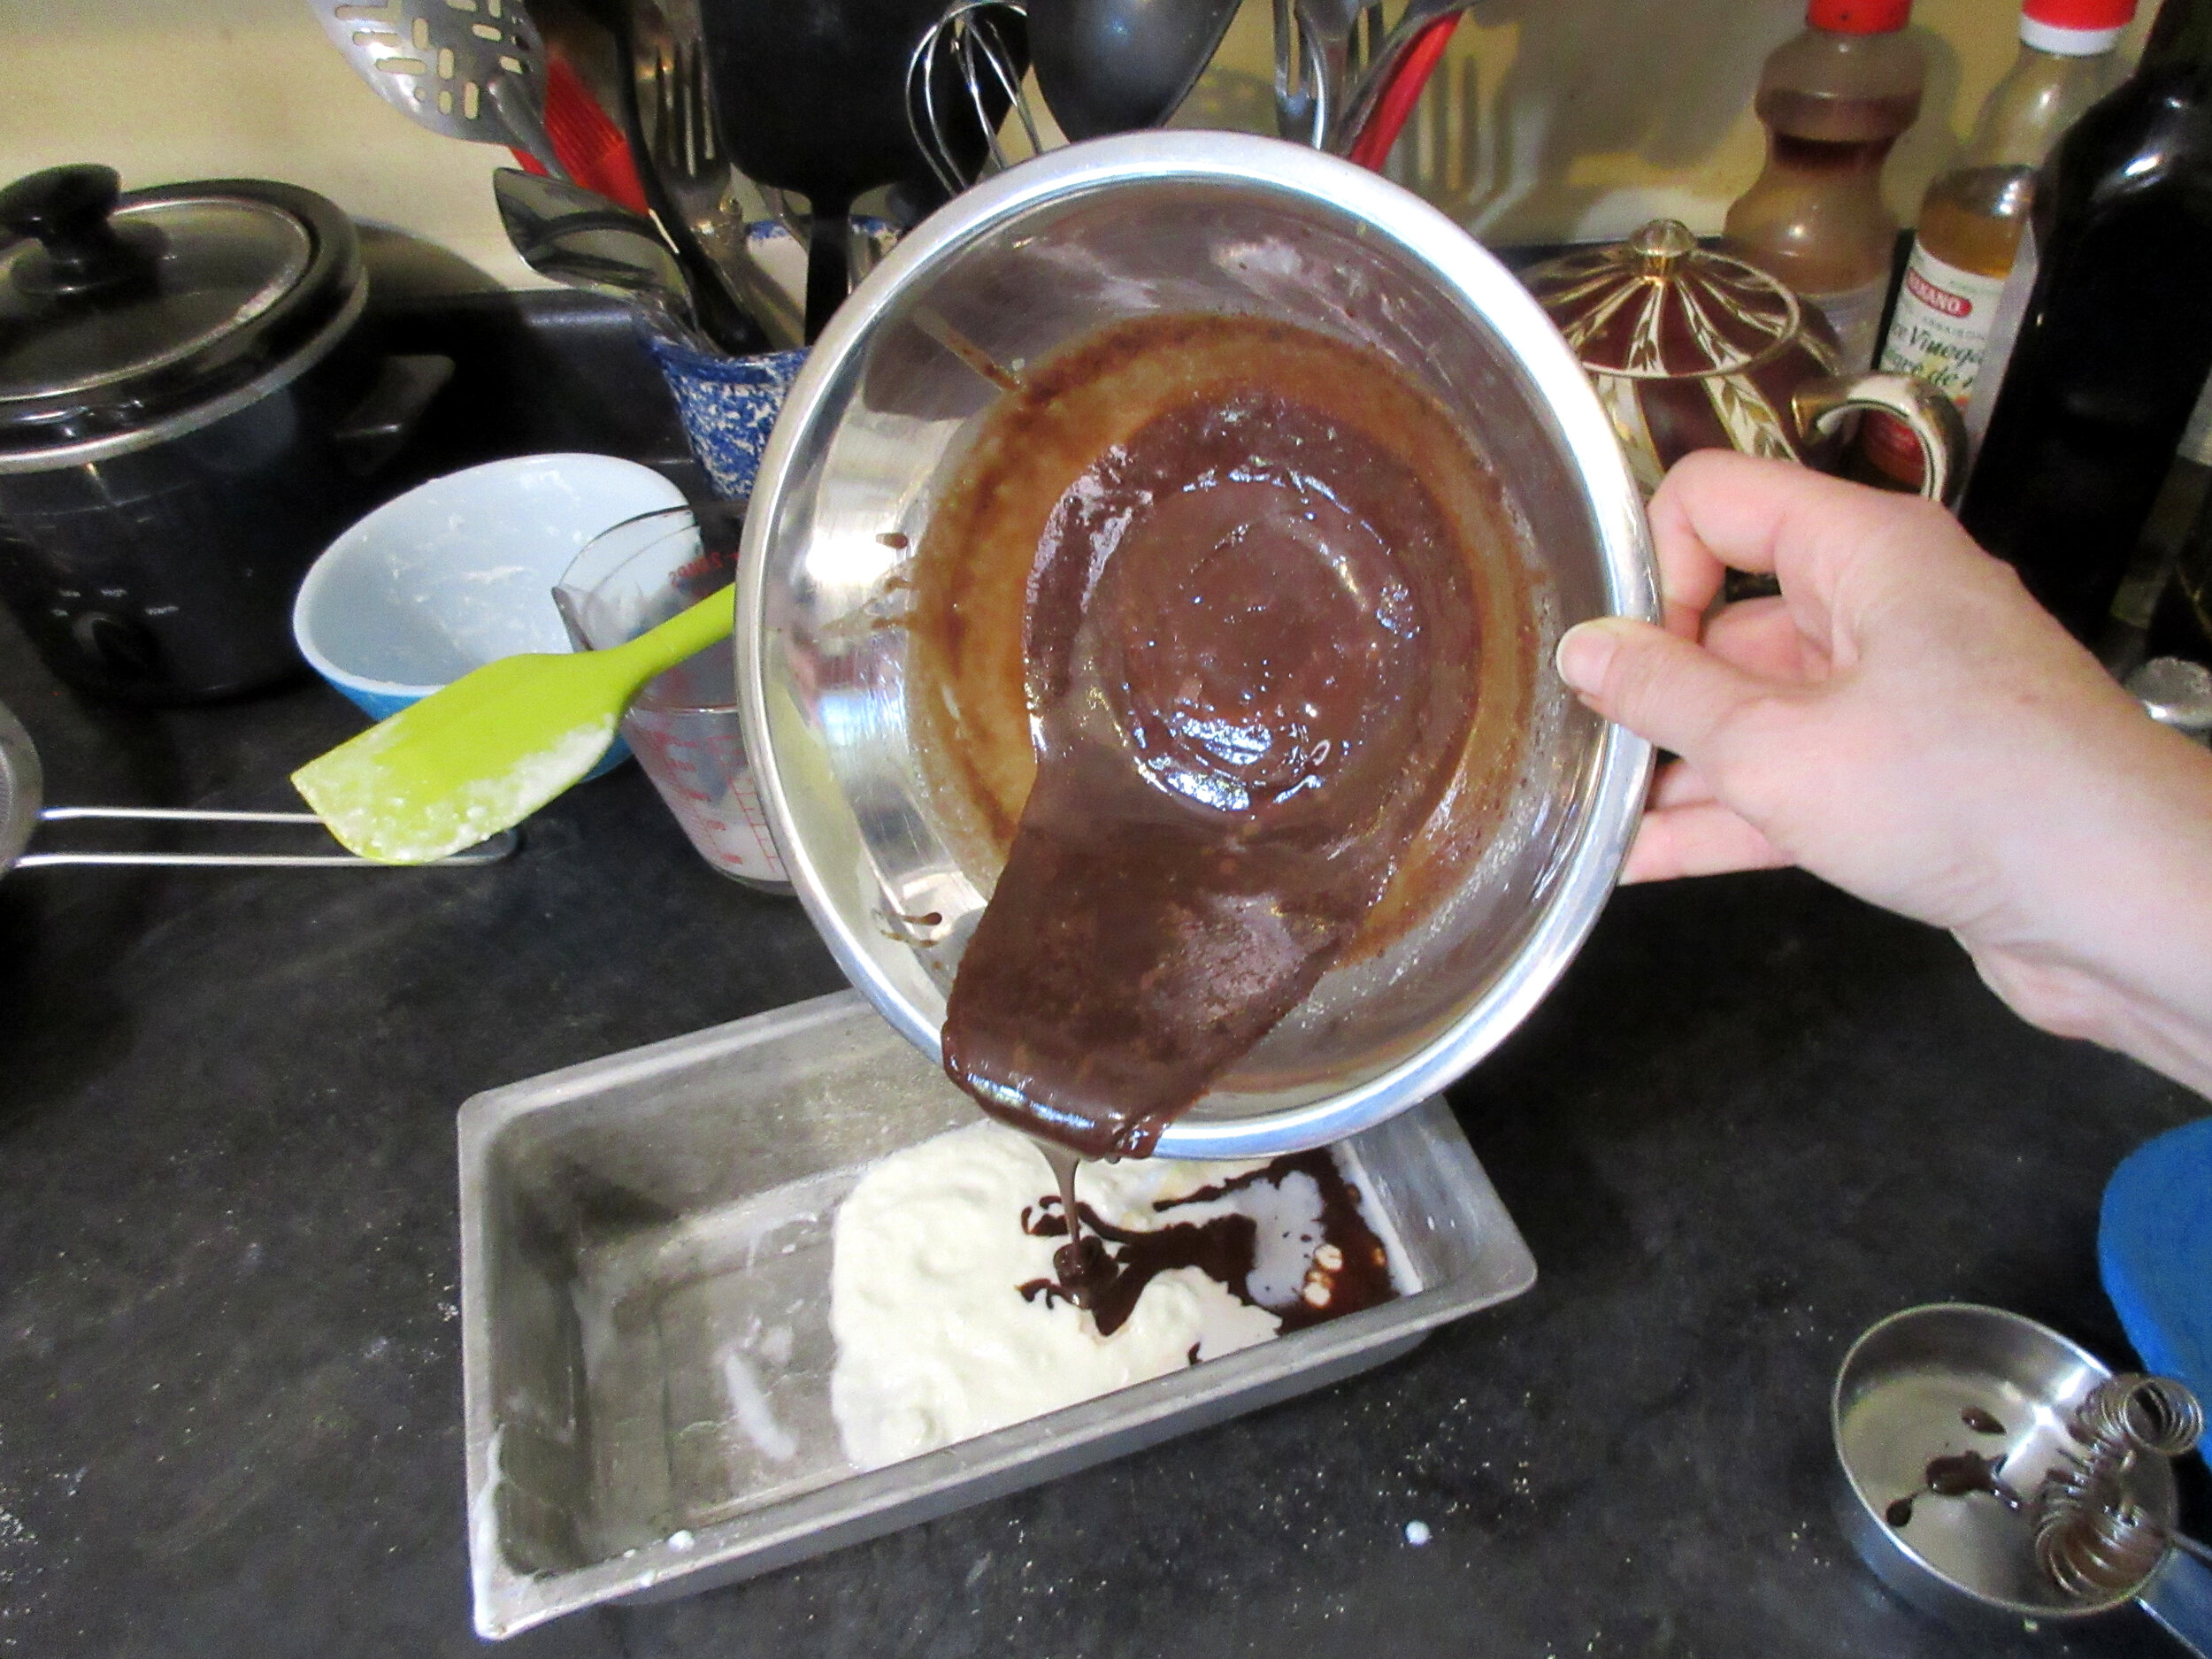
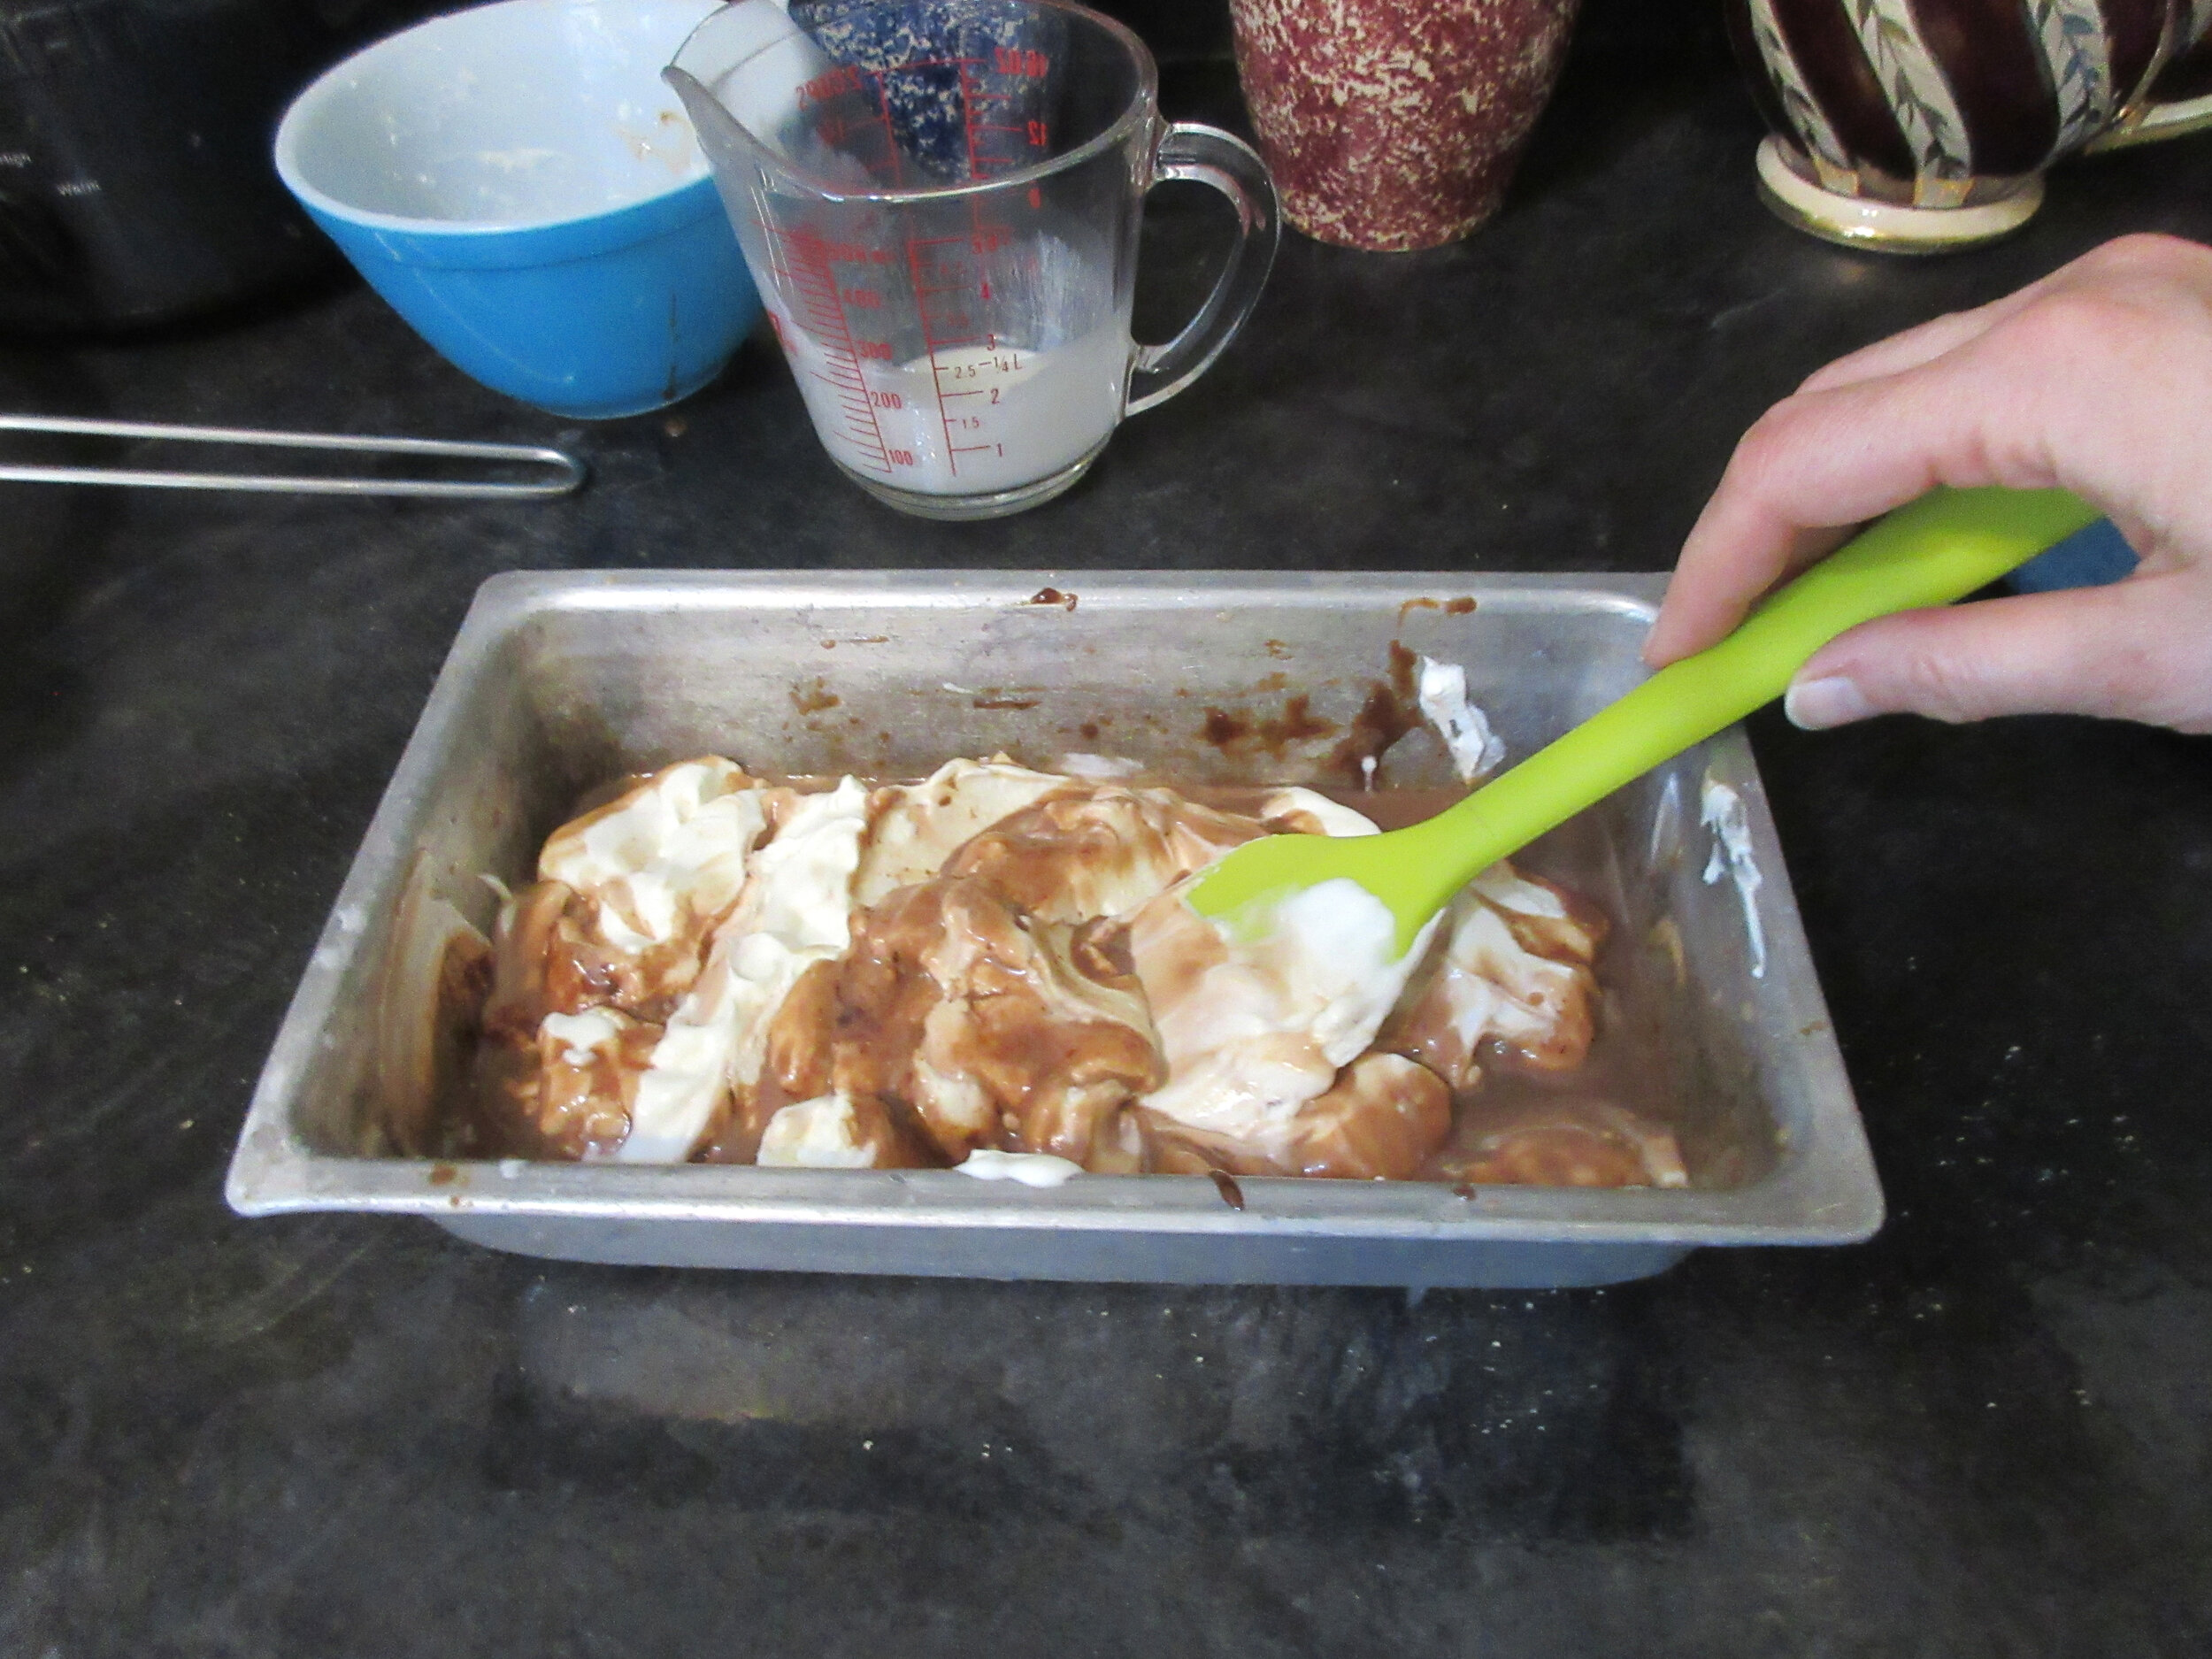
Beat the whipping cream until stiff. In the metal container, stir together the milk/gelatin and the chocolate combinations. Fold in the whipped cream and freeze.
Serve with Marshmallow Mint Sauce or Peppermint Whipped Cream
This Chocolate Mousse recipe comes from Electric Refrigerator Recipes and Menus, a 1929 cookbook written by Miss Alice Bradley that was put out by General Electric to help housewives learn how to use their newfangled kitchen appliance. It is mild and refreshing, but my batch ended up being more similar to an ice cream than a mousse (probably because my freezer is much more efficient than a 1929 “chilling unit”). Still delicious, anyhow. Top with Marshmallow Mint Sauce or Peppermint Whipped Cream from the same cookbook.
Head over to my post about Peppermint Whipped Cream to find out more about the General Electric Monitor Top Refrigerator and keep reading to find out what a refrigerator pan is and the appalling baker’s chocolate square fiasco of 2013.


What is a refrigerator pan?
Electric Refrigerator Recipes and Menus mentions using a refrigerator pan in most of its recipes, so what is it? I’ve read through the cookbook and didn’t notice a written description of a refrigerator pan, but they did appear in a few of the illustrations in the cookbook.
Refrigerator pans are rectangular metal containers. When you make Chocolate Mousse, a good substitute for an official refrigerator pan would be any metal container, mold or baking pan of the correct size. You can see refrigerator pans during recipe preparation in the illustrations below.
Look at the illustrations above and you’ll see a refrigerator pan in the chilling unit of the refrigerator. These pans would make efficient use of the small space in your chilling unit, since you can stack more than one pan. In another illustration, you’ll see a fruit salad that was frozen in one of these pans and has been unmolded onto a bed of lettuce for serving.
I must say, the rectangular shape of the refrigerator pan fruit salad certainly isn’t as eye-catching as intricate and decorative gelatin and dessert molds, but perhaps serving dishes frozen in rectangle refrigerator pans was seen as a sign of progress and affluence at the time.


Likely, refrigerator pans were accessories that came with the purchase of a General Electric refrigerator or perhaps they were an optional add-on. We can see one of these pans in action, thanks to Museums Victoria where there’s a larger GE Monitor Top Refrigerator in the Collection. Thankfully, some of this fridge’s accoutrements weren’t thrown out over the years. Below, you’ll see a photograph of a refrigerator pan and some of its accompanying accessories: a cover and a support that fits in the bottom of the round chilling unit.
It isn’t easy to make out the support piece in the illustrations in Electric Refrigerator Recipes and Menus, but seeing this accessory photographed helps to explain some instructions in the book: “Spill a little water in the chilling unit before putting the cast iron freezing tray support in place. This will make it freeze solidly to the chilling unit.” The refrigerator pan cover would make stacking two pans in the chilling unit easier and less messy. My educated guess is that the refrigerator pans also would have had removable frames for making ice cubes, simply because of this excerpt from the book: “Water can be frozen in the pans, with or without the frames.”


Photographs of General Electric Monitor Top Refrigerator accessories courtesy of Museums Victoria Collections
If you ever get your hands on a working Monitor Top Refrigerator (it’s possible – these fridges were made to last and are actually more energy efficient than our fridges today), here’s some more tips for using refrigerator trays from Electric Refrigerator Recipes and Menus:
“For rapid freezing it is absolutely necessary to have good contact between the tray and the chilling unit.”
“The bottom tray always freezes faster than the top one, and the shallow tray faster than the deep one.”
“A spatula or knife may be inserted between the lower tray and tray support to loosen the tray after it is frozen.”
“A tray of ice cubes may be placed on top of the mixture that is to be frozen. This will preserve the ice from melting, and will hasten the freezing in the lower container. Use cover on the lower pan.”
A rectangular metal pan that’s custom-made for the freezing chamber isn’t only common with General Electric refrigerators at that time. The 1933 booklet Your Frigidaire; Recipes and other Helpful Information explains how to use Frigidaire Freezing Trays. Two types of these stainless steel freezing trays were furnished with the purchase of a refrigerator: metal trays with removable metal grids and metal trays with removable rubber grids. The freezing compartment appears to have a shelf in it to facilitate stacking these freezing trays and each tray features a handle to assist with sliding the trays in and out, which was probably a user experience improvement over the hassle of having to wedge the General Electric refrigerator trays out of the chilling unit with a knife!
Illustrations from Your Frigidaire; Recipes and other Helpful Information showing Frigidaire Freezing Trays
A word to the wise about baker’s chocolate:
Be careful when making recipes that use the ingredient measurement of a “square” of baker’s chocolate! Our Chocolate Mousse recipe tells us to “melt over hot water 1 square chocolate”, which led me to look into how big chocolate squares were in 1929. All evidence that I found indicated that square of baker’s chocolate weighed 1 ounce (28 g) back then, which is what most people would consider the size of a chocolate square today.
While I was researching chocolate squares in 1929, I accidentally found out that many brands of baker’s chocolate changed the size of their squares in 2013 without making a big to-do about it! I remember a chocolate cake that I made a few years ago that was barely chocolate at all and I wonder if this size change was the culprit. The baker’s chocolate package that I bought to make Chocolate Mousse has the traditional 1 ounce per square, though. A square is split into ½ ounce rectangles for easy breakage, so be sure to remember your geometry and use a full 1 oz. square (2 rectangles).
This sneaky baker’s chocolate square reduction comes down to profits, of course. Food companies reduce what you get per package, while not reducing the price to the same amount. In many instances, at least in North America, when you buy a package of baker’s chocolate in 2021, the squares do not weight 1 ounce, they weigh ½ ounce. You get 50% the chocolate when you buy a package of baker’s chocolate now, but I’ve seen complaints online that a package costs 75% to 100% of what it used to.
I can’t get over how irresponsible this is. Sure, it isn’t great that you get less of many ingredients for more money these days, but with most ingredients, you don’t take the food straight out of the package and put it in the mixing bowl. You measure it with a scale or a measuring cup or spoon first.
A square of baker’s chocolate is a unit of measurement. A unit of measurement has been halved in the night and released into the world without a warning that the change has happened! Many people aren’t going to know and make horribly weak chocolate recipes as a result. These companies are messing with our joy.
You’d think when this reduction was being discussed in the company boardrooms, someone would have said, “We can’t half the size of a square! Do you know how many recipes use a square to measure out baking chocolate?” You’d also think that the response would have been, “You’re right! We can’t do that to the world! Let’s reduce the size of another product.”
Perhaps I’m being too dramatic. Be careful the next time you need to buy baker’s chocolate for a recipe, though. You might need to buy twice as many squares.


Read Electric Refrigerator Recipes and Menus online:

To Freeze Desserts and Salads That Need No Stirring
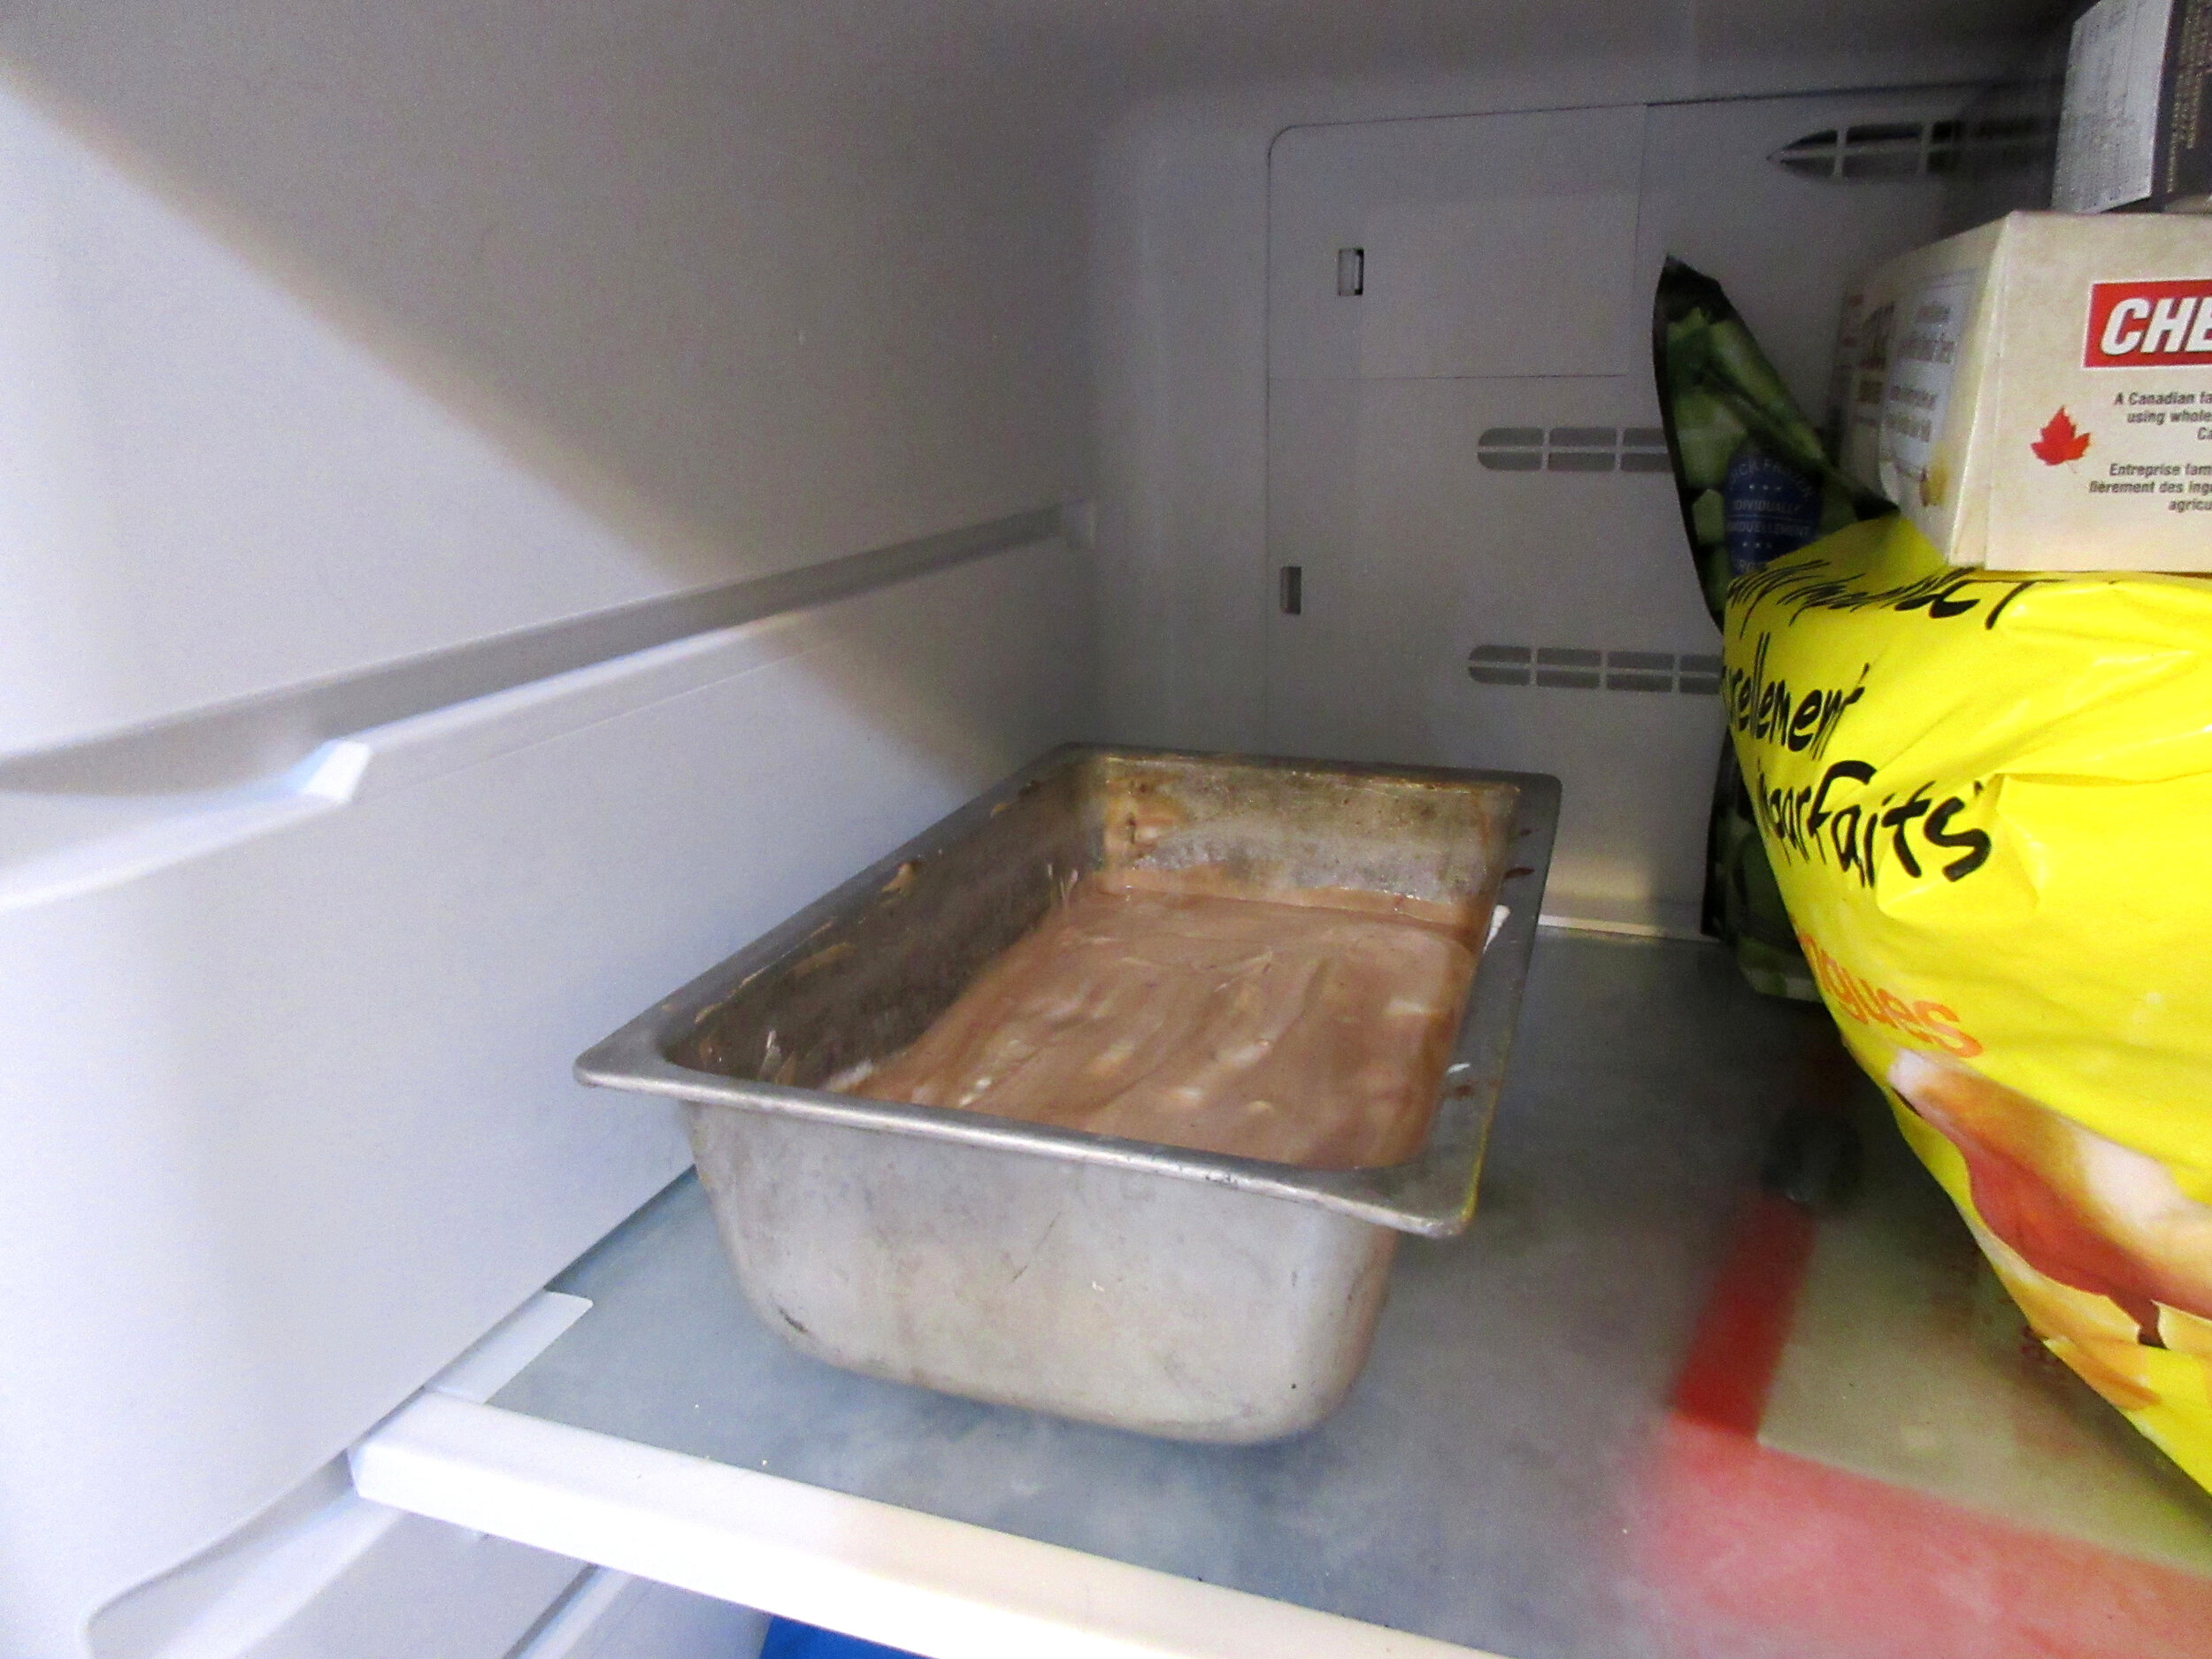
Freezing Method III – Many mixtures can be frozen without stirring. Put mixture in the refrigerator pan and leave in the chilling unit 3 hours or until mixture is firm.
A mousse or parfait frozen in this way in the General Electric Refrigerator is most delicious.
One hour makes 1 pint of mixture very cold and partially frozen.
After 2 hours it has a mushy consistency.
In 3 or 4 hours it should become hard enough to slice and hold its shape. It can be served the same as ice cream. Very fluffy mixtures may not freeze as solidly on top as on the bottom.
In 4 hours it seems to be especially good and somewhat ripened.
A larger amount of mixture takes a longer time to freeze.
It is usually practical to prepare a frozen mixture immediately after one meal and leave it in the refrigerator until the next. One to 2 quarts of mixture may require 7 hours. We have filled the large pan with mousse on Saturday morning, have gone away from home and returned to serve it Sunday night. It can be prepared after breakfast and served for evening dinner or after lunch to serve in the evening.
To Remove Desserts from Refrigerator Pan – Place refrigerator pan for an instant in a large pan of warm water, loosen from the edges with a knife and invert on the serving dish; or remove with a spoon or ice cream scoop and put in individual glasses; or cut in squares or slices, remove with a broad spatula and serve on ice cream plates. To facilitate removal, pans may be lined with heavy paraffin paper before packing frozen ice cream or mixtures that need no stirring.
Individual Frozen Desserts – Any mousse or parfait may be frozen, or a frozen ice cream can be packed in small molds in the chilling unit.
To Serve Individual Desserts – Dip molds for an instant in warm water, loosen around the edge and invert on serving plate.
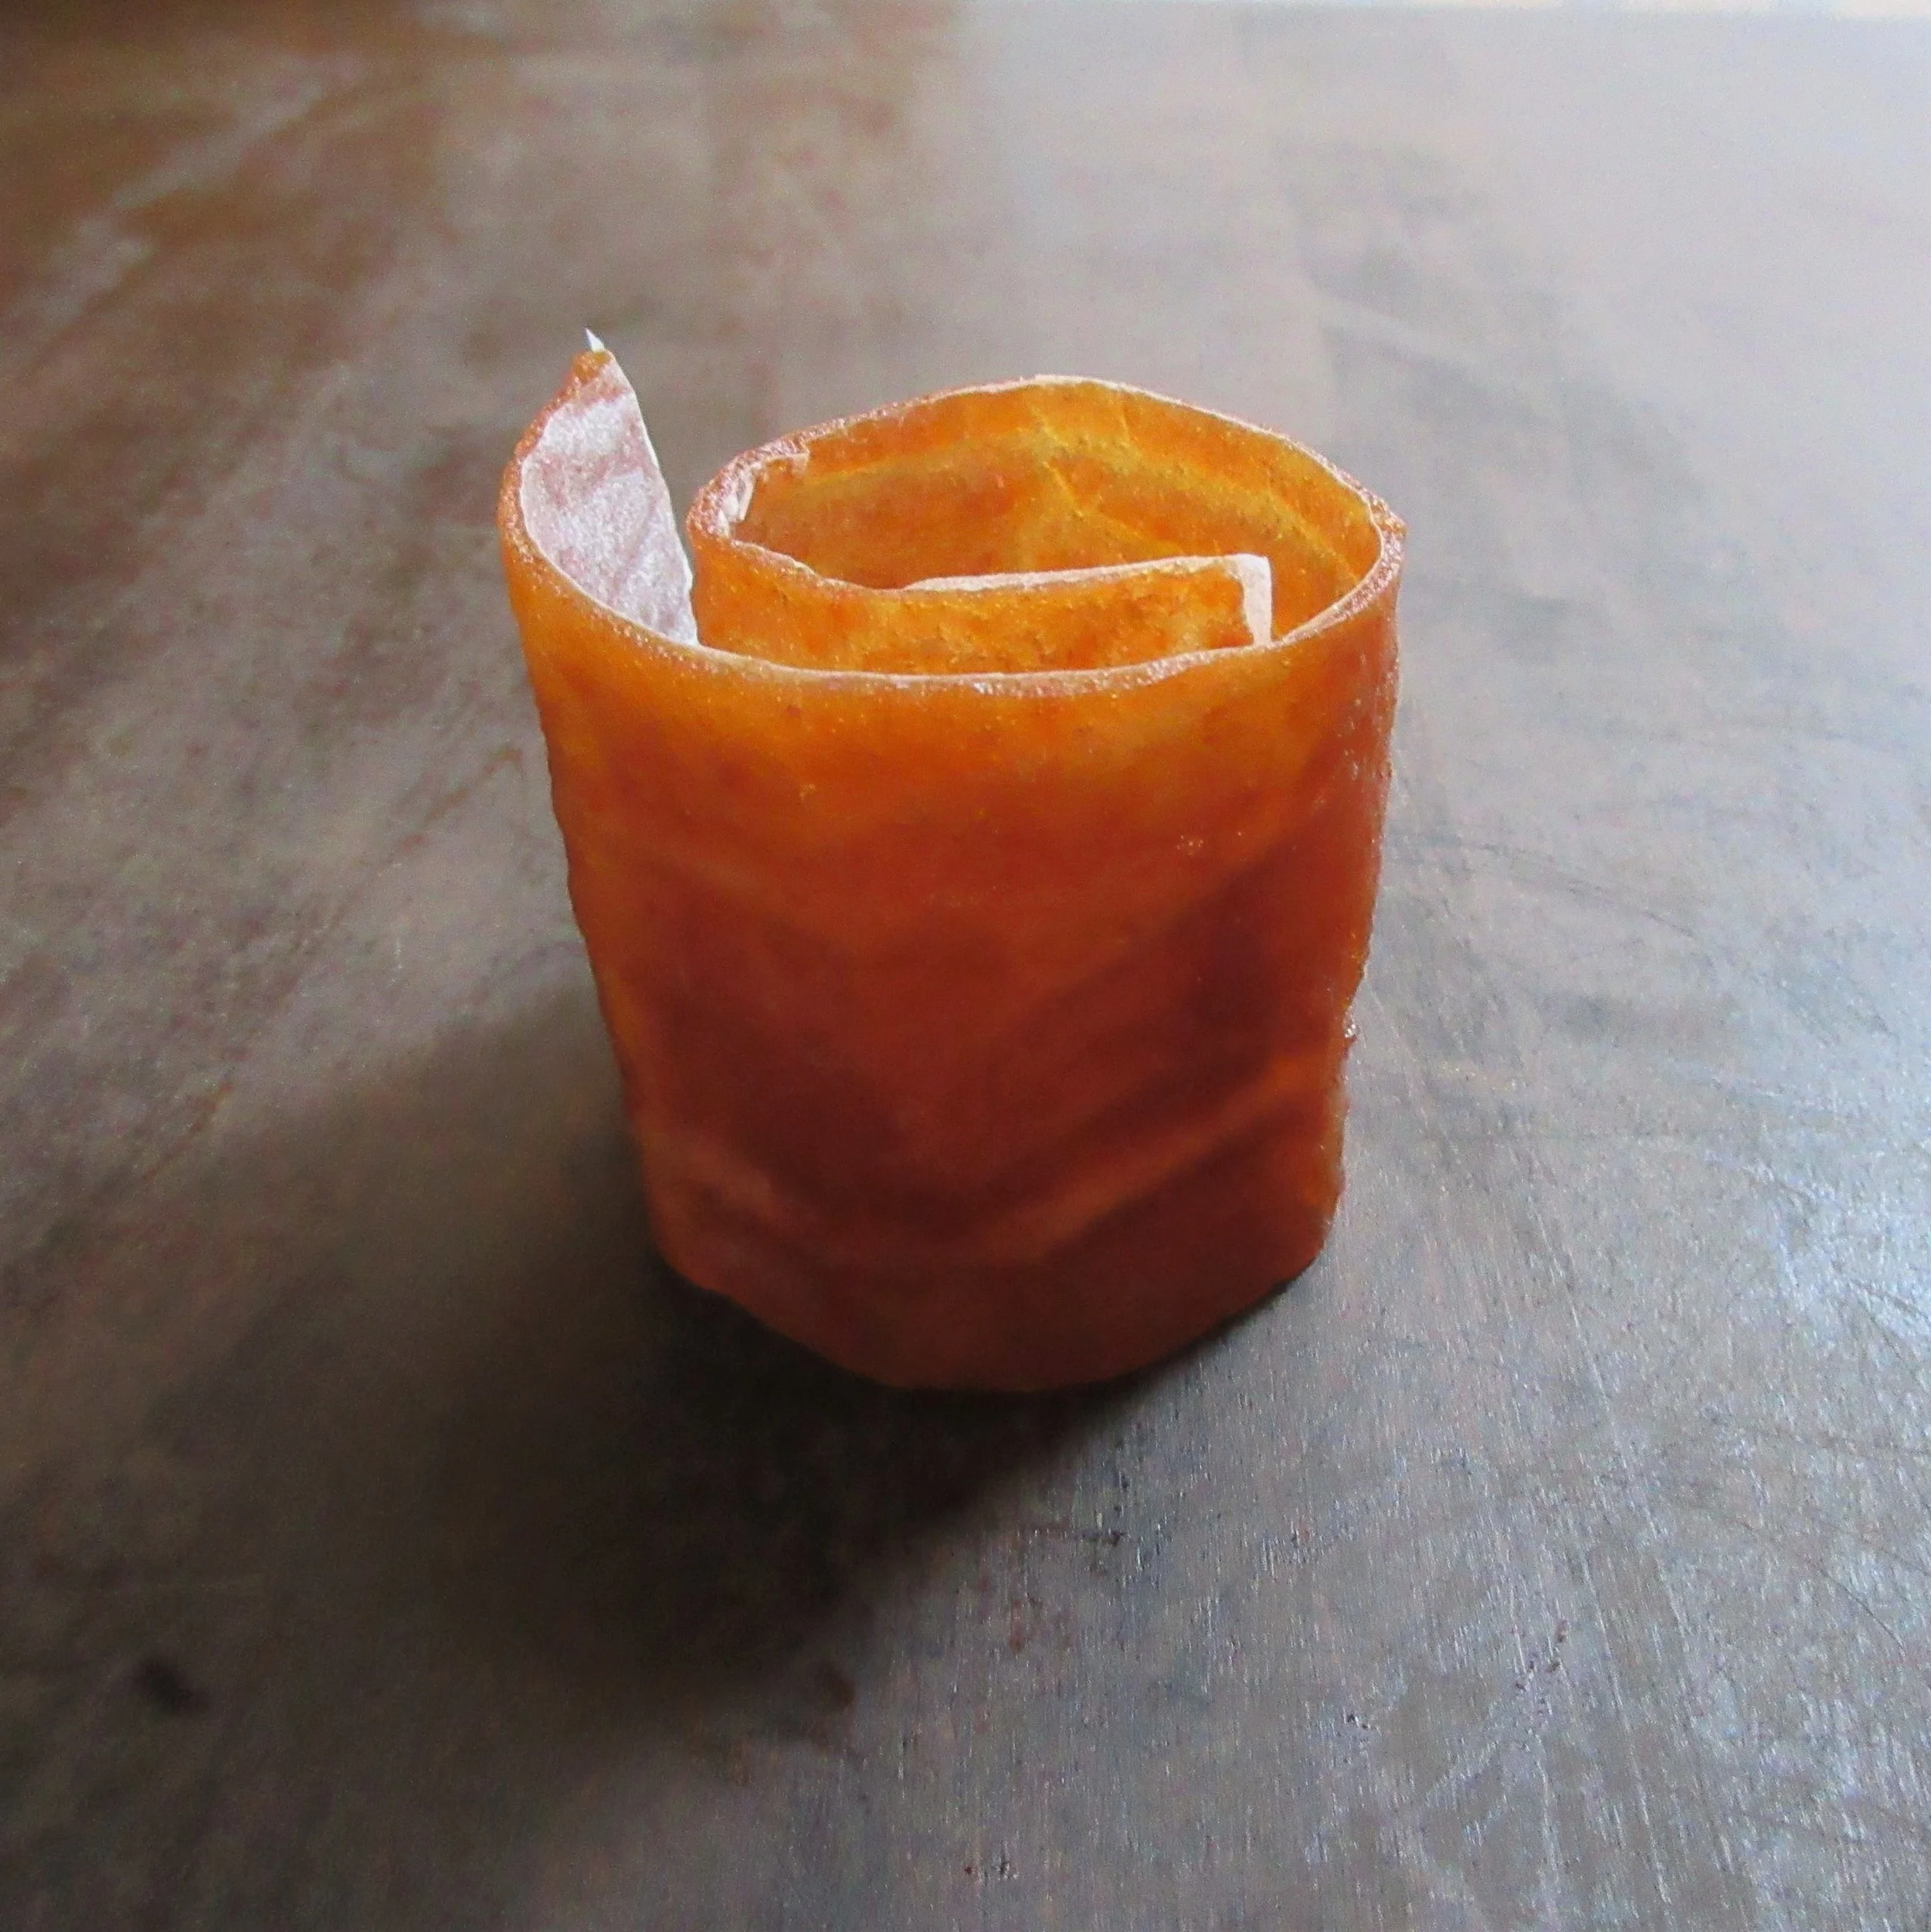
Apple Leather
If you have a look at all the recipes in the “Fruit” category on this blog, you’re going to notice that most of my fruit recipes feature apples. I just did the math, and as of today, we’re talking 62.5% of my fruit recipes. Here’s the reason why: when we moved into our current home in Hamilton, we didn’t realize that the giant tree in our backyard was in fact a very prolific old apple tree!
August is my unofficial Apple Month, when I try to keep as many apples out of the compost bin as possible. Do you want cooking apples next summer? Let me know if you do and they are yours! This Apple Leather recipe is from one of the Victorian cookbooks that I turn to again and again, Miss Leslie's Directions for Cookery from 1851.

You’ll find this recipe in:
Miss Leslie's Directions for Cookery
By: Eliza Leslie
Philadelphia, 1851
Historic Recipe:
PEACH LEATHER. - To six pounds of ripe peaches, (pared and quartered,) allow three pounds of the best brown sugar. Mix them together, and put them into a preserving kettle, with barely water enough to keep them from burning. Pound and mash them a while with a wooden beetle. Then boil and skim them for 3 hours or more, stirring them nearly all the time. When done, spread them thinly on large dishes, and set them in the sun for three or four days. Finish setting them in the oven after the bread is taken out, letting them remain till the oven is cold. Roll up the peach leather and put it away in a box.
Apple leather may be made in the same manner.


My Recipe:
2 cups apple chunks, cored and peeled – 225 g
¾ cup brown sugar – 110 g
½ cup water – 120 mL
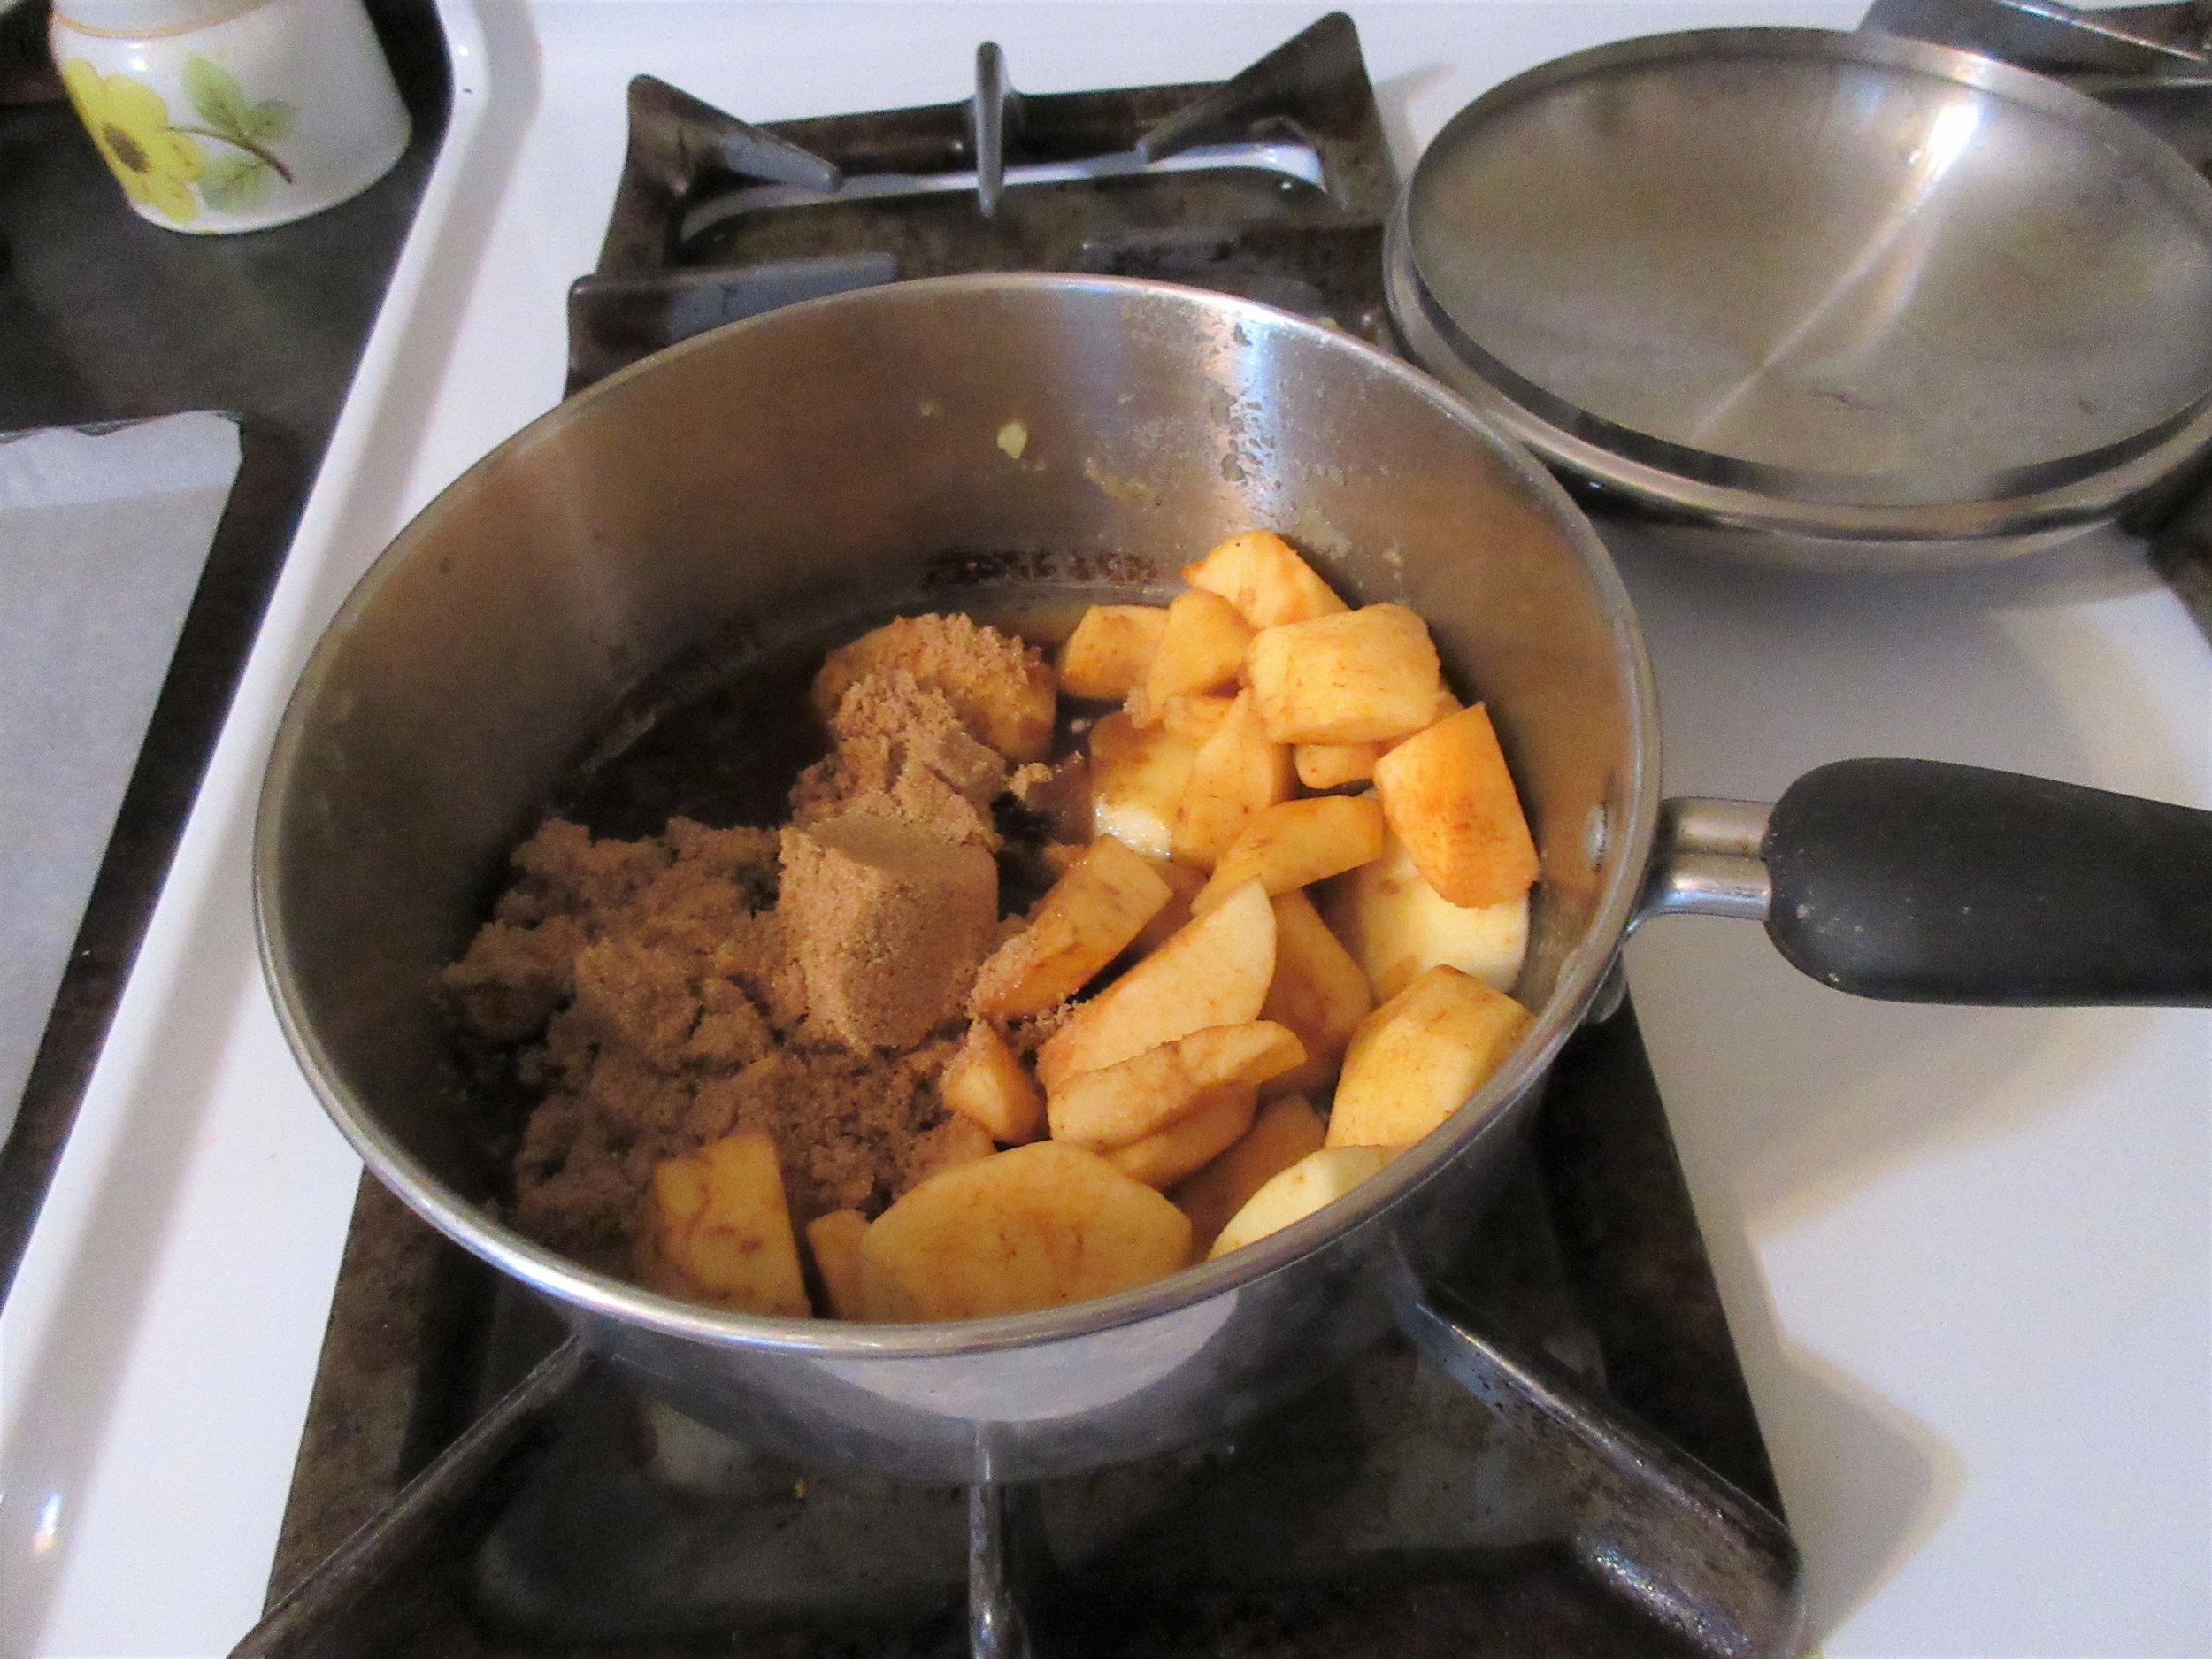
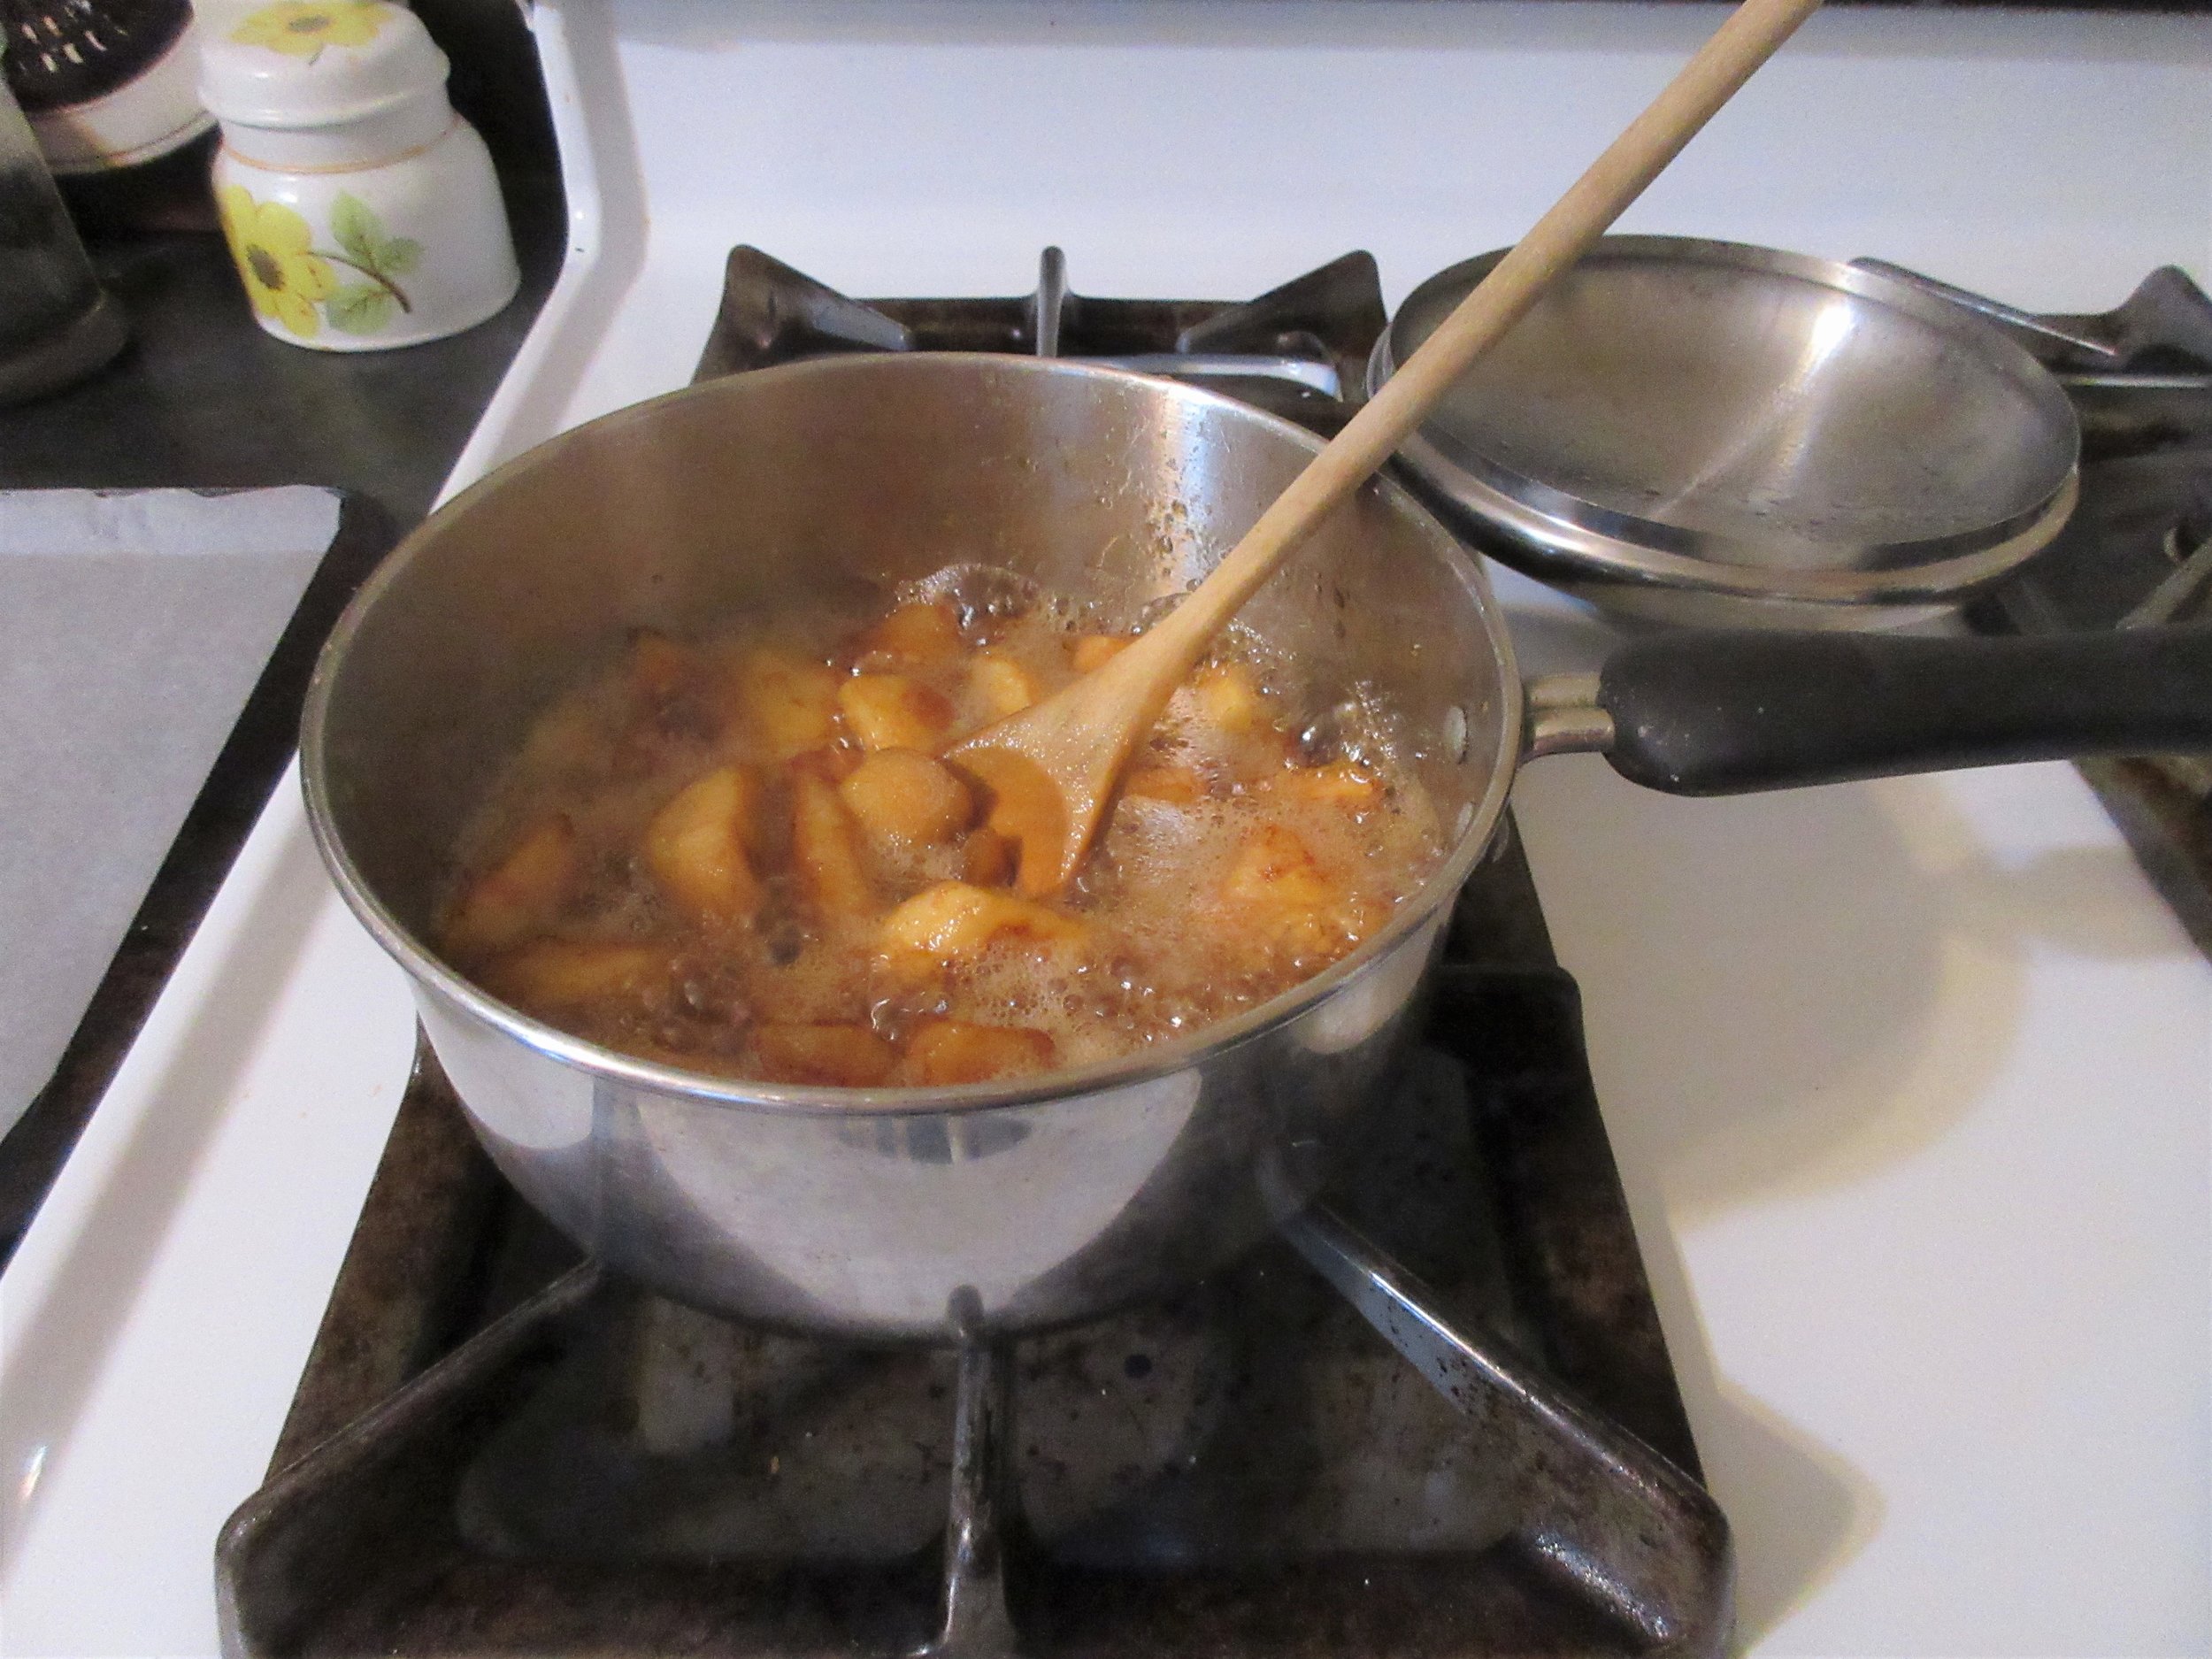
Put the apple chunks, brown sugar and water in a pot and simmer over medium low heat until the apples are mushy. In the meantime, cover a cookie sheet with parchment paper or prepare your dehydrator. Puree in a blender, then spread the mixture evenly (3 or 4 mm/1/8 inch thick) over the parchment paper or dehydrator sheets with a spatula.
Pop the apple leather into your dehydrator or into your oven at a very low temperature. I dehydrated the apple leather in my oven at 220 F (93 C) for about 3 hours. It is finished when it is still slightly tacky when touched, but has structural integrity and doesn’t mush under your fingers.
You may want to make more apple leather than I did when I tested this recipe. I’ve never made a fruit leather before, so I decided to go small! 2 cups of apples mostly filled a small cookie sheet, although I definitely should have left it thicker in some areas. To help you gauge how much to make, contemporary recipes for fruit leather usually ask for 4 cups of apples to fill a large cookie sheet.


Right: a variety of wooden beetles, courtesy of Michigan State Universities Library
If you read the historic recipe and noticed that it instructs “Pound and mash them a while with a wooden beetle”, and you wondered why in the world anyone would mash apples with a wooden insect sculpture, let me show you what a beetle is. Have a look at the image above to see a selection of wooden beetles. A beetle would be used anytime I would grab a potato masher in my kitchen, and it’s just a sturdy wooden kitchen tool with a handle and a flat bottom. It’s perfect for mushing up soft ingredients.


If you have a look at all the recipes in the “Fruit” category on this blog, you’re going to notice that most of my fruit recipes feature apples. I just did the math, and as of today, we’re talking 62.5% of my fruit recipes. Here’s the reason why: when we moved into our current home in Hamilton, we didn’t realize that the giant tree in our backyard was in fact a very prolific old apple tree!
We have no idea what variety of apple we have, but it is by far the tallest apple tree I’ve ever seen. It’s an early apple that begins in late July and tapers off through the month of August. The apples are very sweet, but they are also very very dry so they are mandatory cooking apples. They are mostly green, small in size and as August goes on, some of the apples do develop a slight rosy blush, usually only on one side. Do you have a guess about the type of apple we’ve got? If you do, leave a comment!
August is my unofficial apple month and I’ve made up an Instagram hashtag so that I can see everything I’ve done with my apples over the years: #juliabattlesappletree. This year, I’ve made two huge batches of Apple Butter, To make fine pippen Tarts and this batch of Apple Leather. I’ve made Apple Cinnamon Oatmeal and eaten apples fried in butter with maple syrup drizzled on top. I’ve also “invented” Apple Smoothie Cubes, which is cooked apple puree, frozen in ice cube trays, that I’ll pop in my green smoothies.
The other morning when I was chopping up apples, I snapped a very cute photo of my cat Clementine supervising the proceedings, which of course I posted on Instagram. I honestly had no idea what I was going to do with the apples I was chopping, so I asked what people thought I should make!
There were some fantastic suggestions left in the comments: apple crisp, pickled apples, apple shortbread, apple pie, apple chutney, apple cake, steamed apple pudding, applesauce with peaches or nectarines...and apple leather. The last suggestion really appealed to me because I’ve never made a fruit leather before and also because Steve and I are leaving on a road trip on Wednesday and Apple Leather would make a perfect snack for the car.
I want to give a shoutout to the person who suggested Apple Leather, because I’m a big fan of what she’s up to on Instagram. Jaqu Edge, a.k.a. “Kiwi Nosh” is a food history enthusiast in New Zealand that I’ve been following for a while on Insta. She’s a big fan of anything sweet and usually bakes recipes from New Zealand community cookbooks. I love her cheeky and dry sense of humour, and I found that her pictures of her garden in full bloom were quite therapeutic to me last winter, which I found to be especially depressing! Check her out @kiwinosh.
Read the Cookbook:
Chicken Terrapin
Chicken Terrapin, from the 1903 Good Housekeeping Everyday Cook Book, is a creamy and decadent casserole dish, perfect for using up leftover chicken. After selecting this recipe, my research began with the question "Why is this dish called Chicken TERRAPIN?" and quickly descended down a rabbit hole. Literally. Before beginning to piece together what I learned about Terrapin recipes, I had pulled my childhood copy of Alice in Wonderland off my bookshelf!
The chicken meat in this recipe is meant to take the place of Terrapin Turtle meat and I'll be delving into how one prepares Terrapin meat, the popularity of Turtle recipes, specialized Turtle Soup Tureens and the replacement of dishes featuring turtle meat with Mock Turtle recipes. I'll also explain the appearance of the Mock Turtle character in Alice in Wonderland, and why he is so melancholy in the story.

You'll find this recipe in:
Good Housekeeping Everyday Cook Book
New York, 1903
By: Isabel Gordon Curtis, Associate Editor of Good Housekeeping
Historic Recipe:
Chicken Terrapin
Make a sauce with two level tablespoons of butter, two of flour and one cup of cream, or half cream and chicken stock. Season with salt and pepper. When boiling hot remove from the fire, add two well-beaten eggs and one pint of chopped cold chicken. Butter individual dishes or one baking dish, pour in the chicken mixture and place the dishes in a pan of hot water. Spread crumbs on the top and bake in a moderate oven for twenty minutes. Serve at once.
My Recipe:
2 cups chicken meat, chopped - 350 g
2 tbsp butter
2 tbsp flour
1 cup (236 mL) cream, or 1/2 cup cream & 1/2 cup chicken stock
2 eggs
breadcrumbs
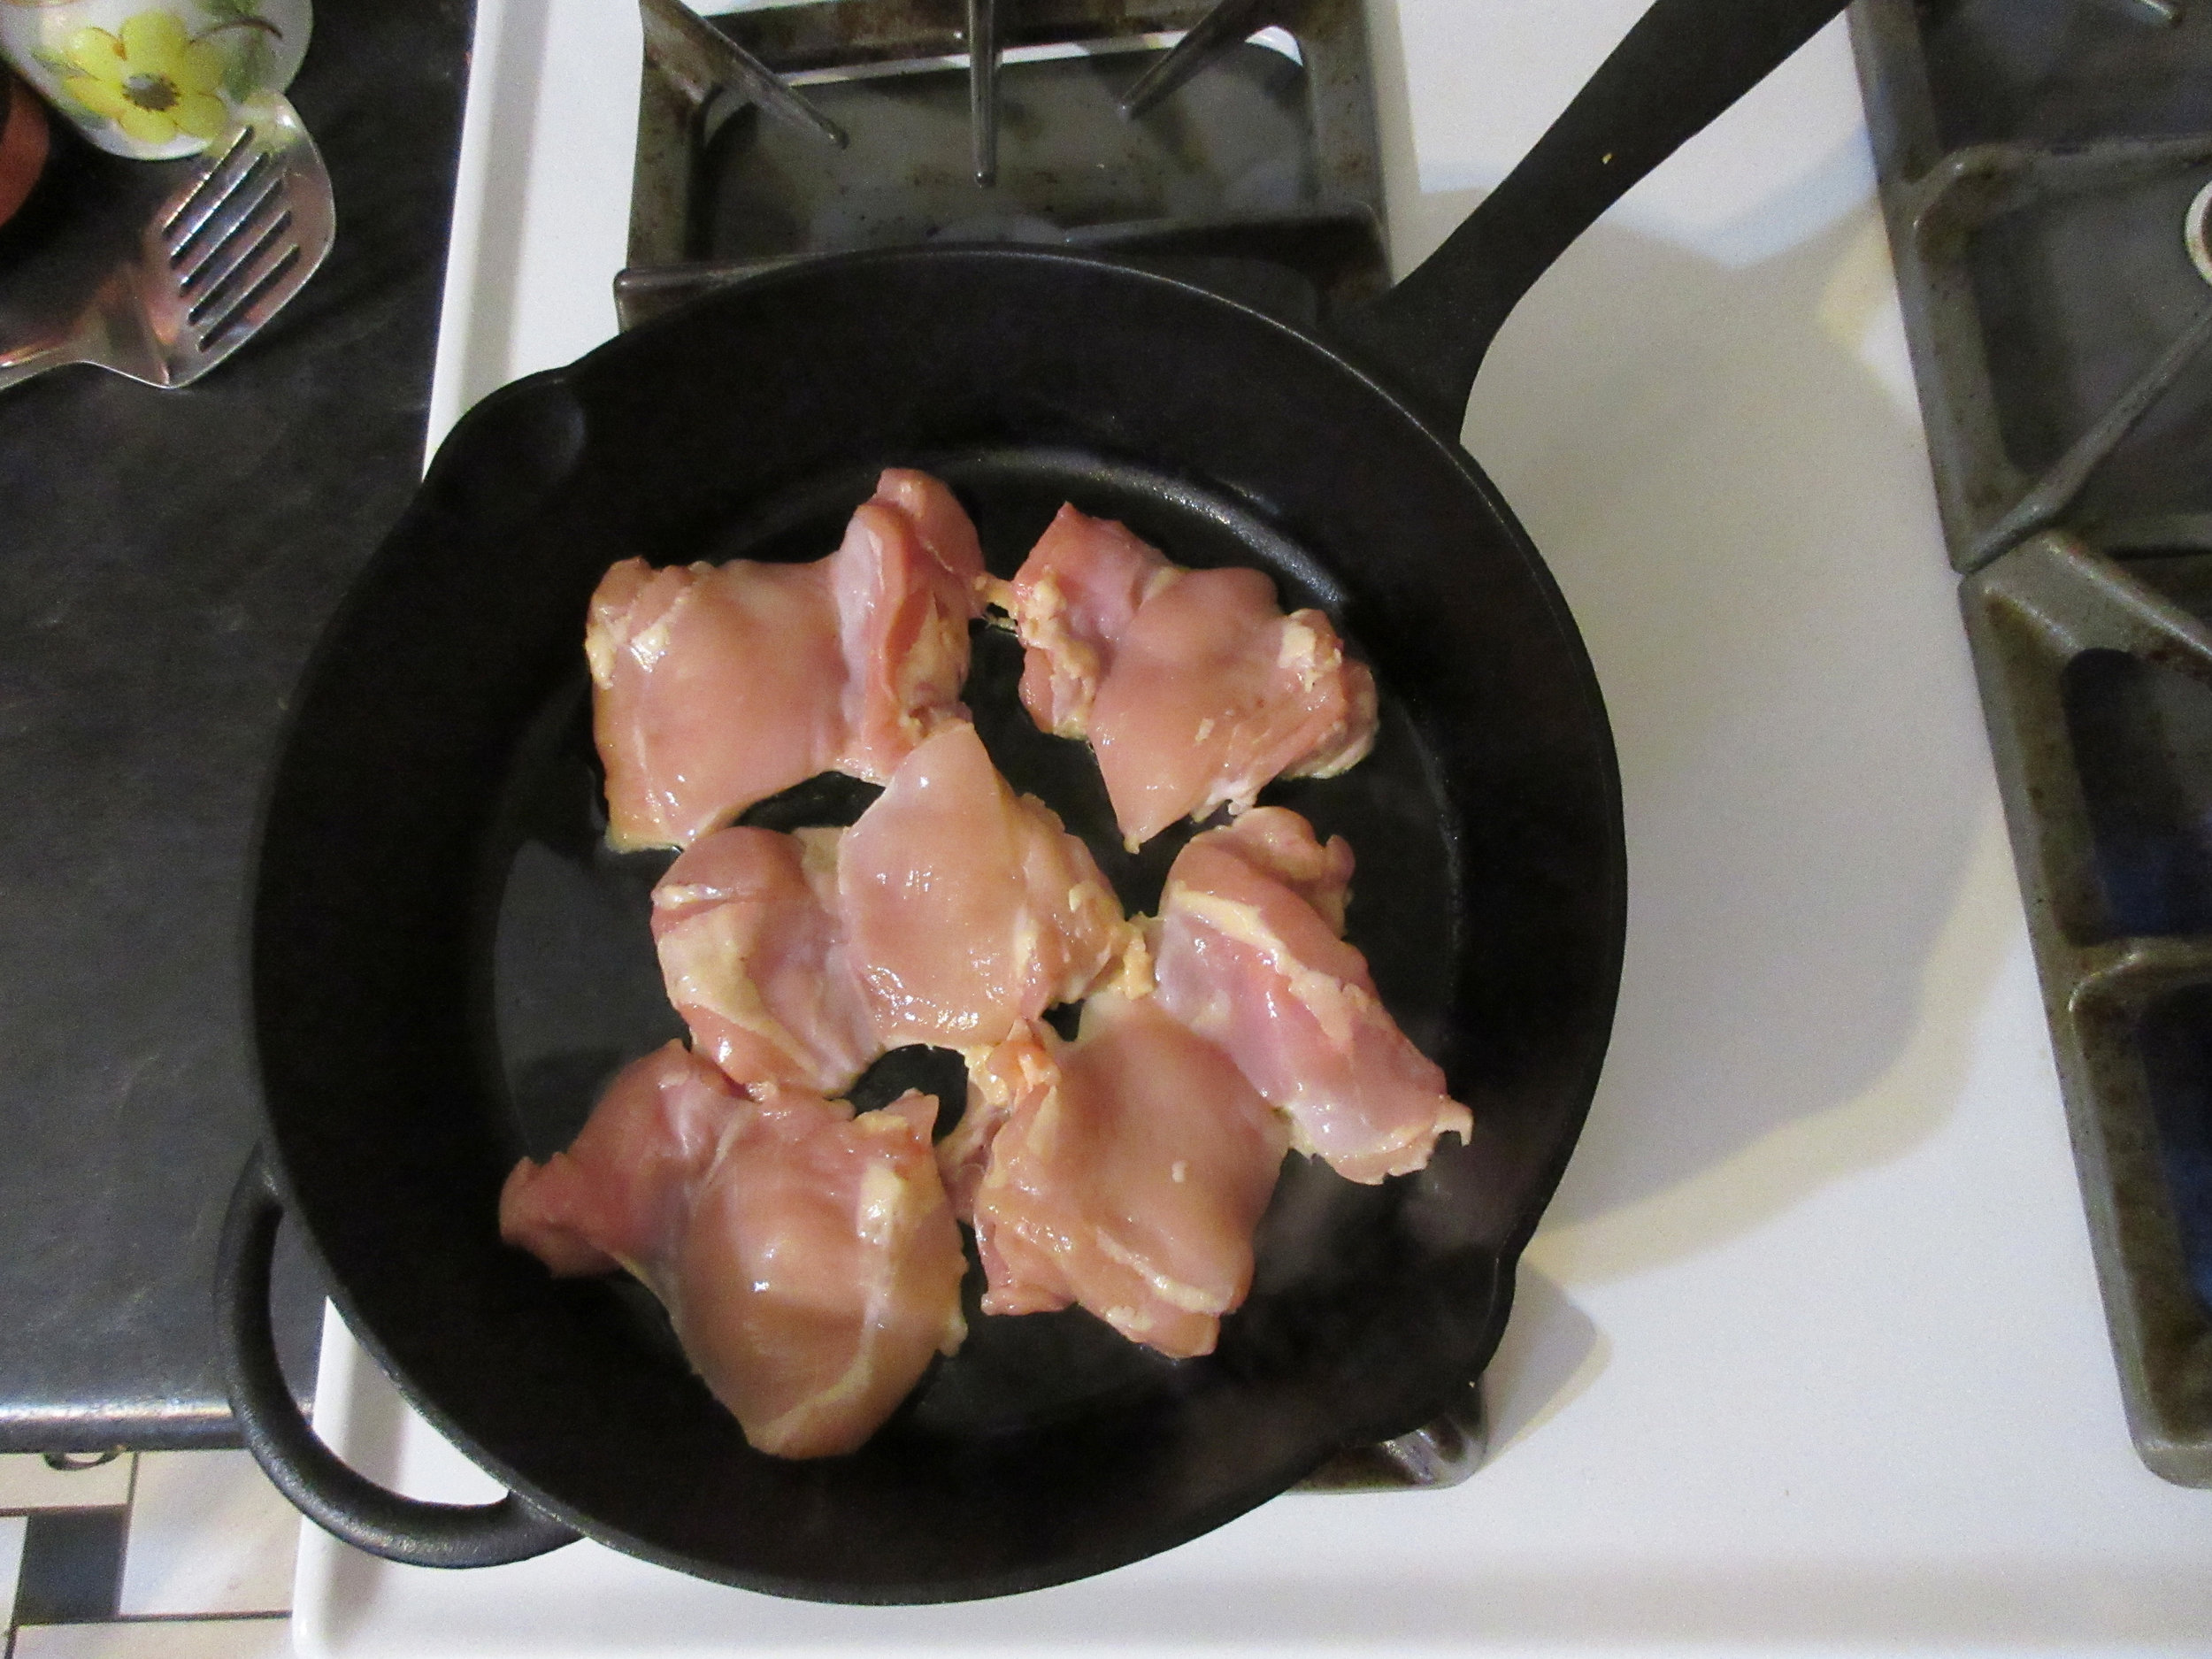
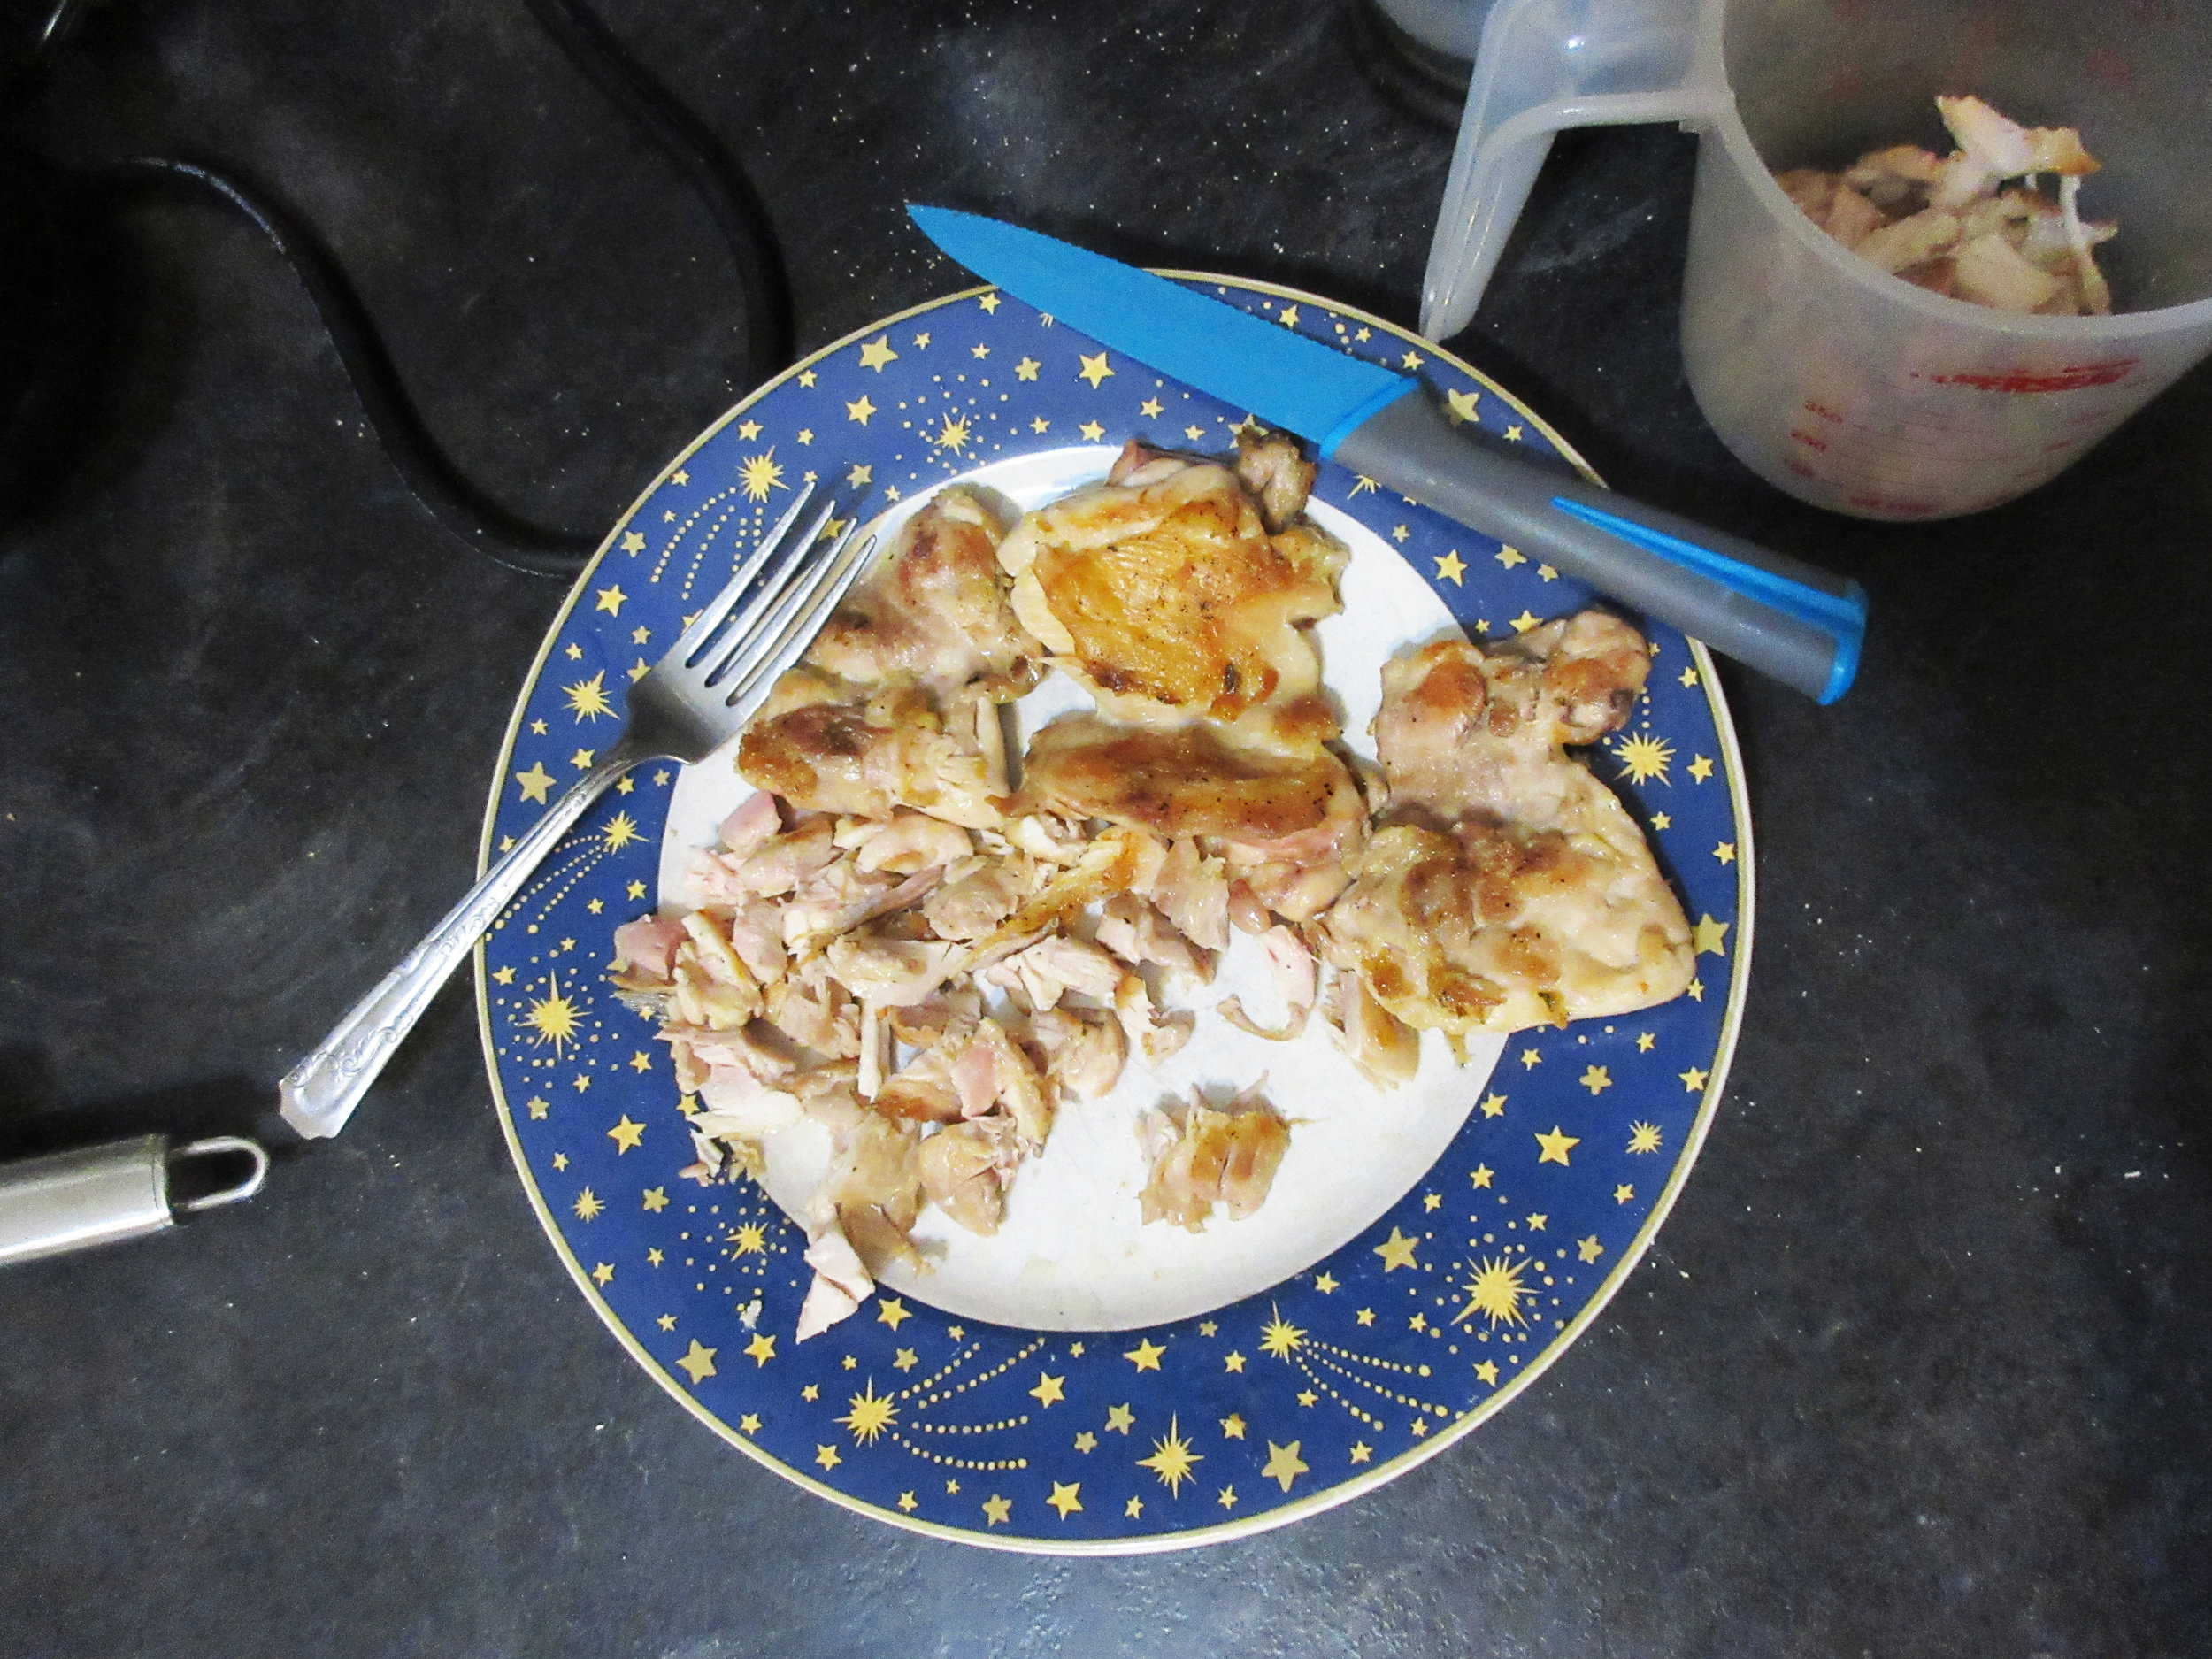
If you don't already have leftover chicken, begin by cooking and chopping the chicken meat. I fried chicken thighs in a frying pan.
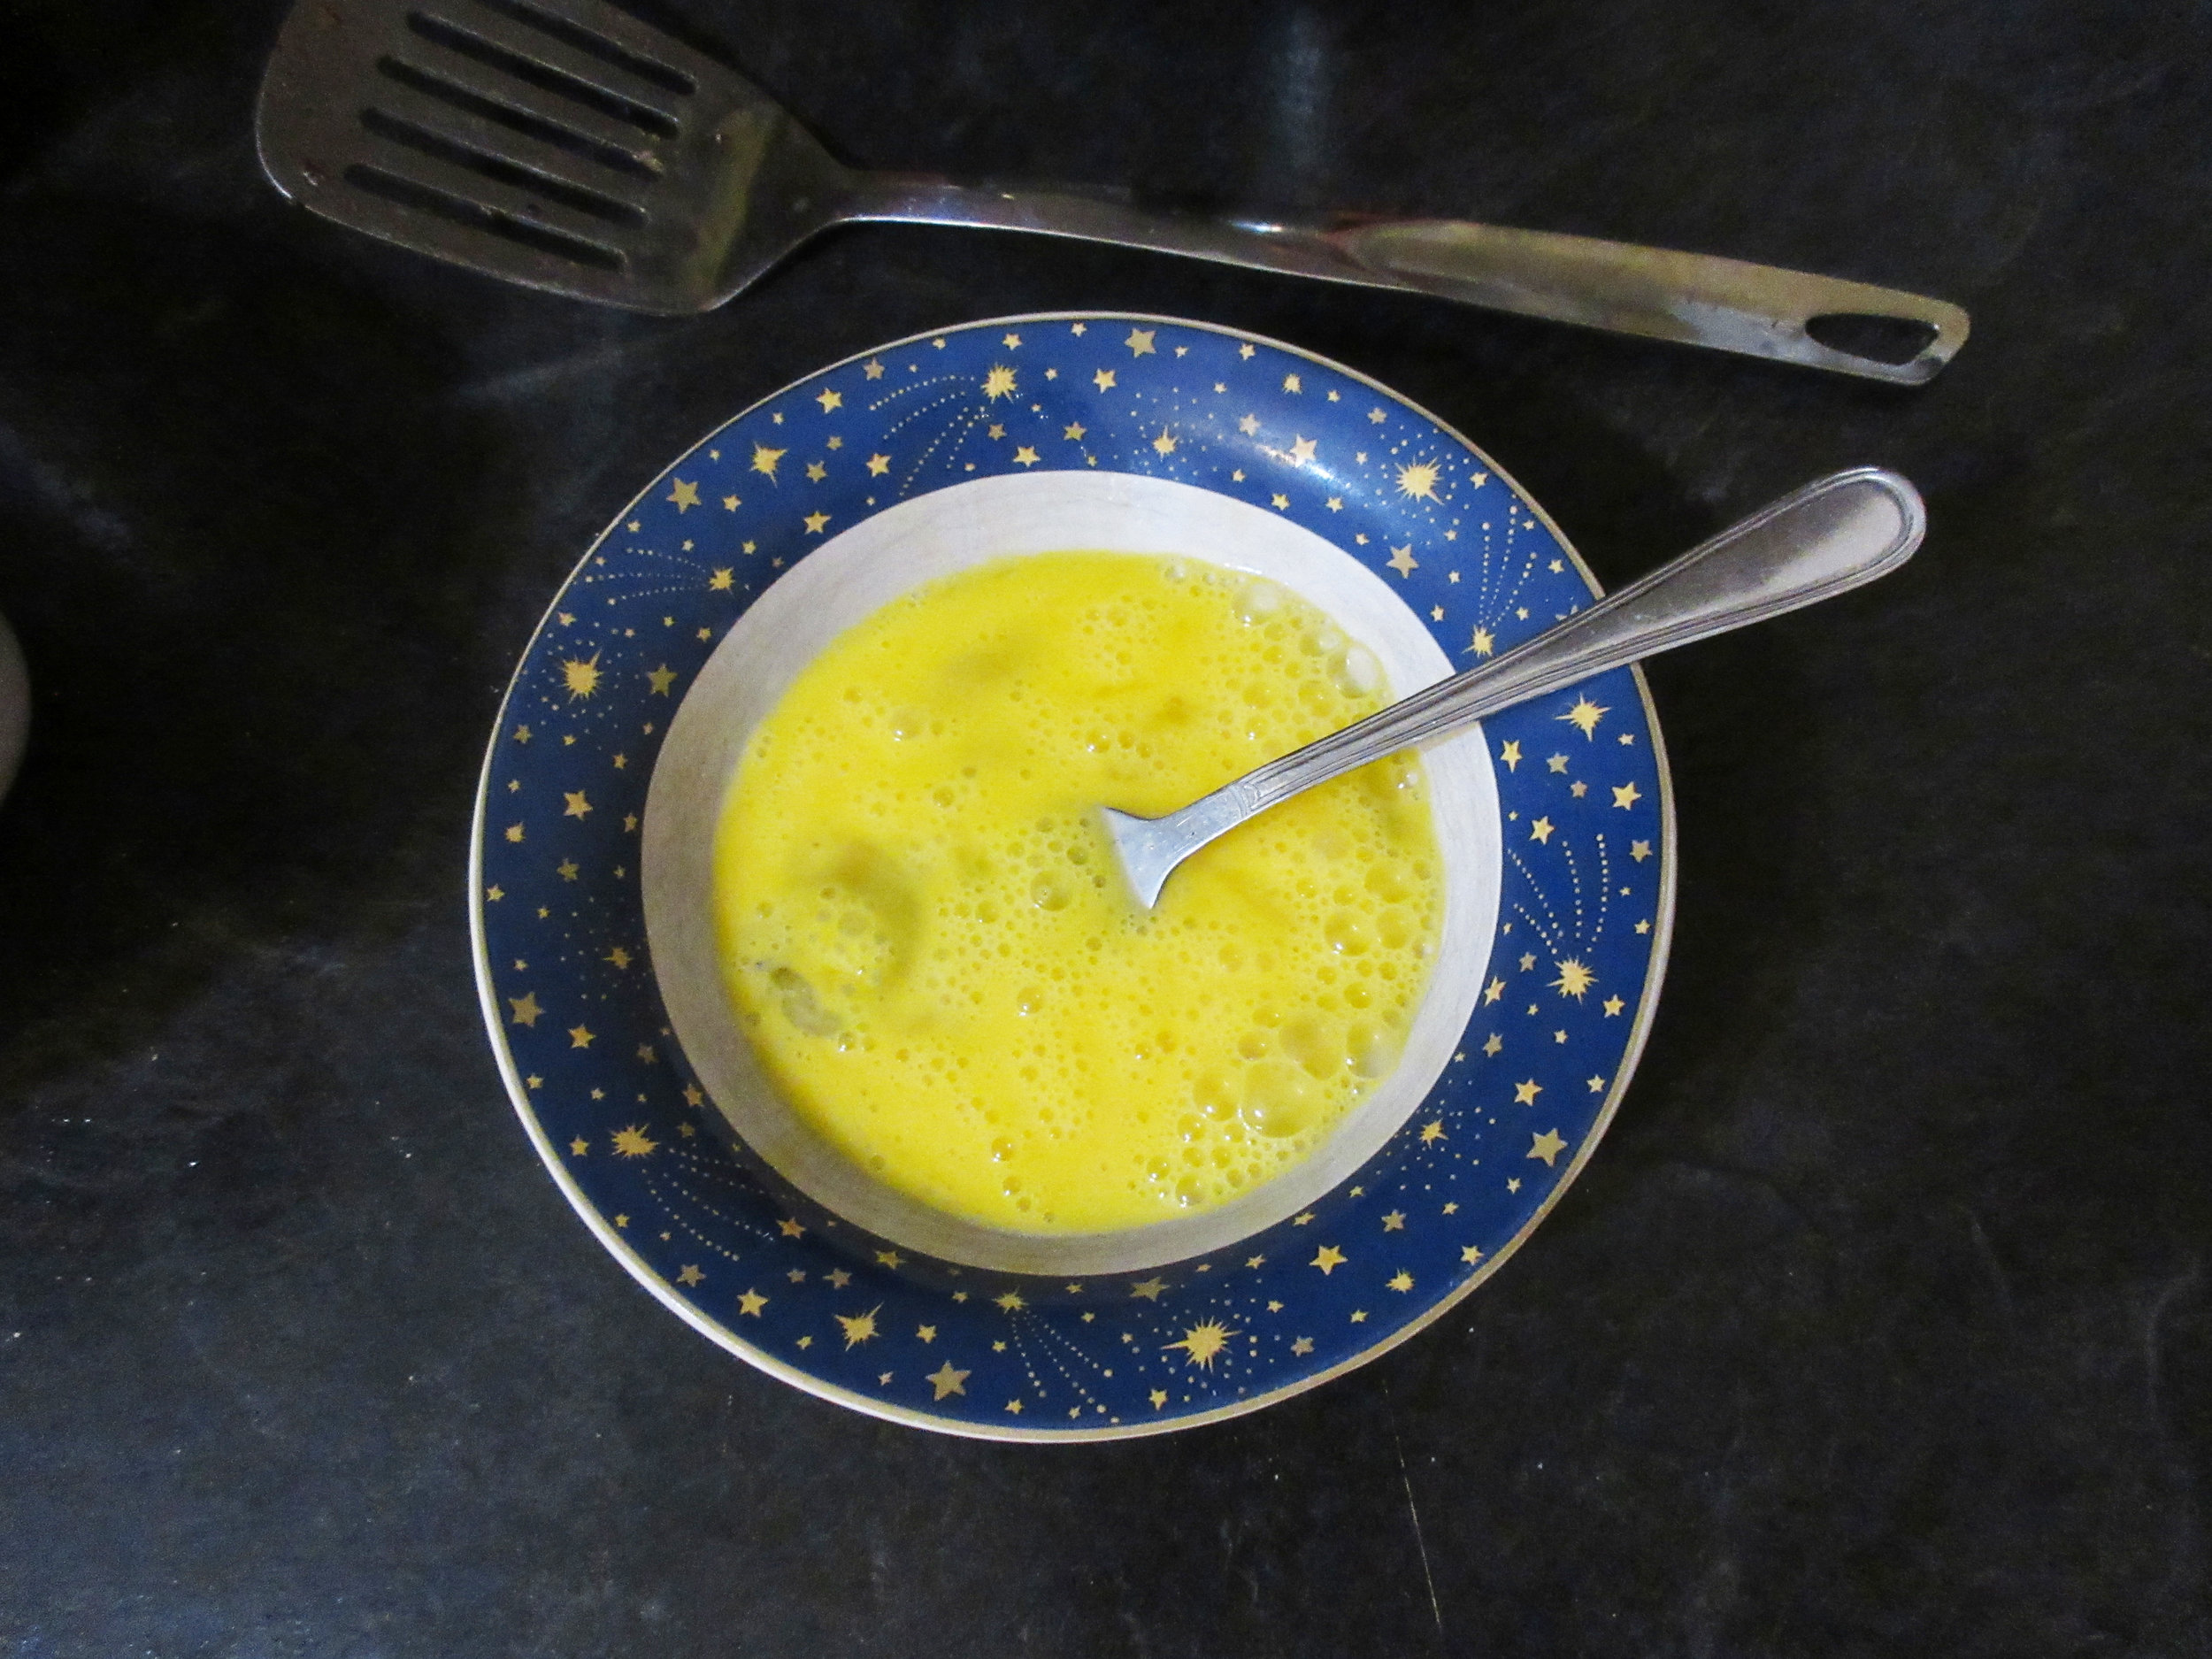
Preheat oven to 350 F/175 C. This recipe recommends either using one large casserole dish or individual ramekins. Grease your baking dish(es) and select a large baking dish or pan for your water bath that will fit the casserole dish or ramekins. Heat water in a kettle. Beat two eggs in a bowl.
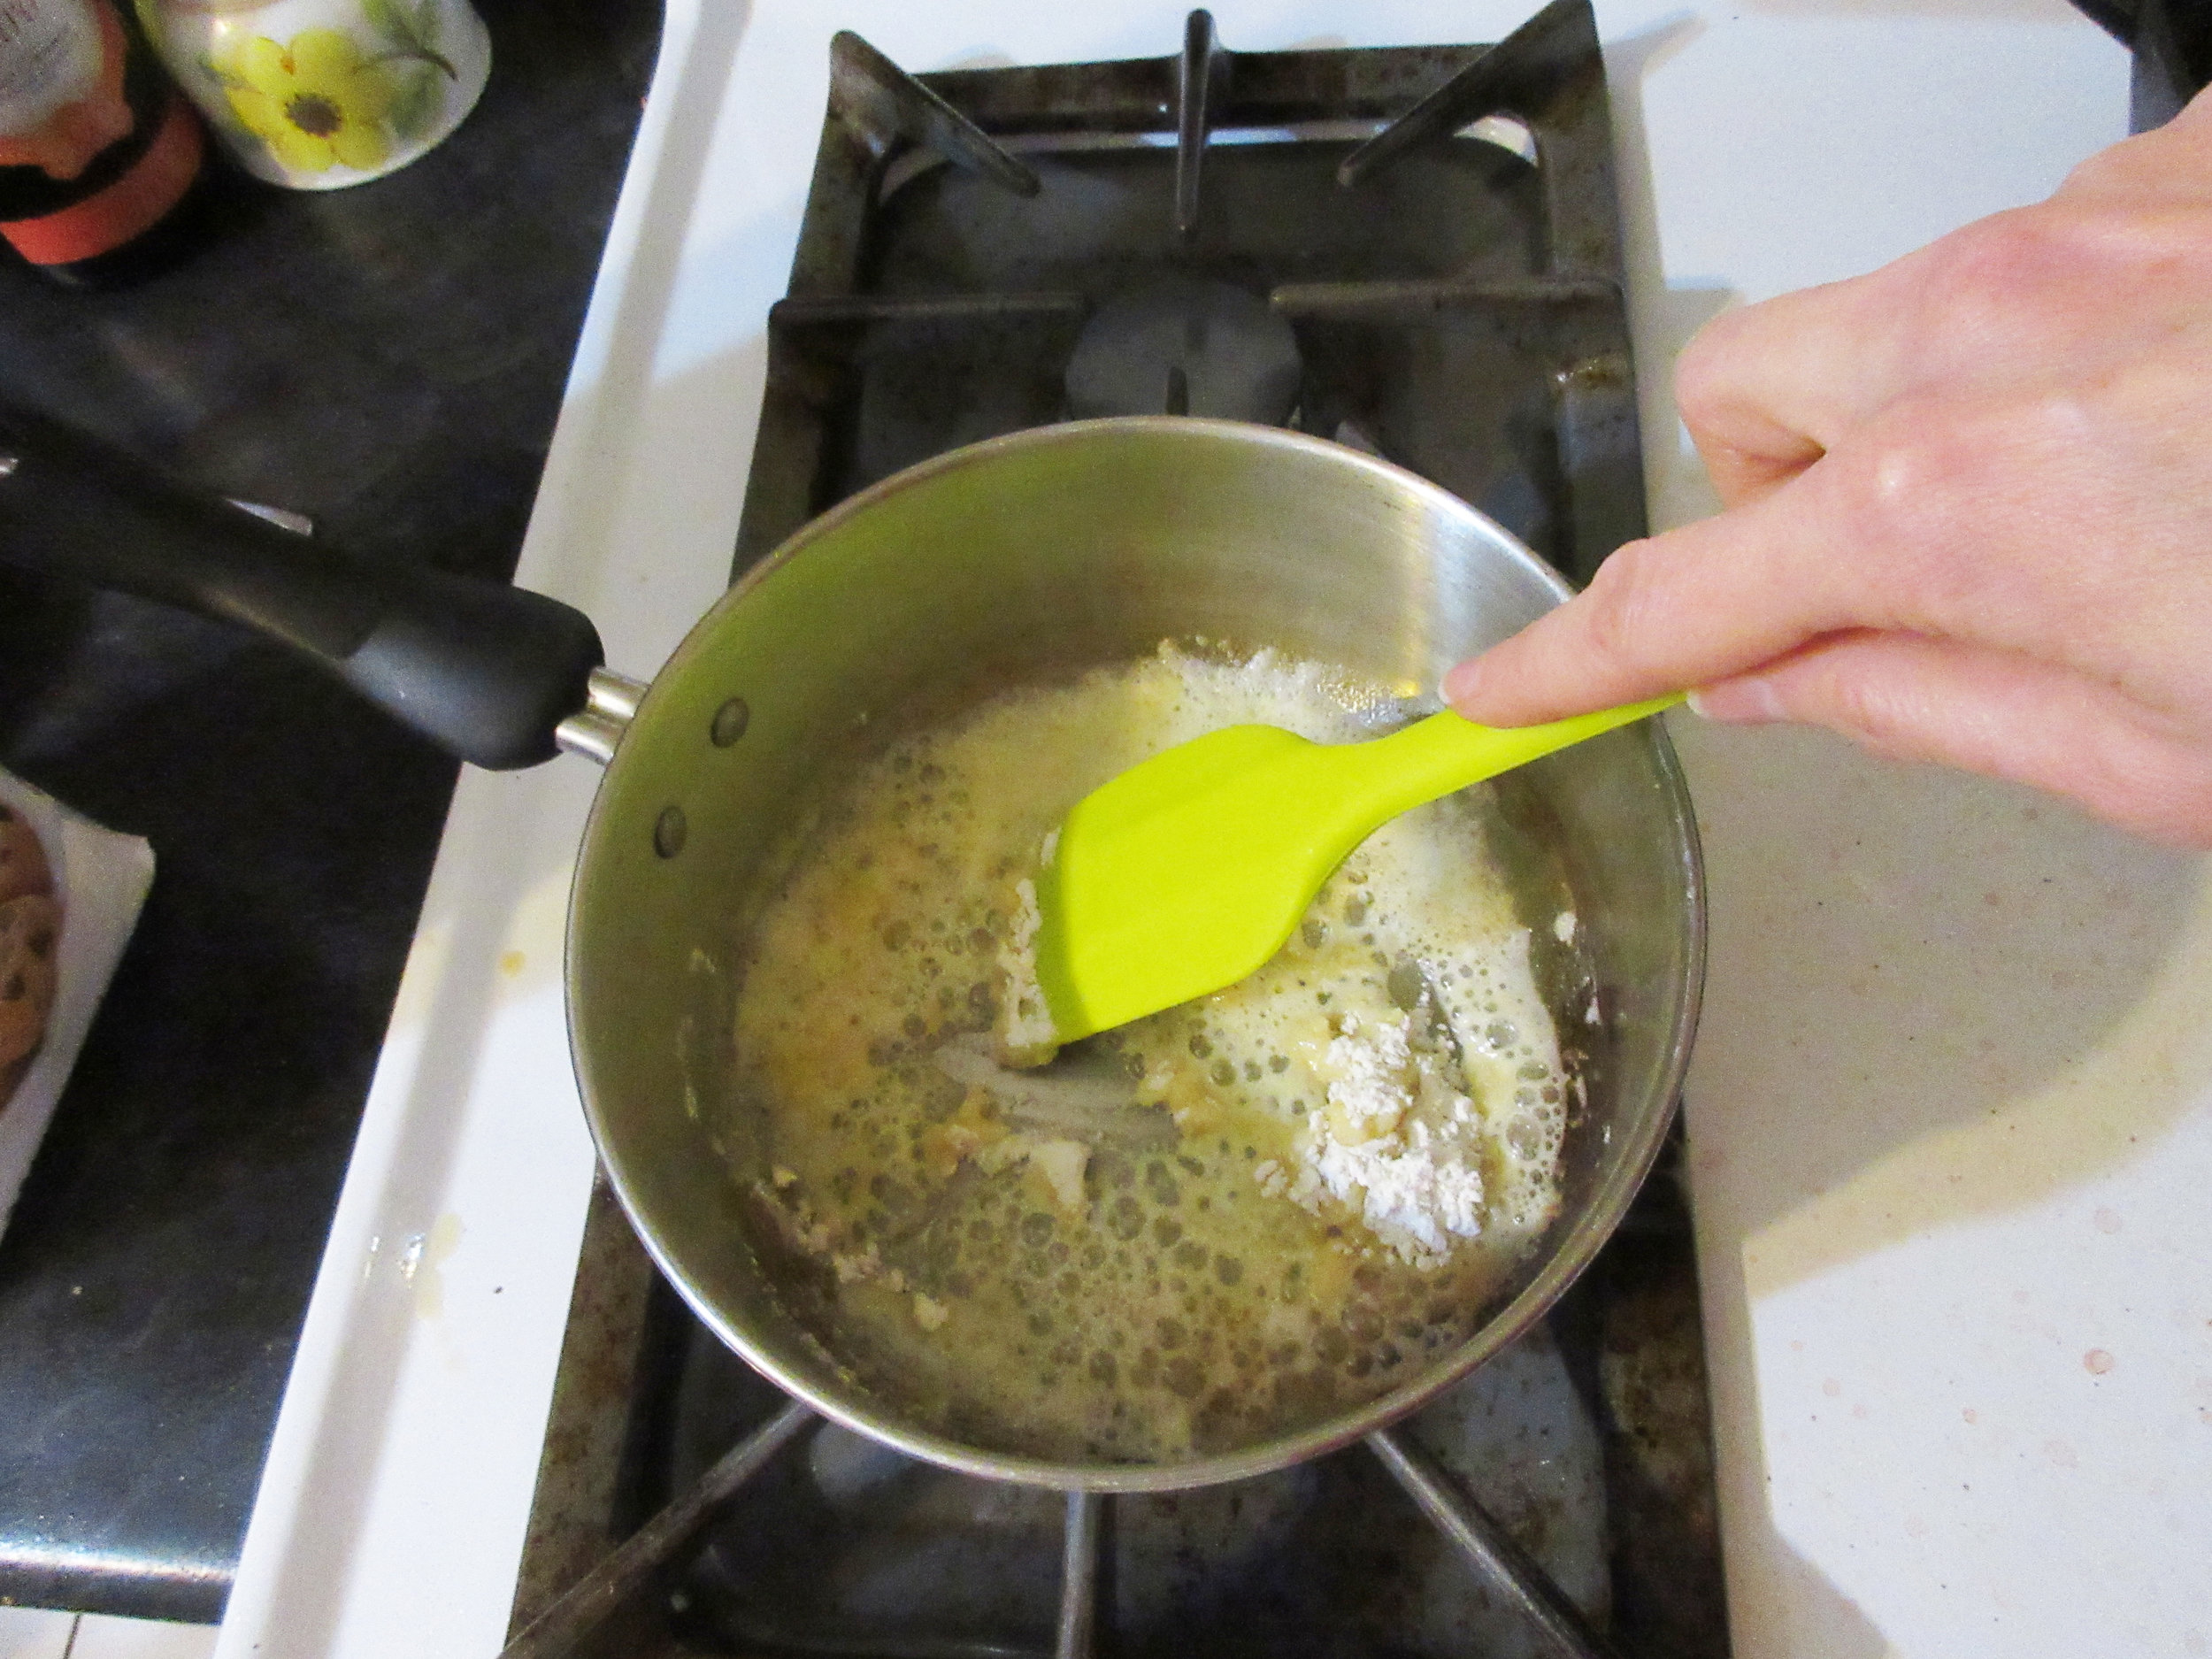
To make the sauce, melt the butter in a saucepan, add the flour while stirring constantly, then gradually stir in the cream or cream and chicken stock. Stir until bubbling, then remove from heat. Stir in the eggs and chopped chicken. Pour the chicken mixture into your baking dish(es) and spoon breadcrumbs on top.
Place the casserole dish or ramekins in the water bath pan and pour about 1 inch (2.5 cm) of hot water from the kettle into the pan surrounding your baking dish(es). Ideally, you want to fill the water bath to cover roughly the bottom half of the chicken mixture in your casserole or ramekins. The water bath will prevent the eggs from curdling and will also prevent browning.
Bake for about 20 minutes. I lost track of time, so my Chicken Terrapin was cooked for about half an hour, and it turned out just fine.

After selecting this recipe, my research began with the question "Why is this dish called Chicken TERRAPIN?" and quickly descended down a rabbit hole. Literally. Before beginning to pull together what I learned about Terrapin dishes, I had pulled my childhood copy of Alice in Wonderland off my bookshelf!
The chicken meat in this recipe is meant to take the place of Terrapin Turtle meat. Turtle recipes were especially popular from the mid nineteenth-century to the early twentieth-century and partially fell out of popularity because the turtle population couldn't support the demand due to over-hunting and lost habitat.
Turtle recipes were also replaced with mock turtle recipes such as Chicken Terrapin because turtles were expensive, tricky to source and very difficult to cook! In the 1851 Miss Leslie's Directions for Cookery , Eliza Leslie writes at the end of her Mock Turtle Soup recipe that "We omit a receipt for real turtle soup, as when that expensive, complicated, and difficult dish is prepared in a private family, it is advisable to hire a first-rate cook for the express purpose. An easy way is to get it ready-made, in any quantity you please, from a turtle-soup house."
How does one prepare Terrapins? Eliza Leslie tells us in the same cookbook. She instructs us to put them alive in a pot of boiling water "and let them remain in until quite dead". The cook would then remove them from the water to pull off the skin and toenails, then boil them again in a pot of salted water until "the flesh becomes quite tender so that you can pinch it off". Once out of the water, the cook should "take them off the shell, remove the sand-bag, and the gall, which you must be careful not to break, as it will make the terrapin so bitter as to be uneatable."
Miss Leslie suggests seasoning the chopped terrapin meat with cayenne pepper, nutmeg and mace, then continues on to suggest serving the terrapin with sauce made with butter, flour, Madeira wine and two beaten eggs. Sound familiar?
300 ways to cook and serve shellfish : terrapin, green turtle, snapper, oysters, oyster crabs, lobsters, clams, crabs and shrimp , 1901, is a source closer to the 1903 publishing date of the Good Housekeeping Everyday Cookbook, and author H. Franklyn Hall gets quite specific about preparing all the shellfish listed in the title. Terrapins have their own chapter in this cookbook.
If boiling terrapins alive makes you feel squeamish, you'll be relieved to find out that Hall suggests killing them in advance. In fact, he advises that cooks leave the slaughtered terrapins "in clear running water from twelve to thirty-six hours" before cooking.
"Wash them in luke-warm water, then dip them in scalding hot water several times; place them one at a time on their back on a table and take a small clean towel and quickly but gently, so as not to tear the flesh, rub all of the outer skin from the head, neck, legs and tail. After all are prepared in the above manner, place them in a pot of boiling water and boil steadily until the legs can be easily separated from the body without any effort. It usually takes from thirty to seventy-five minutes to boil terrapin, sometimes a little longer it all depends upon the age and condition of the terrapin."
Our Chicken Terrapin recipe is similar to the Stewed Terrapin a la Virginia recipe in 300 ways to cook and serve shellfish, and it is suggested that stewed terrapin dishes should use "salt water or diamond back terrapin only...providing they are fat". Stewed Terrapin a la Virginia features a sauce made of butter, broken crackers, cream and chopped parsley. Hall suggests serving the Stewed Terrapin in individual silver tureens or fine china dessert plates. Turtle recipes were popular enough that specific turtle-inspired tureens were created for those who could afford that bit of whimsy. Have a look below at a couple of gorgeous turtle tureens, as well as a photograph of a diamondback terrapin before meeting its end in somebody’s kitchen.


Left to right: Diamondback Terrapin and Turtle Soup Tureens from the Collections of Colonial Williamsburg (c. 1815) and Cooper Hewitt, Smithsonian Design Museum (c. 1880-90)
Then the Queen left off, quite out of breath, and said to Alice, "Have you seen the Mock Turtle yet?"
"No," said Alice, "I don't even know what a Mock Turtle is."
"It's the thing Mock Turtle Soup is made from," said the Queen.
"I never saw one or heard of one," said Alice.
"Come on then," said the Queen, "and he shall tell you his story."
I've heard of Mock Turtle Soup since i was a girl, thanks to the Mock Turtle character in Alice in Wonderland, but I never was fully in on the joke until I started my career in museums. I clearly remember the shock I felt the first time I flipped through a historic cookbook and came across a recipe for Mock Turtle Soup, and suddenly this character made much more sense to me!
Lewis Carroll doesn't actually physically describe the Mock Turtle in the book, other than the fact that he has flappers and is constantly sobbing because "Once...I was a real Turtle." Illustrations depict the Mock Turtle with the body of a sea turtle, hooved hind legs and the head & tail of a calf.

Alice in Wonderland illustration by John Tenniel (1865), depicting the Gryphon, Alice and the Mock Turtle
Let's return to Miss Leslie's Directions for Cookery for a sample Mock Turtle Soup recipe, shall we? I can't imagine how complicated making Turtle soup is, if Mock Turtle Soup is supposed to be simpler. Miss Leslie begins the recipe by stating that "This soup will require eight hours to prepare."
The cook begins with a large calf's head, which she will have prepared by cleaning and soaking. The calf's head, bacon, a knuckle of veal and a ham hock are covered in water in a large pot. The meats are boiled slowly for about four hours, making sure to skim the foam off the top regularly.
Then root vegetables and herbs are added and the pot is boiled for three more hours: "As soon as no more scum rises, put in six potatoes, and three turnips, all sliced thin; with equal proportions of parsley, sweet marjoram, and sweet basil, chopped fine; and cayenne pepper to your taste. The ham will salt it sufficiently."
At hour seven, the cook is instructed to make veal meatballs, which she rolls in flour and fries in butter. After the meatballs are completed, she removes all the meat from the pot and "Cuts the meat from the head in small pieces, and return it to the soup", along with the meatballs. When the soup is close to completion, stir in some Madeira wine, the juice of a lemon and about a dozen egg balls "in the form and size of boy's marbles", made of hard boiled egg yolks held together with raw egg yolks. Bring to a boil again and serve in a soup tureen. What a marathon!
The Mock Turtle sighed deeply and began, in a voice sometimes choked with sobs, to sing this:
"Beautiful Soup, so rich and green,
Waiting in a hot tureen!
Who for such dainties would not stoop?
Soup of the evening, beautiful Soup!"
I remember that day about a decade ago when I was sitting in the museum office, flipping through reprints of Victorian cookbooks to find recipes to make with campers at our Day Camp. When I came across my first Mock Turtle Soup recipe, before reading it I thought that it would be very interesting to make with the campers, knowing that some of them would be familiar with Alice in Wonderland. Then I read the ingredients and how long it would take to prepare and that idea went out the window! How many crying children and complaining parents would be born out of cooking with a calf's head at Day Camp?
Once I understood the Mock Turtle Soup recipe, I understood the Mock Turtle's appearance and why he felt melancholy. With time, the Turtle transformed into a Mock Turtle with body parts of the livestock that came to replace turtle meat in soups. Between tears, the Mock Turtle regales Alice with songs, stories and dance about the better days when he was a Real Turtle - his studies in school, the glorious Lobster Quadrille and finally a ballad about a Beautiful Soup idealized in his memory. Maybe this character mirrors Lewis Caroll's sentiments about a better time when Turtle Soup was available in abundance, and had mostly been replaced by a soup that sadly and vaguely mirrored the original.

Read the Cookbook:

To Fry Fish
To Fry Fish is found in A Plain Cookery Book for the Working Classes, written by Charles Elmé Francatelli in London in 1852. Fortunately, I had some bacon fat in my fridge, so that's what I used to fry my fish. Let me tell you, fish dredged in flour and fried in bacon fat is scrumptious, and so were the fried onions that we ate on the side. I paired the fish with Sharp Sauce for Broiled Meats from the same cookbook. The main component of this sauce is a variety of pickles and it reminds of relish, albeit without the sweetness. I round out this blog post by delving a little bit into the Fish Slice, a serving utensil for fish.

You'll find this recipe in:
A Plain Cookery Book for the Working Classes
By Charles Elmé Francatelli
”Late Maître d’hôtel and Chief Cook to Her Majesty the Queen Victoria”
London, 1852
The Sauce:
'Sharp Sauce for Broiled Meats' goes very well with the fried fish recipe (which you'll find below). The main component of this sauce is a variety of pickles and it reminds of relish, albeit without the sweetness. I ended up with a double batch of this sauce, so before it was finished, I had eaten it with fish, sausages, chicken and pierogies. It paired well with everything, but it was especially delicious with the sausages.
No. 21. SHARP SAUCE FOR BROILED MEATS
Chop fine an onion and a pennyworth of mixed pickles; put these into a saucepan with a half-a-gill of vinegar, a tea-spoonful of mustard, a small bit of butter, a large table-spoonful of bread-raspings, and pepper and salt to season; boil all together on the fire for at least six minutes; then add a gill of water and allow the sauce to boil again for ten minutes longer. The sauce will give an appetizing relish to the coarsest meats or fish when broiled or fried, and also when you are intending to make any cold meat into hash or stew. In the latter case, the quantity of water and raspings must be doubled.


My Recipe:
1 small onion
1 ¼ cups mixed pickles – 225 g
(I used pickled green beans, cucumbers and red peppers)
⅔ cup apple cider vinegar – 156 mL
1 tsp mustard powder
1 tbsp butter
2 heaping tbsp breadcrumbs (this is double the historic recipe)
Salt and pepper to taste
1 ¼ cups water – 300 mL
Honey to taste (optional – not in the historic recipe)
Finely chop the onion and the pickles. Put in a small saucepan with the vinegar, mustard powder, butter, breadcrumbs, salt and pepper. Simmer over medium for 5-10 minutes, then add the water. Allow to bubble for at least another 10 minutes. Add honey to taste, if desired.
My thoughts:
A big issue with this recipe is the measurement of using "a pennyworth of mixed pickles", which literally means "an amount of pickles worth a penny" and is not very instructive for those of us living today! I just guessed and I think it was a good ratio for pulling an amount out of the air. I did find that I needed to double the breadcrumbs to thicken the liquid enough for a sauce, and maybe I wouldn't have had to if I had put more chopped pickles in the pot.
I'm usually a stickler for historical accuracy, but I HAD to add a bit of honey to this recipe to cut the edge from the extreme vinegariness of this sauce! When I sampled it from a spoon when it was cooking, I would immediately start coughing: not a desirable trait for a sauce. I didn't add enough honey to sweeten the sauce , just enough so I could actually eat it. You may like it without the honey, though.

The Fish
Fortunately, I had some bacon fat from when I made Piquant Beets, so that's what I used for frying my fish. Let me tell you, fish dredged in flour and fried in bacon fat is scrumptious, and so were the fried onions that we ate on the side.
No. 121. TO FRY FISH.
For this purpose you must have some kind of fat. Either lard, butter, or dripping fat, would be excellent; but they must be bought, and cost a little money. True; but then, if you can afford yourselves a bit of meat occasionally, by dint of good thrift you should save the fat from the boiled meat, or the dripping from your baked meats, and thus furnish yourselves with fat for frying your fish twice a-week; and let me tell you that by introducing fish as an occasional part of your daily food, your health, as well as your pockets would feel the benefit of such a symptom of economy. Suppose, then, that you have bought some cheap kind of fish, such as herrings, large flounders, plaice, small soles, or any other small or flat fish. First of all, let the fish be washed and wiped dry, and rubbed all over with a little flour. Next, put about two ounces of fat, free from water, in a frying-pan on the fire, and, as soon as it us hot, put the fish in to fry, one or two at a time, according to their size, as, unless they have room enough in the frying-pan they do not fry well; this must be carefully attended to, and when the fish is a little browned on one side, turn it over with a tin fish-slice, that it may be fried on the other side also; and, as soon as done, place the fried fish on a dish and then fry the others. When all your fish are fried, with what fat remains in the pan fry some onions, and place the round the fish, and, by way of adding an extra relish to your meal, just throw a few table-spoonfuls of vinegar, some pepper and salt, into the frying-pan, give it a boil up, and pour this round the fish.


My Recipe:
Fish fillets – herring, flounder, sole or plaice
Flour
Butter, oil or fat (I used bacon fat)
Onions
Vinegar (I used apple cider vinegar)
Salt and pepper
1) Chop the onions – how much depends on your love of onions and how many people you're serving. I cut up 3 medium & small onions for 6 sole fillets and it was a good amount for us.
2) Rinse the fillets with water and pat dry with a tea towel or paper towels. Lightly coat the fish in flour.
3) Warm up the butter, oil or fat in a frying pan over medium heat, then add the fish. Flip over when slightly browned on the bottom. When nicely browned on both sides, put the fillets on a plate to the side and fry the remaining fillets, adding butter/oil/fat as necessary.
4) When the fish is done, fry the onions in the same pan. Serve the onions on the side of the fish.
5) Remove the frying pan from the heat, then pour in some vinegar into the same pan. Stir, add salt and pepper and pour on top of the fish.

Our historic To Fry Fish recipe instructs us "and when the fish is a little browned on one side, turn it over with a tin fish-slice, that it may be fried on the other side also". I've never encountered anyone calling a fish slice by that name in Canada, but today a fish slice is considered an extra long or wide flipper with drainage holes or slots.

My understanding is that fish slices of this era were usually made of silver, not tin, and were used for serving, not flipping. The Encyclopaedic Dictionary (1887) describes a fish-slice as "A broad-bladed silver knife used for serving fish at table. The trowel-shaped blade enables a portion of fish to be removed from the backbone without breaking it into unsightly fragments".
Cassel's Household Guide (1869) delves even further into fish slices: "A silver or plated slice or knife...is used for this, as for other kinds of fish, because steel spoils the flavour of fish. A knife needs to be broad to divide the flakes without breaking them. A fish-knife has a sharp curved point to disengage the bones, and is perforated with holes to allow any water retained about the fish to run off. A fork is not used in helping fish." There's also very specific instructions for using a fish slice to carve different types of fish, so if learning that skill interests you, have a look at Cassel's Household Guide for some fish-carving tips fit for a Butler.
Nineteenth-century silver fish slices are gorgeous, often featuring the shape of a fish and intricately designed perforations. I had a look at the Royal Ontario Museum's online collections and found four beautiful Canadian examples of Fish Slices created from c.1815-1840 in Montreal and Quebec City, crafted by Nelson Walker, Laurent Amiot, James Ellis and Henri Polonceau; and I'll leave you with this little slice of fish-slice eye candy.


Read the Cookbook:


Taheeni
This Taheeni recipe isn't a Tahini recipe, simply because its main ingredient is eggplant and not sesame seeds. I'd describe Taheeni as basically Baba Ganoush, ironically without the tahini! I found this recipe in The Blender Cookbook by Ann Seranne & Eileen Gaden from 1961 in the International Specialties chapter under "The Near East". Today, I'm able to walk into almost any grocery store and buy myself a container of tahini or baba ganoush, but this was likely not the case in 1961. I'll chalk up the name to something getting lost in translation, but whatever it's called, my tastebuds give this this dip two thumbs up.

You'll find this recipe in:
The Blender Cookbook
By: Ann Seranne and Eileen Gaden
New York, 1961
The Original Recipe:
Taheeni
(A Favorite Cocktail Dip in Lebanon)
Cut a thin slice from bottom and top of 1 medium eggplant and backe in a 350˚ F. oven for about 1½ hours, or until tender. Split and remove pulp. Into container put
1 cup eggplant pulp
3 tablespoons lemon juice
3 tablespoons olive or sesame oil
1 clove garlic
1 teaspoon salt
Cover and blend on high speed for 1 minute, or until very smooth and creamy. Pour into a bowl and fold in 1 tablespoon sesame seeds and 1 tablespoon chopped parsley. Serve with vegetable sticks or crackers. Makes about 1½ cups.


My Experience:
This dip recipe is delicious and very straightforward, although I'm kicking myself for not remembering to pop the eggplant on the scale to find out its weight for those of you who aren't in North America. Hopefully this will be an edit I make later on the next time I make a baked eggplant dish. It was a tad on the salty side for my palette, so next time I make this (and there will be a next time, it's really tasty!), I'll probably start with half a teaspoon of salt.

You've probably realized by now that this Taheeni recipe isn't a Tahini recipe, simply because its main ingredient is eggplant and not sesame seeds. I'd describe Taheeni as basically Baba Ganoush, ironically without the tahini!
Taheeni is found in the International Specialties chapter of The Blender Cookbook under "The Near East". Today, I'm able to walk into almost any grocery store and buy myself a container of tahini or baba ganoush, but this was likely not the case in 1961. I'll chalk up the name to something getting lost in translation, but whatever it's called, my tastebuds give this this dip two thumbs up.
I grew up with a copy of The Blender Cookbook on the cookbook shelf in the kitchen, so I jumped at the opportunity to pick up my own copy when I saw it at Bibles for Missions, which is my favourite place to pick up historic/vintage cookbooks here in my hometown of Hamilton, Ontario. I lucked out that I happened to be in the store on a day when books were half price, so I invested an entire 75₵ to add it to my library.
We're in a blenderizing boom these days, thanks to the popularity of green smoothies and make-your-own nut milks. In their Introduction, Ann Seranne and Eileen Gaden urge housewives to get their blenders out of storage and into regular rotation:
If you have only used your blender to mix drinks and make soups, you will find within these pages exciting new ideas, short cuts, and magic recipes that will take the drudgery out of cooking and make it a pleasure. If you own an electric blender and have it stored away on a top shelf, get it down! You don't know the treasure you are hiding! Attach it to the handiest electric outlet and keep it there. And begin, right away, to make some of the easy and quick recipes – all delicious – in this book. Soon you will find that you will use your blender many times every day in the preparation of your daily meals, to grind, grate, crumb, purée, chop, aerate, and homogenize. Your entire cooking habits will become revolutionized almost overnight. You'll find yourself relegating much of your obsolete, old-fashioned kitchen equipment to that top shelf!
I selected this recipe because I was searching for a historic recipe that followed the guidelines of the Cleanse program that I was taking part in last week, but I plan on asking my Mom what her favourite recipes are from the book and trying them out. I actually don't have a childhood memory of her referencing The Blender Cookbook, so she may not have used it very often (or I just didn't notice because I was a kid with bigger fish to fry). My Mom is also one of those cooks who uses a recipe as a starting point, creates her own version and makes the hybrid recipe often from memory. Who knows - perhaps a dish that appeared regularly on our kitchen table has its roots in this book?
